
Maritozzo
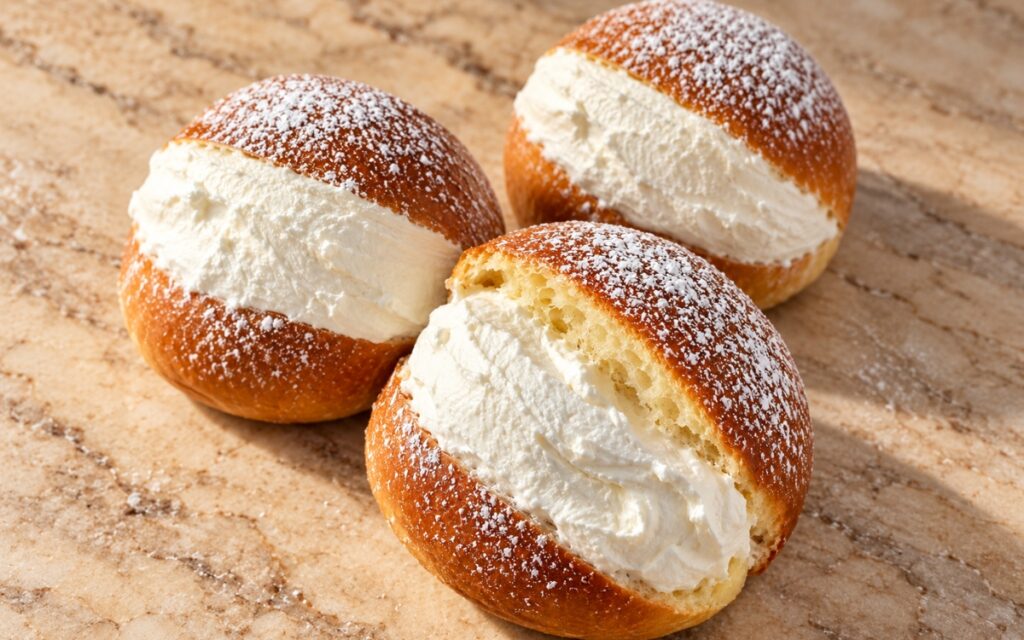
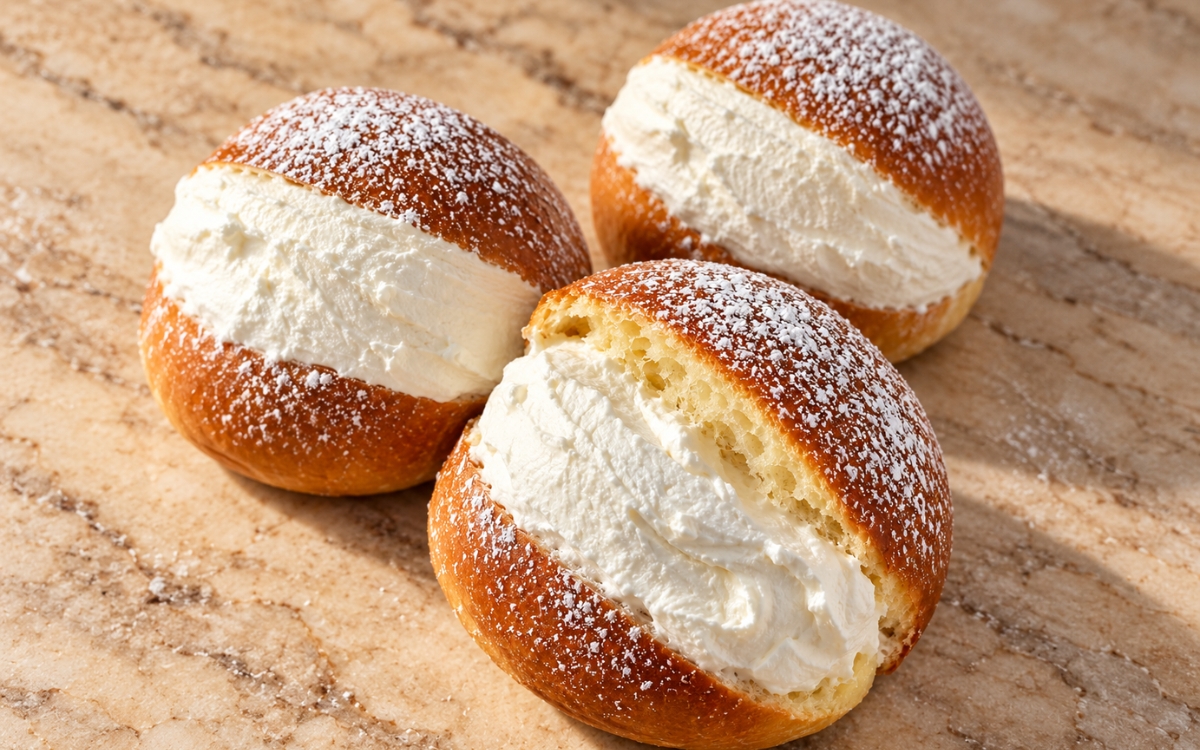
Classic Italian maritozzo buns made from soft, lightly enriched sweet brioche rolls, baked until deeply golden and glossy, then split and generously filled with thick vanilla whipped cream. Adding the butter gradually during kneading, rather than all at once, is what lets this enriched dough absorb it fully without turning greasy or loose — the same incremental-fat technique used elsewhere in this collection whenever a dough carries a high butter content relative to its flour. Full cooling before filling isn’t optional here, since a bun with any residual warmth will melt the whipped cream the moment it touches the inside, and brushing the buns with a light syrup glaze straight out of the oven is what gives them their classic glossy finish.
Prep Time : 35 min
Total Time : 3 hr 30 min
Servings : 8
35 min
3 hr 30 min
8
Ingredients
Sweet Brioche Buns
• 500 g bread flour
• 7 g instant yeast
• 70 g granulated sugar
• 8 g fine salt
• 180 ml whole milk, lukewarm
• 2 large eggs, room temperature
• 1 large egg yolk, room temperature
• 60 g unsalted butter, very soft
• 20 g honey
• 1 tsp vanilla extract
• Finely grated zest of 1 orange
• Finely grated zest of 1 lemon
Egg Wash
• 1 large egg
• 1 tbsp milk
Syrup Glaze
• 40 g granulated sugar
• 40 ml water
Whipped Cream Filling
• 500 ml cold heavy cream, very cold
• 45–60 g powdered sugar, sifted
• 1 tsp vanilla extract
Finish
• Powdered sugar, for dusting
Directions
- Mix the Dough
Combine the bread flour, instant yeast, and sugar in a large bowl or stand mixer bowl, adding the salt on the opposite side from the yeast. Add the lukewarm milk, eggs, egg yolk, honey, vanilla, orange zest, and lemon zest, then mix until a shaggy dough forms with no dry flour remaining. Knead for 5 to 7 minutes until the dough begins to smooth out. - Add the Butter and Develop the Dough
Add the soft butter gradually, a little at a time, kneading well after each addition so the dough absorbs it fully before more goes in. Continue kneading for 8 to 12 minutes until the dough is smooth, elastic, slightly tacky, and able to stretch thinly without tearing quickly — soft and enriched, but not loose or greasy. If the dough feels very sticky, knead a little longer before reaching for extra flour. - First Rise
Shape the dough into a ball, place it in a lightly greased bowl, cover, and let it rise in a warm place until doubled, about 1½ to 2 hours. The dough is ready when it looks puffed, feels airy, and a light fingertip press leaves a slight indentation. - Divide and Shape
Turn the dough out onto a lightly floured surface and divide it into 8 equal pieces, about 105–110 g each. Shape each piece into a tight, smooth ball by pulling the dough edges underneath and rolling gently against the surface, then place them on parchment-lined trays with enough space between them. Flatten each ball very slightly into an oval or rounded bun shape — they should stay plump, not flat. - Second Rise
Cover loosely and let the buns rise again until visibly puffy and nearly doubled, about 45 to 60 minutes. They should look light and expanded; under-proofed buns can bake up dense or split unevenly. - Bake
Heat the oven to 180°C / 350°F. Whisk together the egg and milk for the egg wash and brush the buns gently but thoroughly, then bake for 18 to 20 minutes, rotating the tray if needed, until the buns are a rich, deep golden brown with evenly colored tops. The internal temperature should read about 93–95°C / 200–203°F if checked. Don’t underbake — these buns need their full color for both flavor and structure. - Glaze and Cool
While the buns bake, heat the sugar and water together just until the sugar dissolves, without reducing it — this should stay a light syrup. As soon as the buns come out of the oven, brush them lightly with the syrup glaze for shine and a classic finish, then cool completely on a rack before filling. The buns must be fully cool, or the whipped cream will melt and soften against any remaining warmth. - Make the Whipped Cream
Place the cold heavy cream, powdered sugar, and vanilla in a chilled bowl and whip to medium-firm peaks. The cream should be thick, hold its shape clearly, and be firm enough to mound generously inside the buns, while still looking smooth and creamy rather than grainy. Don’t overwhip, or the texture turns rough and buttery. - Fill the Maritozzi
Using a serrated knife, cut a deep slit down the top center of each bun, leaving the base intact so it opens like a pocket. Pipe or spoon the whipped cream generously into each bun, slightly overfilling for the classic abundant look, then smooth the exposed cream with a small offset spatula or the flat side of a knife for a neat, traditional finish. Dust lightly with powdered sugar just before serving.
*Notes :
- Adding the butter gradually during kneading, rather than dumping it all in at once, is what lets this dough absorb its full fat content without turning greasy or slack. A dough this enriched needs that incremental approach to develop properly, since too much butter added too quickly can overwhelm the gluten structure before it’s had a chance to form.
- Bread flour rather than all-purpose is the choice that gives these buns enough strength to hold a generous whipped cream filling while still staying soft and airy. A weaker flour would struggle to support both the enrichment from the butter and eggs and the weight of the filling once assembled.
- Full cooling before filling deserves to be treated as a hard rule rather than a loose guideline. Whipped cream against even slightly warm bread melts almost immediately, turning what should be a clean, mounded filling into something closer to a syrupy mess.
- Watching the dough’s volume and feel during both rises, rather than relying on the clock alone, matters more here than in many other enriched doughs. Rising times shift considerably with room temperature, and a dough that looks puffed and feels airy is a better doneness signal than a fixed number of minutes.
Why This Recipe Works
This recipe works because gradually incorporating the butter lets the enriched dough develop real strength without becoming greasy, and bread flour gives that dough enough structure to support both an airy crumb and a generous cream filling. Baking the buns until they reach a deep golden color, rather than pulling them pale, builds the flavor and structure this style depends on, and brushing them with syrup glaze straight from the oven locks in shine before they cool. Full cooling before filling protects the whipped cream from melting on contact, and whipping the cream only to medium-firm peaks keeps it smooth and pipeable rather than grainy or overworked.
Ingredient Breakdown
Bread Flour
The structural foundation — gives the buns enough strength to hold a generous filling while staying soft.
Gradually Added Butter
The critical enrichment technique — incorporated a little at a time so the dough absorbs it fully.
Orange and Lemon Zest
The flavor signature — adds the delicate citrus aroma that defines a classic maritozzo.
Syrup Glaze
The finishing shine — brushed on immediately after baking for the classic glossy crust.
Whipped Cream Filling
The dramatic centerpiece — whipped only to medium-firm peaks for a smooth, pipeable texture.
Full Cooling Step
The critical technique — buns must be completely cool before filling or the cream melts.
Flavor Structure Explained
This maritozzo follows a layered balance model:
- Soft, airy foundation (enriched brioche dough)
- Bright citrus aroma (orange and lemon zest)
- Glossy, golden crust (egg wash, syrup glaze)
- Rich, abundant filling (vanilla whipped cream)
- Final delicate finish (powdered sugar dusting)
The enriched brioche dough forms the soft, airy foundation of this bun, while orange and lemon zest add the bright citrus aroma that defines the classic version. The egg wash and syrup glaze together build a glossy, golden crust, the vanilla whipped cream adds a rich, abundant filling once the buns have fully cooled, and a final dusting of powdered sugar finishes the presentation in the traditional style.
Common Mistakes to Avoid
- Adding the Butter All at Once – This overwhelms the dough’s gluten structure and makes it greasy. Always add the butter gradually, kneading well after each addition.
- Using Milk That’s Too Hot – This can weaken or kill the yeast before the dough even rises. Always use milk that’s lukewarm, not hot.
- Filling the Buns Before They’re Fully Cool – This melts the whipped cream on contact. Always cool the buns completely on a rack before filling.
- Overwhipping the Cream – This turns the texture rough and buttery instead of smooth. Always stop at medium-firm peaks.
- Underbaking the Buns – This leaves them pale and structurally weaker. Always bake until they reach a deep golden brown color.
Variations
Coffee Maritozzo Version
Add 1 teaspoon of instant espresso powder to the whipped cream along with the vanilla for a subtle coffee note that pairs particularly well alongside an espresso or cappuccino.
Chocolate-Dipped Version
Dip the top edges of each filled bun lightly in melted dark chocolate before dusting with powdered sugar, for a richer, more dessert-style finish than the classic simple presentation.
Candied Citrus Version
Fold a small amount of finely chopped candied orange peel into the dough along with the zest, per the recipe’s own citrus profile, for a more pronounced citrus flavor throughout the crumb.
Mini Maritozzi Version
Divide the dough into 16 smaller pieces instead of 8, reducing the baking time by 3 to 4 minutes, for bite-sized buns that work well for a brunch spread or dessert table.
Storage & Make-Ahead
Unfilled buns are the part of this recipe worth making ahead, since they keep well for 1 day at room temperature in an airtight container without losing much of their softness. This makes it realistic to bake the brioche the day before and fill them fresh the next morning.
Filled maritozzi are a different story and should be treated as a same-day treat. Once assembled, they need to be refrigerated because of the whipped cream, and they’re genuinely best eaten the same day they’re filled, since both the bun and the cream begin to lose their ideal texture after that.
If your kitchen runs warm, chilling the whipped cream briefly after whipping — before it goes into the buns — helps it hold its shape better during assembly and through the first hour or two of serving. This is a small adjustment worth making in summer months especially.
Filling the buns as close to serving time as possible gives the best texture overall. A maritozzo that’s been filled and refrigerated for several hours still tastes good, but the contrast between the soft bun and the firm, fresh cream is at its most dramatic right after assembly.
Frequently Asked Questions
Can I fill the buns the night before serving?
It’s not recommended, since filled maritozzi are genuinely best the same day they’re assembled. If you need to prep ahead, bake the buns a day early and store them unfilled at room temperature, then fill them close to when you plan to serve.
Why did my whipped cream turn grainy or buttery?
This happens from overwhipping, which pushes the cream past medium-firm peaks into a broken, separated texture. Watch closely as the cream thickens and stop as soon as it holds a clear shape but still looks smooth.
Why did my buns come out dense instead of airy?
This usually traces back to under-proofing at one of the two rise stages, since the dough needs to look visibly puffed and feel airy rather than just sit for a fixed amount of time. Watch the dough’s volume and feel rather than relying on the clock alone, especially if your kitchen runs cool.
Can I make the dough ahead of time?
The unfilled baked buns keep for 1 day at room temperature in an airtight container, which is the most practical way to get ahead on this recipe. Making and filling the whipped cream can then happen close to serving time for the best texture.
What other Italian classics and drinks pair well with this one?
Cannoli, Tiramisu, Softest Homemade Milk Buns, Brioche Toast Bread, and Freddo Cappuccino all share similar enriched-dough or classic Italian techniques and make good options to try next.
Nutrition Facts
( Per Serving — 1 filled bun )
Calories
~430 kcal
Protein
7 g
Fat
24 g
Carbs
45 g
Calories
~430 kcal
Protein
7 g
Fat
24 g
Carbs
45 g
Related Recipes
Related Recipes
-

Banana Bread Donut Bites
Small baked banana bread donut bites with a soft, moist interior, finished warm in a generous cinnamon-sugar coating.
-
Stromboli with Pepperoni and Cheese
Pizza dough rolled tightly around pepperoni, low-moisture mozzarella, thick tomato sauce, and Parmesan, baked until deeply golden and crisp.
-
Mexican Bolillo Bread
Classic homemade Mexican bolillo rolls with a light crisp crust, soft fluffy interior, and the signature tapered oval shape.


You might also like
You might also like
-
Salted Caramel Espresso Cookies
Soft, thick espresso cookies with gooey salted caramel hidden inside and a light sprinkle of flaky salt.
-
Spaghetti alle Vongole
Fresh clams in a light olive-oil, white wine, and garlic emulsion with parsley and lemon zest, tossed with al dente spaghetti.
-
Orange & Earl Grey Loaf
A tender tea loaf scented with orange zest and Earl Grey tea, finished with a light citrus glaze.



Maritozzo
Ingredients
Method
- Combine the bread flour, instant yeast, and sugar in a large bowl or stand mixer bowl, adding the salt on the opposite side from the yeast. Add the lukewarm milk, eggs, egg yolk, honey, vanilla, orange zest, and lemon zest, then mix until a shaggy dough forms with no dry flour remaining. Knead for 5 to 7 minutes until the dough begins to smooth out.
- Add the soft butter gradually, a little at a time, kneading well after each addition so the dough absorbs it fully before more goes in. Continue kneading for 8 to 12 minutes until the dough is smooth, elastic, slightly tacky, and able to stretch thinly without tearing quickly — soft and enriched, but not loose or greasy. If the dough feels very sticky, knead a little longer before reaching for extra flour.
- Shape the dough into a ball, place it in a lightly greased bowl, cover, and let it rise in a warm place until doubled, about 1½ to 2 hours. The dough is ready when it looks puffed, feels airy, and a light fingertip press leaves a slight indentation.
- Turn the dough out onto a lightly floured surface and divide it into 8 equal pieces, about 105–110 g each. Shape each piece into a tight, smooth ball by pulling the dough edges underneath and rolling gently against the surface, then place them on parchment-lined trays with enough space between them. Flatten each ball very slightly into an oval or rounded bun shape — they should stay plump, not flat.
- Cover loosely and let the buns rise again until visibly puffy and nearly doubled, about 45 to 60 minutes. They should look light and expanded; under-proofed buns can bake up dense or split unevenly.
- Heat the oven to 180°C / 350°F. Whisk together the egg and milk for the egg wash and brush the buns gently but thoroughly, then bake for 18 to 20 minutes, rotating the tray if needed, until the buns are a rich, deep golden brown with evenly colored tops. The internal temperature should read about 93–95°C / 200–203°F if checked. Don’t underbake — these buns need their full color for both flavor and structure.
- While the buns bake, heat the sugar and water together just until the sugar dissolves, without reducing it — this should stay a light syrup. As soon as the buns come out of the oven, brush them lightly with the syrup glaze for shine and a classic finish, then cool completely on a rack before filling. The buns must be fully cool, or the whipped cream will melt and soften against any remaining warmth.
- Place the cold heavy cream, powdered sugar, and vanilla in a chilled bowl and whip to medium-firm peaks. The cream should be thick, hold its shape clearly, and be firm enough to mound generously inside the buns, while still looking smooth and creamy rather than grainy. Don’t overwhip, or the texture turns rough and buttery.
- Using a serrated knife, cut a deep slit down the top center of each bun, leaving the base intact so it opens like a pocket. Pipe or spoon the whipped cream generously into each bun, slightly overfilling for the classic abundant look, then smooth the exposed cream with a small offset spatula or the flat side of a knife for a neat, traditional finish. Dust lightly with powdered sugar just before serving.