
Freddo Cappuccino
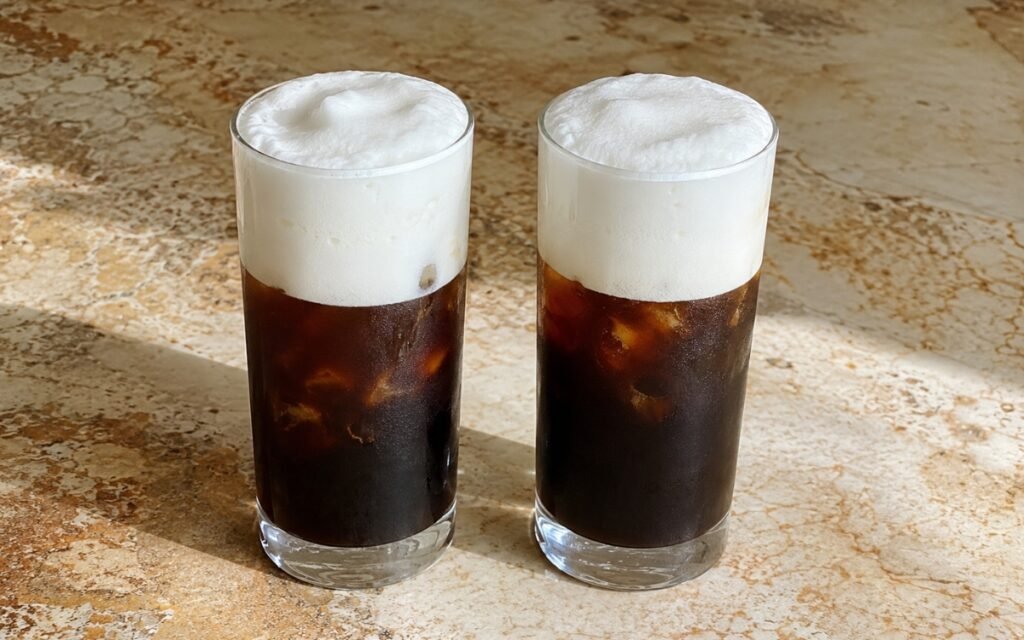
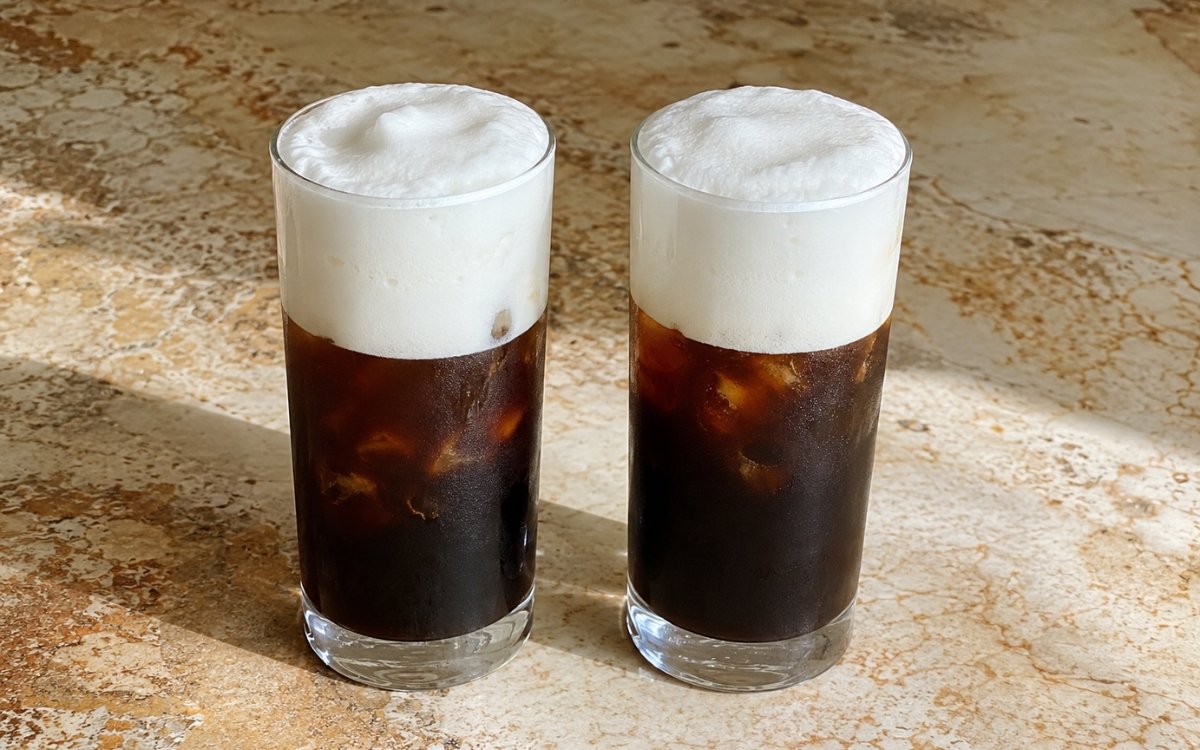
A classic Greek Freddo Cappuccino made with freshly brewed double espresso shaken hard with ice until chilled and foamy, poured over fresh ice, then topped with thick cold milk foam. Strong espresso on the bottom, dense cold foam on top — clean, elegant, and café-style. Shaking the hot espresso hard with ice before it ever meets the milk is the technique this whole drink depends on — that vigorous agitation chills, lightly dilutes, and aerates the espresso into something genuinely glossy and café-style, the same hard-shake principle used elsewhere in this collection whenever a drink needs rapid chilling and real aeration rather than a gentle, gradual cooling. Frothing genuinely cold milk into a thick, dense, spoonable foam, rather than a thin, bubbly one, is what lets that foam sit as a stable cap on top of the espresso instead of collapsing into it. Using fresh ice for serving rather than the already partially melted shaking ice protects the finished drink from unnecessary dilution. The payoff is a drink with a genuinely clean, two-layer structure — a dark, chilled, foam-capped espresso base beneath a thick, stable white foam layer on top.
Prep Time : 7 min
Cook Time : 5 min
Servings : 2
7 min
5 min
2
Ingredients
For the Espresso Base
• 120ml espresso, freshly brewed (4 standard shots total, counting 1 shot = 30ml; 2 shots per serving)
• 120–160g ice cubes, for shaking
Optional Sweetener
• 10–20g granulated sugar, or 15–30ml simple syrup
For the Cold Milk Foam
• 180–220ml very cold milk (low-fat milk gives the most stable classic foam; whole milk gives a richer but softer foam) — this one on Amazon
For Serving
• 8–12 fresh ice cubes
This post may contain affiliate links. As an Amazon Associate I earn from qualifying purchases, at no additional cost to you.
Directions
- Brew the Espresso
Brew 120ml espresso total, equal to 4 standard 30ml shots. If using sugar, stir it into the hot espresso immediately until fully dissolved. The espresso must be fresh and hot before shaking. Sugar dissolves properly only while the espresso is hot. Adding sugar after chilling gives gritty, uneven sweetness. Dissolving sugar into the espresso while it’s still genuinely hot takes advantage of sugar’s much greater solubility at higher temperatures — the same sugar added after the drink is cold and shaken would dissolve far more slowly and incompletely, leaving undissolved granules rather than sweetening evenly. - Shake the Espresso with Ice
Pour the hot espresso into a shaker, drink mixer cup, or sealed jar. Add the shaking ice. Shake hard for 10–15 seconds, until the espresso is fully chilled, slightly aerated, and capped with a light tan foam. Weak shaking gives you cold espresso with no body. Proper shaking chills, lightly dilutes, and aerates the espresso so it becomes glossy and café-style. That vigorous, sustained agitation does two things a gentle stir over ice never would — it chills the espresso rapidly through direct, forceful contact with the ice, and it physically whips air into the liquid, building the base’s own light foam before the milk foam is ever added on top. - Prepare the Glasses
Fill 2 tall glasses with fresh ice. Do not use the half-melted shaking ice for serving. That is lazy and waters the drink down faster. Divide the shaken espresso evenly between the glasses. Ice used in the shaker has already absorbed heat from the hot espresso and begun melting during the vigorous shake — using that same ice for serving would start the drink’s presentation with ice that’s already working against its concentration and temperature. - Make the Cold Milk Foam
Pour the very cold milk into a milk frother, drink mixer, French press, or tall container with a handheld frother. Froth until thick, cold, and stable, with a dense foam texture that can sit on top of the espresso instead of disappearing into it. The foam should be thick and spoonable but still smooth. If it is thin and bubbly, it will collapse. If it is dry and stiff like shaving foam, you overdid it. Genuinely cold milk holds air more stably than milk at any warmer temperature, which is exactly why this foam needs to start from milk that’s fully chilled — that stability is what lets the finished foam sit as a distinct, structured cap rather than sinking or dissolving into the espresso beneath it. - Top the Drinks
Spoon or pour the cold milk foam over each espresso base, dividing it evenly. The finished drink should have a dark chilled espresso layer underneath and a clear thick white foam cap on top. Serve immediately. Building this drink in two clear, separate stages — espresso base first, milk foam added only afterward — is what preserves that defining two-layer structure, distinct from a drink where milk and espresso are combined and stirred together from the start.
*Notes :
- The hard shake given to the espresso before it ever meets the milk is worth understanding as the foundation this entire drink’s texture is built on, distinct from simply pouring hot espresso over ice. That vigorous agitation accomplishes real chilling and real aeration simultaneously — the espresso base itself develops a light foam from the shake alone, before the separately made milk foam is ever added as a second, distinct layer on top.
- The specific target for the milk foam — thick and spoonable, but still smooth, sitting somewhere between a thin, collapsing froth and an overworked, stiff, shaving-foam texture — is worth checking for carefully rather than frothing on autopilot. Foam that’s too thin lacks the structural stability to hold its place as a distinct cap and will sink or dissolve into the espresso base beneath it. Foam that’s overworked past that ideal point, while technically stable, produces a texture that reads as heavy and dry rather than the smooth, dense result this drink calls for.
- Starting from genuinely cold milk, rather than milk that’s merely refrigerated but has been sitting out, matters more here than it might seem given how briefly it’s actually being frothed. Cold milk holds incorporated air considerably more stably than warmer milk does, which is directly responsible for how long the finished foam cap holds its shape and structure once poured over the espresso base.
- Using separate ice for shaking versus serving, the same principle that governs a straight Freddo Espresso, remains just as important here despite the milk foam layered on top. The shaking ice’s partial melt during the vigorous agitation stage means it’s already working against the drink’s concentration by the time shaking is finished — starting the serving glass with genuinely fresh ice protects the whole drink’s structure and temperature through to the last sip.
Why This Recipe Works
This recipe works because the espresso is shaken hard with ice before anything else happens, chilling and aerating it into a genuinely glossy, café-style base with its own light foam. Fresh serving ice, kept separate from the already partially melted shaking ice, protects that base from unnecessary dilution.
The milk foam is built from genuinely cold milk and frothed to a specific thick, stable, spoonable texture — neither too thin to hold its shape nor overworked into something dry and stiff — and added only afterward as a distinct top layer, preserving the drink’s defining two-layer structure of strong espresso beneath dense cold foam.
Ingredient Breakdown
Freshly Brewed, Hard-Shaken Espresso
The base layer — vigorous shaking chills and aerates it into a genuinely glossy, foam-capped foundation before the milk ever joins it.
Fresh Serving Ice
The presentation component — kept separate from the already partially melted shaking ice to protect the finished drink from extra dilution.
Very Cold Milk
The foam’s foundation — genuinely chilled milk holds incorporated air far more stably than warmer milk, directly determining the foam’s staying power.
Thick, Stable Milk Foam
The defining top layer — frothed to a specific spoonable texture, neither thin and collapsing nor overworked and dry.
Two-Stage Build (Espresso First, Foam Added Last)
The critical technique — preserves the drink’s clean, distinct layering rather than blending the components together.
Flavor Structure Explained
This Freddo Cappuccino follows a layered balance model:
- Bold espresso foundation (hard-shaken, chilled espresso)
- Light aerated body (foam whipped in during shaking)
- Cool refreshing structure (fresh serving ice)
- Rich creamy cap (thick, cold milk foam)
Hard-shaken espresso provides the drink’s bold, unmistakably coffee-forward foundation, aerated and chilled through the vigorous shaking process itself. That same shake builds a light foam through the base, giving it real texture before the milk ever arrives. Fresh serving ice keeps the whole drink properly cold and refreshing throughout. A thick, cold milk foam cap sits distinctly on top, contributing rich, creamy contrast without ever becoming the drink’s dominant body — a defining distinction from an iced latte’s much heavier milk proportion.
Common Mistakes to Avoid
- Shaking the Espresso Too Weakly – This produces cold espresso with no real body or foam. Always shake hard for a full 10–15 seconds.
- Using the Same Ice for Shaking and Serving – Shaker ice is already partially melted and dilutes the drink faster. Always use fresh ice for the serving glass.
- Underfrothing or Overfrothing the Milk – Too thin and it collapses into the espresso; too stiff and it turns dry and heavy. Always aim for thick, spoonable, but still smooth.
- Adding Sugar After Chilling Instead of Before – Cold sugar dissolves poorly and can leave gritty granules. Always dissolve it into the hot espresso first.
- Using Too Much Milk – This turns the drink into something closer to an iced latte rather than a proper cappuccino. Always keep the milk to a foam cap, not the drink’s main body.
Variations
Whole Milk Version
Substitute whole milk for low-fat milk for a richer flavour, accepting a slightly softer, less stable foam.
Sweeter Version
Increase the sugar or simple syrup slightly for a more classic Greek café “medium” or “sweet” style.
Extra-Strong Version
Increase to 3 shots of espresso per serving for a bolder, more intense base beneath the same milk foam cap.
Cocoa-Dusted Version
Finish with a light dusting of unsweetened cocoa powder over the milk foam for an extra aromatic touch.
Storage & Make-Ahead
This drink is meant to be shaken, foamed, and served fresh; it does not hold or store well once assembled, since both the milk foam and the ice will degrade quickly.
Espresso can be brewed just before shaking, but should not be brewed far in advance, since its flavour and aroma fade noticeably as it sits.
Very cold milk should be kept refrigerated until the moment of frothing for the best foam stability.
Frequently Asked Questions
Why does the espresso need to be shaken hard before the milk foam is ever added?
A hard, vigorous shake chills the espresso rapidly and physically whips air into it, building a light foam through the base itself. Weak shaking produces cold espresso with no real body, missing the glossy, aerated texture this drink depends on before the milk layer is even considered.
Why use separate ice for shaking and serving?
The shaking ice has already absorbed heat and begun melting during the vigorous shake. Using that same partially melted ice for serving starts the drink with ice that’s already working against its concentration and temperature.
Why does the milk need to be very cold before frothing?
Genuinely cold milk holds incorporated air far more stably than warmer milk does. That stability is directly responsible for how well the finished foam holds its shape and sits as a distinct cap rather than sinking or dissolving into the espresso base.
Why shouldn’t more milk be used to make the drink bigger or milder?
This is specifically a cappuccino format, where the milk’s role is a foam cap rather than the drink’s main body. Using too much milk moves the drink toward an iced latte’s much heavier milk proportion, losing the strong-espresso-beneath-dense-foam structure that defines a proper Freddo Cappuccino.
Are there other Greek-style or foam-topped iced coffee drinks worth trying?
Freddo Espresso, Iced Flat White, Iced Oat Milk Cappuccino, and Greek Frappé all build on related shaken or foam-topped espresso techniques, each taking the format in its own distinct direction worth exploring.
Nutrition Facts
( per serving )
Calories
~70 kcal
Protein
4 g
Fat
2 g
Carbs
8 g
Calories
~70 kcal
Protein
4 g
Fat
2 g
Carbs
8 g
Related Recipes
Related Recipes

Salted Caramel Iced Latte
Genuine deep amber caramel sauce integrated into hot espresso, layered with cold milk and ice, finished with flaky sea salt.
Toasted Coconut Cold Brew
Strong, chilled cold brew coffee sweetened with warm toasted coconut syrup and softened with a restrained splash of coconut milk.
White Chocolate Iced Mocha
Gently melted white chocolate sauce combined with hot espresso, poured over ice and cold milk for a creamy, pale caramel-cream mocha.
You might also like
You might also like
Cranberry Orange Lemonade
Cold-extracted lemon zest and juice combined with gently extracted cranberries cooked in orange juice for a vivid red-orange, tart lemonade.
Mango Pineapple Pitcher Drink
Macerated, strained mango-lime base combined with pineapple and a second infusion of fresh mango, pineapple, and lime wheels.
Lychee Lemonade
Cold-extracted lemon zest and juice combined with blended, twice-strained lychee for a pale, delicate, floral lemonade.



Freddo Cappuccino
Ingredients
Method
- Brew 120ml espresso total, equal to 4 standard 30ml shots. If using sugar, stir it into the hot espresso immediately until fully dissolved. The espresso must be fresh and hot before shaking. Sugar dissolves properly only while the espresso is hot. Adding sugar after chilling gives gritty, uneven sweetness. Dissolving sugar into the espresso while it’s still genuinely hot takes advantage of sugar’s much greater solubility at higher temperatures — the same sugar added after the drink is cold and shaken would dissolve far more slowly and incompletely, leaving undissolved granules rather than sweetening evenly.
- Pour the hot espresso into a shaker, drink mixer cup, or sealed jar. Add the shaking ice. Shake hard for 10–15 seconds, until the espresso is fully chilled, slightly aerated, and capped with a light tan foam. Weak shaking gives you cold espresso with no body. Proper shaking chills, lightly dilutes, and aerates the espresso so it becomes glossy and café-style. That vigorous, sustained agitation does two things a gentle stir over ice never would — it chills the espresso rapidly through direct, forceful contact with the ice, and it physically whips air into the liquid, building the base’s own light foam before the milk foam is ever added on top.
- Fill 2 tall glasses with fresh ice. Do not use the half-melted shaking ice for serving. That is lazy and waters the drink down faster. Divide the shaken espresso evenly between the glasses. Ice used in the shaker has already absorbed heat from the hot espresso and begun melting during the vigorous shake — using that same ice for serving would start the drink’s presentation with ice that’s already working against its concentration and temperature.
- Pour the very cold milk into a milk frother, drink mixer, French press, or tall container with a handheld frother. Froth until thick, cold, and stable, with a dense foam texture that can sit on top of the espresso instead of disappearing into it. The foam should be thick and spoonable but still smooth. If it is thin and bubbly, it will collapse. If it is dry and stiff like shaving foam, you overdid it. Genuinely cold milk holds air more stably than milk at any warmer temperature, which is exactly why this foam needs to start from milk that’s fully chilled — that stability is what lets the finished foam sit as a distinct, structured cap rather than sinking or dissolving into the espresso beneath it.
- Spoon or pour the cold milk foam over each espresso base, dividing it evenly. The finished drink should have a dark chilled espresso layer underneath and a clear thick white foam cap on top. Serve immediately. Building this drink in two clear, separate stages — espresso base first, milk foam added only afterward — is what preserves that defining two-layer structure, distinct from a drink where milk and espresso are combined and stirred together from the start.