
Cannoli
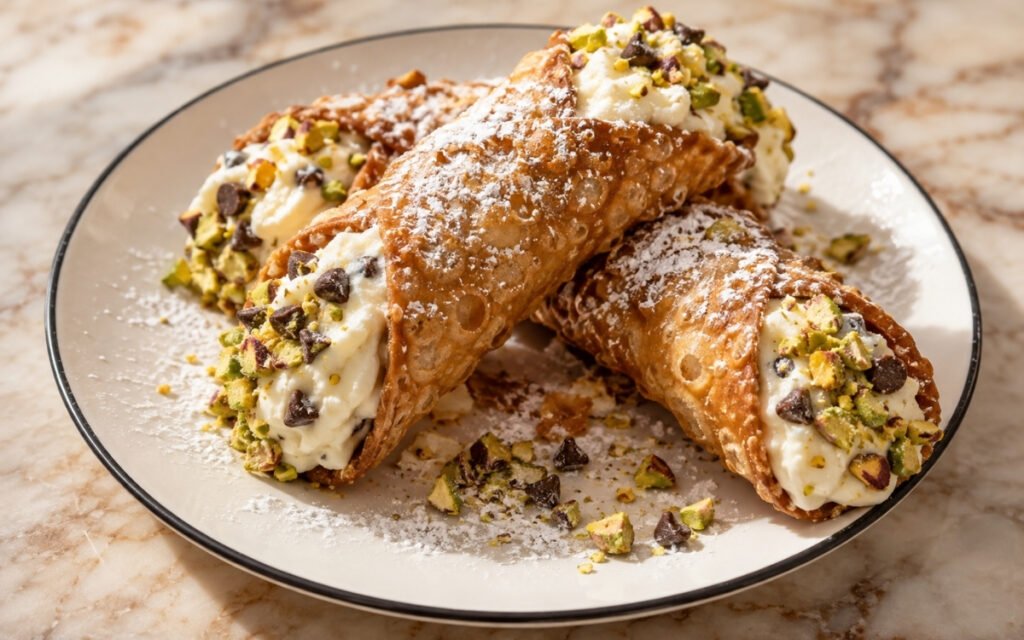
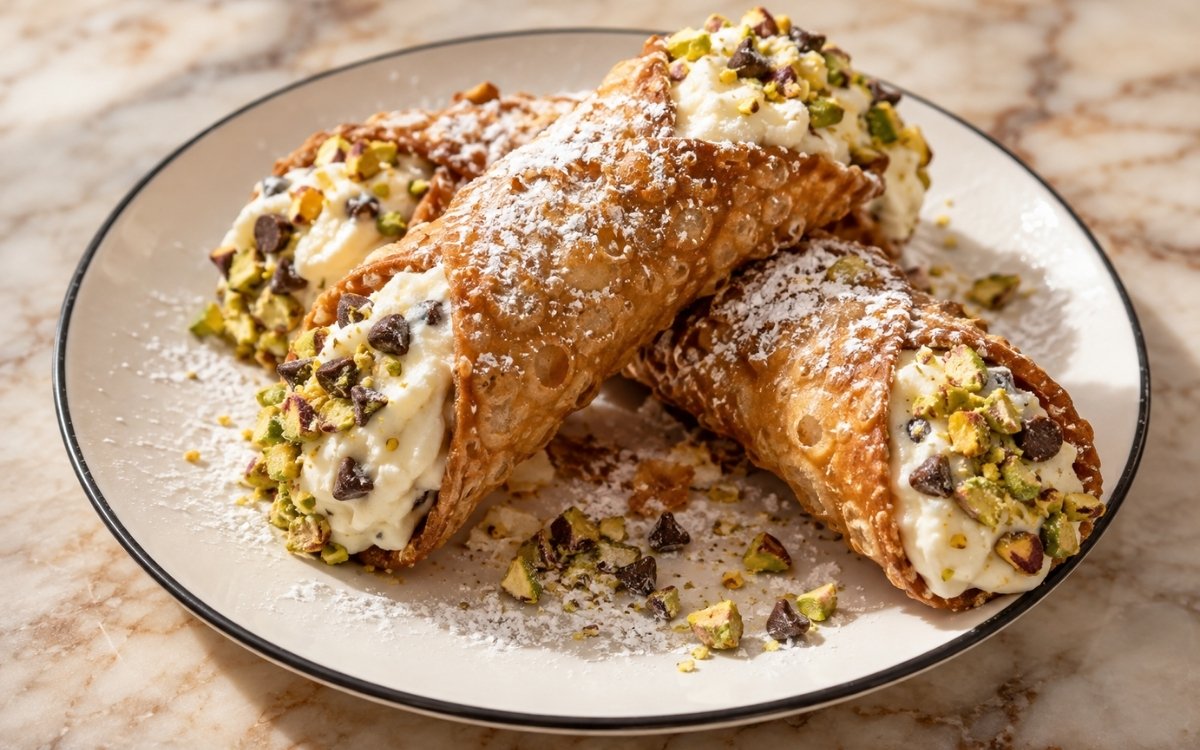
Classic Sicilian cannoli with crisp, blistered fried pastry shells filled with sweetened ricotta cream and finished with chopped pistachios, chocolate chips, and powdered sugar, built entirely around a well-drained ricotta, a rested dough, proper frying temperature, and filling the shells only just before serving so they stay crisp. Draining the ricotta for at least 4 hours before it meets sugar and vanilla gives the filling a thick, pipeable body — a ricotta that’s too wet produces a loose filling that quickly softens the shells. Rolling the shell dough very thin gives cannoli their light, shatter-crisp texture rather than a heavy, bready result. Filling the shells only right before serving keeps them audibly crisp when bitten, since filled cannoli gradually lose that crispness over time. The result is a dessert with classic Sicilian contrast — a crisp, blistered shell around cool, smooth, rich ricotta cream.
Prep Time : 45 min
Cook Time : 30 min
Servings : 12 cannoli
45 min
30 min
12 cannoli
Ingredients
For the Cannoli Shell Dough
• 250g all-purpose flour — this one on Amazon
• 25g granulated sugar
• 10g unsweetened cocoa powder (optional but traditional in many versions) — this one on Amazon
• 1g ground cinnamon
• 2g fine salt
• 30g cold lard, or unsalted butter if needed
• 1 small egg
• 60ml Marsala wine — this one on Amazon
• 10ml white wine vinegar
• 1 egg white, lightly beaten, for sealing
• Neutral frying oil, as needed
For the Ricotta Filling
• 750g whole-milk ricotta, preferably sheep’s milk if available — this one on Amazon
• 180g powdered sugar, sifted
• 1 tsp vanilla extract — this one on Amazon
• 1g ground cinnamon, or to taste
• 50–60g mini dark chocolate chips (optional but very common) — this one on Amazon
• 30g finely chopped candied orange or citron (optional)
For Finishing
• 60–80g chopped pistachios
• Extra mini chocolate chips, if using
• Powdered sugar, for dusting
This post may contain affiliate links. As an Amazon Associate I earn from qualifying purchases, at no additional cost to you.
Directions
- Drain the Ricotta
Line a sieve with cheesecloth or paper towels, add the ricotta, and place it over a bowl. Refrigerate for at least 4 hours, preferably overnight, until noticeably drier and thicker. This is one of the most important steps. If the ricotta is too wet, the filling will be loose and will quickly soften the shells. That extended draining period removes real, considerable moisture from the ricotta before it ever meets the sugar and flavourings, protecting the finished filling’s own thick, pipeable consistency and, by extension, the shells’ own crispness once filled. - Make the Shell Dough
In a bowl, combine the flour, sugar, cocoa powder if using, cinnamon, and salt. Rub in the lard until the mixture looks sandy. Add the egg, Marsala, and vinegar. Mix until a rough dough forms, then knead for 8–10 minutes until smooth and fairly firm. If the dough feels too dry, add Marsala 1 teaspoon at a time. If sticky, add a very small amount of flour. Wrap tightly and let rest at room temperature for 1 hour. The dough should feel smooth, elastic, and firmer than pasta dough. Resting is essential so it can be rolled thinly without springing back. - Make the Ricotta Filling
Once the ricotta is well drained, transfer it to a bowl and press it through a fine sieve or beat briefly until smooth. Add the powdered sugar, vanilla, and cinnamon. Mix until smooth. Fold in the mini chocolate chips and candied orange if using. Cover and refrigerate until needed. Do not overmix into a loose, whipped mixture. The filling should be creamy but thick enough to pipe and hold its shape. That deliberate restraint in mixing protects the ricotta’s own naturally thick texture from being whipped into something looser — overmixing at this stage would work against everything the earlier draining step accomplished. - Roll and Cut the Dough
Divide the rested dough into 2 pieces. Keep one covered while rolling the other. Roll the dough very thin, about 1–2mm thick, using a pasta machine or rolling pin. Thin dough is crucial for crisp, delicate shells. Cut into circles about 10–12cm wide. Re-roll scraps once if needed. Wrap each round around a metal cannoli tube, overlapping the ends slightly. Brush one overlapping edge with egg white and press to seal firmly. If the dough is too thick, the shells will be hard and bready instead of light and shatter-crisp. If the seal is weak, the shells can open while frying. - Fry the Shells
Heat neutral oil to 175–180°C. Fry the wrapped dough tubes in batches for about 1½–2 minutes, turning as needed, until deep golden and blistered. Lift out and drain on paper towels. Let cool just enough to handle, then carefully slide the shells off the metal tubes while still slightly warm. Repeat with the remaining dough. The shells should be evenly golden with small bubbles and blisters. Too cool oil means greasy shells; too hot oil means a dark outside before the dough fully crisps. Remove shells from the tubes while still warm; if fully cold, they can stick and crack. Let shells cool completely before filling. That specific timing for removing the shells from their tubes — warm, not fully cold — is a narrow window; wait too long and the shell’s own contraction as it cools can cause it to stick and crack against the metal. - Fill and Finish
Transfer the ricotta filling to a piping bag. Pipe the filling into each shell from both ends so the center is fully filled. Dip or sprinkle the exposed ends with chopped pistachios, mini chocolate chips, or both. Dust lightly with powdered sugar. Serve immediately or within a short time of filling. Fill only right before serving. Once filled, cannoli gradually lose their crispness. That deliberate, last-minute timing protects the shells’ own moisture-sensitive crispness from the ricotta filling’s own real moisture content, which begins softening the shell the moment the two actually meet.
*Notes :
- Drain the ricotta for 4 hours or more so the filling holds its shape. A wetter ricotta produces a correspondingly wetter filling that compromises the crisp shell it’s meant to sit inside.
- Remove the fried shells from their metal tubes while they’re still warm, rather than letting them cool fully. The shell’s own structure contracts as it cools, and waiting too long risks it sticking to and cracking against the metal tube it was shaped around — getting them off while warm keeps the shells intact.
- Fill the shells only right before serving to keep the contrast between crisp shell and creamy filling. Filled cannoli gradually lose their crispness, because the ricotta’s moisture starts softening the shell from the moment of contact, which is exactly why this final assembly step is held back until as close to serving as possible.
Why This Recipe Works
This recipe works because the ricotta is drained for 4 hours or more, building the thick, pipeable body the filling depends on. The shell dough is rested properly, letting it roll out thin without springing back, and rolled very thin for a shatter-crisp texture.
Shells are fried at a carefully maintained temperature and removed from their tubes at exactly the right, brief window while still warm. Filling only right before serving protects the shells’ own crispness from the ricotta’s real moisture content, delivering the dish’s whole defining contrast between crisp shell and cool, creamy filling.
Ingredient Breakdown
Thoroughly Drained Ricotta
A 4-hour drain builds the thick, pipeable body this filling depends on.
Rested Shell Dough
Relaxes the gluten so the dough rolls out thin without springing back.
Thin-Rolled Dough (1–2mm)
Thinness produces cannoli’s characteristic light, shatter-crisp shell.
Warm-Removed Fried Shells
A narrow timing window protects the shells from sticking and cracking against their metal tubes.
Restrained Ricotta Mixing
Protects the filling from turning loose and whipped, keeping it thick and shape-holding.
Last-Minute Filling
The finishing technique — protects the crisp shells from the ricotta’s own real moisture, preserving their signature audible crunch.
Flavor Structure Explained
The flavours work in layers:
- Crisp, blistered foundation (thin-rolled, properly fried shell)
- Rich, creamy centre (thoroughly drained, sweetened ricotta filling)
- Optional deep sweetness (mini chocolate chips, candied orange)
- Nutty, crunchy finish (chopped pistachios)
- Sweet dusting (powdered sugar)
A thin-rolled, properly fried shell provides this cannoli’s crisp, blistered foundation, its texture protected through careful frying and precise timing. Thoroughly drained, sweetened ricotta defines the rich, creamy centre. Optional mini chocolate chips and candied orange add pockets of deeper sweetness throughout the filling. Chopped pistachios finish the exposed ends with real, nutty crunch, and a light dusting of powdered sugar ties this classic Sicilian pastry together with one final, sweet touch.
Common Mistakes to Avoid
- Skipping or Shortening the Ricotta’s Draining Time – This leaves the filling loose and quick to soften the shells. Always drain it for the full 4 hours or more.
- Overmixing the Ricotta Filling – This turns it loose and whipped rather than thick and pipeable. Always mix just until smooth.
- Rolling the Dough Too Thick – This produces hard, bready shells instead of light, shatter-crisp ones. Always roll it very thin.
- Leaving the Shells on the Tubes Too Long After Frying – This risks sticking and cracking as they cool. Always remove them while still slightly warm.
- Filling the Shells Too Far in Advance – This causes them to gradually lose their crispness. Always fill only right before serving.
Variations
Sheep’s Milk Ricotta Version
Use sheep’s milk ricotta if available for the most classical, fullest flavour, accepting that good-quality whole-milk cow’s ricotta also works well.
Candied Citrus Version
Include the optional finely chopped candied orange or citron in the filling, for a more traditional, citrus-bright pocket of flavour throughout the ricotta.
Chocolate-Cocoa Shell Version
Include the optional cocoa powder in the dough, as is traditional, for a deeper, more visually distinct shell colour and subtle chocolate note.
Make-Ahead Component Version
Fry the shells one day ahead and store them airtight once fully cool, and prepare the filling one day ahead as well, assembling only right before serving.
Storage & Make-Ahead
The most classical ricotta choice here is sheep’s milk, which gives the fullest, most traditional flavour, though a very good whole-milk cow’s milk ricotta also works well as a more widely available alternative.
The filling’s texture should always be thick, smooth, and pipeable, never runny, so if it looks loose at any point, the most likely fix is simply draining the ricotta for longer before proceeding with the rest of the recipe.
Thin rolling of the shell dough is essential, since thick dough makes noticeably heavier shells, and both the Marsala and the vinegar play real roles here — Marsala for classical flavour and blistering, vinegar for tenderness and that same blistering effect.
Lard remains the most traditional fat for the shell dough, giving better texture than butter, and maintaining the frying oil steadily between 175 and 180°C throughout gives the best blistered, crisp shell.
Shells can be fried up to a day ahead and stored airtight once fully cool, and the filling can likewise be made a day ahead and kept chilled, but always assemble the two together only right before you plan to actually serve the cannoli.
Frequently Asked Questions
Why does the ricotta need to drain for so many hours before it’s used in the filling?
That extended draining removes real, considerable moisture from the ricotta. A wetter ricotta produces a correspondingly looser filling, and that excess moisture would quickly soften the crisp shells it’s meant to sit inside.
Why does the shell dough need to rest for a full hour before rolling?
That rest lets the gluten relax after kneading, so the dough rolls out thin without springing back.
Why must the dough be rolled to such a specific, thin measurement?
That thinness produces cannoli’s characteristic light, shatter-crisp texture. Dough rolled even modestly thicker bakes up correspondingly heavier and more bready, losing exactly the delicate quality this recipe depends on.
Why do the shells need to come off their metal tubes while still warm rather than fully cooled?
The shell’s own structure contracts as it cools, and waiting too long risks it sticking to and cracking against the metal tube. That specific, brief timing window protects the shells’ structural integrity.
Are there other classic Italian or European dessert dishes worth trying?
Tiramisu and Panna Cotta both offer other classic Italian dessert directions worth exploring. Classic French Madeleines is also worth trying for a different, elegant baked treat, and Pastel de Nata Blondies and White Chocolate Blueberry Muffins offer other sweet baked treats worth exploring.
Nutrition Facts
( Per Serving — 1 cannolo )
Calories
~340 kcal
Protein
9 g
Fat
18 g
Carbs
34 g
Calories
~340 kcal
Protein
9 g
Fat
18 g
Carbs
34 g
Related Recipes
Related Recipes

Crispiest Fried Chicken
Buttermilk-brined chicken with a thick, craggy double-dredged crust built using a cold-water rehydration dip, then double-fried until aggressively crunchy.
Brie and Bacon Omelette
A soft folded omelette filled with creamy melted Brie and crispy bacon, served with golden breakfast potatoes and buttered toast.
Mexican Bolillo Bread
Classic homemade Mexican bolillo rolls with a light crisp crust, soft fluffy interior, and the signature tapered oval shape.

You might also like
You might also like
Chocolate Cream Cold Brew
Strong, chilled cold brew coffee topped with a thick, cleanly dissolved chocolate cream cold foam that slowly marbles into the coffee.
Crêpes Suzette
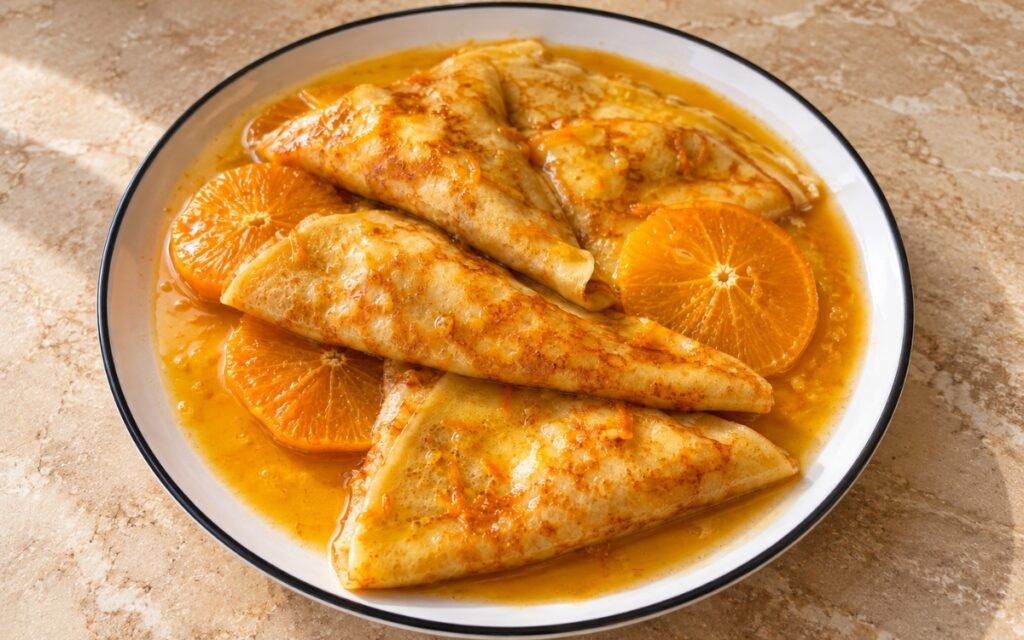
Delicate French crêpes folded into triangles and coated in a glossy orange-butter Suzette sauce with fresh orange juice and zest.
Chicken Parm Hero
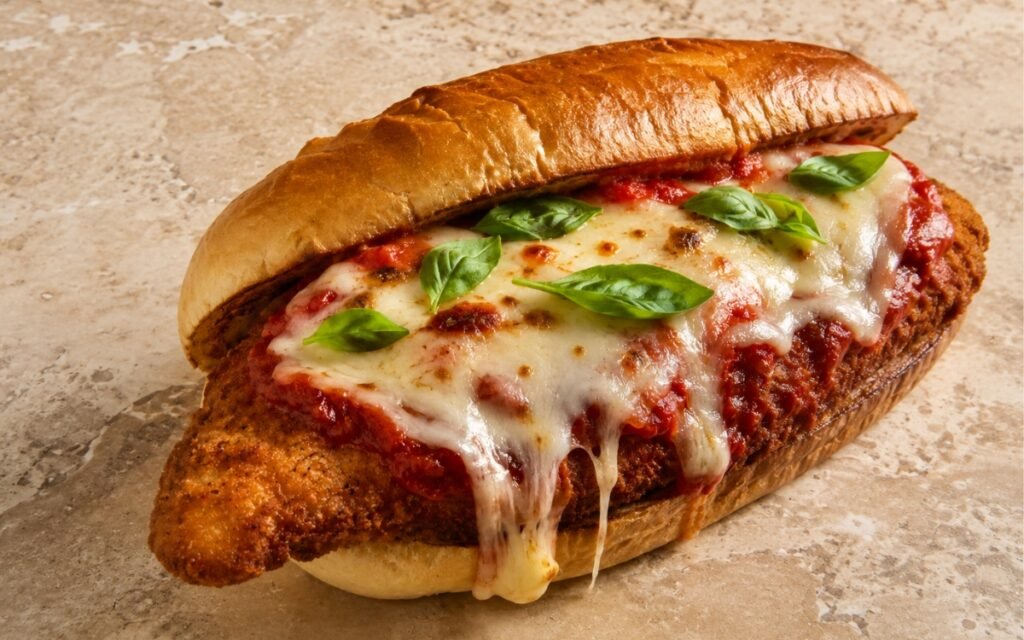
A golden fried chicken cutlet in a toasted hoagie roll, topped with thick marinara, melted mozzarella, Parmesan, and fresh basil.
Cannoli
Ingredients
Method
- Line a sieve with cheesecloth or paper towels, add the ricotta, and place it over a bowl. Refrigerate for at least 4 hours, preferably overnight, until noticeably drier and thicker. This is one of the most important steps. If the ricotta is too wet, the filling will be loose and will quickly soften the shells. That extended draining period removes real, considerable moisture from the ricotta before it ever meets the sugar and flavourings, protecting the finished filling’s own thick, pipeable consistency and, by extension, the shells’ own crispness once filled.
- In a bowl, combine the flour, sugar, cocoa powder if using, cinnamon, and salt. Rub in the lard until the mixture looks sandy. Add the egg, Marsala, and vinegar. Mix until a rough dough forms, then knead for 8–10 minutes until smooth and fairly firm. If the dough feels too dry, add Marsala 1 teaspoon at a time. If sticky, add a very small amount of flour. Wrap tightly and let rest at room temperature for 1 hour. The dough should feel smooth, elastic, and firmer than pasta dough. Resting is essential so it can be rolled thinly without springing back.
- Once the ricotta is well drained, transfer it to a bowl and press it through a fine sieve or beat briefly until smooth. Add the powdered sugar, vanilla, and cinnamon. Mix until smooth. Fold in the mini chocolate chips and candied orange if using. Cover and refrigerate until needed. Do not overmix into a loose, whipped mixture. The filling should be creamy but thick enough to pipe and hold its shape. That deliberate restraint in mixing protects the ricotta’s own naturally thick texture from being whipped into something looser — overmixing at this stage would work against everything the earlier draining step accomplished.
- Divide the rested dough into 2 pieces. Keep one covered while rolling the other. Roll the dough very thin, about 1–2mm thick, using a pasta machine or rolling pin. Thin dough is crucial for crisp, delicate shells. Cut into circles about 10–12cm wide. Re-roll scraps once if needed. Wrap each round around a metal cannoli tube, overlapping the ends slightly. Brush one overlapping edge with egg white and press to seal firmly. If the dough is too thick, the shells will be hard and bready instead of light and shatter-crisp. If the seal is weak, the shells can open while frying.
- Heat neutral oil to 175–180°C. Fry the wrapped dough tubes in batches for about 1½–2 minutes, turning as needed, until deep golden and blistered. Lift out and drain on paper towels. Let cool just enough to handle, then carefully slide the shells off the metal tubes while still slightly warm. Repeat with the remaining dough. The shells should be evenly golden with small bubbles and blisters. Too cool oil means greasy shells; too hot oil means a dark outside before the dough fully crisps. Remove shells from the tubes while still warm; if fully cold, they can stick and crack. Let shells cool completely before filling. That specific timing for removing the shells from their tubes — warm, not fully cold — is a narrow window; wait too long and the shell’s own contraction as it cools can cause it to stick and crack against the metal.
- Transfer the ricotta filling to a piping bag. Pipe the filling into each shell from both ends so the center is fully filled. Dip or sprinkle the exposed ends with chopped pistachios, mini chocolate chips, or both. Dust lightly with powdered sugar. Serve immediately or within a short time of filling. Fill only right before serving. Once filled, cannoli gradually lose their crispness. That deliberate, last-minute timing protects the shells’ own moisture-sensitive crispness from the ricotta filling’s own real moisture content, which begins softening the shell the moment the two actually meet.