
Portuguese Custard Tarts (Pastéis de Nata)
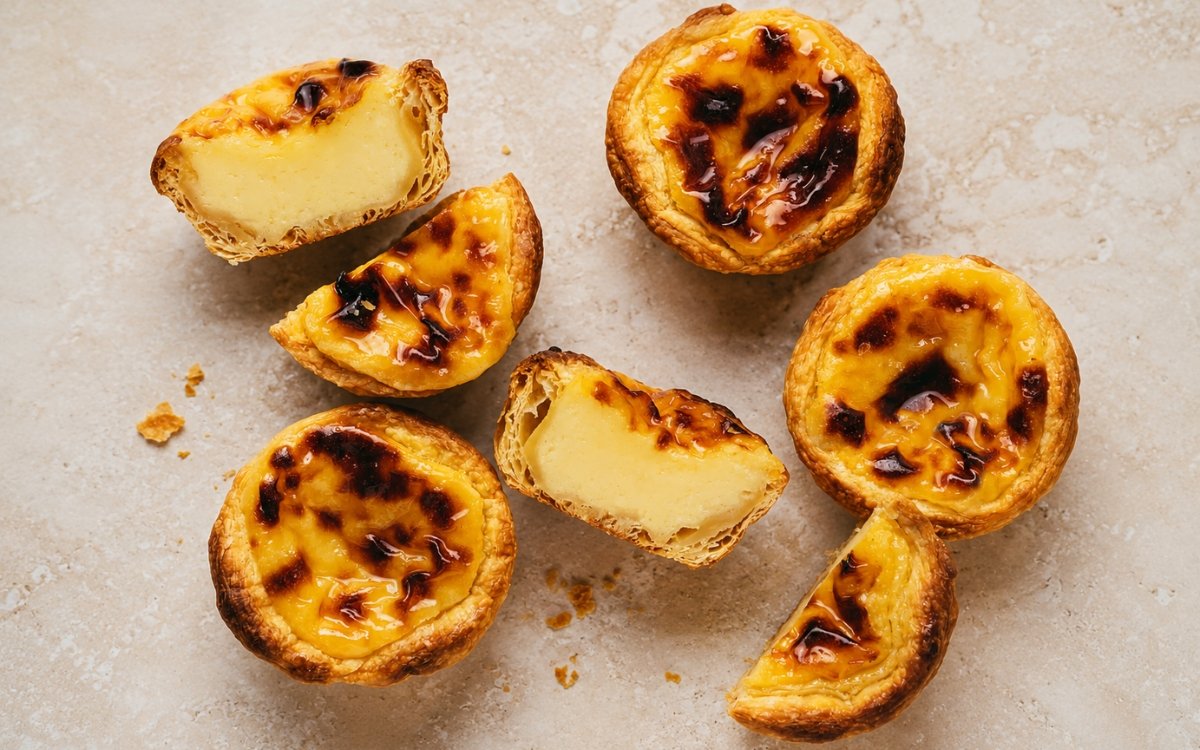
Classic Portuguese custard tarts made from rolled, laminated puff pastry shaped into small fluted cups, filled with a silky egg yolk custard, and baked at very high heat until the custard develops its signature dark caramelised leopard spots while the pastry stays shatteringly crisp and flaky. Rolling the puff pastry into a tight log before slicing it into rounds is the technique this whole tart depends on for its structure — that spiral, once pressed into the tin, is what gives the finished shell its distinctive layered, flaky walls rather than a flat, uniform crust, the same rolled-and-sliced lamination principle used elsewhere in this collection whenever a laminated dough needs visible, structural layers rather than a smooth surface. Baking at genuinely extreme heat, well above what most home ovens are set to for pastry, is what allows the custard’s surface to caramelise into dark spots within the same short window the pastry needs to crisp — a cooler oven would either leave the custard pale or overbake the pastry waiting for that colour to develop. Straining the custard base before it ever meets the pastry protects the finished tart from any curdled egg strands or lumps. The payoff is a tart with genuinely crisp, flaky pastry walls cradling a silky, wobbling custard marked with deep caramelised spots on top.
Prep Time : 40 min
Cook Time : 1 hr, 30 min
Servings : 12
40 min
1 hr, 30 min
12
Ingredients
For the Pastry
• 1 sheet all-butter puff pastry, about 320–375g, thawed if frozen but kept cold
• Extra flour, for rolling
For the Custard Base
• 250ml whole milk
• 1 cinnamon stick
• 1 strip lemon peel, no white pith
• 150g granulated sugar
• 60ml water
• 25g all-purpose flour — this one on Amazon
• 6 large egg yolks
• 1 whole egg
• 5ml vanilla extract — this one on Amazon
This post may contain affiliate links. As an Amazon Associate I earn from qualifying purchases, at no additional cost to you.
Directions
- Roll and Shape the Pastry
On a lightly floured surface, roll the puff pastry into a rectangle about 3–4mm thick if it isn’t already at that thickness. Starting from one long edge, roll the pastry tightly into a log, like a jelly roll. Wrap and chill the log for 20–30 minutes until firm. Once chilled, slice the log into 12 even rounds, about 2cm thick. Place each round cut-side up in a standard muffin tin cup. Using your thumbs, press and spread each round outward and up the sides of the cup, working the spiral pattern visible in the dough so it lines the cup evenly with a slightly thicker rim at the top. The spiral visible on each slice’s cut face is exactly what becomes the tart shell’s signature layered wall once pressed up the sides of the tin — that structure is only achievable because the pastry was rolled into a log first, rather than simply cut from a flat sheet into individual rounds. - Chill the Shaped Shells
Once all 12 cups are lined with pastry, place the muffin tin in the refrigerator for at least 10 minutes while you prepare the custard. Chilling the shaped pastry firms the butter back up after the warmth of handling, which is what lets the shells hold their shape and puff evenly rather than slumping or shrinking once they hit the hot oven. - Infuse the Milk
In a small saucepan, combine the milk, cinnamon stick, and lemon peel. Heat gently over medium-low heat until steaming but not boiling. Remove from the heat and let it steep for 10–15 minutes to infuse. Strain out the cinnamon and lemon peel before using. This gentle infusion draws the cinnamon and lemon’s aromatic oils into the milk without ever bringing it to a full boil, which would risk scalding the milk and pushing those flavours toward something harsher and less delicate than the tart’s traditionally subtle background aroma calls for. - Make the Sugar Syrup
In a separate small saucepan, combine the sugar and water. Bring to a boil over medium heat and cook for 1–2 minutes, just until the sugar fully dissolves and the syrup turns clear. Do not let it caramelise or turn golden at this stage. Remove from the heat. This syrup needs to stay a clear, simple syrup rather than developing any colour — its role here is purely to sweeten and slightly thicken the custard base, and any caramelisation at this stage would push the flavour toward something closer to butterscotch, working against the tart’s intended clean sweetness. - Build the Custard Base
Whisk the flour into the strained warm milk until completely smooth, with no lumps remaining. Slowly pour in the hot sugar syrup while whisking constantly. In a separate bowl, whisk the egg yolks and whole egg together until smooth. Gradually whisk a small amount of the warm milk mixture into the eggs to temper them, then pour the tempered egg mixture back into the remaining milk mixture, whisking constantly. Stir in the vanilla extract. Strain the entire custard through a fine sieve into a jug or bowl to remove any lumps or bits of cooked egg. Tempering the eggs gradually, rather than pouring the hot milk in all at once, prevents the sudden temperature shock that would scramble them — that careful gradual warming is what keeps the final custard silky rather than flecked with tiny curdled bits. - Fill the Tart Shells
Preheat the oven to its highest setting, ideally 250°C or higher if your oven allows, along with a heavy baking tray placed inside to preheat as well. Remove the chilled pastry-lined muffin tin from the refrigerator. Pour the strained custard into each shell, filling to just below the top edge of the pastry, leaving a small gap since the custard will puff slightly during baking. Do not overfill. Overfilled tarts will spill over and stick the pastry to the tin, ruining the shape as they bake. - Bake
Carefully place the muffin tin directly onto the preheated baking tray in the oven. Bake at the highest possible temperature for 12–18 minutes, watching closely toward the end. The tarts are ready when the pastry is deeply golden and crisp, and the custard has puffed slightly with dark caramelised spots forming across the surface, while the centre still has a gentle wobble. Every oven behaves differently at extreme heat, so watch rather than trust the clock alone. Placing the muffin tin directly onto an already-hot baking tray gives the pastry immediate, intense heat from below the moment it enters the oven, which is what helps the bottom crisp properly in the same short window the custard needs to develop its characteristic dark spots on top. - Cool Briefly and Serve
Let the tarts cool in the tin for 5 minutes, then carefully transfer them to a wire rack. Pastéis de nata are traditionally served warm or at room temperature, dusted with cinnamon or powdered sugar if desired, though the pastry and custard both taste best without waiting too long after baking. This brief cooling in the tin lets the custard finish setting just enough to release cleanly, while the tarts are still warm enough to showcase the contrast between the crisp, flaky shell and the soft, silky custard inside.
*Notes :
- Rolling the pastry into a tight log before slicing is worth understanding as the technique specifically responsible for pastéis de nata’s recognisable layered shell, distinct from a standard tart crust pressed from a flat sheet. The visible spiral on each sliced round, once worked up the sides of the muffin cup, becomes the structural basis of the finished shell’s flaky, ridged walls — a shell cut directly from flat pastry without that rolling step would bake into something far more uniform and considerably less textured.
- The custard’s extreme baking temperature is a genuine departure from how most custard-filled pastries are typically baked, and it’s worth understanding why. Pastéis de nata’s signature dark, caramelised spots on the custard’s surface require intense, direct heat to develop within a short window, and that same intensity is what crisps the surrounding pastry properly in the same few minutes. A more moderate oven temperature, more typical for custard tarts generally, would either leave the custard pale and undercaramelised or force a much longer bake that would overcook the delicate pastry shell before the custard ever developed those characteristic spots.
- Straining the custard base at two separate points in this recipe — once for the infused milk, once for the completed custard — protects the final texture from two different potential sources of imperfection. The first strain removes the cinnamon stick and lemon peel after infusing; the second removes any small curdled bits that might have formed during tempering, however carefully that step was handled. Skipping either strain risks a custard with visible imperfections in its otherwise silky texture.
- The sugar syrup’s specific instruction to stay clear and undercooked, never allowed to caramelise at that early stage, is a detail worth respecting rather than treating as an arbitrary limit. A syrup pushed toward colour at this point would carry a butterscotch-like flavour into the custard base that works against the clean, more straightforward sweetness pastéis de nata are traditionally known for — the actual caramelisation this tart is famous for is meant to happen later, on the custard’s exposed surface in the oven, not baked into the base itself.
Why This Recipe Works
This recipe works because the pastry’s structure is built specifically through rolling and slicing rather than simple sheet-cutting, which is what produces the tart’s characteristic layered, flaky shell.
The custard base is built carefully — infused gently, tempered gradually, and strained twice — to stay silky rather than curdled, and it’s baked at genuinely extreme heat specifically calibrated to develop the signature dark caramelised spots on the surface within the same short window the pastry needs to crisp properly.
Chilling the shaped pastry before it ever meets the custard protects its structure through that intense bake.
Ingredient Breakdown
Rolled-and-Sliced Puff Pastry
The structural technique — a tight log sliced into rounds, rather than a flat sheet, produces the tart’s signature layered, ridged shell.
Cinnamon-and-Lemon Infused Milk
The custard’s aromatic base — gently steeped rather than boiled, for subtle background flavour without harshness.
Undercooked, Clear Sugar Syrup
The sweetening component — deliberately stopped before any caramelisation, keeping the custard’s flavour clean rather than butterscotch-like.
Twice-Strained Custard
The texture protection — removes both the infusion aromatics and any curdled bits from tempering, for a genuinely silky final custard.
Extreme Oven Heat
The critical baking condition — allows the custard’s characteristic dark spots to develop in the same short window the pastry needs to crisp.
Flavor Structure Explained
This pastéis de nata follows a layered balance model:
- Crisp buttery foundation (laminated puff pastry shell)
- Silky sweet centre (egg yolk custard)
- Warm aromatic depth (cinnamon, lemon)
- Deep caramelised finish (browned custard surface)
The crisp, flaky puff pastry shell provides a buttery, structural foundation that shatters lightly with each bite. The silky egg yolk custard inside delivers rich, gentle sweetness with a soft, wobbling texture. Cinnamon and lemon peel, infused into the milk, contribute warm, subtle aromatic depth running quietly through the custard. The custard’s dark, caramelised surface spots, developed under extreme oven heat, finish each tart with a deeper, slightly bittersweet contrast against the custard’s clean sweetness beneath.
Common Mistakes to Avoid
- Cutting the Pastry From a Flat Sheet Instead of a Rolled Log – This produces a flat, uniform crust rather than the signature layered, flaky shell. Always roll the pastry into a tight log before slicing.
- Boiling the Milk During Infusion – This risks scalding the milk and pushing the cinnamon and lemon flavours toward something harsher. Always heat it gently, just until steaming.
- Letting the Sugar Syrup Caramelise – This pushes the flavour toward butterscotch rather than the tart’s traditionally clean sweetness. Always stop as soon as the sugar dissolves and the syrup turns clear.
- Tempering the Eggs Too Quickly – Pouring hot milk in all at once scrambles the eggs. Always temper gradually, adding a small amount first before combining fully.
- Baking at a Moderate Temperature – This won’t develop the characteristic dark caramelised spots within the same window the pastry needs to crisp. Always bake at the highest possible oven setting.
Variations
Extra-Spiced Version
Add a small pinch of ground nutmeg or a second, smaller strip of lemon peel to the infused milk for a more pronounced aromatic character.
Mini Tart Version
Use a mini muffin tin instead of a standard one for smaller, bite-sized tarts, reducing the bake time by a few minutes and watching closely.
Orange Peel Version
Substitute a strip of orange peel for the lemon peel in the milk infusion for a slightly sweeter, more floral citrus note.
Powdered Sugar and Cinnamon Finish
Dust the finished, slightly cooled tarts with a mixture of powdered sugar and ground cinnamon for a more decorated presentation.
Storage & Make-Ahead
The custard base can be made a few hours ahead and refrigerated in a covered container; whisk again before using, as it may separate slightly on standing.
Shaped, unfilled pastry shells can be prepared ahead and refrigerated for a few hours, or frozen in the muffin tin for up to 1 month before filling and baking directly from frozen with a few extra minutes added to the bake time.
Baked tarts are best eaten the same day, ideally within a few hours, while the pastry is still fully crisp; they can be stored at room temperature for up to 1 day, though the pastry will soften somewhat.
To refresh, warm briefly in a hot oven for a few minutes rather than a microwave, which will soften the pastry considerably.
Frequently Asked Questions
Why does the pastry need to be rolled into a log before being sliced into rounds?
The visible spiral on each sliced round is what becomes the tart shell’s characteristic layered, ridged wall once pressed up the sides of the muffin cup. Pastry cut directly from a flat sheet, without that rolling step, bakes into a much more uniform, less textured crust.
Why does this recipe call for such an extremely high oven temperature?
Pastéis de nata’s signature dark, caramelised spots on the custard’s surface need intense, direct heat to develop within a short window. That same intensity is what crisps the surrounding pastry properly in the same few minutes — a cooler oven would either leave the custard pale or overbake the delicate pastry shell waiting for those spots to form.
Why does the sugar syrup need to stay clear rather than being cooked until it caramelises?
A syrup pushed toward colour at this early stage would carry a butterscotch-like flavour into the custard base, working against the tart’s traditionally clean sweetness. The actual caramelisation this tart is known for happens later, on the custard’s exposed surface in the oven.
Why is the custard strained twice during preparation?
The first strain removes the cinnamon stick and lemon peel after infusing the milk. The second removes any small curdled bits that might have formed during tempering, however carefully that step was handled — together, both strains protect the custard’s silky final texture.
Are there other custard-based desserts worth trying?
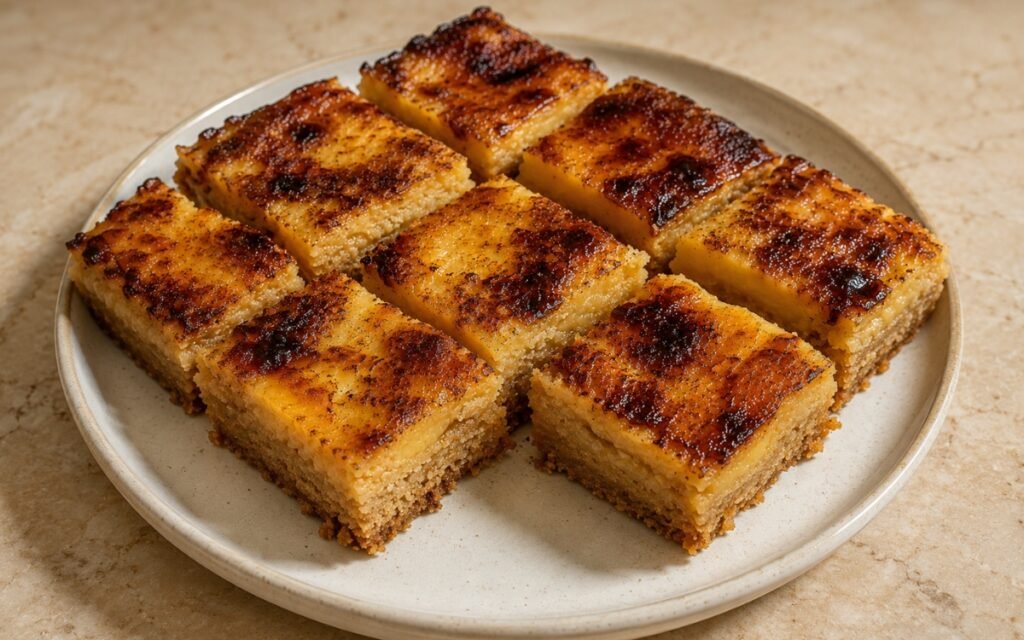
Pastel de Nata Blondies is a bar-format version of the same flavour, built on a blondie base with the same broiled, caramelised custard top, but cut into squares like brownies instead of baked in individual puff pastry shells. Flan Round Cake is also worth exploring if you enjoy this kind of silky egg custard — built on the same principle of a rich, delicate custard, though baked in a water bath in one full cake pan and finished with a deep amber caramel rather than the direct-heat caramelised spots pastéis de nata are known for.
Nutrition Facts
( per serving )
Calories
~210 kcal
Protein
4 g
Fat
13 g
Carbs
20 g
Calories
~210 kcal
Protein
4 g
Fat
13 g
Carbs
20 g
Related Recipes
Related Recipes

Hibiscus and Orange Poached Pears with Vanilla Ice Cream
Firm pears gently poached in vivid hibiscus-orange syrup until deeply stained pink-magenta, served over vanilla bean ice cream with fresh orange zest.
Portuguese Pork Bifana
Thin pork slices marinated in garlic and white wine, simmered until glossy and tender, piled into crusty homemade papo-seco rolls.
Sopa de Albóndigas
Tender beef-and-rice meatballs simmered gently in a savory red tomato broth with carrot, potato, and zucchini.
You might also like
You might also like
Pastel de Nata Blondies
A brown-butter blondie base topped with silky cinnamon-lemon custard, broiled until deeply caramelised and spotted, sliced into thick squares.
Portuguese Pork Bifana
Thin pork slices marinated in garlic and white wine, simmered until glossy and tender, piled into crusty homemade papo-seco rolls.
Pasta alla Norma
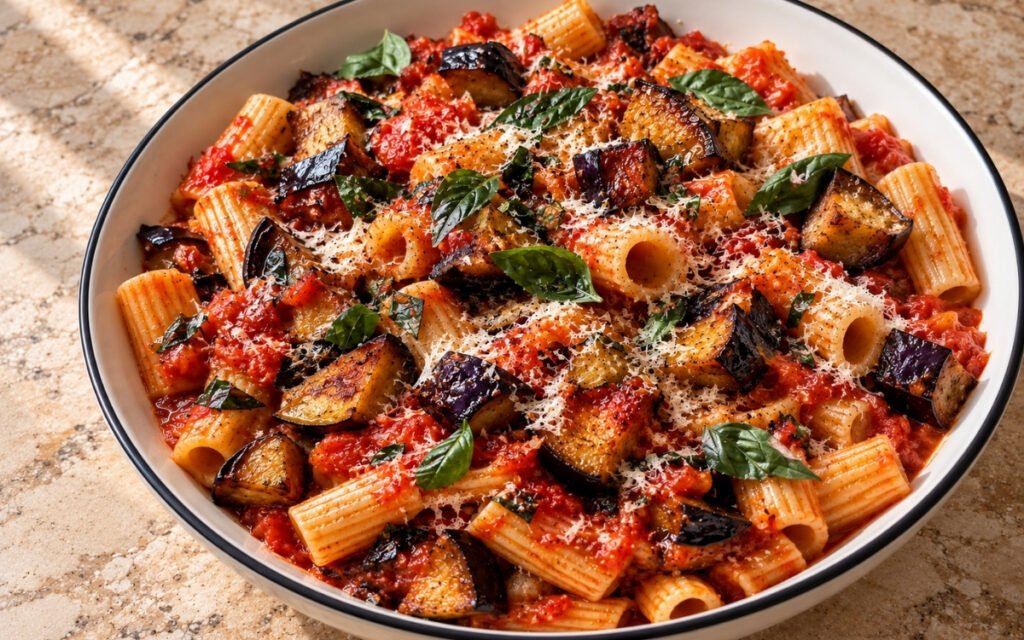
Glossy pasta tossed with deeply golden fried eggplant in a simple tomato basil sauce, finished with grated ricotta salata.
Portuguese Custard Tarts (Pastéis de Nata)
Ingredients
Method
- On a lightly floured surface, roll the puff pastry into a rectangle about 3–4mm thick if it isn’t already at that thickness. Starting from one long edge, roll the pastry tightly into a log, like a jelly roll. Wrap and chill the log for 20–30 minutes until firm. Once chilled, slice the log into 12 even rounds, about 2cm thick. Place each round cut-side up in a standard muffin tin cup. Using your thumbs, press and spread each round outward and up the sides of the cup, working the spiral pattern visible in the dough so it lines the cup evenly with a slightly thicker rim at the top. The spiral visible on each slice’s cut face is exactly what becomes the tart shell’s signature layered wall once pressed up the sides of the tin — that structure is only achievable because the pastry was rolled into a log first, rather than simply cut from a flat sheet into individual rounds.
- Once all 12 cups are lined with pastry, place the muffin tin in the refrigerator for at least 10 minutes while you prepare the custard. Chilling the shaped pastry firms the butter back up after the warmth of handling, which is what lets the shells hold their shape and puff evenly rather than slumping or shrinking once they hit the hot oven.
- In a small saucepan, combine the milk, cinnamon stick, and lemon peel. Heat gently over medium-low heat until steaming but not boiling. Remove from the heat and let it steep for 10–15 minutes to infuse. Strain out the cinnamon and lemon peel before using. This gentle infusion draws the cinnamon and lemon’s aromatic oils into the milk without ever bringing it to a full boil, which would risk scalding the milk and pushing those flavours toward something harsher and less delicate than the tart’s traditionally subtle background aroma calls for.
- In a separate small saucepan, combine the sugar and water. Bring to a boil over medium heat and cook for 1–2 minutes, just until the sugar fully dissolves and the syrup turns clear. Do not let it caramelise or turn golden at this stage. Remove from the heat. This syrup needs to stay a clear, simple syrup rather than developing any colour — its role here is purely to sweeten and slightly thicken the custard base, and any caramelisation at this stage would push the flavour toward something closer to butterscotch, working against the tart’s intended clean sweetness.
- Whisk the flour into the strained warm milk until completely smooth, with no lumps remaining. Slowly pour in the hot sugar syrup while whisking constantly. In a separate bowl, whisk the egg yolks and whole egg together until smooth. Gradually whisk a small amount of the warm milk mixture into the eggs to temper them, then pour the tempered egg mixture back into the remaining milk mixture, whisking constantly. Stir in the vanilla extract. Strain the entire custard through a fine sieve into a jug or bowl to remove any lumps or bits of cooked egg. Tempering the eggs gradually, rather than pouring the hot milk in all at once, prevents the sudden temperature shock that would scramble them — that careful gradual warming is what keeps the final custard silky rather than flecked with tiny curdled bits.
- Preheat the oven to its highest setting, ideally 250°C or higher if your oven allows, along with a heavy baking tray placed inside to preheat as well. Remove the chilled pastry-lined muffin tin from the refrigerator. Pour the strained custard into each shell, filling to just below the top edge of the pastry, leaving a small gap since the custard will puff slightly during baking. Do not overfill. Overfilled tarts will spill over and stick the pastry to the tin, ruining the shape as they bake.
- Carefully place the muffin tin directly onto the preheated baking tray in the oven. Bake at the highest possible temperature for 12–18 minutes, watching closely toward the end. The tarts are ready when the pastry is deeply golden and crisp, and the custard has puffed slightly with dark caramelised spots forming across the surface, while the centre still has a gentle wobble. Every oven behaves differently at extreme heat, so watch rather than trust the clock alone. Placing the muffin tin directly onto an already-hot baking tray gives the pastry immediate, intense heat from below the moment it enters the oven, which is what helps the bottom crisp properly in the same short window the custard needs to develop its characteristic dark spots on top.
- Let the tarts cool in the tin for 5 minutes, then carefully transfer them to a wire rack. Pastéis de nata are traditionally served warm or at room temperature, dusted with cinnamon or powdered sugar if desired, though the pastry and custard both taste best without waiting too long after baking. This brief cooling in the tin lets the custard finish setting just enough to release cleanly, while the tarts are still warm enough to showcase the contrast between the crisp, flaky shell and the soft, silky custard inside.