
Basque Burnt Cheesecake
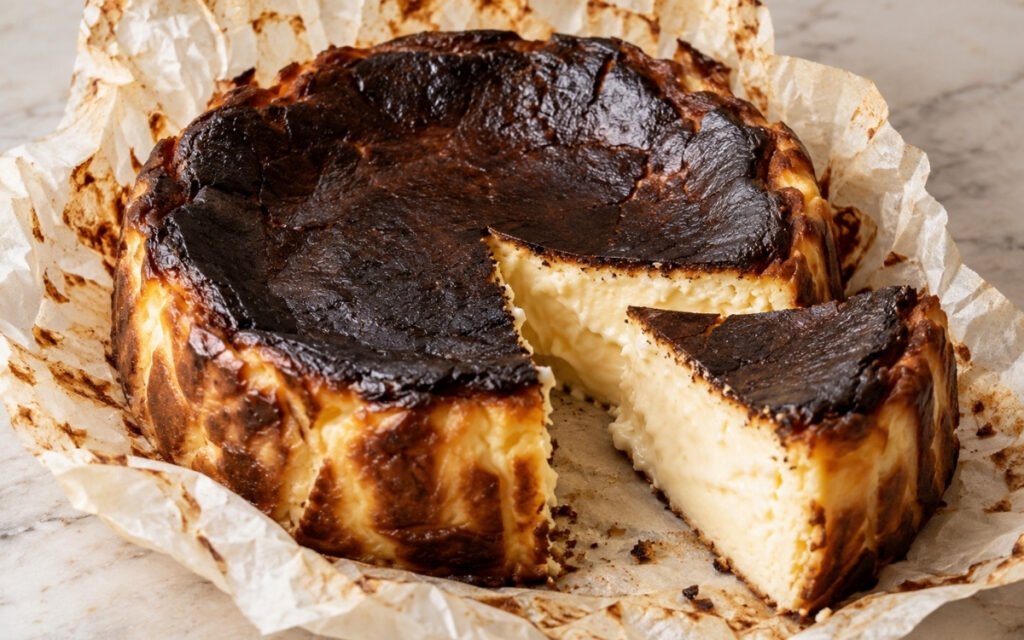
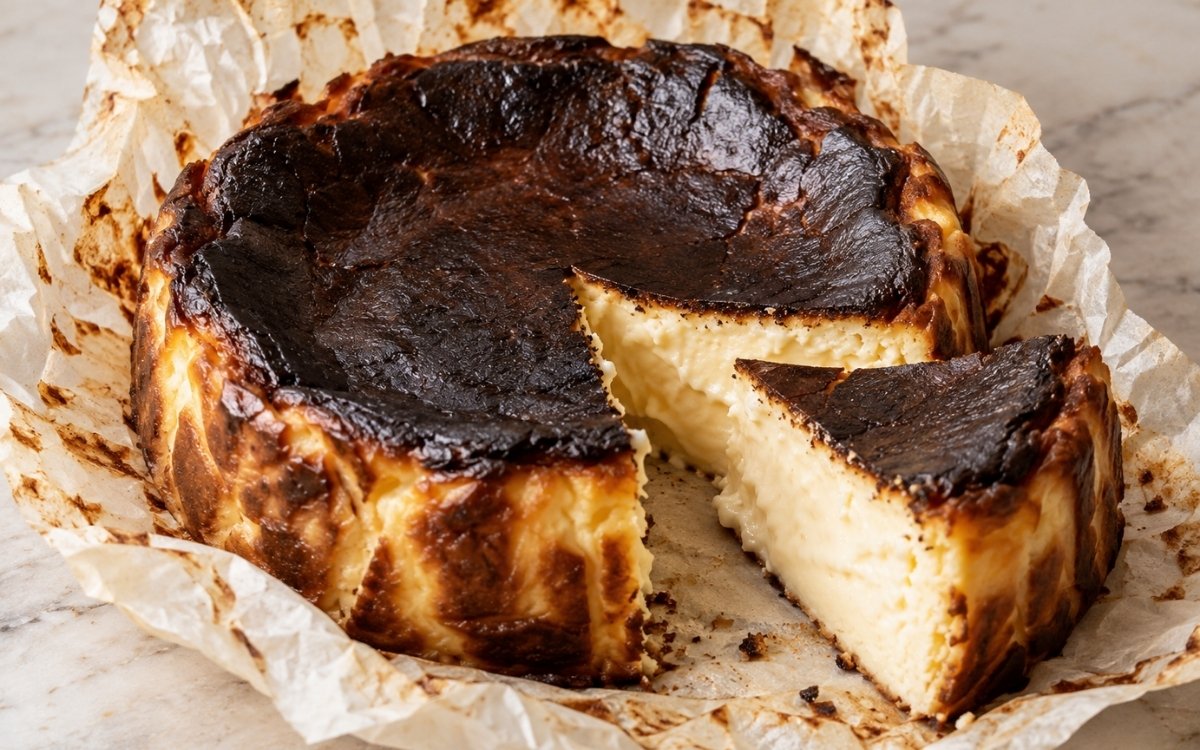
A tall, deeply burnt Basque-style cheesecake with a near-black top, crinkled parchment edges, and a pale ivory custard center that stays soft, creamy, and barely set, this version using reduced sugar for a more tangy, less sweet cheesecake, with an optional autumn spice layer of ginger, nutmeg, cinnamon, and clove for extra depth. Baking the cheesecake genuinely hard and hot, rather than at a gentler temperature, is the technique this whole dessert depends on for its characteristic near-black top and soft, custard-like center — a cooler oven would neither develop that dramatic surface colour nor set the custard correctly within the same window, the same hard-and-hot-bake principle used elsewhere in this collection whenever a custard’s own contrasting exterior and interior depend on real, aggressive heat rather than a slower, gentler approach. Pulling the cheesecake before the center looks fully set is what protects it from turning dry once chilled — it continues firming as it cools. Letting the collapse happen naturally as it cools is a genuine, intended part of this style rather than a failure. The payoff is a cheesecake with real, dramatic contrast — a near-black, bittersweet burnt top over a pale, creamy, barely-set custard center.
Prep Time : 20 min
Bake Time : 50–60 min
Servings : 12 slices
20 min
50–60 min
12 slices
Ingredients
For the Pan
• Unsalted butter, for greasing the pan — this one on Amazon
• 2 large sheets parchment paper
For the Cheesecake Batter
• 680g full-fat cream cheese, room temperature — this one on Amazon
• 225g mascarpone, room temperature — this one on Amazon
• 160g granulated sugar
• 6 large eggs, room temperature
• 1 large egg yolk, room temperature
• 4g fine sea salt
• 415ml heavy cream, room temperature — this one on Amazon
• 8g vanilla extract — this one on Amazon
• 52g all-purpose flour, sifted — this one on Amazon
Optional Autumn Spice Blend
(Not traditional, but recommended for a deeper fall/autumn flavor profile)
• ½ tsp ground ginger
• ¼ tsp freshly grated nutmeg
• ½ tsp ground cinnamon
• ½ tsp ground cloves
This post may contain affiliate links. As an Amazon Associate I earn from qualifying purchases, at no additional cost to you.
Directions
- Prepare the Pan
Heat the oven to 220°C / 425°F. Grease a 23cm / 9-inch springform pan with butter. Press one large sheet of parchment into the pan, letting it rise well above the sides. Add a second sheet crosswise so the whole pan is lined and the parchment forms tall crinkled walls. Place the pan on a baking tray. The parchment should extend at least 5cm / 2 inches above the pan. The cheesecake rises dramatically, then collapses as it cools. That generous parchment height gives the batter real room to expand upward during baking, protecting the tall walls from being overwhelmed once the cheesecake rises well past the pan’s own edge. - Soften the Cheeses
Add the cream cheese and mascarpone to the bowl of a stand mixer fitted with the paddle attachment. Mix on medium-low speed until completely smooth, about 2–3 minutes. Scrape down the bowl several times. The cheese must be truly room temperature. Cold cream cheese creates small lumps that are hard to remove later. That genuine room temperature softness lets the cheese actually break down smoothly under the paddle — cold cheese would resist blending evenly, leaving small lumps that become considerably harder to smooth out once other ingredients join. - Add the Sugar and Salt
Add the sugar and salt. Mix on medium speed for 2 minutes, until smooth and creamy. Because this version uses half the sugar of the reference formula, the batter will be more tangy and less sweet, and the top may brown slightly less aggressively unless the oven is properly hot. The mixture should look glossy and smooth, with no visible cheese lumps. That reduced sugar amount shifts the finished cheesecake toward a genuinely more tangy, cheese-forward flavour — but it also means the oven’s own real heat becomes even more important for building the characteristic dark, burnt top. - Add the Eggs
With the mixer running on low, add the eggs one at a time. Add the extra yolk last. Wait until each egg is mostly incorporated before adding the next. Scrape down the sides and bottom of the bowl. Do not whip air into the batter. Basque cheesecake should be dense, creamy, and custardy, not fluffy. That deliberate, low-speed, one-at-a-time addition protects the batter from incorporating excess air — a cheesecake whipped too vigorously would bake up with a lighter, souffle-like lift rather than the dense, custardy texture this style depends on. - Add Cream, Vanilla, Flour, and Spices
Add the heavy cream and vanilla. Mix on low until smooth. If using the autumn spice blend, whisk the spices into the sifted flour first so they distribute evenly. Sift the flour into the bowl and mix on low just until incorporated. Scrape down the bowl once more and mix briefly. Flour must be sifted. Small flour pockets are very visible in a soft custard cheesecake. That sifting step breaks up any clumps in the flour before it ever meets the batter, protecting the finished custard’s own smooth, even texture from small, visible pockets a coarser addition would leave behind. - Optional Strain for the Smoothest Custard
For the cleanest texture, pass the batter through a fine sieve into a large jug or bowl. Pour the batter into the prepared pan. Tap the pan gently on the counter to release large air bubbles. If the batter had any small cream cheese lumps, straining is the fix. Do not rely on baking to hide them. That deliberate straining step catches any residual lumps the mixing stage might have missed, protecting the finished custard’s own smooth texture in a way baking alone genuinely cannot correct. - Bake Hard and Hot
Bake on the center rack at 220°C / 425°F for 50–60 minutes. The cheesecake is ready when the top is deeply browned to almost black in places, the edges are puffed and set, the center still has a strong wobble when the pan is gently shaken, and the surface has risen, cracked, and darkened dramatically. If the center is still very liquid but the top is already dark, lower the oven to 200°C / 390°F and bake another 5–8 minutes. If the cheesecake is set but the top is not dark enough, move it higher in the oven for the final 3–5 minutes. Do not wait for the center to look fully set. It will continue firming as it cools. Fully set in the oven means dry after chilling. That specific wobble-check, rather than waiting for visual firmness, accounts for real, substantial carryover setting the custard undergoes as it cools — a cheesecake pulled once it looks fully set in the oven would already be overbaked and dry by the time it’s chilled. - Cool and Collapse
Remove the cheesecake from the oven and leave it in the pan. It will be very puffed at first, then collapse as it cools. Cool at room temperature for 2–3 hours. For a soft but sliceable custard, chill for at least 4 hours, preferably overnight. For the creamiest texture, bring slices back toward room temperature before serving. The collapse is normal. The wrinkled top, cracks, and sunken center are part of the style, not a failure. That genuine, expected collapse reflects the same dramatic oven-spring reversing itself as the custard cools and the trapped structure settles — it’s a real, intended visual signature of this style rather than any sign something went wrong. - Slice and Serve
Release the springform pan and peel the parchment away carefully. Slice with a sharp knife dipped in hot water and wiped clean between cuts. Serve slightly cool or room temperature. The center should be creamy, soft, and custard-like, with a thin bitter-sweet burnt top. That hot, wiped knife technique lets each cut through the soft custard come out clean, rather than dragging and smearing the delicate interior with each successive slice.
*Notes :
- Baking the cheesecake genuinely hard and hot deserves genuine recognition as the technique most directly responsible for this dessert’s whole defining contrast. The recipe’s own explicit target — a top “deeply browned to almost black in places” alongside a center that “still has a strong wobble” — reflects real, deliberate technique: only sustained, aggressive heat produces that dramatic surface colour within the same window the custard needs to set correctly.
- Pulling the cheesecake while the center still shows a genuine wobble, rather than waiting for it to look fully set, deserves the same attention this technique receives throughout this collection’s other custard-based desserts. The recipe’s own explicit warning that “fully set in the oven means dry after chilling” reflects real, substantial carryover setting the custard continues undergoing well after it leaves the oven.
- Letting the cheesecake’s dramatic collapse happen naturally as it cools deserves genuine respect as a real, intended part of this style rather than something to correct or prevent. The recipe’s own explicit framing — “the collapse is normal… not a failure” — reflects authentic Basque cheesecake technique, where the wrinkled top and sunken center are as much a visual signature as the burnt top itself.
- Using genuinely room-temperature cream cheese and mascarpone deserves attention as a real, practical necessity rather than a minor convenience. The recipe’s own explicit warning that “cold cream cheese creates small lumps that are hard to remove later” reflects a real, common failure point this simple preparatory step protects against from the very start.
Why This Recipe Works
This recipe works because the cream cheese and mascarpone are genuinely softened before mixing, protecting against stubborn lumps. The batter is mixed on low speed throughout, protecting against unwanted air and the fluffier texture it would produce.
The flour is sifted and the batter optionally strained, catching any small clumps or lumps before baking. The cheesecake is baked hard and hot, building the dramatic near-black top while the interior stays soft.
Pulling it while the center still wobbles protects against overbaking, since real carryover setting continues well into the cooling stage, and the natural collapse that follows is a genuine, intended feature of this classic Basque style.
Ingredient Breakdown
Genuinely Room-Temperature Cream Cheese and Mascarpone
The critical technique — softens fully for smooth blending, protecting against stubborn lumps.
Low-Speed, One-at-a-Time Egg Addition
The critical technique — protects against whipping in unwanted air, keeping the batter dense and custardy.
Sifted Flour (and Optional Straining)
The critical technique — protects the finished custard’s smooth texture from visible pockets or lumps.
Hard, Hot Bake (220°C / 425°F)
The critical technique — builds the dramatic, near-black top within the same window the custard needs to set.
Wobble-Check Doneness Cue
The critical technique — accounts for real carryover setting, protecting the custard from turning dry once chilled.
Natural Post-Bake Collapse
The finishing feature — a genuine, intended part of this classic Basque style rather than a flaw.
Flavor Structure Explained
This Basque burnt cheesecake follows a layered balance model:
- Bittersweet, dramatic exterior (near-black burnt top)
- Rich, dense body (full-fat cream cheese, mascarpone, heavy cream)
- Tangy, cheese-forward depth (reduced sugar)
- Warm, optional spice (ginger, nutmeg, cinnamon, clove)
- Soft, custardy centre (barely-set interior)
A near-black burnt top provides this cheesecake’s dramatic, genuinely bittersweet exterior, built through real, aggressive oven heat. Full-fat cream cheese, mascarpone, and heavy cream contribute rich, dense body throughout. Reduced sugar keeps the flavour tangy and genuinely cheese-forward rather than overly sweet. An optional warm spice blend of ginger, nutmeg, cinnamon, and clove adds real autumn depth for those who want it. A soft, barely-set custard centre finishes the dessert with the pale, creamy interior this classic Basque style is specifically known for.
Common Mistakes to Avoid
- Using Cold Cream Cheese or Mascarpone – This creates small lumps that are hard to remove later. Always let both fully reach room temperature first.
- Whipping Excess Air Into the Batter – This produces a fluffier, less custardy texture. Always mix on low speed, especially when adding the eggs.
- Skipping the Sifted Flour – This risks visible flour pockets in the soft, custard-like finished texture. Always sift it before incorporating.
- Waiting for the Center to Look Fully Set in the Oven – This overbakes the custard, leaving it dry once chilled. Always pull it while a genuine wobble remains.
- Trying to Prevent the Natural Collapse – This is a normal, intended part of the style. Always let it happen naturally as the cheesecake cools.
Variations
Dramatic Burnt Top Version
Bake at 230°C / 445°F for the first 20 minutes, then reduce to 220°C / 425°F until done, per the recipe’s own suggestion, for an even more pronounced, darker burnt top.
Autumn Spice Version
Include the optional ginger, nutmeg, cinnamon, and clove, per the recipe’s own note, keeping the clove amount exact or slightly reduced given how powerful it can be.
Floral Note Version
Add 1 tsp orange blossom water, per the recipe’s own optional suggestion, for a floral character instead of the autumn spice blend.
Basic, Mascarpone-Free Version
Omit the mascarpone, per the recipe’s own note that it’s “not strictly necessary in the most basic version,” accepting a slightly less rich, less soft finished texture.
Storage & Make-Ahead
The classical base for this cheesecake is genuinely crustless, baked hot, heavily browned, and intentionally collapsed, with the crinkled parchment walls and dark top being essential elements of the style rather than optional decoration.
This version’s reduced sugar, at 160g, makes it noticeably less sweet and more cheese-forward, though it also slightly reduces browning, which is exactly why maintaining high oven heat matters even more than usual.
Do not use low-fat dairy anywhere in this recipe; full-fat cream cheese, mascarpone, and heavy cream are required for the correct, genuinely custardy texture this style depends on.
For a pale, barely-set interior, the cheesecake should still wobble clearly in the middle when removed from the oven, and avoiding overmixing protects against the rougher, souffle-like lift too much incorporated air would create.
The best serving window is after overnight chilling, then resting at room temperature for 30 to 45 minutes before slicing, which lets the custard reach its intended creamiest, most sliceable texture.
Frequently Asked Questions
Why does the oven need to be so genuinely hot and aggressive for this cheesecake?
That real, sustained heat is what builds the dramatic, near-black top within the same window the interior custard needs to set. A cooler oven simply couldn’t produce both that colour and the correctly barely-set centre together.
Why is the cheesecake pulled while the center still shows a genuine wobble?
The custard continues firming considerably even after it leaves the oven. Waiting until it looks fully set while baking means it’s already overbaked, and it will turn dry once fully chilled.
Why does the cheesecake collapse so dramatically as it cools, and is that a problem?
That collapse is a genuine, intended feature of authentic Basque cheesecake, not a failure. The wrinkled top, cracks, and sunken center are part of this classic style’s own visual signature.
Why can’t the cream cheese and mascarpone go into the mixer cold?
Cold cheese resists blending evenly and creates small lumps that become considerably harder to remove once the other ingredients are added. Genuine room temperature is what lets everything actually smooth out properly.
Are there other classic Italian, French, or custard-based dessert dishes worth trying?
Tiramisu and Panna Cotta both offer other classic dessert directions worth exploring. No-Bake Biscoff Cheesecake and Japanese Sweet Potato Crème Brûlée are also worth trying for other rich, custard-based treats, and Pastéis de Nata offers another classic custard-based dessert worth exploring.
Nutrition Facts
( Per Serving — 1 slice of 12 )
Calories
~420 kcal
Protein
8 g
Fat
36 g
Carbs
16 g
Calories
~420 kcal
Protein
8 g
Fat
36 g
Carbs
16 g
Related Recipes
Related Recipes

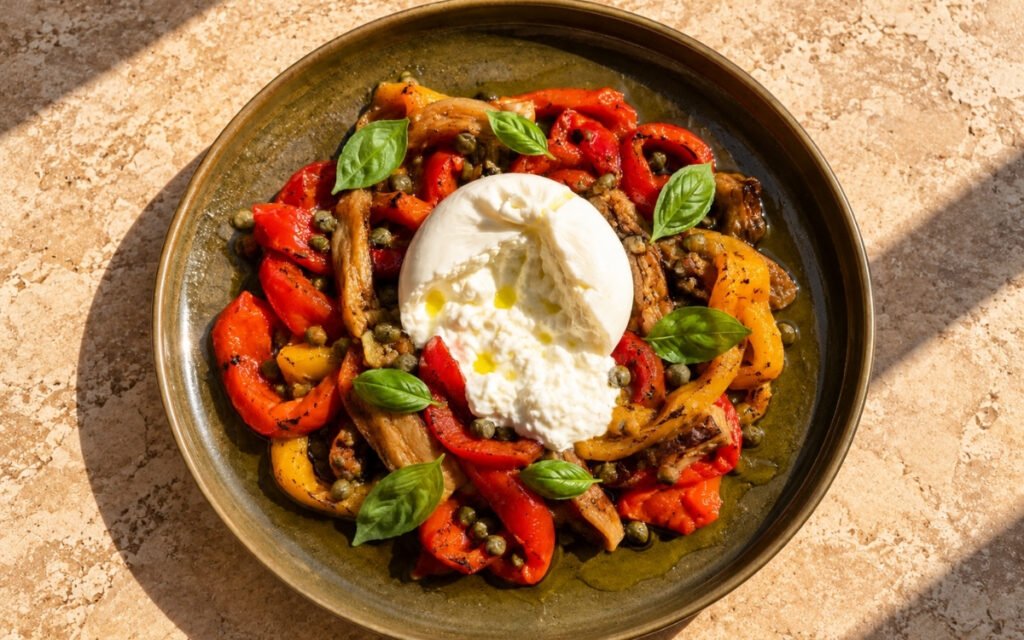
Spanish Escalivada with Burrata & Capers
Fully roasted peppers, eggplant, and onion, peeled and torn into soft smoky strips, dressed with olive oil, finished with torn burrata, capers, and basil.
Pizza Bianca Caprese
Creamy cheese base topped with thinly sliced heirloom tomatoes, arugula, Parmigiano-Reggiano, basil, and balsamic glaze over a blistered crust.
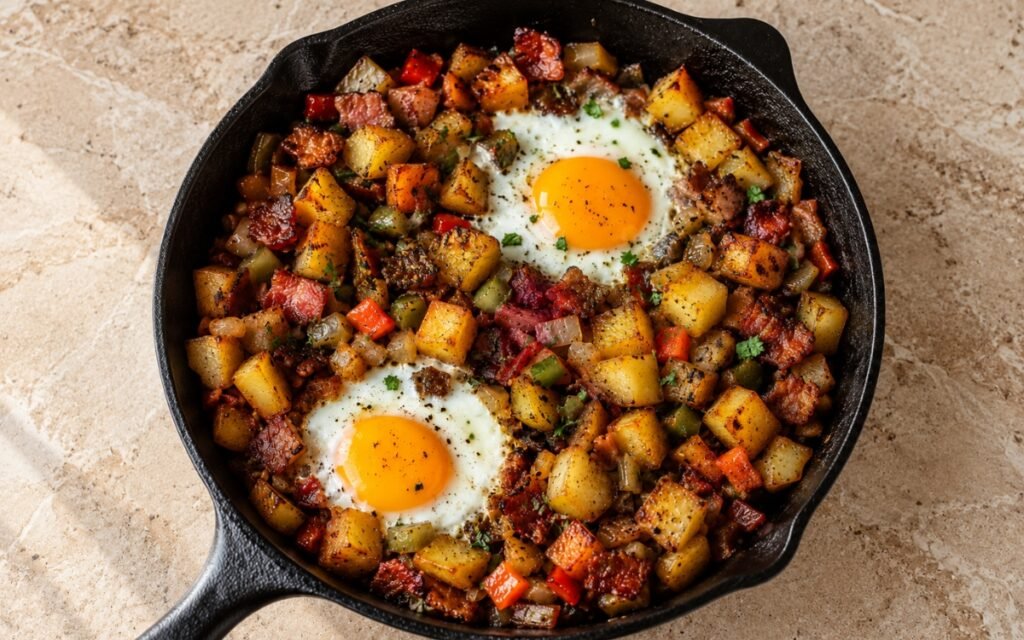
Breakfast Hash with Eggs and Potatoes
Crispy diced potatoes, browned breakfast sausage, crisp bacon, peppers, onions, and eggs cooked directly into the hash with runny yolks.

You might also like
You might also like
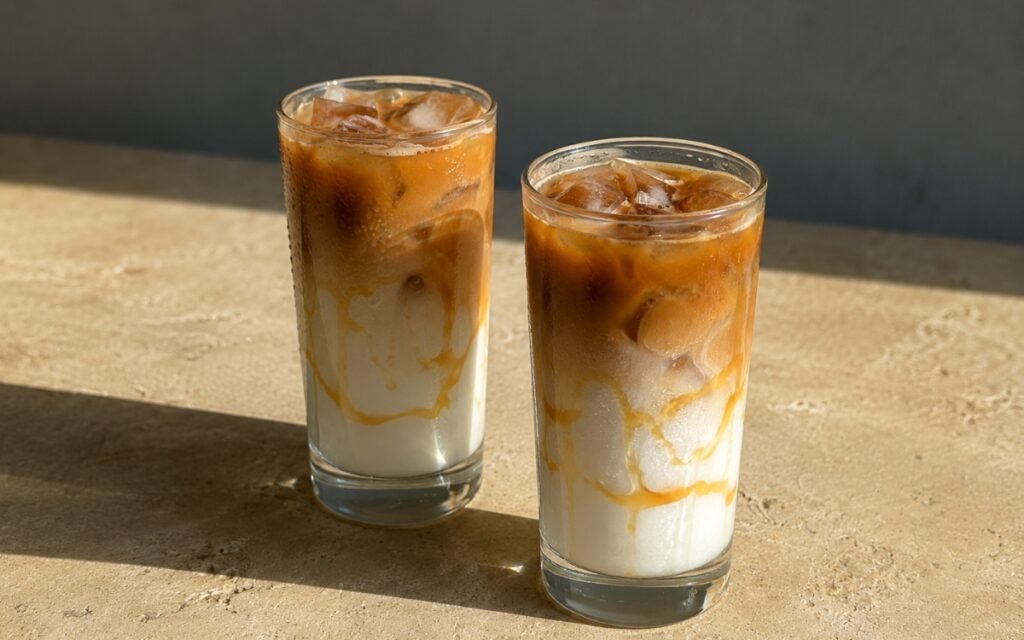
Iced Caramel Macchiato
Vanilla-sweetened cold milk, ice, and espresso poured over the top to create a dramatic dark swirl, finished with caramel sauce drizzle.
Classic Mashed Potatoes
Creamy, buttery mashed potatoes with perfectly smooth texture – the ultimate comfort food side dish.
Spaghetti alla Nerano
Fried zucchini rounds tossed with spaghetti in a glossy, emulsified Pecorino Romano sauce, finished with black pepper and fresh basil.
Basque Burnt Cheesecake
Ingredients
Method
- Heat the oven to 220°C / 425°F. Grease a 23cm / 9-inch springform pan with butter. Press one large sheet of parchment into the pan, letting it rise well above the sides. Add a second sheet crosswise so the whole pan is lined and the parchment forms tall crinkled walls. Place the pan on a baking tray. The parchment should extend at least 5cm / 2 inches above the pan. The cheesecake rises dramatically, then collapses as it cools. That generous parchment height gives the batter real room to expand upward during baking, protecting the tall walls from being overwhelmed once the cheesecake rises well past the pan’s own edge.
- Add the cream cheese and mascarpone to the bowl of a stand mixer fitted with the paddle attachment. Mix on medium-low speed until completely smooth, about 2–3 minutes. Scrape down the bowl several times. The cheese must be truly room temperature. Cold cream cheese creates small lumps that are hard to remove later. That genuine room temperature softness lets the cheese actually break down smoothly under the paddle — cold cheese would resist blending evenly, leaving small lumps that become considerably harder to smooth out once other ingredients join.
- Add the sugar and salt. Mix on medium speed for 2 minutes, until smooth and creamy. Because this version uses half the sugar of the reference formula, the batter will be more tangy and less sweet, and the top may brown slightly less aggressively unless the oven is properly hot. The mixture should look glossy and smooth, with no visible cheese lumps. That reduced sugar amount shifts the finished cheesecake toward a genuinely more tangy, cheese-forward flavour — but it also means the oven’s own real heat becomes even more important for building the characteristic dark, burnt top.
- With the mixer running on low, add the eggs one at a time. Add the extra yolk last. Wait until each egg is mostly incorporated before adding the next. Scrape down the sides and bottom of the bowl. Do not whip air into the batter. Basque cheesecake should be dense, creamy, and custardy, not fluffy. That deliberate, low-speed, one-at-a-time addition protects the batter from incorporating excess air — a cheesecake whipped too vigorously would bake up with a lighter, souffle-like lift rather than the dense, custardy texture this style depends on.
- Add the heavy cream and vanilla. Mix on low until smooth. If using the autumn spice blend, whisk the spices into the sifted flour first so they distribute evenly. Sift the flour into the bowl and mix on low just until incorporated. Scrape down the bowl once more and mix briefly. Flour must be sifted. Small flour pockets are very visible in a soft custard cheesecake. That sifting step breaks up any clumps in the flour before it ever meets the batter, protecting the finished custard’s own smooth, even texture from small, visible pockets a coarser addition would leave behind.
- For the cleanest texture, pass the batter through a fine sieve into a large jug or bowl. Pour the batter into the prepared pan. Tap the pan gently on the counter to release large air bubbles. If the batter had any small cream cheese lumps, straining is the fix. Do not rely on baking to hide them. That deliberate straining step catches any residual lumps the mixing stage might have missed, protecting the finished custard’s own smooth texture in a way baking alone genuinely cannot correct.
- Bake on the center rack at 220°C / 425°F for 50–60 minutes. The cheesecake is ready when the top is deeply browned to almost black in places, the edges are puffed and set, the center still has a strong wobble when the pan is gently shaken, and the surface has risen, cracked, and darkened dramatically. If the center is still very liquid but the top is already dark, lower the oven to 200°C / 390°F and bake another 5–8 minutes. If the cheesecake is set but the top is not dark enough, move it higher in the oven for the final 3–5 minutes. Do not wait for the center to look fully set. It will continue firming as it cools. Fully set in the oven means dry after chilling. That specific wobble-check, rather than waiting for visual firmness, accounts for real, substantial carryover setting the custard undergoes as it cools — a cheesecake pulled once it looks fully set in the oven would already be overbaked and dry by the time it’s chilled.
- Remove the cheesecake from the oven and leave it in the pan. It will be very puffed at first, then collapse as it cools. Cool at room temperature for 2–3 hours. For a soft but sliceable custard, chill for at least 4 hours, preferably overnight. For the creamiest texture, bring slices back toward room temperature before serving. The collapse is normal. The wrinkled top, cracks, and sunken center are part of the style, not a failure. That genuine, expected collapse reflects the same dramatic oven-spring reversing itself as the custard cools and the trapped structure settles — it’s a real, intended visual signature of this style rather than any sign something went wrong.
- Release the springform pan and peel the parchment away carefully. Slice with a sharp knife dipped in hot water and wiped clean between cuts. Serve slightly cool or room temperature. The center should be creamy, soft, and custard-like, with a thin bitter-sweet burnt top. That hot, wiped knife technique lets each cut through the soft custard come out clean, rather than dragging and smearing the delicate interior with each successive slice.