
Flan Round Cake
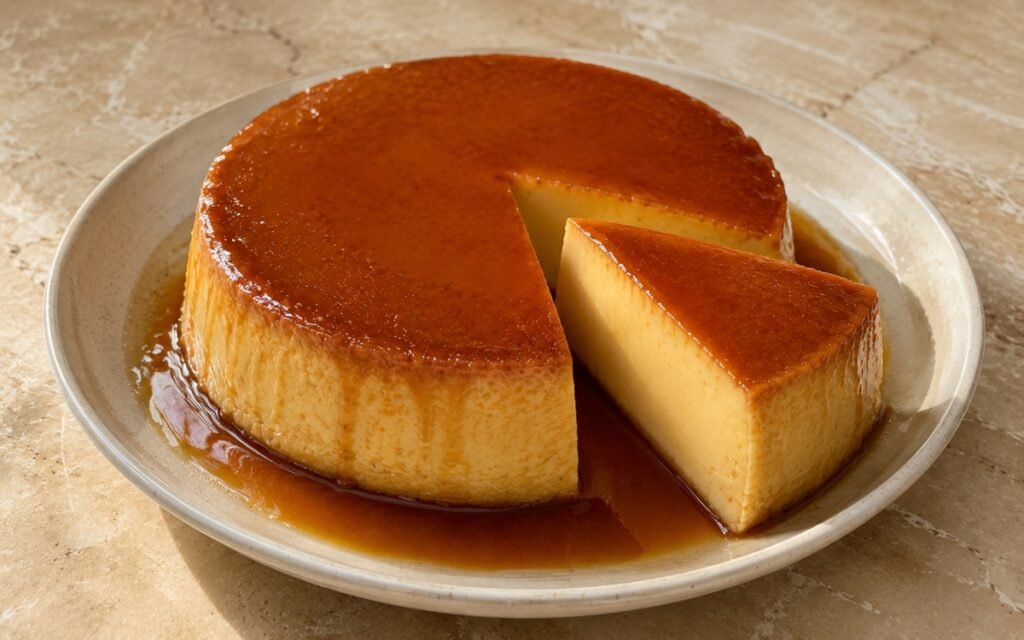
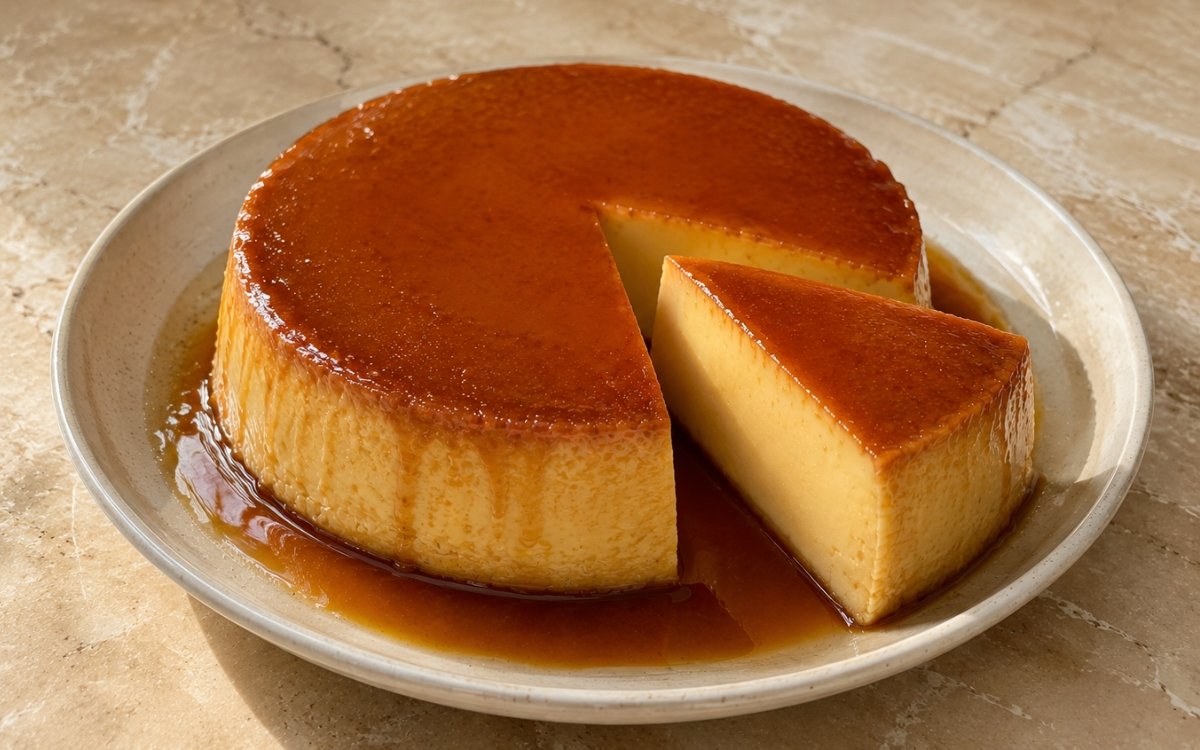
A classic 8-inch round flan with silky dense custard, glossy deep amber caramel, and a smooth pale golden interior, baked gently in a water bath, chilled until fully set, then unmoulded so the caramel runs down the sides and pools around the base. Straining the custard before it ever goes into the pan is the technique that separates a genuinely silky flan from a merely acceptable one — it removes egg threads, spice clumps, and any uneven bits that would otherwise bake into visible specks, the same fine-strain principle used elsewhere in this collection whenever a custard base needs to come out perfectly smooth. Baking gently in a water bath, rather than direct dry heat, protects the custard from the rubbery edges and cracked surface that direct heat produces, since the water bath keeps the temperature around the pan gentle and even. Chilling for a full 6 hours minimum, ideally overnight, is what allows the custard to finish setting into something dense and genuinely sliceable rather than loose and fragile. The payoff is a whole cake with a glossy, deep amber caramel pooling around a pale golden custard, sliced to reveal a perfectly smooth, uncracked interior.
Prep Time : 25 min
Cook Time : 1 hr, 10 min
Servings : 8
25 min
1 hr, 10 min
8
Ingredients
For the Caramel
• 200g granulated sugar
• 60ml water
• 1 pinch fine sea salt
For the Flan Custard
• 5 large eggs
• 2 large egg yolks
• 397g sweetened condensed milk
• 354ml evaporated milk
• 240ml whole milk
• 10ml vanilla extract — this one on Amazon
• 2g fine sea salt
• ⅛ tsp ground cinnamon — this one on Amazon
• ⅛ tsp ground cloves — this one on Amazon
• ⅛ tsp ground nutmeg — this one on Amazon
For the Water Bath
• Hot water, enough to come halfway up the sides of the cake pan
This post may contain affiliate links. As an Amazon Associate I earn from qualifying purchases, at no additional cost to you.
Directions
- Prepare the Pan
Use a solid 20cm / 8-inch round cake pan with high sides. Do not use a springform pan. Caramel and custard will leak through it, and that would be a stupid way to ruin an otherwise simple dessert. Place the cake pan near the stove before making the caramel. Once caramel is ready, it sets fast. A solid, seamless pan is the only real option here — even a well-sealed springform has enough of a seam for hot caramel and thin custard to find their way through during the long bake. - Make the Caramel
Add the sugar, water, and pinch of salt to a small saucepan. Cook over medium heat until the sugar dissolves, then let it boil without stirring. Swirl the pan gently if needed, but do not stir once the syrup is boiling. Cook until the caramel turns deep amber, about 8–12 minutes. It should smell rich and toasted, not burnt. Immediately pour the caramel into the 8-inch cake pan and tilt the pan carefully so the caramel coats the bottom evenly and runs slightly up the sides. Set aside to harden. Do not take the caramel too dark. Burnt caramel tastes bitter and will dominate the custard. Stirring boiling sugar syrup encourages stray sugar crystals to seed the whole batch, which is what causes grainy, crystallised caramel rather than a smooth, glassy one — a gentle swirl of the pan moves the syrup without introducing that risk. - Prepare the Custard
Preheat the oven to 160°C. In a large bowl, whisk the eggs and egg yolks gently until combined. Do not whip air into them. Add the sweetened condensed milk, evaporated milk, whole milk, vanilla extract, fine sea salt, cinnamon, cloves, and nutmeg. Whisk gently until smooth and fully combined. The spices are intentionally restrained. They should deepen the flavour, not make the flan taste like pumpkin pie. Whisking gently rather than vigorously keeps air bubbles out of the custard from the very start — those trapped bubbles have nowhere productive to go once baked, and they’re what turn a silky custard into one riddled with small holes. - Strain the Custard
Pour the custard through a fine sieve into a clean jug or bowl. This removes egg threads, spice clumps, and any uneven bits. This step is not optional if you want a smooth flan. Skipping it gives you a rougher custard with little cooked egg specks. Even carefully whisked eggs leave behind some stringy, partially set threads (chalazae) that never fully break down into the liquid — straining catches exactly this kind of texture flaw before it has a chance to bake in and become visible in the finished slice. - Fill the Pan
Pour the strained custard over the hardened caramel in the cake pan. Tap the pan lightly on the counter to release large bubbles. If there is foam on the surface, skim it off with a spoon. Foam bakes into a pitted top instead of a clean smooth surface. This is a second layer of protection against surface imperfections, on top of the straining — any bubbles or foam that survived straining and pouring are addressed here, right before the custard goes into the oven where any remaining flaws would set permanently. - Set Up the Water Bath
Place the filled cake pan inside a larger roasting pan or baking dish. Pour hot water into the outer dish until it reaches halfway up the sides of the cake pan. Cover the flan loosely with foil. The foil protects the surface from drying and prevents over-browning. The water bath’s entire purpose is moderating and evening out the heat reaching the custard — surrounding the cake pan with hot water caps the maximum temperature the custard’s edges can reach at around the boiling point of water, protecting against the rubbery, overcooked edges that direct oven heat would produce. - Bake the Flan
Bake at 160°C for 55–70 minutes, until the edges are set and the centre still has a gentle wobble when the pan is nudged. The internal temperature should be about 80–82°C in the centre. Do not bake until completely firm in the oven. It will finish setting as it cools. If the centre sloshes like liquid, it needs more time. If the whole flan is stiff and cracked, it is overbaked. Pulling the flan while the centre still visibly wobbles is a genuinely counterintuitive instruction worth trusting — residual heat continues cooking the custard for a period after it leaves the oven, and a flan that looks fully set inside the oven will be considerably overbaked by the time it’s finished carrying over. - Cool Slowly
Remove the cake pan from the water bath and let it cool at room temperature for 1 hour. Do not unmould it warm. Warm flan breaks easily and the custard texture will look loose. A custard that’s still warm hasn’t yet reached the firmer, more structured state it needs for clean handling — attempting to unmould at this stage risks the whole flan breaking apart rather than releasing cleanly as one piece. - Chill the Flan
Cover and refrigerate for at least 6 hours, preferably overnight. The flan must be fully cold before unmoulding. This chilling time is the main turning point. Flan needs time to set dense, smooth, and sliceable. The custard’s proteins continue firming and settling into their final structure throughout this extended chilling period — this is not simply about temperature, but about giving the custard’s texture time to fully develop into something dense enough to slice cleanly rather than something that spreads or collapses under a knife. - Unmould the Flan
Run a thin knife carefully around the edge of the pan. Dip the bottom of the pan briefly in warm water for 20–30 seconds to loosen the caramel. Place a rimmed serving plate over the pan, then invert confidently in one motion. Let the flan release naturally. The caramel should run down the sides and pool around the base. Do not shake it violently. If it does not release, warm the bottom for another few seconds and try again. The brief warm water dip gently melts just the outermost layer of hardened caramel where it contacts the pan, loosening its grip without melting the caramel throughout — too long in the water risks losing the caramel’s structure entirely before it even reaches the plate. - Slice and Serve
Cut into 8 slices. Pull one slice slightly forward to show the smooth custard interior and allow caramel to pool around it. Serve cold. Presenting one slice pulled forward, rather than a fully intact round, deliberately reveals the flan’s defining visual detail — the clean, unbroken custard texture and the caramel pooling around the cut edge.
*Notes :
- The relationship between the caramel and the custard is worth understanding as a slow transformation that happens entirely during baking and chilling, not something achieved at the caramel-making stage. The hardened caramel poured into the pan starts out glassy and brittle, but over the course of baking and then the extended chilling period, moisture from the custard gradually dissolves the caramel’s surface back into a glossy, pourable sauce — which is exactly what allows it to run down the sides and pool around the base once the flan is unmoulded, rather than staying stuck as a hard, brittle disc.
- Restraint with the warm spices — cinnamon, cloves, and nutmeg, each measured in eighths of a teaspoon — is a deliberate choice rather than an oversight. These spices are present specifically to add a subtle background warmth and depth to the custard, not to make the flan taste overtly spiced. Adding more than the specified small amounts risks pushing the flavour toward something closer to pumpkin pie, which works against the clean, milky custard flavour a proper flan is built around.
- The water bath and the extended, patient chilling period both address the same underlying vulnerability from different angles: custard is a genuinely delicate structure that’s easy to overcook or handle prematurely. The water bath protects it during the active cooking stage by moderating heat, while the long chill afterward protects it during the structural-setting stage by giving the custard’s proteins time to fully firm without any external stress. Skipping or shortening either stage compromises the final texture in a way that’s difficult to fix afterward.
- Unmoulding while the flan is still warm is one of the more tempting shortcuts to take, given how long the full process already runs, and it’s also one of the most consequential mistakes to make. A flan that hasn’t had its full chilling time doesn’t yet have the density and structural integrity to survive being inverted and released from the pan cleanly — the risk of it breaking apart rather than sliding out as one intact piece rises sharply the less time it’s had to fully chill.
Why This Recipe Works
This recipe works because every stage protects the custard’s delicate texture in sequence: gentle whisking avoids trapping air, straining removes any egg threads or clumps before baking, the water bath moderates the oven’s heat so the edges don’t overcook while the centre finishes, and pulling the flan while it still wobbles accounts for the residual carryover cooking that continues after it leaves the oven.
The extended cooling and chilling periods that follow are what allow the custard to finish setting into something genuinely dense and sliceable, and they’re also what lets the hardened caramel slowly transform into the glossy sauce that pools around the unmoulded flan.
Ingredient Breakdown
Gently Whisked Eggs and Yolks
The custard’s base — combined without whipping in air, avoiding the small holes that trapped bubbles would create once baked.
Three-Milk Custard Base (Condensed, Evaporated, Whole)
The specific dairy blend — condensed milk for sweetness and body, evaporated milk for richness, whole milk to round out the consistency.
Strained Custard
The critical smoothing step — removes egg threads and spice clumps before baking, ensuring a perfectly smooth final texture.
Restrained Warm Spices
The background flavour layer — cinnamon, cloves, and nutmeg used in small amounts specifically to deepen, not dominate, the custard’s flavour.
Water Bath
The gentle cooking technique — moderates and evens out the oven’s heat, protecting the custard’s edges from overcooking while the centre finishes.
Flavor Structure Explained
This flan follows a layered balance model:
- Deep caramelised foundation (amber caramel)
- Rich creamy centre (three-milk custard)
- Warm aromatic undertone (cinnamon, cloves, nutmeg)
- Smooth vanilla finish (vanilla extract)
The caramel defines the dessert’s first impression with deep, toasted sweetness and a glossy sheen that coats each slice. The custard itself provides a rich, dense, milky centre built from three distinct dairy components layered for sweetness, richness, and body. The restrained warm spices add a subtle aromatic depth running quietly underneath the custard’s dominant milkiness. A clean vanilla finish ties the caramel and custard together, rounding out the whole dessert without introducing any competing flavour.
Common Mistakes to Avoid
- Stirring the Caramel While It Boils – This encourages sugar crystallisation and can turn the caramel grainy instead of smooth. Always swirl the pan gently instead of stirring.
- Whipping Air Into the Custard – Trapped air bubbles create small holes throughout the baked custard. Always whisk gently, just until combined.
- Skipping the Straining Step – This leaves egg threads and spice clumps visible in the finished custard. Always strain through a fine sieve before pouring into the pan.
- Baking Until Completely Firm in the Oven – The custard continues cooking from residual heat after it leaves the oven, so a fully firm flan straight from the oven will be overbaked once cooled. Always pull it while the centre still has a gentle wobble.
- Unmoulding While Still Warm – Warm flan lacks the structural density to release cleanly and is prone to breaking apart. Always chill for the full recommended time, ideally overnight, before unmoulding.
Variations
Coffee Flan
Add 5g of instant espresso powder dissolved into the whole milk before combining with the other custard ingredients for a coffee-flecked variation.
Coconut Flan
Replace the whole milk with an equal amount of full-fat coconut milk for a subtly tropical variation on the same base.
Orange Zest Flan
Add the finely grated zest of one orange to the custard mixture before straining for a bright citrus note underneath the caramel.
Individual Flans
Divide the caramel and custard among 6–8 small ramekins instead of one large pan, reducing the bake time to about 35–45 minutes and checking doneness earlier.
Storage & Make-Ahead
The baked, chilled flan can be refrigerated, covered, in its pan for up to 4 days before unmoulding and serving — many people find the flavour and texture actually improve after a full day of chilling.
Once unmoulded, leftover slices can be refrigerated in an airtight container for up to 3 days. Flan is not suitable for freezing; the custard’s texture breaks down and becomes watery once thawed.
Frequently Asked Questions
Why can’t a springform pan be used for this recipe?
Even a well-sealed springform pan has a seam where the base meets the sides, and both the thin caramel and the liquid custard will find their way through that seam over the course of baking. A solid, one-piece cake pan is the only reliable option for keeping everything contained.
Why is it important not to stir the caramel while it’s boiling?
Stirring boiling sugar syrup can introduce stray crystals that seed the whole batch, causing the caramel to turn grainy rather than staying smooth and glassy. A gentle swirl of the pan moves the syrup around without triggering that crystallisation.
Why does the custard need to be strained before baking?
Even carefully whisked eggs leave behind small threads and occasionally slightly clumped spices that don’t fully dissolve into the liquid. Straining catches these before baking, which is what produces a completely smooth, unblemished custard texture in the finished flan.
Why pull the flan from the oven while the centre still wobbles, rather than baking until it looks fully set?
Custard continues cooking from residual heat for some time after it leaves the oven. A flan that already looks completely firm inside the oven will end up considerably overbaked and potentially cracked once it’s finished carrying over and cooling.
Why does the flan need such a long chilling time before unmoulding?
The custard’s structure needs the extended chilling period to fully firm and settle into something dense enough to slice cleanly. A flan unmoulded too early, before it’s fully chilled, lacks that structural integrity and is likely to break apart rather than release in one clean piece.
Nutrition Facts
( per serving )
Calories
~380 kcal
Protein
11 g
Fat
14 g
Carbs
52 g
Calories
~380 kcal
Protein
11 g
Fat
14 g
Carbs
52 g
Related Recipes
Related Recipes

Rosemary Peach White Iced Tea
White tea at 75–80°C for 3–4 minutes, peach rosemary syrup made separately and strained — stirred in with restraint, chilled. Delicate, floral, and quietly fruity.
Peach White Tea Spritzer Mocktail
Peaches simmered in thin slices, white tea steeped at 70–85°C with thyme — honey dissolved while warm, topped with club soda. Light, floral, and refined.
Cucumber Elderflower Tonic Mocktail
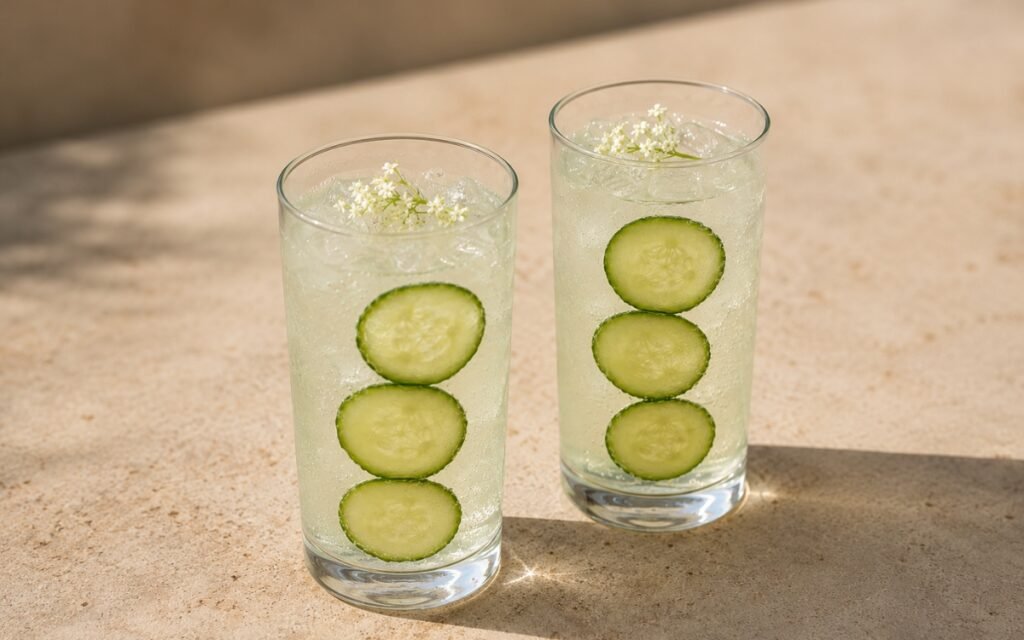
Elderflower and cucumber sweetness over tonic water — nearly clear, intensely aromatic, and elegant.


You might also like
You might also like
Crêpes Suzette
Delicate French crêpes folded into triangles and coated in a glossy orange-butter Suzette sauce with fresh orange juice and zest.
Homemade Churros with Chocolate Sauce
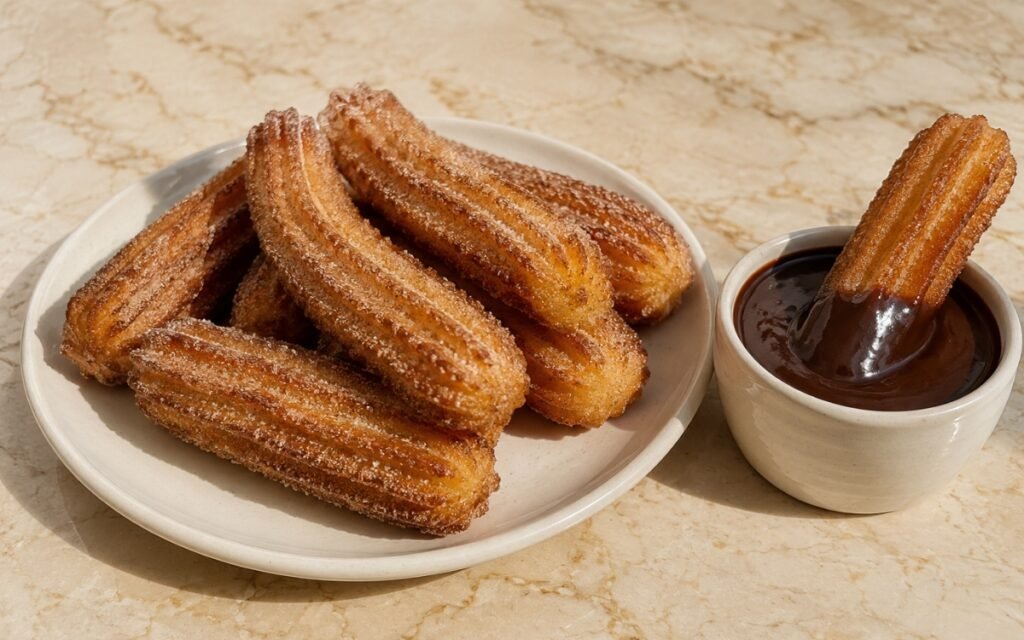
Piped churro dough cooked for real structure, fried until deeply golden and ridged, tossed in cinnamon sugar, and served with rich chocolate sauce.
Blood Orange Citrus Pitcher
Brown sugar syrup with blood orange and lemon zest off heat — combined with 750ml blood orange juice, 240ml lemon for structure, cold water, chilled. Vivid and crowd-ready.


Flan Round Cake
Ingredients
Method
- Use a solid 20cm / 8-inch round cake pan with high sides. Do not use a springform pan. Caramel and custard will leak through it, and that would be a stupid way to ruin an otherwise simple dessert. Place the cake pan near the stove before making the caramel. Once caramel is ready, it sets fast. A solid, seamless pan is the only real option here — even a well-sealed springform has enough of a seam for hot caramel and thin custard to find their way through during the long bake.
- Add the sugar, water, and pinch of salt to a small saucepan. Cook over medium heat until the sugar dissolves, then let it boil without stirring. Swirl the pan gently if needed, but do not stir once the syrup is boiling. Cook until the caramel turns deep amber, about 8–12 minutes. It should smell rich and toasted, not burnt. Immediately pour the caramel into the 8-inch cake pan and tilt the pan carefully so the caramel coats the bottom evenly and runs slightly up the sides. Set aside to harden. Do not take the caramel too dark. Burnt caramel tastes bitter and will dominate the custard. Stirring boiling sugar syrup encourages stray sugar crystals to seed the whole batch, which is what causes grainy, crystallised caramel rather than a smooth, glassy one — a gentle swirl of the pan moves the syrup without introducing that risk.
- Preheat the oven to 160°C. In a large bowl, whisk the eggs and egg yolks gently until combined. Do not whip air into them. Add the sweetened condensed milk, evaporated milk, whole milk, vanilla extract, fine sea salt, cinnamon, cloves, and nutmeg. Whisk gently until smooth and fully combined. The spices are intentionally restrained. They should deepen the flavour, not make the flan taste like pumpkin pie. Whisking gently rather than vigorously keeps air bubbles out of the custard from the very start — those trapped bubbles have nowhere productive to go once baked, and they’re what turn a silky custard into one riddled with small holes.
- Pour the custard through a fine sieve into a clean jug or bowl. This removes egg threads, spice clumps, and any uneven bits. This step is not optional if you want a smooth flan. Skipping it gives you a rougher custard with little cooked egg specks. Even carefully whisked eggs leave behind some stringy, partially set threads (chalazae) that never fully break down into the liquid — straining catches exactly this kind of texture flaw before it has a chance to bake in and become visible in the finished slice.
- Pour the strained custard over the hardened caramel in the cake pan. Tap the pan lightly on the counter to release large bubbles. If there is foam on the surface, skim it off with a spoon. Foam bakes into a pitted top instead of a clean smooth surface. This is a second layer of protection against surface imperfections, on top of the straining — any bubbles or foam that survived straining and pouring are addressed here, right before the custard goes into the oven where any remaining flaws would set permanently.
- Place the filled cake pan inside a larger roasting pan or baking dish. Pour hot water into the outer dish until it reaches halfway up the sides of the cake pan. Cover the flan loosely with foil. The foil protects the surface from drying and prevents over-browning. The water bath’s entire purpose is moderating and evening out the heat reaching the custard — surrounding the cake pan with hot water caps the maximum temperature the custard’s edges can reach at around the boiling point of water, protecting against the rubbery, overcooked edges that direct oven heat would produce.
- Bake at 160°C for 55–70 minutes, until the edges are set and the centre still has a gentle wobble when the pan is nudged. The internal temperature should be about 80–82°C in the centre. Do not bake until completely firm in the oven. It will finish setting as it cools. If the centre sloshes like liquid, it needs more time. If the whole flan is stiff and cracked, it is overbaked. Pulling the flan while the centre still visibly wobbles is a genuinely counterintuitive instruction worth trusting — residual heat continues cooking the custard for a period after it leaves the oven, and a flan that looks fully set inside the oven will be considerably overbaked by the time it’s finished carrying over.
- Remove the cake pan from the water bath and let it cool at room temperature for 1 hour. Do not unmould it warm. Warm flan breaks easily and the custard texture will look loose. A custard that’s still warm hasn’t yet reached the firmer, more structured state it needs for clean handling — attempting to unmould at this stage risks the whole flan breaking apart rather than releasing cleanly as one piece.
- Cover and refrigerate for at least 6 hours, preferably overnight. The flan must be fully cold before unmoulding. This chilling time is the main turning point. Flan needs time to set dense, smooth, and sliceable. The custard’s proteins continue firming and settling into their final structure throughout this extended chilling period — this is not simply about temperature, but about giving the custard’s texture time to fully develop into something dense enough to slice cleanly rather than something that spreads or collapses under a knife.
- Run a thin knife carefully around the edge of the pan. Dip the bottom of the pan briefly in warm water for 20–30 seconds to loosen the caramel. Place a rimmed serving plate over the pan, then invert confidently in one motion. Let the flan release naturally. The caramel should run down the sides and pool around the base. Do not shake it violently. If it does not release, warm the bottom for another few seconds and try again. The brief warm water dip gently melts just the outermost layer of hardened caramel where it contacts the pan, loosening its grip without melting the caramel throughout — too long in the water risks losing the caramel’s structure entirely before it even reaches the plate.
- Cut into 8 slices. Pull one slice slightly forward to show the smooth custard interior and allow caramel to pool around it. Serve cold. Presenting one slice pulled forward, rather than a fully intact round, deliberately reveals the flan’s defining visual detail — the clean, unbroken custard texture and the caramel pooling around the cut edge.