
Classic Southern Buttermilk Biscuits
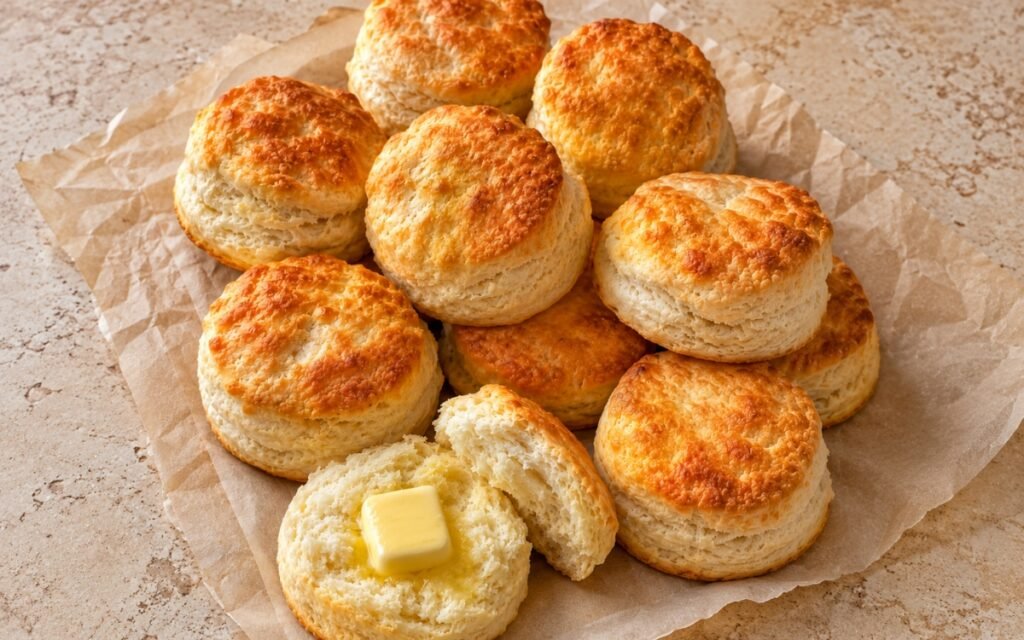
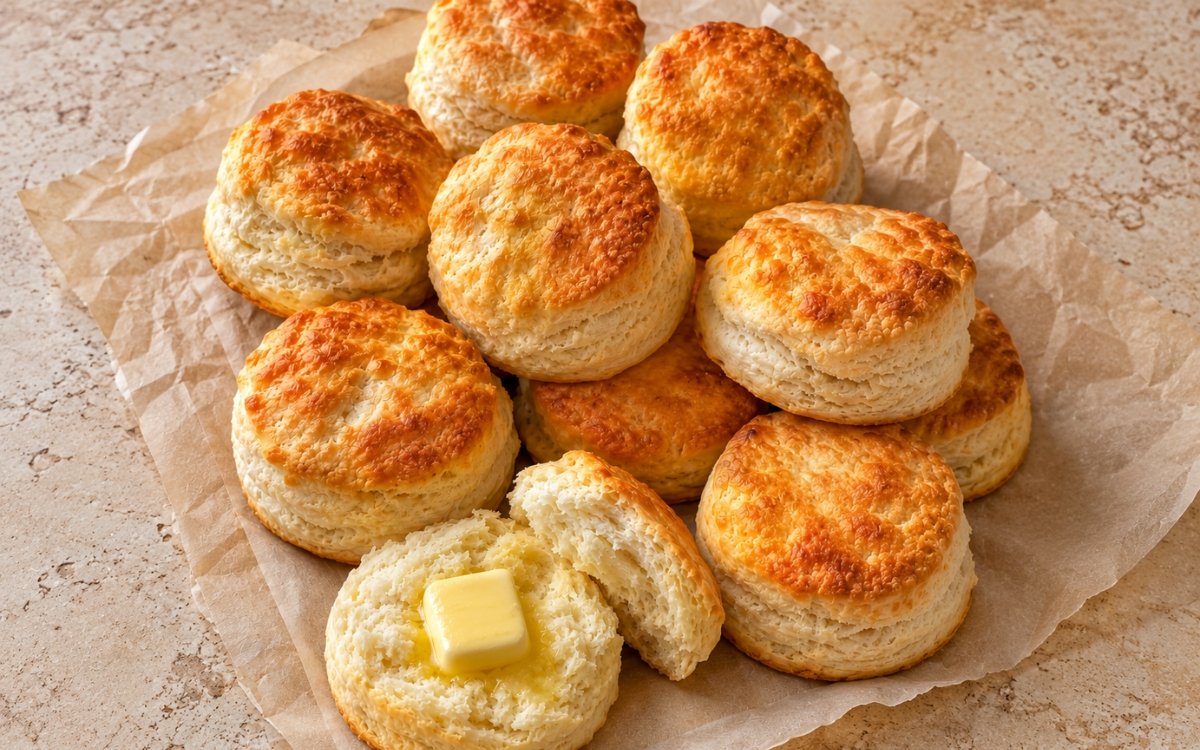
Tall, flaky Southern buttermilk biscuits with deeply golden tops, tender layered sides, and a soft steamy interior. The key is very cold butter, minimal mixing, and a few gentle laminated folds to build height and flaky layers without turning them tough. Keeping the butter genuinely cold and leaving a mix of fine crumbs, pea-sized pieces, and larger flat shards throughout the dough is the technique this whole biscuit depends on for real height and flakiness — those distinct fat pieces create steam pockets in the oven’s initial strong heat, physically lifting the layers before the structure has a chance to set, the same cold-fat-for-flaky-lift principle used elsewhere in this collection whenever a biscuit or pastry’s rise depends on mechanical steam rather than leavening alone. Laminating the dough through several gentle letter-folds, rather than patting it out just once, is what builds the tall, distinctly layered sides this biscuit is known for. Cutting straight down without twisting is what protects those layers’ cut edges from being sealed shut, which would otherwise trap them and limit the rise. The payoff is a biscuit with real, classic Southern character — a richly golden top over tall, tender, visibly layered sides that pull apart into soft, steamy pieces.
Prep Time : 20 min
Bake Time : 15–18 min
Servings : 12
20 min
15–18 min
12
Ingredients
For the Biscuit Dough
• 500g all-purpose flour — this one on Amazon
• 18g baking powder
• 4g baking soda
• 10g fine sea salt
• 12g sugar
• 170g unsalted butter, very cold, cut into small cubes or coarsely grated — this one on Amazon
• 420g cold buttermilk — this one on Amazon
For Finishing
• 1–2 tbsp buttermilk, for brushing tops
• 20–30g melted butter, optional, for brushing after baking
This post may contain affiliate links. As an Amazon Associate I earn from qualifying purchases, at no additional cost to you.
Directions
- Preheat the Oven
Preheat the oven to 230°C. Line a baking tray with parchment paper or leave it unlined if it is light-colored and clean. A hot oven is important — biscuits need strong initial heat so the butter releases steam quickly and lifts the layers before the structure sets. That aggressive initial heat is precisely what converts the dough’s carefully preserved cold fat pieces into steam fast enough to actually lift the layers — a cooler oven would let the dough’s structure begin setting before that lift has a real chance to happen. - Mix the Dry Ingredients
In a large bowl, whisk together the flour, baking powder, baking soda, salt, and sugar until evenly combined. Distributing the leaveners thoroughly matters — uneven mixing gives uneven lift. That thorough whisking ensures the baking powder and soda are dispersed consistently throughout the flour, rather than clumped in pockets that would cause some biscuits to rise more than others. - Cut in the Butter
Add the cold butter. Work it into the flour using your fingertips, a pastry cutter, or by rubbing it lightly between your fingers until the mixture contains a mix of fine sandy crumbs, pea-sized butter pieces, and a few larger flat shards of butter. Do not fully blend the butter in. Those visible butter pieces are what create steam pockets and flaky layers in the oven. If the butter starts softening, place the bowl in the fridge for 5–10 minutes before continuing. That deliberate range of fat piece sizes — from fine crumbs up to larger flat shards — is what builds real textural variety into the finished biscuit, with the larger shards specifically responsible for the most dramatic, visible layers. - Add the Buttermilk
Pour in the cold buttermilk and mix gently with a fork or spatula just until a shaggy dough forms and no obvious dry flour remains. The dough should look rough, soft, and slightly sticky, not smooth. Do not knead it like bread dough. Overworking develops too much gluten and gives dense biscuits instead of tender ones. Stopping the mixing the moment the dough comes together, rather than continuing for a smoother appearance, is what protects the finished biscuits from toughening — flour’s gluten develops more the longer it’s worked, and this dough has genuinely little need for that extra structure. - Laminate the Dough
Turn the dough out onto a lightly floured work surface. Pat it into a rough rectangle about 2.5cm thick. Fold it like a letter: fold one third inward, fold the other third over it. Turn the dough 90 degrees, pat it out again, and repeat this folding process 2 more times. This gives you 3 total fold rounds. These folds are what create the tall layered sides. Keep it gentle — you are stacking layers, not kneading. That repeated folding mechanically builds real, distinct, stacked layers into the dough before it ever reaches the oven — a single pat-out, without this lamination, simply wouldn’t produce the same tall, visibly layered sides this biscuit depends on. - Pat and Cut the Biscuits
Pat the dough into a final rectangle about 3cm thick. Use a round cutter about 6–7cm wide and cut straight down without twisting. Twisting seals the edges and can reduce the rise. Gather the scraps gently, pat once more, and cut the remaining biscuits until you have 12 total. Arrange them on the tray: place them slightly apart for more defined edges, or place them just touching for softer sides and a taller upward rise. For classic Southern-style tall biscuits, placing them just touching works very well. Cutting straight down, never twisting, protects the dough’s own cut edges from being sealed shut — a twisted cut would trap the layers built during lamination, directly limiting how much the biscuit can rise. - Chill Briefly
Place the tray in the fridge or freezer for 10 minutes. This re-firms the butter and helps the biscuits hold shape and rise taller instead of spreading. That brief chill firms the butter back up after all the handling during shaping, giving the biscuits real structural stability right before they meet the oven’s aggressive initial heat. - Brush and Bake
Brush the tops lightly with buttermilk. Bake at 230°C for 15–18 minutes, until the tops are richly golden brown and the biscuits have risen high with clearly visible layers. The tops should be well colored, not pale. Pale biscuits are usually underbaked and tend to have a doughier center. That deep golden colour reflects real, substantial baking having taken place all the way through — a paler biscuit pulled too early would still taste doughy at its centre despite looking technically finished on top. - Finish
Remove from the oven and, if desired, brush lightly with melted butter for extra flavor and a soft sheen. Let rest for 5 minutes before serving. Serve warm. One biscuit split open with butter melting into the middle is the benchmark. Brushing that optional butter on while the biscuits are still genuinely hot lets it melt in and soak slightly into the surface, adding real richness rather than sitting as a separate, unabsorbed layer.
*Notes :
- Keeping the butter genuinely cold and preserving that specific range of piece sizes — fine crumbs, pea-sized bits, and larger flat shards — deserves recognition as the technique most responsible for this biscuit’s real height and flakiness. Those distinct fat pieces create steam pockets as the dough bakes in the oven’s strong initial heat, and that steam is specifically what physically lifts the layers before the surrounding structure has any chance to set and lock the biscuit’s shape in place.
- Laminating the dough through several gentle letter-folds deserves the same attention this technique receives throughout classic Southern biscuit-making. That repeated folding mechanically builds real, stacked layers into the dough well before it ever reaches the oven, which is directly what produces the tall, visibly layered sides a proper Southern biscuit is known for — a single pat-out alone simply wouldn’t achieve the same result.
- Cutting straight down with the round cutter, never twisting, deserves genuine respect as a small but consequential detail. Twisting the cutter seals the dough’s cut edges shut, trapping the very layers built during lamination and directly reducing how much the biscuit can rise in the oven — a clean, straight cut protects that full potential rise.
- The recipe’s own explicit distinction between arranging biscuits slightly apart versus just touching deserves attention as a real, deliberate choice about the finished result. Biscuits placed just touching support each other as they rise, encouraging a taller, more upward growth with softer sides — exactly the classic Southern-style profile this recipe is built around.
Why This Recipe Works
This recipe works because the butter is kept genuinely cold and left in a deliberate range of piece sizes, building the steam pockets responsible for real height and flakiness. The dough is mixed only until it comes together, protecting tenderness by avoiding unnecessary gluten development.
Repeated lamination folds build tall, distinct layers before baking even begins, and cutting straight down without twisting protects those layers’ full rise potential.
A brief chill firms everything back up before the biscuits meet the oven’s strong initial heat, and baking until genuinely deep golden confirms they’re properly cooked through.
Ingredient Breakdown
Genuinely Cold Butter (Mixed Piece Sizes)
The critical technique — fine crumbs through larger shards together create the steam pockets responsible for real height and flakiness.
Minimally Mixed, Shaggy Dough
The critical technique — stopping at “just combined” protects tenderness by avoiding unnecessary gluten development.
Repeated Letter-Fold Lamination (3 Rounds)
The critical technique — mechanically builds the tall, distinctly layered sides this biscuit is known for.
Straight-Down Cutting (Never Twisted)
The critical technique — protects the dough’s cut edges from being sealed shut, preserving full rise potential.
Brief Pre-Bake Chill
he finishing technique — re-firms the butter, giving real structural stability right before the oven’s aggressive initial heat.
Flavor Structure Explained
This classic Southern buttermilk biscuit follows a layered balance model:
- Richly golden, crisp top (strong initial oven heat, buttermilk wash)
- Tall, distinctly layered sides (repeated lamination folds)
- Soft, steamy interior (cold-fat steam pockets, minimal mixing)
- Rich buttery finish (optional melted butter brush)
Strong initial oven heat and a buttermilk wash together build this biscuit’s richly golden, appealingly crisp top. Repeated lamination folds create the tall, distinctly layered sides that define a proper Southern biscuit. Cold-fat steam pockets and minimal mixing produce a soft, genuinely steamy interior beneath that golden exterior. An optional brush of melted butter after baking finishes each biscuit with rich, simple satisfaction, ready to be split open with more butter melting into the middle.
Common Mistakes to Avoid
- Letting the Butter Soften Before Cutting It In – This loses the distinct pieces responsible for real steam lift. Always keep it genuinely cold, chilling further if needed.
- Overmixing the Dough – This develops too much gluten, producing dense rather than tender biscuits. Always stop as soon as the dough comes together.
- Skipping the Lamination Folds – This misses the tall, distinctly layered sides a proper Southern biscuit depends on. Always complete all 3 fold rounds.
- Twisting the Cutter – This seals the dough’s edges shut and reduces rise. Always cut straight down.
- Pulling the Biscuits While Still Pale – This usually means they’re underbaked with a doughy center. Always bake until richly golden brown.
Variations
Extra-Tall Version
Arrange the cut biscuits just touching on the tray, per the recipe’s own guidance, for a taller, more upward rise with softer sides.
Defined-Edge Version
Space the biscuits slightly apart instead for more distinct, individually crisp edges.
Extra-Rich Version
Brush generously with melted butter immediately after baking for a softer, glossier finished top.
Herb or Cheese Version
Fold a small amount of shredded cheese or chopped herbs into the dough during the final lamination fold for a savoury variation.
Storage & Make-Ahead
Keep everything cold. Cold butter is the whole structure.
If your buttermilk is very thick, reserve 20–30g and add only if needed. The dough should be soft but not wet.
Best served warm, but they also reheat well in a low oven.
Frequently Asked Questions
Why does the butter need to stay in such a specific range of piece sizes — crumbs, pea-sized bits, and larger shards?
Those distinct fat pieces create steam pockets as the dough bakes in the oven’s strong heat, and that steam is what physically lifts the biscuit’s layers before the structure sets. The range of sizes builds real textural variety, with the larger shards responsible for the most dramatic layers.
Why does the dough need to be laminated through several folds rather than just patted out once?
That repeated folding mechanically builds real, stacked layers into the dough before it ever bakes, which is directly responsible for the tall, distinctly layered sides a proper Southern biscuit is known for.
Why is it so important to cut straight down without twisting the cutter?
Twisting seals the dough’s cut edges shut, trapping the layers built during lamination and directly reducing how much the biscuit can rise. A clean, straight cut protects that full rise potential.
Why does the recipe distinguish between spacing biscuits apart versus placing them just touching?
Biscuits placed just touching support each other as they rise, encouraging a taller, more upward growth with softer sides — the classic Southern-style profile this recipe is built around.
Are there other classic biscuit-based, scone, or Southern breakfast dishes worth trying?
Southern Biscuits and Sausage Gravy and Breakfast Sausage Egg and Cheese Biscuit Sandwich both make excellent use of this exact biscuit. Cheddar Chive Scones is also worth trying for a related savoury baking direction, and Chicken and Waffles offers another classic Southern-inspired comfort dish worth exploring.
Nutrition Facts
( Per Serving — 1 biscuit )
Calories
~220 kcal
Protein
5 g
Fat
9 g
Carbs
30 g
Calories
~220 kcal
Protein
5 g
Fat
9 g
Carbs
30 g
Related Recipes
Related Recipes

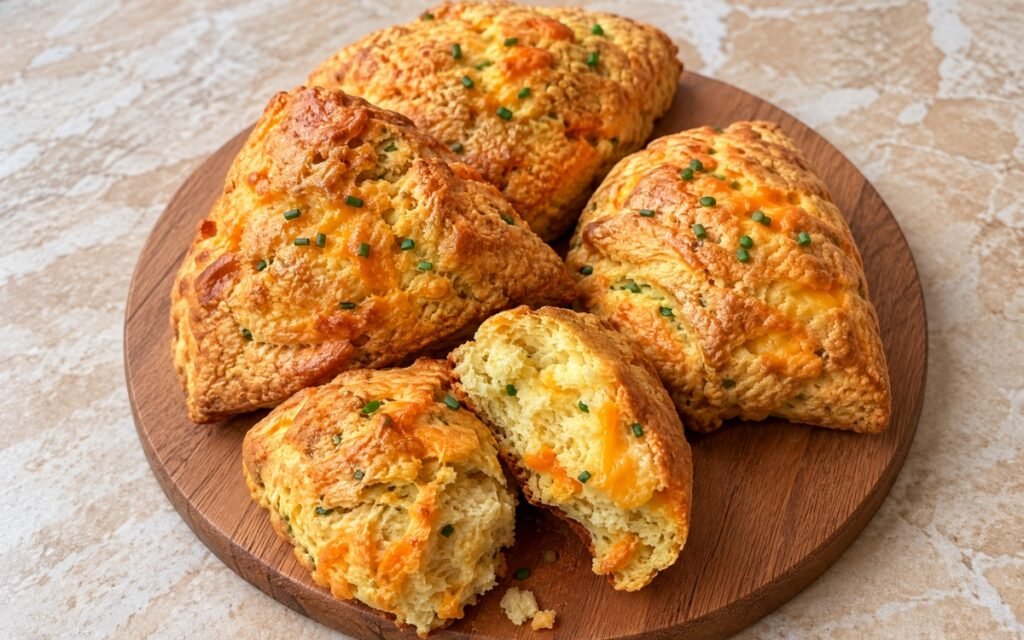
Cheddar Chive Scones
Savory cheddar chive scones with golden craggy tops, buttery flaky interiors, sharp cheddar pockets, and fresh chive flecks throughout.
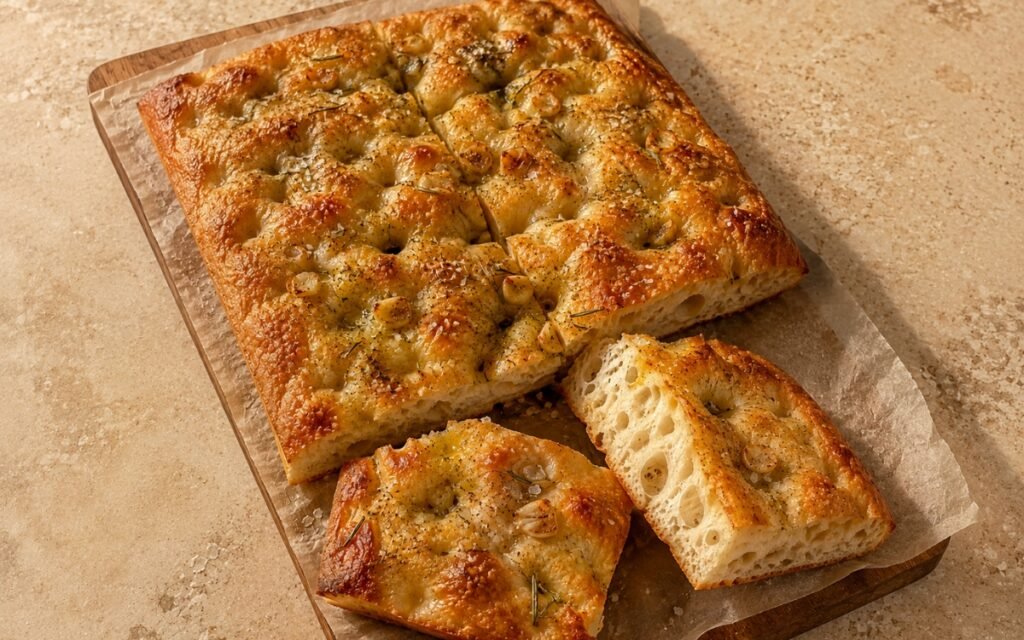
Garlic Butter Focaccia
A golden, high-hydration focaccia with a crisp fried bottom, deeply dimpled airy crumb, and glossy garlic rosemary butter, built over a 48–72 hour cold ferment.
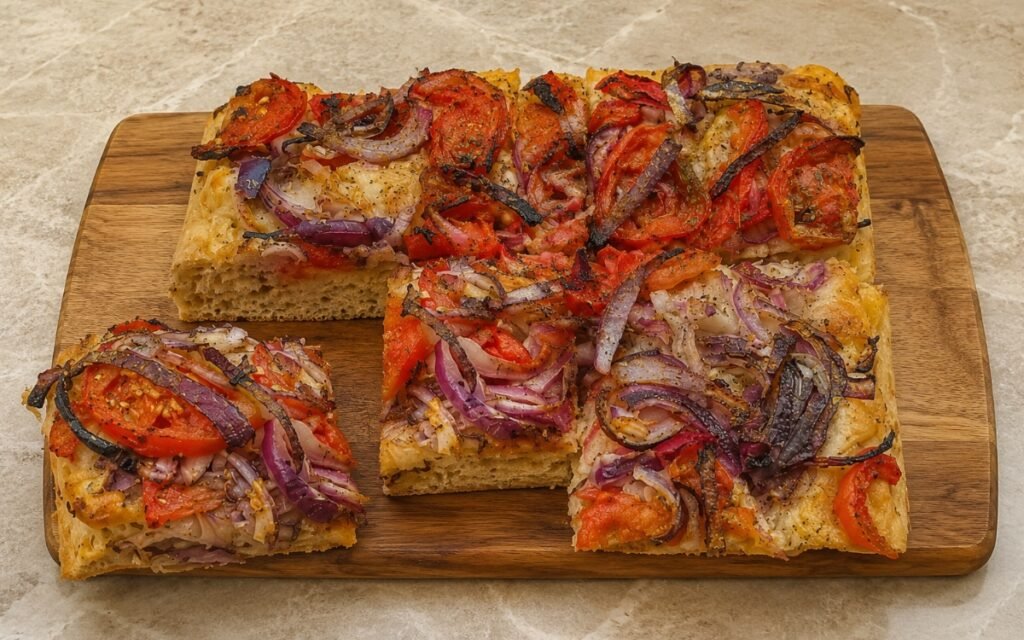
Greek Ladenia with Tomato and Red Onion
Long-fermented, focaccia-like dough baked crisp underneath and airy inside, topped generously with ripe tomato, red onion, and oregano.
You might also like
You might also like
Cornbread
Classic skillet cornbread with a deeply golden, crisp-edged crust and a moist, tender interior, baked in a preheated cast iron skillet.
Brie and Bacon Omelette
A soft folded omelette filled with creamy melted Brie and crispy bacon, served with golden breakfast potatoes and buttered toast.
Greek Ladenia with Tomato and Red Onion
Long-fermented, focaccia-like dough baked crisp underneath and airy inside, topped generously with ripe tomato, red onion, and oregano.
Classic Southern Buttermilk Biscuits
Ingredients
Method
- Preheat the oven to 230°C. Line a baking tray with parchment paper or leave it unlined if it is light-colored and clean. A hot oven is important — biscuits need strong initial heat so the butter releases steam quickly and lifts the layers before the structure sets. That aggressive initial heat is precisely what converts the dough’s carefully preserved cold fat pieces into steam fast enough to actually lift the layers — a cooler oven would let the dough’s structure begin setting before that lift has a real chance to happen.
- In a large bowl, whisk together the flour, baking powder, baking soda, salt, and sugar until evenly combined. Distributing the leaveners thoroughly matters — uneven mixing gives uneven lift. That thorough whisking ensures the baking powder and soda are dispersed consistently throughout the flour, rather than clumped in pockets that would cause some biscuits to rise more than others.
- Add the cold butter. Work it into the flour using your fingertips, a pastry cutter, or by rubbing it lightly between your fingers until the mixture contains a mix of fine sandy crumbs, pea-sized butter pieces, and a few larger flat shards of butter. Do not fully blend the butter in. Those visible butter pieces are what create steam pockets and flaky layers in the oven. If the butter starts softening, place the bowl in the fridge for 5–10 minutes before continuing. That deliberate range of fat piece sizes — from fine crumbs up to larger flat shards — is what builds real textural variety into the finished biscuit, with the larger shards specifically responsible for the most dramatic, visible layers.
- Pour in the cold buttermilk and mix gently with a fork or spatula just until a shaggy dough forms and no obvious dry flour remains. The dough should look rough, soft, and slightly sticky, not smooth. Do not knead it like bread dough. Overworking develops too much gluten and gives dense biscuits instead of tender ones. Stopping the mixing the moment the dough comes together, rather than continuing for a smoother appearance, is what protects the finished biscuits from toughening — flour’s gluten develops more the longer it’s worked, and this dough has genuinely little need for that extra structure.
- Turn the dough out onto a lightly floured work surface. Pat it into a rough rectangle about 2.5cm thick. Fold it like a letter: fold one third inward, fold the other third over it. Turn the dough 90 degrees, pat it out again, and repeat this folding process 2 more times. This gives you 3 total fold rounds. These folds are what create the tall layered sides. Keep it gentle — you are stacking layers, not kneading. That repeated folding mechanically builds real, distinct, stacked layers into the dough before it ever reaches the oven — a single pat-out, without this lamination, simply wouldn’t produce the same tall, visibly layered sides this biscuit depends on.
- Pat the dough into a final rectangle about 3cm thick. Use a round cutter about 6–7cm wide and cut straight down without twisting. Twisting seals the edges and can reduce the rise. Gather the scraps gently, pat once more, and cut the remaining biscuits until you have 12 total. Arrange them on the tray: place them slightly apart for more defined edges, or place them just touching for softer sides and a taller upward rise. For classic Southern-style tall biscuits, placing them just touching works very well. Cutting straight down, never twisting, protects the dough’s own cut edges from being sealed shut — a twisted cut would trap the layers built during lamination, directly limiting how much the biscuit can rise.
- Place the tray in the fridge or freezer for 10 minutes. This re-firms the butter and helps the biscuits hold shape and rise taller instead of spreading. That brief chill firms the butter back up after all the handling during shaping, giving the biscuits real structural stability right before they meet the oven’s aggressive initial heat.
- Brush the tops lightly with buttermilk. Bake at 230°C for 15–18 minutes, until the tops are richly golden brown and the biscuits have risen high with clearly visible layers. The tops should be well colored, not pale. Pale biscuits are usually underbaked and tend to have a doughier center. That deep golden colour reflects real, substantial baking having taken place all the way through — a paler biscuit pulled too early would still taste doughy at its centre despite looking technically finished on top.
- Remove from the oven and, if desired, brush lightly with melted butter for extra flavor and a soft sheen. Let rest for 5 minutes before serving. Serve warm. One biscuit split open with butter melting into the middle is the benchmark. Brushing that optional butter on while the biscuits are still genuinely hot lets it melt in and soak slightly into the surface, adding real richness rather than sitting as a separate, unabsorbed layer.