
Homemade Kaiser Rolls
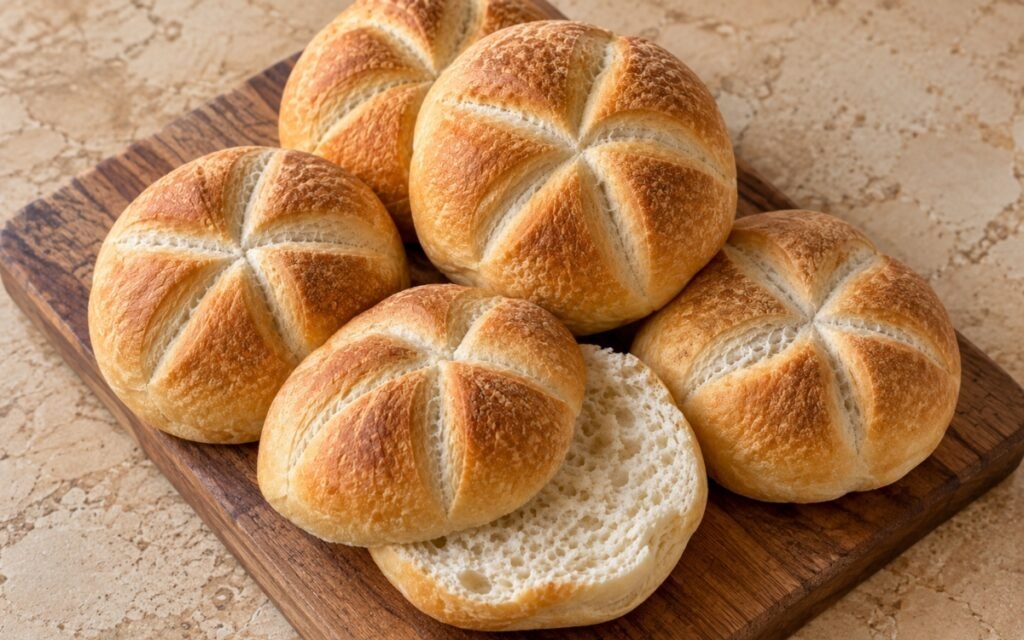
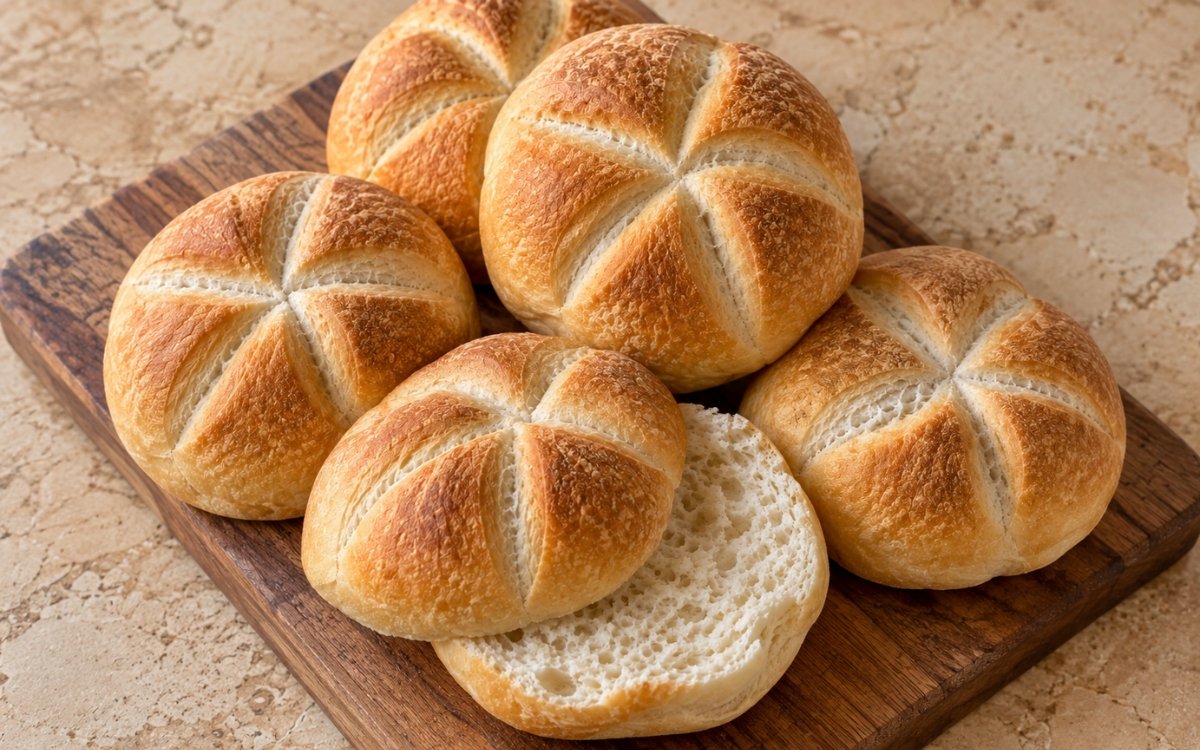
Classic homemade Kaiser rolls with a clearly defined five-point star top, a thin tender crust, and a soft airy sandwich crumb. They should be sturdy enough for deli sandwiches and burgers, but still soft and easy to bite through. Proofing the stamped rolls pattern-side down is the technique this whole recipe depends on for keeping that five-point star genuinely crisp and defined — proofing them right-side up would let gravity and continued rising soften those pressed ridges before they ever reach the oven, the same proof-face-down-to-protect-pattern principle used elsewhere in this collection whenever a stamped or scored dough’s surface detail needs protecting through the final rise. Keeping the initial oven steam brief and light is what helps the surface expand fully before the crust sets, without pushing these sandwich rolls toward a thick, hard crust they’re not meant to have. Watching for that specific golden colour, rather than deep browning, is what keeps the crust thin and tender rather than crusty and hard. The payoff is a roll with real, classic character — a crisp, clearly defined star top over a soft, airy, sturdy sandwich crumb.
Prep Time : 25 min
Bake Time : 15–18 min
Servings : 8 Kaiser rolls
25 min
15–18 min
8 Kaiser rolls
Ingredients
For the Dough
• 500g bread flour — this one on Amazon
• 315–325ml warm water, about 30°C
• 7g active dry yeast
• 10g sugar
• 10g fine sea salt
• 20g neutral oil
For Shaping and Baking
• Extra flour, for dusting
• Warm water in a spray bottle, or a little steam in the oven
This post may contain affiliate links. As an Amazon Associate I earn from qualifying purchases, at no additional cost to you.
Directions
- Activate the Yeast
In a large bowl, combine the warm water, yeast, and sugar. Stir briefly and let stand for 5–10 minutes, until foamy. The surface should look clearly active before you continue. If the yeast does not foam, stop there and replace it — inactive yeast gives dense rolls no amount of kneading will fix. Confirming that visible foam before proceeding is what catches inactive yeast early — continuing with the rest of the ingredients on the assumption the yeast is fine would only reveal the problem much later, once the dough has failed to rise properly. - Mix the Dough
Add the flour, salt, and oil. Mix until a rough dough forms, then knead by hand for 8–10 minutes, or in a stand mixer for 6–8 minutes, until smooth, elastic, and only lightly tacky. The dough should feel soft and supple, not stiff. Kaiser rolls need enough hydration to produce a light sandwich crumb, but not so much that the dough loses structure and the star pattern softens away. That specific hydration balance protects two competing needs at once — enough moisture for a genuinely light crumb, but not so much that the dough becomes too soft to hold a crisp, defined star pattern once stamped. - First Rise
Shape the dough into a ball and place it in a lightly oiled bowl. Cover and let rise for 1 to 1½ hours, until doubled. The dough should look expanded and airy and should slowly spring back when gently pressed. If you cut this rise short, the rolls will bake up too tight and the interiors will feel bready rather than light. That full rise gives the yeast genuine time to build the lightness responsible for the roll’s eventual soft, airy crumb — cutting it short would leave the dough without enough developed lift to bake up properly light. - Divide and Pre-Shape
Turn the dough out onto the counter and divide it into 8 equal pieces, about 105–108g each. Shape each piece into a tight round. Cover loosely and let rest for 10 minutes. This short rest matters. If you try to stamp or shape the rolls immediately after tightening them, the dough will resist and the finished pattern will be less even. That relaxation matters directly at the next stage — dough that’s just been tightened into a round is genuinely more resistant to the specific stamping this recipe’s signature pattern requires. - Shape the Kaiser Rolls
Flatten each round slightly into a thick disk. Dust the tops lightly with flour. Using a Kaiser roll stamp, press a deep five-point star pattern into each roll. For the most defined pattern, place the stamped rolls pattern-side down on a lightly floured cloth or parchment and cover loosely. Proof for 35–45 minutes, until puffy but not over-expanded. Proofing them pattern-side down helps stop the star ridges from relaxing too much during the final proof. If you proof too long, the pattern will blur; if you proof too little, the rolls may burst unevenly in the oven. That specific orientation, pattern-side down, uses the dough’s own weight to help hold the pressed ridges in place as it continues to rise — proofing right-side up would let those same ridges relax and soften under gravity and continued expansion. - Preheat the Oven
During the final proof, preheat the oven to 220°C. If possible, place a small empty metal tray on the lower rack so you can add a little hot water or steam at the start of baking. Kaiser rolls benefit from some initial steam because it helps the surface expand before the crust sets. That early steam keeps the dough’s surface soft and pliable for longer during the first minutes of baking, which is directly what allows the star pattern and overall shape to expand fully before the crust hardens into its final form. - Flip and Bake
Carefully flip the proofed rolls so the star pattern faces up and place them on a parchment-lined baking tray. Lightly mist them with water, or add a little steam to the oven. Bake for 15–18 minutes, until lightly golden and set. Do not bake them too dark. These are meant to be sandwich rolls with a thin tender crust, not hard crusty rolls. If they bake into something close to a crusty artisan bun, they went too far. Watching for that specific, lighter golden colour rather than pushing for deep browning is what keeps this roll’s crust genuinely thin and tender — the exact distinction between a proper Kaiser roll and a heartier, crustier artisan bun. - Cool
Transfer the rolls to a wire rack and cool before slicing. The crust will soften slightly as they cool, which is exactly what you want here. Slicing too early compresses the crumb and makes the interior seem denser than it really is. That gradual softening as the rolls cool is part of this bread’s own intended character — a Kaiser roll’s crust is meant to end up thin and yielding rather than staying crisp, and slicing before that process finishes would compress a crumb that hasn’t yet fully set.
*Notes :
- Proofing the stamped rolls pattern-side down deserves genuine recognition as the technique most responsible for whether the finished bread actually shows off a clean, defined star. That orientation uses the dough’s own weight against gravity to help hold the pressed ridges in place through the final rise — proofed right-side up instead, those same ridges would relax and soften considerably before the rolls ever reached the oven.
- Keeping the initial oven steam genuinely brief and light deserves the same attention this technique receives throughout this collection’s other steam-baked breads. That early steam keeps the dough’s surface pliable for longer during the critical first minutes of baking, letting both the overall shape and the star pattern expand fully before the crust sets and locks that expansion in place.
- Watching specifically for a lighter, golden colour rather than pushing toward deep browning deserves genuine respect as the detail that actually separates a proper Kaiser roll from a crustier artisan-style bun. These rolls are built around a thin, tender crust meant to soften further as they cool — baking to a darker colour would push the crust toward a thickness and hardness that works against that intended texture.
- Letting the crust soften naturally as the rolls cool, rather than treating that softening as a flaw, deserves attention as a genuine, intended part of this bread’s final character. A Kaiser roll’s crust is meant to end up thin and yielding, and slicing before that natural softening has finished would compress a crumb that hasn’t yet fully set, making the interior seem denser than it actually is.
Why This Recipe Works
This recipe works because the dough is kept at a specific hydration balance, soft enough for a light crumb without losing the structure needed to hold a stamped pattern. A full first rise builds real lightness, and a brief rest after dividing relaxes the gluten for clean stamping.
Proofing the stamped rolls pattern-side down protects that star from relaxing before baking. Brief, light initial steam lets the surface expand fully before the crust sets, and watching for a specifically lighter golden colour keeps the crust thin and tender rather than thick and hard.
Ingredient Breakdown
Balanced-Hydration Dough
The critical technique — soft enough for a light crumb, structured enough to hold a stamped star pattern.
Post-Division Rest
The critical technique — relaxes the gluten so each piece stamps cleanly rather than resisting the pattern.
Pattern-Side-Down Proofing
The critical technique — uses the dough’s own weight to protect the pressed star from relaxing during the final rise.
Brief, Light Initial Steam
The critical baking technique — keeps the surface pliable long enough for full expansion before the crust sets.
Lighter Golden Bake Target
The critical finishing technique — protects the roll’s intended thin, tender crust rather than pushing toward a crustier result.
Flavor Structure Explained
This Kaiser roll follows a layered balance model:
- Thin, tender crust (light steam, watched golden colour)
- Soft, airy interior (balanced hydration, full first rise)
- Defined, classic surface pattern (pattern-side-down proofing)
- Neutral, versatile flavour (simple, balanced dough)
Light initial steam and a watched, lighter golden bake target together produce this roll’s thin, genuinely tender crust. A balanced-hydration dough, given a full first rise, builds a soft, airy interior throughout. Pattern-side-down proofing protects the roll’s classic, defined five-point star surface. With a simple, balanced flavour, these rolls are built specifically to support whatever sandwich or burger filling they’re eventually used for.
Common Mistakes to Avoid
- Skipping the Yeast Activation Check – This risks building a whole dough around dead yeast. Always confirm visible foam before proceeding.
- Using Too Much Water in the Dough – This makes the dough too soft to hold the stamped star pattern. Always start with the lower amount and add more only if genuinely needed.
- Proofing the Stamped Rolls Pattern-Side Up – This lets the star ridges relax and blur before baking. Always proof pattern-side down.
- Overproofing the Stamped Rolls – This softens the star definition and weakens oven spring. Always watch for puffy but not over-expanded.
- Baking Until Deeply Browned – This pushes the crust toward thick and hard rather than thin and tender. Always watch for a lighter golden colour.
Variations
Seeded Kaiser rolls
Brush the tops lightly with water and sprinkle with sesame or poppy seeds before baking for a different classic finish.
Whole Wheat Blend Version
Substitute a portion of the bread flour with whole wheat for a heartier, more rustic roll.
Mini Kaiser rolls Version
Divide the dough into 12 smaller pieces for slider-sized Kaiser rolls.
Extra-Soft Version
Brush the baked rolls with a little melted butter right after they come out of the oven for a softer, richer crust.
Storage & Make-Ahead
Cool fully, then store airtight. They are best the day they are baked, but still good the next day for sandwiches.
Best flour: bread flour gives the best balance of chew, structure, and sandwich strength.
Always add club soda only at the moment of serving. Pre-mixed sangria loses carbonation rapidly Flour the stamp lightly before each press so it releases cleanly.and feels flat and less refreshing.
Frequently Asked Questions
Why does the Kaiser roll need to proof pattern-side down rather than right-side up?
That orientation uses the dough’s own weight to help hold the pressed star ridges in place through the final rise. Proofed right-side up, those same ridges would relax and soften considerably before the rolls ever reached the oven.
Why does the oven need only a little steam rather than a heavier application?
That early, brief steam keeps the dough’s surface pliable for longer during the critical first minutes of baking, letting both the shape and the star pattern expand fully before the crust sets and locks that expansion in place.
Why should the rolls be baked to a lighter golden colour rather than deeply browned?
These rolls depend on a thin, tender crust that’s meant to soften further as they cool. Baking to a darker colour would push the crust toward a thickness and hardness that works against that intended sandwich-roll texture.
Why does the crust soften as the rolls cool, and is that a problem?
That softening is a genuine, intended part of this bread’s character, not a flaw. A Kaiser roll’s crust is meant to end up thin and yielding rather than staying crisp.
Are there other classic bread roll or artisan bread dishes worth trying?
Telera Rolls and Long French Rolls both offer other classic sandwich roll directions worth exploring. Everything Bagels and Classic French Baguette are also worth trying for other classic homemade bread projects.
Nutrition Facts
( Per Serving — 1 roll )
Calories
~260 kcal
Protein
8 g
Fat
3 g
Carbs
50 g
Calories
~260 kcal
Protein
8 g
Fat
3 g
Carbs
50 g
Related Recipes
Related Recipes

Long French Rolls
Soft homemade long French sandwich rolls with a smooth golden top, thin tender crust, and pale fluffy interior.
The Softest Homemade Milk Buns
Small tangzhong-enriched milk buns with glossy golden tops and a soft, cottony interior that pulls apart into fine tender strands.
Cornbread
Classic skillet cornbread with a deeply golden, crisp-edged crust and a moist, tender interior, baked in a preheated cast iron skillet.
You might also like
You might also like
Crispy Zucchini Fritters
Zucchini salted and firmly squeezed dry, mixed into a thick herb-Parmesan batter, fried without crowding until golden. Crisp and herbaceous.
Chiles Rellenos with Tomato Sauce
Roasted poblano peppers stuffed with melting cheese, coated in whipped egg batter, and pan-fried golden. Served over a glossy tomato-chipotle sauce.
Crispy Sweet Potato Fries
Sweet potatoes soaked, dried, lightly coated in cornstarch, seasoned, and baked until golden and crisp. Sweet, savory, and satisfying.
Homemade Kaiser Rolls
Ingredients
Method
- In a large bowl, combine the warm water, yeast, and sugar. Stir briefly and let stand for 5–10 minutes, until foamy. The surface should look clearly active before you continue. If the yeast does not foam, stop there and replace it — inactive yeast gives dense rolls no amount of kneading will fix. Confirming that visible foam before proceeding is what catches inactive yeast early — continuing with the rest of the ingredients on the assumption the yeast is fine would only reveal the problem much later, once the dough has failed to rise properly.
- Add the flour, salt, and oil. Mix until a rough dough forms, then knead by hand for 8–10 minutes, or in a stand mixer for 6–8 minutes, until smooth, elastic, and only lightly tacky. The dough should feel soft and supple, not stiff. Kaiser rolls need enough hydration to produce a light sandwich crumb, but not so much that the dough loses structure and the star pattern softens away. That specific hydration balance protects two competing needs at once — enough moisture for a genuinely light crumb, but not so much that the dough becomes too soft to hold a crisp, defined star pattern once stamped.
- Shape the dough into a ball and place it in a lightly oiled bowl. Cover and let rise for 1 to 1½ hours, until doubled. The dough should look expanded and airy and should slowly spring back when gently pressed. If you cut this rise short, the rolls will bake up too tight and the interiors will feel bready rather than light. That full rise gives the yeast genuine time to build the lightness responsible for the roll’s eventual soft, airy crumb — cutting it short would leave the dough without enough developed lift to bake up properly light.
- Turn the dough out onto the counter and divide it into 8 equal pieces, about 105–108g each. Shape each piece into a tight round. Cover loosely and let rest for 10 minutes. This short rest matters. If you try to stamp or shape the rolls immediately after tightening them, the dough will resist and the finished pattern will be less even. That relaxation matters directly at the next stage — dough that’s just been tightened into a round is genuinely more resistant to the specific stamping this recipe’s signature pattern requires.
- Flatten each round slightly into a thick disk. Dust the tops lightly with flour. Using a Kaiser roll stamp, press a deep five-point star pattern into each roll. For the most defined pattern, place the stamped rolls pattern-side down on a lightly floured cloth or parchment and cover loosely. Proof for 35–45 minutes, until puffy but not over-expanded. Proofing them pattern-side down helps stop the star ridges from relaxing too much during the final proof. If you proof too long, the pattern will blur; if you proof too little, the rolls may burst unevenly in the oven. That specific orientation, pattern-side down, uses the dough’s own weight to help hold the pressed ridges in place as it continues to rise — proofing right-side up would let those same ridges relax and soften under gravity and continued expansion.
- During the final proof, preheat the oven to 220°C. If possible, place a small empty metal tray on the lower rack so you can add a little hot water or steam at the start of baking. Kaiser rolls benefit from some initial steam because it helps the surface expand before the crust sets. That early steam keeps the dough’s surface soft and pliable for longer during the first minutes of baking, which is directly what allows the star pattern and overall shape to expand fully before the crust hardens into its final form.
- Carefully flip the proofed rolls so the star pattern faces up and place them on a parchment-lined baking tray. Lightly mist them with water, or add a little steam to the oven. Bake for 15–18 minutes, until lightly golden and set. Do not bake them too dark. These are meant to be sandwich rolls with a thin tender crust, not hard crusty rolls. If they bake into something close to a crusty artisan bun, they went too far. Watching for that specific, lighter golden colour rather than pushing for deep browning is what keeps this roll’s crust genuinely thin and tender — the exact distinction between a proper Kaiser roll and a heartier, crustier artisan bun.
- Transfer the rolls to a wire rack and cool before slicing. The crust will soften slightly as they cool, which is exactly what you want here. Slicing too early compresses the crumb and makes the interior seem denser than it really is. That gradual softening as the rolls cool is part of this bread’s own intended character — a Kaiser roll’s crust is meant to end up thin and yielding rather than staying crisp, and slicing before that process finishes would compress a crumb that hasn’t yet fully set.