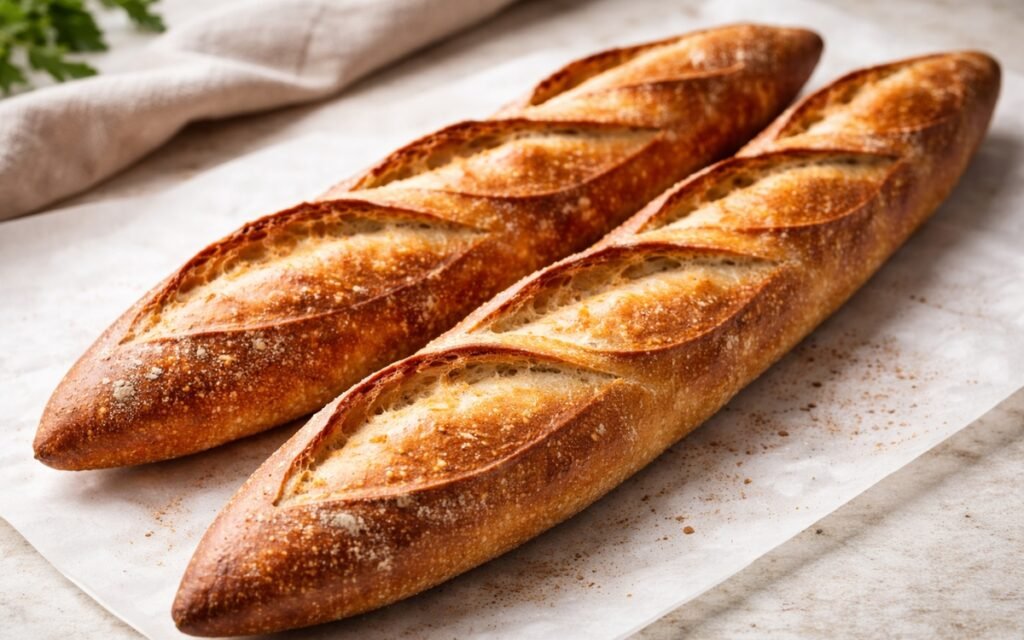
Classic French Baguette
A proper French baguette is one of the most rewarding things you can bake at home — crackling golden crust, open, airy crumb, and a depth of flavour that comes entirely from time and a well-made poolish. This recipe uses a 12–24 hour pre-ferment that does most of the work while you sleep, producing the complex, slightly tangy flavour that industrial baguettes cannot replicate. The technique requires patience, not expertise. Make the poolish tonight. Bake tomorrow. The result is better than most bakeries within reach.
Prep Time : 30 min
Cook Time : 26 min
Servings : 2 baguettes
30 min
26 min
2 baguettes
Ingredients
For the Poolish (make 12–24 hours ahead)
• 115g high-quality bread flour
• 115g water, room temperature
• 0.1–0.2g active dry yeast, a very small pinch
For the Final Dough
• 225g high-quality bread flour — this one on Amazon
• 115g water
• 7g fine sea salt
• 1.3–1.4g active dry yeast, slightly less than ½ tsp
• All of the poolish from above
This post may contain affiliate links. As an Amazon Associate I earn from qualifying purchases, at no additional cost to you.
Directions
- Make the Poolish (12–24 Hours Ahead)
The poolish is the foundation of this recipe and the reason a homemade baguette can have flavour that rivals a professional bakery. In a medium bowl, combine the 115g of bread flour, 115g of room-temperature water, and the tiny pinch of yeast — 0.1–0.2g is approximately what fits on the tip of a small knife. The quantity of yeast in the poolish is deliberately minuscule. A larger quantity would ferment the poolish too rapidly, burning through the available sugars before the slow, complex fermentation byproducts that provide flavour — organic acids, esters, and other aromatic compounds — have time to develop. The tiny amount of yeast is precisely what produces a 12–24 hour fermentation window at room temperature rather than a 2-hour one. Stir the poolish vigorously until completely uniform — no dry flour should remain. At 100% hydration (equal weights of flour and water), the poolish will look like a thick, wet batter rather than a dough. This is correct. Cover tightly with plastic wrap and leave at room temperature for 12–24 hours. The poolish is ready when its surface shows a dome of fine bubbles, it has a pleasantly sour, slightly alcoholic, yeasty smell, and when you move the bowl it has a loose, almost liquid quality with visible gas bubbles throughout. A poolish that has gone too long will have a sunken, concave top and a more sharply sour smell — still usable but at the very edge of viability. - Mix the Final Dough
In a large bowl or stand mixer bowl, combine the remaining 225g bread flour, 115g water, 7g salt, and the remaining yeast. Add the entire poolish. Mix together until a rough, shaggy dough forms with no dry flour remaining — by hand for 1–2 minutes of initial mixing, or briefly on the lowest speed of a stand mixer fitted with the dough hook. The salt is added at this stage rather than with the poolish for a specific reason: direct contact between salt and yeast inhibits yeast activity. By adding salt only at the final dough stage after the yeast has already been incorporated into the poolish, you allow the yeast to activate fully in the poolish during the fermentation period without any salt interference. - Knead to Full Gluten Development
Knead the dough by hand on a lightly floured surface for 8–10 minutes, or in a stand mixer on medium-low speed for 8 minutes, or on the dough cycle of a bread machine. The baguette dough at 68% hydration is moderately sticky — wetter than pasta dough but firmer than ciabatta or pizza dough. It will stick to your hands and the counter during the first few minutes of kneading, and this is normal. Resist the urge to add excessive flour to manage the stickiness — additional flour changes the hydration ratio and produces a denser, less open crumb. Work through the stickiness by using a bench scraper to periodically fold the dough back onto itself. The dough is ready when it is smooth, elastic, and extensible — it should stretch easily when pulled without tearing immediately. Lightly oil a medium-large bowl with a very small amount of olive oil or cooking spray — use as little as possible, as the soft, high-hydration dough will absorb surface fat and an excess will alter the recipe’s balance. Transfer the kneaded dough to the bowl, turn it once to coat in the thin oil film. Punch the centre of the dough gently once with your fist, then fold the edges of the dough toward the centre — lift the edge, pull it to the centre, press, rotate the bowl a quarter turn, and repeat around the entire circumference. This fold-and-turn stretches and organises the gluten network without the aggressive compression of continued kneading. Cover with a clean kitchen towel or plastic wrap. - First Rise
Allow the covered dough to rise at room temperature for 45–60 minutes until it has visibly increased in volume and feels lighter and more airy when gently pressed. The dough does not need to double — baguette dough at this hydration rises more moderately than enriched breads. While the dough rises, prepare your equipment: if using a baking stone, place it on the middle rack. Place a cast iron pan or heavy oven-safe pan on the floor of the oven or the lowest rack. Begin heating 480ml (2 cups) of water to boiling close to when the oven preheat is complete — you want it ready to pour at the moment the baguettes go in. - Divide and Pre-Shape
Turn the risen dough out onto a work surface lightly dusted with just enough flour to prevent immediate sticking. Divide into two equal pieces — weigh them if possible for consistent results. Each piece should weigh approximately 175g. Shape each piece loosely into a rough rectangle by gently pressing and stretching without degassing it aggressively — the gas bubbles developed during the first rise contribute to the open crumb structure and should be preserved as much as possible at this stage. Cover both pieces with a damp cloth and allow to rest for 10–15 minutes. This bench rest is important: the gluten tensioned by the initial shaping relaxes during this period, making the subsequent final shaping into the baguette form significantly easier and reducing the likelihood of the dough tearing or resisting as you roll it. - Final Shape
Working with one piece at a time, gently flatten the dough piece into a rough rectangle approximately 20cm long. Fold the far edge of the rectangle toward you by about one-third, pressing the folded edge down firmly with the heel of your hand to seal it to the dough below. Now fold the near edge away from you by about one-third, pressing to seal. You now have a longer, narrower piece. Rotate it 180 degrees and repeat the process: fold the far edge toward you and seal, then fold the near edge away and seal. At this point the dough should have elongated noticeably and begun to tighten. Roll the shaped log seam-side down and, with both hands cupped over the dough, apply gentle, even downward pressure while rolling back and forth and simultaneously working your hands apart toward the ends. This rolling motion extends the log from the centre outward, producing even elongation without thinning the centre more than the ends. Continue rolling until the baguette reaches approximately 40cm (16 inches) in length. Taper the last few centimetres at each end by applying slightly more pressure and rolling with just your fingertips to produce the characteristic pointed ends of a classic baguette. - Second Rise
Transfer the shaped baguettes seam-side down onto either a parchment-lined baking sheet lightly greased with cooking spray, or into the folds of a heavily floured cotton kitchen towel (a couche), using the towel’s fabric to create supporting walls between the baguettes that hold their shape during proofing. If using a kitchen towel, fold the fabric between and around the baguettes to provide lateral support. Cover loosely with lightly greased plastic wrap and allow to proof for 45–60 minutes at room temperature until the baguettes look visibly lighter, slightly puffy, and less dense than when freshly shaped. They will not double in size — an increase of approximately 50% is typical and correct. - Preheat and Score
Preheat the oven to 230°C (450°F) for a minimum of 45 minutes before baking if using a baking stone — the stone requires sustained heat to reach temperature fully and a stone that has not been preheated long enough transfers insufficient heat to the baguette base. If baking on a sheet pan, 20 minutes of preheat is sufficient. If the baguettes proofed on a kitchen towel, gently roll them seam-side down onto a sheet of parchment paper and transfer to a peel or inverted baking sheet for loading into the oven. Immediately before loading the oven, score each baguette with 3–5 diagonal cuts along the length of the loaf using a sharp razor blade (lame) or serrated knife. The cuts should be made at approximately 45 degrees to the baguette’s surface rather than straight down, approximately 1cm deep, overlapping slightly, and covering most of the baguette’s length. The scoring is structurally essential — it creates deliberate weak points in the crust surface through which the baguette can expand during oven spring. An unscored baguette will burst randomly at its weakest point, producing an irregular, uncontrolled expansion rather than the uniform, blade-like opening that runs along each score and is the visual signature of a properly made baguette. - Steam Bake
Load the baguettes into the preheated oven as quickly as possible — on parchment directly onto the hot stone if using one, or on the parchment-lined baking sheet. Immediately and carefully pour the boiling water into the cast iron pan on the lower rack and close the oven door quickly to trap the resulting steam. The steam is critical for the first 10 minutes of baking. It keeps the baguette’s surface moist and flexible during the initial oven spring, allowing the bread to expand fully before the crust sets. Without steam, the crust sets too quickly in the dry oven heat and constrains the expansion, producing a smaller, denser baguette with a thicker, tougher crust. With steam, the crust remains extensible during oven spring, then dries out in the second half of baking to produce the thin, crackling, deeply coloured crust that is the defining physical quality of an authentic baguette. Bake for 24–28 minutes until the baguettes are a very deep golden brown — not pale gold or medium brown, but genuinely dark amber with deep colour at the score openings and no pale patches remaining. - Cool Completely Before Serving
Transfer the baked baguettes to a wire rack immediately and allow to cool completely before slicing or serving. The cooling period is not merely a safety precaution against burning — it is a functional part of the baking process. During the first 20–30 minutes after the baguette leaves the oven, significant moisture migration is still occurring within the crumb as the interior steam equalises and the crust transitions from soft to crackling. Cutting a hot baguette traps steam in the crumb and produces a gummy, compressed interior texture. A baguette cooled fully on a wire rack will crackle audibly when the crust cools and contracts — this sound is the reliable indicator that the crust has set properly.
*Notes :
- The poolish pre-ferment is what separates a flavourful baguette from a serviceable one. In the absence of a poolish, a direct-method baguette made with the full quantity of yeast and allowed to rise for 1–2 hours at room temperature contains primarily CO2 from rapid yeast fermentation and very little of the complex organic acid and ester compounds that give artisan bread its depth. The poolish’s 12–24 hour fermentation at room temperature produces lactic and acetic acids from bacterial activity alongside the yeast’s CO2 production, and these acids contribute the subtle tang and complexity that characterises good French bread. The tiny amount of yeast in the poolish — a pinch, not a measured quantity — is the calibration that produces the correct 12–24 hour window. More yeast produces a shorter, less complex fermentation; less or no yeast would not produce a viable poolish in a reasonable timeframe.
- Steam in the oven is the element that most home bakers overlook or approximate inadequately. The boiling water poured into a heavy cast iron pan at the moment of loading the bread generates a rapid, dense burst of steam that fills the oven environment immediately. The cast iron retains heat well and sustains steam generation from the water for the critical first 8–10 minutes. Alternatives — a spray bottle through the door, ice cubes instead of boiling water — produce less consistent steam and less predictable results. The investment in a heavy cast iron pan for this purpose is worthwhile for anyone who bakes bread regularly.
- Bread flour rather than all-purpose flour is non-negotiable for baguette structure. The higher protein content produces the strong, extensible gluten network that allows the baguette to stretch during oven spring without tearing, and it produces the semi-open, irregular crumb structure with clear alveoles (air pockets) rather than the tight, uniform crumb of lower-protein flour baguettes.
Why This Recipe Works
This recipe works because it addresses all three variables that distinguish a genuine baguette from a bread-shaped approximation: flavour complexity from the overnight poolish fermentation, crumb structure from sufficient gluten development through kneading, and crust quality from the steam-bake method and high oven temperature.
The shaping technique produces a tight, evenly structured loaf that expands uniformly at the score openings. The cooling on a wire rack allows the crust to crackle properly. Each step is in service of the same goal — the crackling, golden, complex, open-crumbed baguette that makes everything eaten with it taste better.
Ingredient Breakdown
High-Quality Bread Flour
Higher protein content produces the strong, extensible gluten that allows oven spring without tearing and creates the semi-open crumb structure. Quality matters — French-style bread flour with 12–13% protein is ideal.
Poolish (Pre-ferment)
The flavour foundation — 12–24 hours of slow fermentation at 100% hydration produces the organic acids and aromatic compounds that give authentic French bread its characteristic complexity.
68% Hydration
The moderate moisture level that produces a dough workable by hand while providing enough water for the open crumb development that defines baguette texture.
Minimal Yeast
Both the poolish and the final dough use deliberately small quantities of yeast to produce slow fermentation that develops flavour over time rather than speed over quality.
Steam Bath (Boiling Water)
The crust-forming element — moisture in the oven during the first 10 minutes of baking keeps the surface flexible for oven spring before drying to the characteristic crackling crust.
Scoring at 45 Degrees
The structural release that allows controlled expansion at the score lines and produces the blade-like openings that are the visual signature of a proper baguette.
Flavor Structure Explained
This baguettes follow a layered balance model:
- Caramelized crust (Maillard exterior)
- Wheaty crumb base (flour, fermentation)
- Subtle tang (poolish fermentation)
- Natural sweetness (flour sugars)
- Minimalist composition (flour, water, yeast, salt)
The crust defines the primary experience — deeply caramelised, slightly bitter at the edges, with a crisp, crackling texture from properly developed starch. The crumb provides contrast, delivering soft, wheaty flavor with gentle tang from fermentation. Subtle acidity from the poolish adds depth, while natural sugars contribute faint sweetness. With no enriching ingredients, the structure relies entirely on process — fermentation, hydration, and heat — creating complexity from simplicity rather than additions.
Common Mistakes to Avoid
- Skipping the Poolish or Shortening Its Fermentation – The flavour complexity of a proper baguette develops over 12–24 hours in the poolish. A 2-hour poolish produces a flatter, less interesting baguette. Plan ahead.
- Adding Too Much Flour During Kneading – Managing stickiness by adding flour changes the hydration ratio and produces a denser, less open crumb. Work through the stickiness with a bench scraper.
- Under-proofing for the Second Rise – A baguette that goes into the oven before sufficient proofing has occurred will tear uncontrollably rather than expanding at the score lines. The loaves should look visibly lighter and puffy before scoring.
- Scoring Straight Down Rather Than at 45 Degrees – A straight-down score does not produce the blade-like opening of an authentic baguette. The angled cut at 45 degrees to the surface creates the proper expansion flap.
- Insufficient Steam – Too little steam means the crust sets before the baguette has fully expanded — smaller, denser loaves with thicker crusts. Use boiling water in a heavy cast iron pan.
- Cutting While Hot – Steam trapped in the crumb produces gummy, compressed interior texture. Always cool completely before cutting.
Variations
Whole Wheat Baguette
Replace 30% of the bread flour (approximately 100g) with whole wheat flour. Reduce the water slightly to 220g to compensate for the higher absorption of the whole wheat. The result is nuttier, slightly denser, and more robust in flavour.
Olive and Herb Baguette
Fold 80g of roughly chopped pitted olives and 10g of fresh rosemary into the dough after kneading, before the first rise. The olives provide pockets of salt and oil throughout the crumb.
Seeded French Baguette
Brush the scored baguette surface with water and sprinkle generously with sesame seeds, poppy seeds, or a mixture before baking. The seeds toast during baking and add nutty depth to the crust.
Storage & Make-Ahead
A baguette is at its absolute best within 4 hours of baking, when the crust has its maximum crackle and the crumb has its ideal chewiness and flavor. By the next morning, the crust will have softened, and while the bread will still be pleasant to eat, it will be noticeably past its prime.
For short-term storage, keep the baguette at room temperature for up to 24 hours wrapped in a paper bag or a clean cloth. Do not use plastic, since it traps moisture and makes the crust soften faster. Before serving, you can refresh the baguette in a 180°C oven for about 5 minutes to bring back some of the crust.
Baguettes also freeze well for up to 1 month. Wrap them tightly in plastic and then in foil. To use, thaw at room temperature for about 1 hour, or place the frozen baguette directly into a 180°C oven for around 15 minutes, until it is heated through and the crust has crisped again.
The poolish can also be made ahead. After 12 hours at room temperature, it can be refrigerated for up to 24 more hours, giving you a total window of 36 hours. A refrigerated poolish develops a more acidic and more complex flavor than one kept only at room temperature. Let it come to room temperature for about 30 minutes before mixing it into the final dough.
Frequently Asked Questions
What is a poolish?
A poolish is a type of pre-ferment — a portion of the recipe’s flour and water combined with a very small amount of yeast and allowed to ferment for 12–24 hours before the final dough is mixed. It was developed by Polish bakers in the 19th century, introduced to France in the early 20th century, and became fundamental to French baguette production. Its long, slow fermentation produces flavour complexity that a direct-method dough made entirely on the day of baking cannot replicate.
What is a lame and where do I find one?
A lame is a specialized baking tool — a razor blade on a handle used specifically for scoring bread dough. The thin, sharp blade cuts through proofed dough cleanly without dragging or deflating it. Available at baking supply stores and online. A sharp serrated knife or a sharp regular knife work as substitutes, though with slightly less precision.
Why do my baguettes not have an open crumb?
The most common causes are insufficient gluten development (under-kneading), insufficient hydration (too much added flour), under-proofing at the second rise, or insufficient steam during baking. All four factors contribute to the open crumb — correct all four and the result improves significantly.
Can I make this without a baking stone?
Yes — bake directly on a preheated sheet pan for a similar result. A preheated sheet pan provides more bottom heat than a cold sheet pan and improves the base crust, though a dedicated baking stone or steel produces the most consistent results.
What is the best way to enjoy a fresh baguette?
A just-baked baguette requires almost nothing — a generous amount of good unsalted butter and fine salt alongside coffee is the most pure expression of the bread. Beyond that: deli meats and French cheese; jambon-beurre (ham and butter); charcuterie; and any cheese board. For sandwiches, half a baguette per serving provides the right balance of bread to filling.
Nutrition Facts
( per Baguette )
Calories
~580 kcal
Protein
18 g
Fat
2 g
Carbs
118 g
Calories
~580 kcal
Protein
18 g
Fat
2 g
Carbs
118 g
Related Recipes
Related Recipes


You might also like
You might also like

Pan-Seared Chicken Breast (Skin on)
Crispy-skinned, butter-basted chicken breast with golden exterior and perfectly juicy interior.
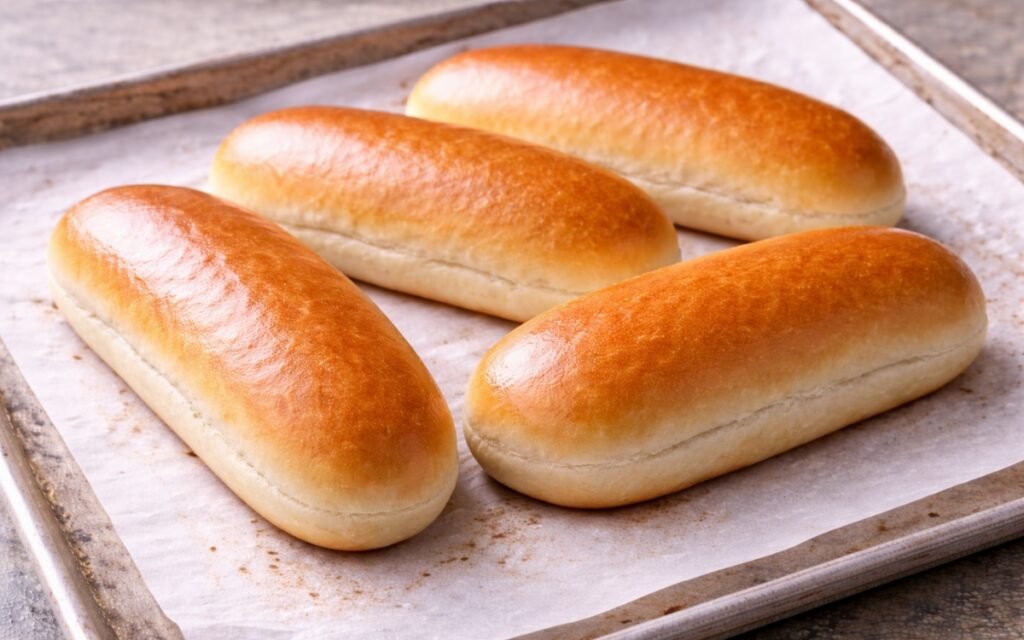
Classic Hot Dog Buns
All-purpose flour dough rolled into even logs and milk-washed for a soft, pale golden crust — the classic neutral hot dog bun for everyday use, ready in 2.5 hours.
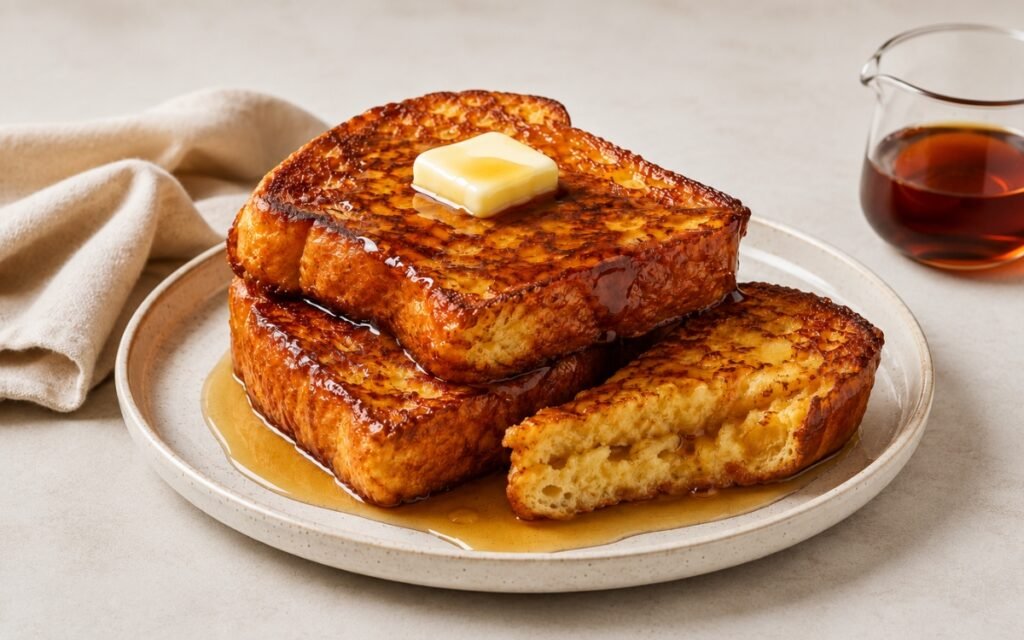
Classic French Toast
Three eggs and three yolks whisked with cream, cinnamon, and nutmeg — briefly soaking thick brioche and cooking 3 minutes per side in foaming butter until deeply golden. 30 minutes.


Classic French Baguette
Ingredients
Method
- The poolish is the foundation of this recipe and the reason a homemade baguette can have flavour that rivals a professional bakery. In a medium bowl, combine the 115g of bread flour, 115g of room-temperature water, and the tiny pinch of yeast — 0.1–0.2g is approximately what fits on the tip of a small knife. The quantity of yeast in the poolish is deliberately minuscule. A larger quantity would ferment the poolish too rapidly, burning through the available sugars before the slow, complex fermentation byproducts that provide flavour — organic acids, esters, and other aromatic compounds — have time to develop. The tiny amount of yeast is precisely what produces a 12–24 hour fermentation window at room temperature rather than a 2-hour one. Stir the poolish vigorously until completely uniform — no dry flour should remain. At 100% hydration (equal weights of flour and water), the poolish will look like a thick, wet batter rather than a dough. This is correct. Cover tightly with plastic wrap and leave at room temperature for 12–24 hours. The poolish is ready when its surface shows a dome of fine bubbles, it has a pleasantly sour, slightly alcoholic, yeasty smell, and when you move the bowl it has a loose, almost liquid quality with visible gas bubbles throughout. A poolish that has gone too long will have a sunken, concave top and a more sharply sour smell — still usable but at the very edge of viability.
- In a large bowl or stand mixer bowl, combine the remaining 225g bread flour, 115g water, 7g salt, and the remaining yeast. Add the entire poolish. Mix together until a rough, shaggy dough forms with no dry flour remaining — by hand for 1–2 minutes of initial mixing, or briefly on the lowest speed of a stand mixer fitted with the dough hook. The salt is added at this stage rather than with the poolish for a specific reason: direct contact between salt and yeast inhibits yeast activity. By adding salt only at the final dough stage after the yeast has already been incorporated into the poolish, you allow the yeast to activate fully in the poolish during the fermentation period without any salt interference.
- Knead the dough by hand on a lightly floured surface for 8–10 minutes, or in a stand mixer on medium-low speed for 8 minutes, or on the dough cycle of a bread machine. The baguette dough at 68% hydration is moderately sticky — wetter than pasta dough but firmer than ciabatta or pizza dough. It will stick to your hands and the counter during the first few minutes of kneading, and this is normal. Resist the urge to add excessive flour to manage the stickiness — additional flour changes the hydration ratio and produces a denser, less open crumb. Work through the stickiness by using a bench scraper to periodically fold the dough back onto itself. The dough is ready when it is smooth, elastic, and extensible — it should stretch easily when pulled without tearing immediately. Lightly oil a medium-large bowl with a very small amount of olive oil or cooking spray — use as little as possible, as the soft, high-hydration dough will absorb surface fat and an excess will alter the recipe’s balance. Transfer the kneaded dough to the bowl, turn it once to coat in the thin oil film. Punch the centre of the dough gently once with your fist, then fold the edges of the dough toward the centre — lift the edge, pull it to the centre, press, rotate the bowl a quarter turn, and repeat around the entire circumference. This fold-and-turn stretches and organises the gluten network without the aggressive compression of continued kneading. Cover with a clean kitchen towel or plastic wrap.
- Allow the covered dough to rise at room temperature for 45–60 minutes until it has visibly increased in volume and feels lighter and more airy when gently pressed. The dough does not need to double — baguette dough at this hydration rises more moderately than enriched breads. While the dough rises, prepare your equipment: if using a baking stone, place it on the middle rack. Place a cast iron pan or heavy oven-safe pan on the floor of the oven or the lowest rack. Begin heating 480ml (2 cups) of water to boiling close to when the oven preheat is complete — you want it ready to pour at the moment the baguettes go in.
- Turn the risen dough out onto a work surface lightly dusted with just enough flour to prevent immediate sticking. Divide into two equal pieces — weigh them if possible for consistent results. Each piece should weigh approximately 175g. Shape each piece loosely into a rough rectangle by gently pressing and stretching without degassing it aggressively — the gas bubbles developed during the first rise contribute to the open crumb structure and should be preserved as much as possible at this stage. Cover both pieces with a damp cloth and allow to rest for 10–15 minutes. This bench rest is important: the gluten tensioned by the initial shaping relaxes during this period, making the subsequent final shaping into the baguette form significantly easier and reducing the likelihood of the dough tearing or resisting as you roll it.
- Working with one piece at a time, gently flatten the dough piece into a rough rectangle approximately 20cm long. Fold the far edge of the rectangle toward you by about one-third, pressing the folded edge down firmly with the heel of your hand to seal it to the dough below. Now fold the near edge away from you by about one-third, pressing to seal. You now have a longer, narrower piece. Rotate it 180 degrees and repeat the process: fold the far edge toward you and seal, then fold the near edge away and seal. At this point the dough should have elongated noticeably and begun to tighten. Roll the shaped log seam-side down and, with both hands cupped over the dough, apply gentle, even downward pressure while rolling back and forth and simultaneously working your hands apart toward the ends. This rolling motion extends the log from the centre outward, producing even elongation without thinning the centre more than the ends. Continue rolling until the baguette reaches approximately 40cm (16 inches) in length. Taper the last few centimetres at each end by applying slightly more pressure and rolling with just your fingertips to produce the characteristic pointed ends of a classic baguette.
- Transfer the shaped baguettes seam-side down onto either a parchment-lined baking sheet lightly greased with cooking spray, or into the folds of a heavily floured cotton kitchen towel (a couche), using the towel’s fabric to create supporting walls between the baguettes that hold their shape during proofing. If using a kitchen towel, fold the fabric between and around the baguettes to provide lateral support. Cover loosely with lightly greased plastic wrap and allow to proof for 45–60 minutes at room temperature until the baguettes look visibly lighter, slightly puffy, and less dense than when freshly shaped. They will not double in size — an increase of approximately 50% is typical and correct.
- Preheat the oven to 230°C (450°F) for a minimum of 45 minutes before baking if using a baking stone — the stone requires sustained heat to reach temperature fully and a stone that has not been preheated long enough transfers insufficient heat to the baguette base. If baking on a sheet pan, 20 minutes of preheat is sufficient. If the baguettes proofed on a kitchen towel, gently roll them seam-side down onto a sheet of parchment paper and transfer to a peel or inverted baking sheet for loading into the oven. Immediately before loading the oven, score each baguette with 3–5 diagonal cuts along the length of the loaf using a sharp razor blade (lame) or serrated knife. The cuts should be made at approximately 45 degrees to the baguette’s surface rather than straight down, approximately 1cm deep, overlapping slightly, and covering most of the baguette’s length. The scoring is structurally essential — it creates deliberate weak points in the crust surface through which the baguette can expand during oven spring. An unscored baguette will burst randomly at its weakest point, producing an irregular, uncontrolled expansion rather than the uniform, blade-like opening that runs along each score and is the visual signature of a properly made baguette.
- Load the baguettes into the preheated oven as quickly as possible — on parchment directly onto the hot stone if using one, or on the parchment-lined baking sheet. Immediately and carefully pour the boiling water into the cast iron pan on the lower rack and close the oven door quickly to trap the resulting steam. The steam is critical for the first 10 minutes of baking. It keeps the baguette’s surface moist and flexible during the initial oven spring, allowing the bread to expand fully before the crust sets. Without steam, the crust sets too quickly in the dry oven heat and constrains the expansion, producing a smaller, denser baguette with a thicker, tougher crust. With steam, the crust remains extensible during oven spring, then dries out in the second half of baking to produce the thin, crackling, deeply coloured crust that is the defining physical quality of an authentic baguette. Bake for 24–28 minutes until the baguettes are a very deep golden brown — not pale gold or medium brown, but genuinely dark amber with deep colour at the score openings and no pale patches remaining.
- Transfer the baked baguettes to a wire rack immediately and allow to cool completely before slicing or serving. The cooling period is not merely a safety precaution against burning — it is a functional part of the baking process. During the first 20–30 minutes after the baguette leaves the oven, significant moisture migration is still occurring within the crumb as the interior steam equalises and the crust transitions from soft to crackling. Cutting a hot baguette traps steam in the crumb and produces a gummy, compressed interior texture. A baguette cooled fully on a wire rack will crackle audibly when the crust cools and contracts — this sound is the reliable indicator that the crust has set properly.