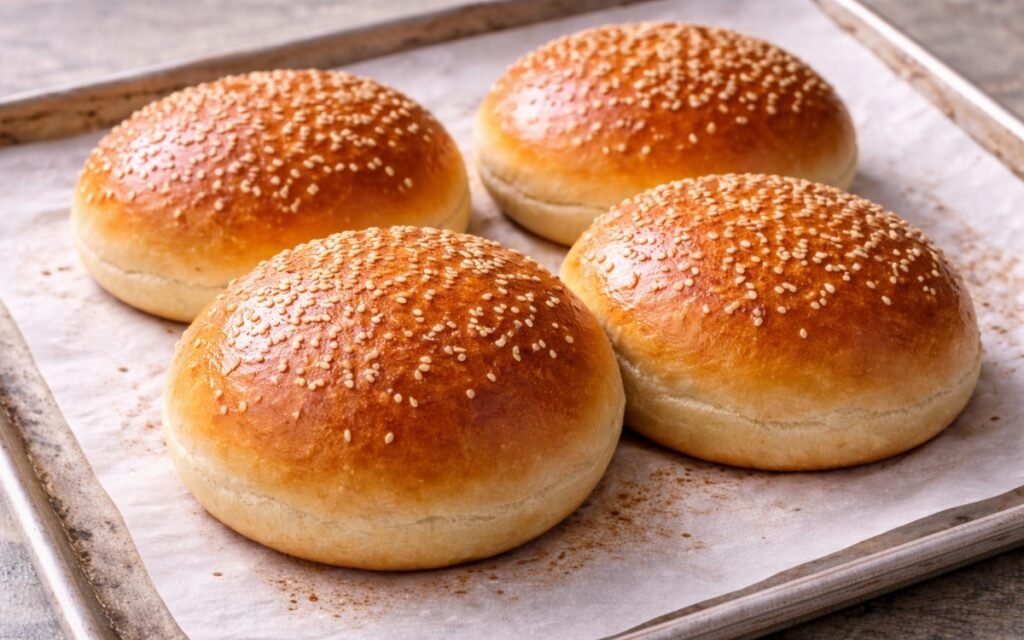
Classic Burger Buns
The lean, neutral, sesame-topped burger bun that does exactly what a bun should do — hold the burger together, absorb the juices, and get out of the way of the flavour. Made with all-purpose flour, a small amount of butter, and a two-stage proof, these buns have a soft, slightly chewy crumb, a golden sesame-seeded top, and none of the richness that competes with a heavily sauced burger. The Brioche Burger Buns are the richer, more indulgent version of the same concept — if brioche is the bun for when you want the bun to contribute, this is the bun for when you want it to support. Both belong in the rotation. Which one you reach for depends entirely on what is going between them.
Prep Time : 20 min
Cook Time : 16 min
Servings : 4
20 min
16 min
4
Ingredients
For the Dough
• 250g all-purpose flour — this one on Amazon
• 4g fine sea salt
• 12g sugar
• 4g active dry yeast
• 30g unsalted butter, melted, or neutral oil — this one on Amazon
• 60g whole milk, warm, 24–27°C
• 80g water, warm, 24–27°C
For the Egg Wash and Topping
• 1 egg
• Small splash of water
• 2–3 tbsp white sesame seeds
This post may contain affiliate links. As an Amazon Associate I earn from qualifying purchases, at no additional cost to you.
Directions
- Combine the Dry Ingredients
In a large bowl, combine the all-purpose flour, fine sea salt, sugar, and active dry yeast. Stir briefly for 20–30 seconds to distribute all four dry ingredients evenly throughout the flour before any liquid is introduced. This distribution step prevents localised concentrations of salt or yeast — high concentrations of salt in direct contact with the yeast before the liquid dilutes and distributes both can slow yeast activity at those points. All-purpose flour is specified rather than bread flour deliberately: the lower protein content of all-purpose produces a slightly softer, less chewy bun with a more tender crumb — the neutral, yielding texture that makes a classic burger bun recede behind its filling. Bread flour produces a chewier, more bread-forward bun that is noticeably more present in the eating experience. For a bun intended to be functional and neutral, all-purpose is the correct choice. - Mix the Wet Ingredients and Form the Dough
In a separate small bowl or jug, combine the warm milk, warm water, and melted butter. The liquids should be in the 24–27°C range — comfortably warm to the touch but not hot. Above 38°C the yeast’s cell membranes begin to suffer heat damage; below 20°C the activation is significantly slowed. Melted butter is specified here rather than the softened butter used in the brioche bun recipe — in a lean dough with lower total enrichment, the melted butter incorporates more quickly and evenly than softened butter would, and the structural difference between the two incorporation methods is less significant at this lower fat quantity than it would be in a brioche-style dough. Pour the liquid mixture over the dry ingredients and mix with your hand or a spoon until a rough, shaggy dough forms with no dry flour remaining at the bottom of the bowl. - Knead Until Smooth
Transfer the rough dough to a clean work surface and knead for 6–8 minutes by hand, or use a stand mixer fitted with a dough hook at medium-low speed for 6 minutes. The classic burger bun dough is considerably easier to handle than the brioche version — lower fat content, lower hydration, and no egg produce a dough that is manageable from the first minute of kneading rather than sticky and challenging. The dough should feel soft and slightly tacky at the start — soft enough to compress easily when pressed, with a slight surface tackiness that is distinct from sticking to your hands. If it is genuinely sticking to everything and impossible to work, add a very small dusting of flour. If it feels too firm and tears when stretched, add a small splash of water. By the end of the kneading period it should feel smooth, elastic, and slightly springy when pressed — the windowpane test applies here as well: a small piece stretched thin between your fingers should be translucent without tearing, indicating sufficient gluten development to produce a well-structured bun. - First Rise
Shape the kneaded dough into a smooth ball and transfer to a lightly oiled bowl. Turn once to coat all surfaces in a thin film of oil. Cover with plastic wrap or a damp kitchen towel and allow to rise at room temperature for 60–90 minutes until roughly doubled in size. The classic burger bun dough rises more actively than the brioche version at the same temperature — the lower fat content means the yeast’s activity is less inhibited by surrounding fat molecules, producing a faster, more vigorous fermentation. At warm room temperature the dough may double in as little as 60 minutes; in a cooler kitchen it will take closer to 90 minutes. Use the visual doubled-volume indicator rather than the clock alone. - Divide and Shape
Turn the risen dough out onto a lightly floured work surface and divide into 4 equal portions — each approximately 110g. Weigh them for consistency. Shape each portion into a tight, smooth ball using the cupped-hand rolling technique: place each piece on the work surface, cup your hand over it, and roll in a tight circular motion with light downward pressure, gradually tightening the surface tension until a smooth, firm ball has formed with all the edges tucked cleanly underneath. Surface tension in the ball determines the evenness of the bun’s rise — a tight, smooth ball expands evenly in all directions during proofing; a loose, rough ball expands unevenly and produces an irregular final shape. Place the shaped balls on a parchment-lined baking sheet with at least 6–7cm of space between each one to accommodate the expansion during the second proof. Using the palm of your hand, press each ball firmly and evenly flat — to approximately 2–3cm in height and 9–10cm in diameter. This flattening step is important: without it, the ball proofs and bakes into a rounded dome rather than the characteristically wide, flat burger bun shape. A properly flattened ball, when proofed and baked, expands outward into the familiar wide, even disc that fits a burger patty cleanly. - Second Rise
Cover the shaped, flattened buns loosely with lightly greased plastic wrap or a damp cloth. Allow to proof at room temperature for 30–45 minutes until visibly puffy, noticeably expanded from their flattened shape, and soft to a very gentle press. The second proof for classic buns is shorter than for brioche buns — the lean dough proofs more actively. The buns are ready when they have expanded significantly and feel light and airy, with a gentle finger press leaving an indentation that springs back slowly but completely. Begin preheating the oven to 190°C (375°F) in the final 15 minutes of the second proof. - Egg Wash, Sesame Seeds, and Bake
In a small bowl, whisk the egg with a small splash of water until completely smooth and uniform — no streaks of unincorporated white should remain, as they produce pale, streaky patches on the bun surface. Using a pastry brush, apply a thin, even coat of egg wash to the top and sides of each bun with gentle strokes that do not press down on the proofed dough. The egg wash browning produced on a classic bun is slightly less dramatic than on a brioche bun — the lean dough’s lower sugar content means less caramelisation — but still produces a noticeably deeper, more even golden colour than uncoated dough. Immediately after applying the egg wash, scatter white sesame seeds generously across the top surface of each bun — the wet egg wash acts as the adhesive, holding the seeds against the surface during baking. The quantity of seeds should be generous enough to cover most of the top surface, as they lose some volume during baking and gaps become more visible in the finished bun. Bake for 15–18 minutes until the tops are evenly golden brown and the buns sound slightly hollow when tapped on the base. Transfer immediately to a wire rack.
*Notes :
- The choice between classic burger buns and brioche buns is a genuine application decision rather than a quality hierarchy. Classic buns are the correct choice for heavily built burgers — double patty smash burgers with multiple sauces, stacked fried chicken sandwiches with heavy fillings — where the filling is the primary event and the bun’s role is structural support and neutral carbohydrate base. Brioche buns contribute flavour, richness, and a buttery softness that adds to the eating experience of a simpler, more delicately constructed burger but can be overwhelming in combination with very bold, heavily sauced fillings. The classic bun is also more forgiving under moisture — its more neutral crumb absorbs sauces and juices without becoming as soft as an enriched brioche would.
- Sesame seeds on a burger bun are not merely decorative. Toasted sesame has a nutty, slightly sweet aromatic character that has a specific and well-established affinity with grilled beef — the same reason sesame oil appears in so many beef-forward Asian preparations. The sesame seeds on a classic burger bun toast during the oven bake and their aromatic compounds are present in every bite of the assembled burger, contributing a subtle but real background flavour that a plain bun cannot provide.
- All-purpose flour at the specific hydration of this recipe — 140g liquid to 250g flour, approximately 56% — produces the classic American burger bun texture: soft, slightly yielding, with a crumb that compresses pleasantly under the weight of burger ingredients rather than resisting them. The texture is more tender than a standard bread roll but less rich and pillowy than a fully enriched brioche.
Why This Recipe Works
This recipe works because every decision is calibrated for the specific application of a neutral, structural, sesame-topped burger bun rather than for a showpiece bread. All-purpose flour produces the correct texture. Melted butter at 30g provides enough enrichment for flavour and softness without crossing into brioche territory.
The sugar at 12g provides yeast food and browning without noticeable sweetness. The two-stage proof produces the correct open, soft crumb. The egg wash and sesame seed finish produce the visual and flavour identity of a classic burger bun. Nothing in the recipe is excessive or absent — it is calibrated for its purpose.
Ingredient Breakdown
All-Purpose Flour
The moderate protein content produces a softer, more tender bun than bread flour — the neutral, yielding texture that makes the bun structural without being aggressively bread-like.
Melted Butter
Provides flavour depth and crumb softness at a quantity that contributes without enriching to brioche levels — melted for faster, more even incorporation in a lean dough at low enrichment.
Sugar
Yeast food and subtle Maillard browning contributor — at 12g it produces a marginally sweeter crust than a completely unsugared bun without making the bread taste sweet.
Active Dry Yeast
Leavening agent — produces the CO2 during both proofing stages that creates the soft, open crumb structure.
Egg Wash
The golden finish — produces the Maillard-browned colour and slight sheen characteristic of a classic diner-style burger bun.
White Sesame Seeds
The aromatic topping — toasts during baking to a nutty, slightly sweet character that has a specific affinity for grilled beef and fried chicken.
Flavor Structure Explained
This burger buns follow a layered balance model:
- Mild wheaty base (crumb)
- Light caramelized crust (egg wash)
- Nutty aromatic top (sesame seeds)
- Subtle sweetness (dough)
- Neutral carrier role (overall balance)
The crumb establishes the foundation with a soft, mildly wheaty and faintly sweet profile that stays intentionally restrained. The crust adds a slightly deeper, caramelised note from light Maillard browning, giving just enough contrast. Sesame seeds define the most distinctive layer, contributing toasted nuttiness and aromatic depth that pairs naturally with savory fillings. The underlying sweetness remains subtle, supporting rather than leading. The overall structure is controlled and neutral — present enough to matter, but designed to stay out of the way.
Common Mistakes to Avoid
- Not Flattening Before the Second Proof – The most common shaping error. Unflattened balls proof and bake into dome shapes rather than wide, flat buns. Press firmly to approximately 2–3cm height before the second proof.
- Over-proofing at the Second Rise – The classic bun dough rises more actively than enriched brioche dough. 30–45 minutes is the correct window — significantly over-proofed buns can collapse slightly in the oven or produce a coarse, irregular crumb.
- Applying Too Much Egg Wash – Excess egg wash pools around the base of the buns and produces dark, slightly burnt rings at the edges. Apply a thin, even coat with light brushstrokes.
- Applying Sesame Seeds Too Sparingly – Seeds applied thinly fall off at the edges and produce a sparse, patchy topping on the finished bun. Be generous — they reduce in apparent volume during baking.
- Cutting Before Fully Cooled – The crumb is still setting in the first 15–20 minutes after baking. Cutting too early compresses the still-warm interior into a gummy, dense layer.
Variations
No Sesame Plain Buns
Omit the sesame seeds after applying the egg wash and bake plain. The resulting bun has a clean, golden surface suitable for any application where the sesame character would compete with a specific topping or sauce.
Poppy Seed Version
Replace the white sesame seeds with poppy seeds for a slightly more bitter, denser topping with a different visual identity.
Everything Seasoning Buns
Replace the sesame seeds with everything bagel seasoning — white sesame, poppy seeds, dried onion, dried garlic — applied generously over the egg-washed surface for a boldly flavoured topping that pairs particularly well with the Double Smash Burger.
Whole Wheat Version
Replace 80g of the all-purpose flour with 80g of whole wheat flour. Increase the water by 10ml to compensate for whole wheat’s higher absorption. The result is slightly denser and nuttier with a more pronounced grain flavour suited to more robustly flavoured burgers.
Storage & Make-Ahead
Baked buns can be stored in a sealed bag at room temperature for up to 3 days. Because this is a lean dough, the buns hold their texture well at room temperature. They may become slightly firmer on the second and third day, but they toast back very well.
To refresh leftover buns, split them and toast them cut-side down in a dry skillet for 60 to 90 seconds, until golden. This restores some surface crispness and warms the crumb, giving a result that is very close to freshly baked.
The buns can also be frozen in a sealed bag for up to 1 month. For convenience, split them before freezing, since the frozen halves can go straight into the toaster without thawing.
For a make-ahead option, shape and flatten the buns, then place them on a tray, cover tightly, and refrigerate for up to 16 hours before the second proof. When ready to bake, remove them from the refrigerator and let them proof at room temperature for 45 to 60 minutes, which is slightly longer than usual because they are starting cold. Then egg wash and bake as normal.
Frequently Asked Questions
What is the difference between classic burger buns and brioche buns?
Classic burger buns are lean — made with all-purpose flour, a small amount of butter, and no egg in the dough — producing a neutral, slightly chewy, structurally supportive bun that recedes behind the filling. Brioche Burger Buns are enriched with butter, egg, and milk, producing a tender, slightly sweet, more flavourful bun that contributes its own character to the eating experience. Choose classic for heavily sauced, complex burgers where neutral support is needed; choose brioche for simpler constructions where the bun’s richness is a desired addition.
Why all-purpose flour rather than bread flour?
Bread flour’s higher protein produces a chewier, more assertively bread-textured bun that is noticeable as a bread component while eating. All-purpose produces the softer, more neutral texture characteristic of a classic diner-style burger bun — it compresses pleasantly rather than offering resistance.
Can I make these without sesame seeds?
Yes — the buns are complete without the seeds. The sesame adds a specific nutty aromatic character that many people associate with the classic burger bun identity, but the bun structure, flavour, and function are unchanged without them.
What should I use these buns for?
These buns are the natural pairing for the Double Smash Burger — the classic, neutral bun lets the caramelised beef crust and burger sauce be the primary flavour event. They also work for the Spicy Fried Chicken Sandwich — the sesame topping has a specific affinity with the fried chicken’s crust, and the neutral crumb does not compete with the gochujang marinade and garlic-sriracha mayo.
How do I get a perfectly even sesame seed coverage?
Apply the egg wash first and immediately scatter the sesame seeds over the still-wet surface from a height of approximately 15–20cm, which allows them to distribute naturally rather than clumping where they land. For even denser coverage, dip the egg-washed top of each bun directly into a shallow bowl of sesame seeds and press very gently.
Nutrition Facts
( per serving )
Calories
~275 kcal
Protein
8 g
Fat
7 g
Carbs
45 g
Calories
~275 kcal
Protein
8 g
Fat
7 g
Carbs
45 g
Related Recipes
Related Recipes

Garlic Parmesan Carrot Fries
Crispy roasted carrot fries with garlic and Parmesan cheese—a healthier, flavorful alternative.
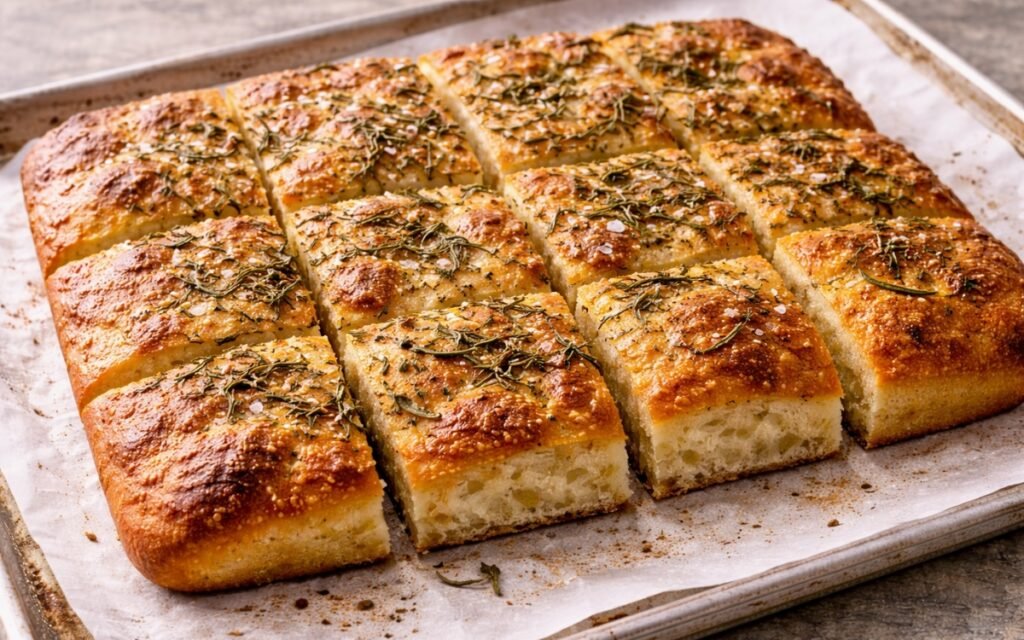
Focaccia
00 flour, semolina, and generous olive oil cold-fermented for 48–72 hours — focaccia with a crackling crust, cloud-soft interior, and the complex flavour only time can produce.
Patatas Bravas with Mayonnaise-Style Aioli
Parboiled potatoes shaken for rough edges and roasted shatteringly crispy — bravas sauce with dual paprika and sherry vinegar added at the end, creamy garlic aioli alongside. The Spanish tapas combination.


You might also like
You might also like
Garlic Butter Sirloin Steak
Pan-seared sirloin steak crowned with herb-infused garlic butter for restaurant-quality results.
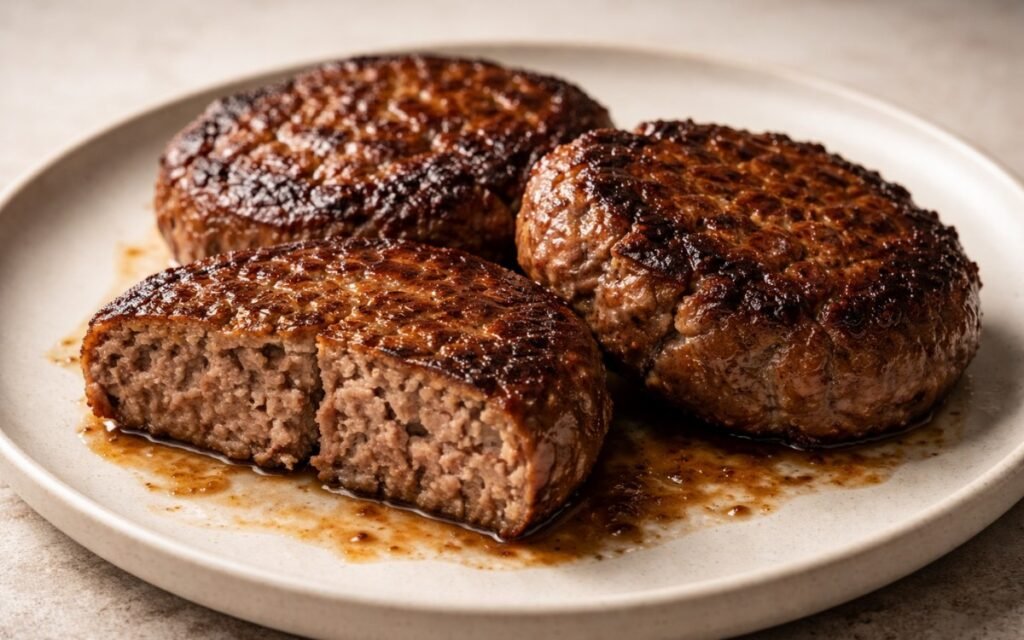
Easy Ground Beef Patties
Restaurant-quality beef patties with caramelized crust, juicy center, and butter-basted perfection.
Crispy Parmesan Smashed Potatoes
Ultra-crispy smashed potatoes roasted with Parmesan cheese – crunchy outside, fluffy inside perfection.


Classic Burger Buns
Ingredients
Method
- In a large bowl, combine the all-purpose flour, fine sea salt, sugar, and active dry yeast. Stir briefly for 20–30 seconds to distribute all four dry ingredients evenly throughout the flour before any liquid is introduced. This distribution step prevents localised concentrations of salt or yeast — high concentrations of salt in direct contact with the yeast before the liquid dilutes and distributes both can slow yeast activity at those points. All-purpose flour is specified rather than bread flour deliberately: the lower protein content of all-purpose produces a slightly softer, less chewy bun with a more tender crumb — the neutral, yielding texture that makes a classic burger bun recede behind its filling. Bread flour produces a chewier, more bread-forward bun that is noticeably more present in the eating experience. For a bun intended to be functional and neutral, all-purpose is the correct choice.
- In a separate small bowl or jug, combine the warm milk, warm water, and melted butter. The liquids should be in the 24–27°C range — comfortably warm to the touch but not hot. Above 38°C the yeast’s cell membranes begin to suffer heat damage; below 20°C the activation is significantly slowed. Melted butter is specified here rather than the softened butter used in the brioche bun recipe — in a lean dough with lower total enrichment, the melted butter incorporates more quickly and evenly than softened butter would, and the structural difference between the two incorporation methods is less significant at this lower fat quantity than it would be in a brioche-style dough. Pour the liquid mixture over the dry ingredients and mix with your hand or a spoon until a rough, shaggy dough forms with no dry flour remaining at the bottom of the bowl.
- Transfer the rough dough to a clean work surface and knead for 6–8 minutes by hand, or use a stand mixer fitted with a dough hook at medium-low speed for 6 minutes. The classic burger bun dough is considerably easier to handle than the brioche version — lower fat content, lower hydration, and no egg produce a dough that is manageable from the first minute of kneading rather than sticky and challenging. The dough should feel soft and slightly tacky at the start — soft enough to compress easily when pressed, with a slight surface tackiness that is distinct from sticking to your hands. If it is genuinely sticking to everything and impossible to work, add a very small dusting of flour. If it feels too firm and tears when stretched, add a small splash of water. By the end of the kneading period it should feel smooth, elastic, and slightly springy when pressed — the windowpane test applies here as well: a small piece stretched thin between your fingers should be translucent without tearing, indicating sufficient gluten development to produce a well-structured bun.
- Shape the kneaded dough into a smooth ball and transfer to a lightly oiled bowl. Turn once to coat all surfaces in a thin film of oil. Cover with plastic wrap or a damp kitchen towel and allow to rise at room temperature for 60–90 minutes until roughly doubled in size. The classic burger bun dough rises more actively than the brioche version at the same temperature — the lower fat content means the yeast’s activity is less inhibited by surrounding fat molecules, producing a faster, more vigorous fermentation. At warm room temperature the dough may double in as little as 60 minutes; in a cooler kitchen it will take closer to 90 minutes. Use the visual doubled-volume indicator rather than the clock alone.
- Turn the risen dough out onto a lightly floured work surface and divide into 4 equal portions — each approximately 110g. Weigh them for consistency. Shape each portion into a tight, smooth ball using the cupped-hand rolling technique: place each piece on the work surface, cup your hand over it, and roll in a tight circular motion with light downward pressure, gradually tightening the surface tension until a smooth, firm ball has formed with all the edges tucked cleanly underneath. Surface tension in the ball determines the evenness of the bun’s rise — a tight, smooth ball expands evenly in all directions during proofing; a loose, rough ball expands unevenly and produces an irregular final shape. Place the shaped balls on a parchment-lined baking sheet with at least 6–7cm of space between each one to accommodate the expansion during the second proof. Using the palm of your hand, press each ball firmly and evenly flat — to approximately 2–3cm in height and 9–10cm in diameter. This flattening step is important: without it, the ball proofs and bakes into a rounded dome rather than the characteristically wide, flat burger bun shape. A properly flattened ball, when proofed and baked, expands outward into the familiar wide, even disc that fits a burger patty cleanly.
- Cover the shaped, flattened buns loosely with lightly greased plastic wrap or a damp cloth. Allow to proof at room temperature for 30–45 minutes until visibly puffy, noticeably expanded from their flattened shape, and soft to a very gentle press. The second proof for classic buns is shorter than for brioche buns — the lean dough proofs more actively. The buns are ready when they have expanded significantly and feel light and airy, with a gentle finger press leaving an indentation that springs back slowly but completely. Begin preheating the oven to 190°C (375°F) in the final 15 minutes of the second proof.
- In a small bowl, whisk the egg with a small splash of water until completely smooth and uniform — no streaks of unincorporated white should remain, as they produce pale, streaky patches on the bun surface. Using a pastry brush, apply a thin, even coat of egg wash to the top and sides of each bun with gentle strokes that do not press down on the proofed dough. The egg wash browning produced on a classic bun is slightly less dramatic than on a brioche bun — the lean dough’s lower sugar content means less caramelisation — but still produces a noticeably deeper, more even golden colour than uncoated dough. Immediately after applying the egg wash, scatter white sesame seeds generously across the top surface of each bun — the wet egg wash acts as the adhesive, holding the seeds against the surface during baking. The quantity of seeds should be generous enough to cover most of the top surface, as they lose some volume during baking and gaps become more visible in the finished bun. Bake for 15–18 minutes until the tops are evenly golden brown and the buns sound slightly hollow when tapped on the base. Transfer immediately to a wire rack.