Ingredients
Method
Combine the Dry Ingredients
- In a large bowl, combine the all-purpose flour, fine sea salt, sugar, and active dry yeast. Stir briefly for 20–30 seconds to distribute all four dry ingredients evenly throughout the flour before any liquid is introduced. This distribution step prevents localised concentrations of salt or yeast — high concentrations of salt in direct contact with the yeast before the liquid dilutes and distributes both can slow yeast activity at those points. All-purpose flour is specified rather than bread flour deliberately: the lower protein content of all-purpose produces a slightly softer, less chewy bun with a more tender crumb — the neutral, yielding texture that makes a classic burger bun recede behind its filling. Bread flour produces a chewier, more bread-forward bun that is noticeably more present in the eating experience. For a bun intended to be functional and neutral, all-purpose is the correct choice.
Mix the Wet Ingredients and Form the Dough
- In a separate small bowl or jug, combine the warm milk, warm water, and melted butter. The liquids should be in the 24–27°C range — comfortably warm to the touch but not hot. Above 38°C the yeast's cell membranes begin to suffer heat damage; below 20°C the activation is significantly slowed. Melted butter is specified here rather than the softened butter used in the brioche bun recipe — in a lean dough with lower total enrichment, the melted butter incorporates more quickly and evenly than softened butter would, and the structural difference between the two incorporation methods is less significant at this lower fat quantity than it would be in a brioche-style dough. Pour the liquid mixture over the dry ingredients and mix with your hand or a spoon until a rough, shaggy dough forms with no dry flour remaining at the bottom of the bowl.
Knead Until Smooth
- Transfer the rough dough to a clean work surface and knead for 6–8 minutes by hand, or use a stand mixer fitted with a dough hook at medium-low speed for 6 minutes. The classic burger bun dough is considerably easier to handle than the brioche version — lower fat content, lower hydration, and no egg produce a dough that is manageable from the first minute of kneading rather than sticky and challenging. The dough should feel soft and slightly tacky at the start — soft enough to compress easily when pressed, with a slight surface tackiness that is distinct from sticking to your hands. If it is genuinely sticking to everything and impossible to work, add a very small dusting of flour. If it feels too firm and tears when stretched, add a small splash of water. By the end of the kneading period it should feel smooth, elastic, and slightly springy when pressed — the windowpane test applies here as well: a small piece stretched thin between your fingers should be translucent without tearing, indicating sufficient gluten development to produce a well-structured bun.
First Rise
- Shape the kneaded dough into a smooth ball and transfer to a lightly oiled bowl. Turn once to coat all surfaces in a thin film of oil. Cover with plastic wrap or a damp kitchen towel and allow to rise at room temperature for 60–90 minutes until roughly doubled in size. The classic burger bun dough rises more actively than the brioche version at the same temperature — the lower fat content means the yeast's activity is less inhibited by surrounding fat molecules, producing a faster, more vigorous fermentation. At warm room temperature the dough may double in as little as 60 minutes; in a cooler kitchen it will take closer to 90 minutes. Use the visual doubled-volume indicator rather than the clock alone.
Divide and Shape
- Turn the risen dough out onto a lightly floured work surface and divide into 4 equal portions — each approximately 110g. Weigh them for consistency. Shape each portion into a tight, smooth ball using the cupped-hand rolling technique: place each piece on the work surface, cup your hand over it, and roll in a tight circular motion with light downward pressure, gradually tightening the surface tension until a smooth, firm ball has formed with all the edges tucked cleanly underneath. Surface tension in the ball determines the evenness of the bun's rise — a tight, smooth ball expands evenly in all directions during proofing; a loose, rough ball expands unevenly and produces an irregular final shape. Place the shaped balls on a parchment-lined baking sheet with at least 6–7cm of space between each one to accommodate the expansion during the second proof. Using the palm of your hand, press each ball firmly and evenly flat — to approximately 2–3cm in height and 9–10cm in diameter. This flattening step is important: without it, the ball proofs and bakes into a rounded dome rather than the characteristically wide, flat burger bun shape. A properly flattened ball, when proofed and baked, expands outward into the familiar wide, even disc that fits a burger patty cleanly.
Second Rise
- Cover the shaped, flattened buns loosely with lightly greased plastic wrap or a damp cloth. Allow to proof at room temperature for 30–45 minutes until visibly puffy, noticeably expanded from their flattened shape, and soft to a very gentle press. The second proof for classic buns is shorter than for brioche buns — the lean dough proofs more actively. The buns are ready when they have expanded significantly and feel light and airy, with a gentle finger press leaving an indentation that springs back slowly but completely. Begin preheating the oven to 190°C (375°F) in the final 15 minutes of the second proof.
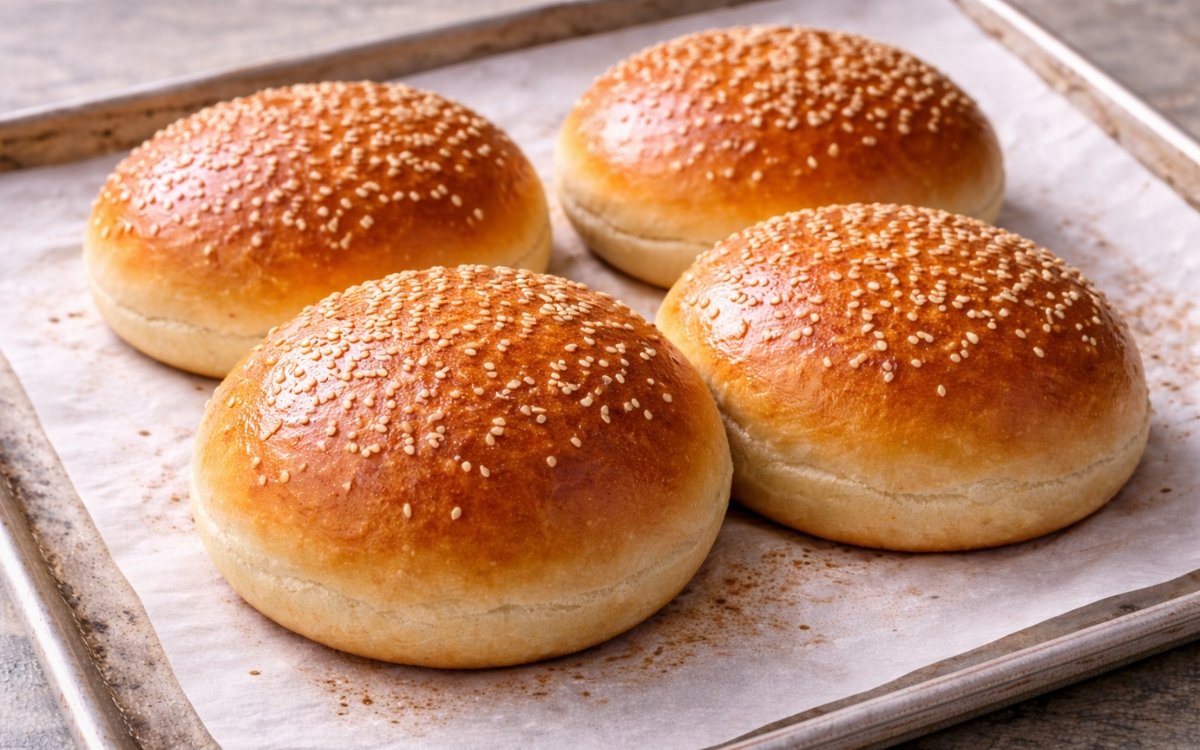
Egg Wash, Sesame Seeds, and Bake
- In a small bowl, whisk the egg with a small splash of water until completely smooth and uniform — no streaks of unincorporated white should remain, as they produce pale, streaky patches on the bun surface. Using a pastry brush, apply a thin, even coat of egg wash to the top and sides of each bun with gentle strokes that do not press down on the proofed dough. The egg wash browning produced on a classic bun is slightly less dramatic than on a brioche bun — the lean dough's lower sugar content means less caramelisation — but still produces a noticeably deeper, more even golden colour than uncoated dough. Immediately after applying the egg wash, scatter white sesame seeds generously across the top surface of each bun — the wet egg wash acts as the adhesive, holding the seeds against the surface during baking. The quantity of seeds should be generous enough to cover most of the top surface, as they lose some volume during baking and gaps become more visible in the finished bun. Bake for 15–18 minutes until the tops are evenly golden brown and the buns sound slightly hollow when tapped on the base. Transfer immediately to a wire rack.
Notes
The choice between classic burger buns and brioche buns is a genuine application decision rather than a quality hierarchy. Classic buns are the correct choice for heavily built burgers — double patty smash burgers with multiple sauces, stacked fried chicken sandwiches with heavy fillings — where the filling is the primary event and the bun's role is structural support and neutral carbohydrate base. Brioche buns contribute flavour, richness, and a buttery softness that adds to the eating experience of a simpler, more delicately constructed burger but can be overwhelming in combination with very bold, heavily sauced fillings. The classic bun is also more forgiving under moisture — its more neutral crumb absorbs sauces and juices without becoming as soft as an enriched brioche would.
Sesame seeds on a burger bun are not merely decorative. Toasted sesame has a nutty, slightly sweet aromatic character that has a specific and well-established affinity with grilled beef — the same reason sesame oil appears in so many beef-forward Asian preparations. The sesame seeds on a classic burger bun toast during the oven bake and their aromatic compounds are present in every bite of the assembled burger, contributing a subtle but real background flavour that a plain bun cannot provide.
All-purpose flour at the specific hydration of this recipe — 140g liquid to 250g flour, approximately 56% — produces the classic American burger bun texture: soft, slightly yielding, with a crumb that compresses pleasantly under the weight of burger ingredients rather than resisting them. The texture is more tender than a standard bread roll but less rich and pillowy than a fully enriched brioche.