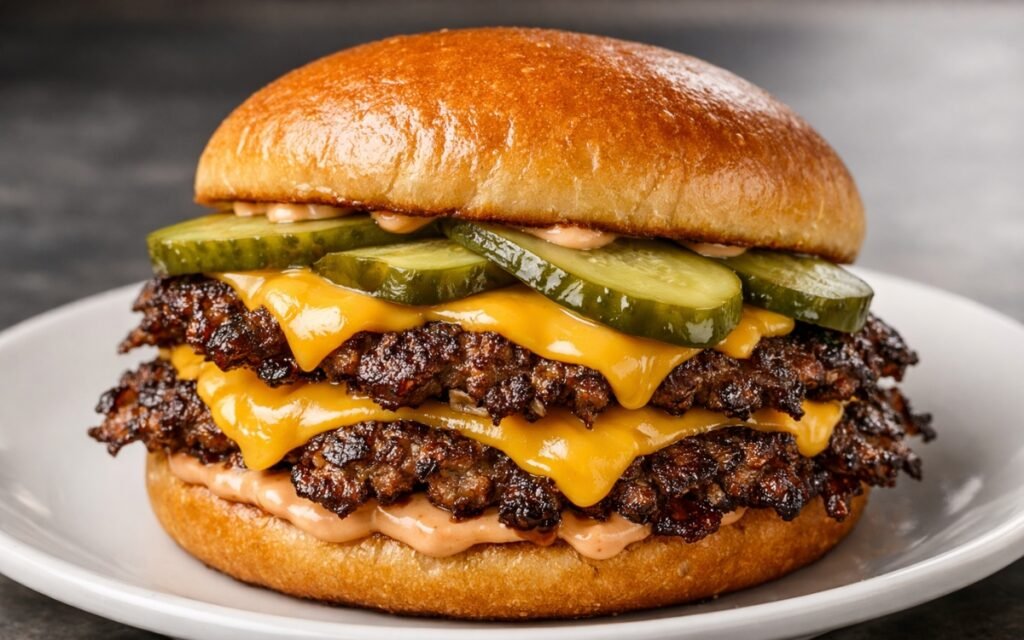
Double Smash Burger
Perfectly crispy, juicy, and loaded with melty cheese — this double smash burger hits every note of flavour and texture. Two thin 85g patties of 75/25 beef smashed hard onto a screaming-hot cast iron, scraped up with their caramelised crust intact, stacked with two slices of American cheese, and served on a buttery toasted bun with tangy-sweet burger sauce and dill pickle planks. This is diner-style smash burger done properly at home, and it is on the plate in twenty minutes.
Prep Time : 20 min
Cook Time : 20 min
Servings : 4 burgers
20 min
20 min
4 burgers
Ingredients
For the Burgers
• 680g ground beef, 75/25 fat ratio
• 12g black pepper, about 1 tsp per burger
• 12g kosher salt, about 1 tsp per burger
• 8 slices American cheese, 2 per burger
• 4 hamburger buns
• 4 dill pickles, sliced lengthwise into thin planks
For the Burger Sauce
• 60g mayonnaise
• 60g ketchup
• 60g yellow mustard
• 5g Worcestershire sauce, about 1 tsp — this one on Amazon
• 8g smoked paprika, about ½ tbsp — this one on Amazon
• ½ dill pickle, finely diced
• ¼ small sweet onion, finely diced
• ½ garlic clove, finely grated
• salt, to taste
• Freshly ground black pepper, to taste
If you’re looking for the perfect burger buns, try both versions — our Brioche Burger Buns for a rich, buttery, soft texture, or our Classic Burger Buns for a lighter, more structured roll that holds up to juicy burgers.
This post may contain affiliate links. As an Amazon Associate I earn from qualifying purchases, at no additional cost to you.
Directions
- Make the Burger Sauce
In a small bowl, combine the mayonnaise, ketchup, yellow mustard, Worcestershire sauce, smoked paprika, finely diced pickle, finely diced onion, and grated garlic. Stir firmly until completely uniform — no visible streaks of individual ingredients should remain. The smoked paprika disperses into the fat of the mayonnaise as you mix, tinting the sauce a warm, deep orange-pink that is visually characteristic of a proper burger sauce. The sauce is built on a three-condiment base — mayo, ketchup, and mustard — that covers all three primary flavour registers simultaneously: richness from the mayo, sweetness and acidity from the ketchup, and sharp, fermented tang from the mustard. Worcestershire sauce adds the umami depth that the three condiments lack individually. Diced pickle provides briny punctuation and textural contrast. Finely diced sweet onion adds mild sweetness and crunch. Grated garlic — on a Microplane ideally, so it dissolves into the sauce completely — provides savory backbone without any detectable garlic pieces. Season with a small amount of kosher salt and freshly cracked black pepper, tasting as you go. Refrigerate until needed. This sauce is noticeably better after even 30 minutes in the refrigerator as the raw onion softens in the acid, the garlic mellows, and all components integrate into a cohesive sauce rather than tasting like individual ingredients combined. - Portion and Prepare the Beef
Divide the 680g of ground beef into 8 equal portions of approximately 85g each — two patties per burger, four burgers total. Handle the beef as minimally as possible. Roll each portion into a very loose ball shape without compacting it — the looser the ball, the more easily it smashes flat without resistance, and the more irregular and craggily textured the smashed patty’s edges will be. Irregular, craggy edges produce dramatically more surface area in contact with the hot pan, which means more Maillard browning, more crust, and more flavour than a smooth, evenly compacted ball produces. Do not form flat patties — the smashing technique requires a ball shape. Season the tops of the balls lightly with kosher salt and black pepper immediately before cooking — the seasoning goes on just before they hit the pan rather than in advance, because salt draws moisture to the surface and any moisture on the surface of the beef when it contacts the hot pan creates steam that inhibits the crust formation the entire technique depends on. - Preheat the Pan to the Correct Temperature
Place a large cast iron skillet over medium-high to high heat and allow it to preheat for a full 3–4 minutes until you see faint wisps of smoke rising from the dry surface. The temperature of the cooking surface at the moment the beef makes contact is the single most important variable in smash burger cooking — it determines the entire quality of the crust. An under-heated surface produces grey, soft, steamed beef with minimal browning even when smashed thin. A correctly preheated surface at the threshold of smoking produces the immediate, aggressive Maillard browning that creates the deeply caramelised, lacy-edged crust that defines a proper smash burger. Cast iron is the correct material for this application because its thermal mass retains heat through the cold beef contact that would drop a thinner pan’s temperature below the effective searing threshold. Work in batches of 1–2 balls at a time to maintain the pan temperature. Each batch of two balls requires the pan to be smoking hot when they go in — allow 60–90 seconds of recovery time between batches if needed. - Smash the Patties Hard and Fast
Place one beef ball in the hot pan. Immediately place a piece of parchment paper or greaseproof paper over the ball and position a heavy, wide, flat spatula — or a dedicated burger press — directly over the centre. Apply firm, direct, downward pressure for 10–15 seconds, pressing as hard as you can, spreading the ball from its centre outward into a thin, roughly 12–14cm patty with irregular, thin, craggy edges. The smashing must happen within the first 5 seconds of the beef hitting the pan — once the proteins begin to set from the heat, the ball resists smashing and the benefit of the technique is lost. The craggy, irregular edges produced by hard smashing are not an accident or a flaw — they are the most important textural element of the technique. Those thin, irregular edges make direct contact with the pan over their entire surface, caramelising to a deep, crispy, almost lacy char that no other burger preparation technique produces. Season the top surface with an additional small amount of salt and pepper while the patty cooks. Repeat for the second ball if doing two at once. - Wait for the Crust to Fully Develop
After smashing, put the spatula down and leave the patties completely undisturbed for 90 seconds to 2 minutes. The temptation to check the underside, to press again, or to move the patty must be resisted entirely. The crust forms through sustained, uninterrupted contact between the beef and the hot pan surface — every movement disrupts this contact and resets the browning process. You will know the crust is ready to release by two indicators: the edges of the patty will show visible browning and the beef will naturally release from the pan surface when you slide a thin spatula under it. If it sticks and requires force, it needs another 20–30 seconds. When the crust has fully developed and releases cleanly, scrape firmly under the entire patty in a single decisive motion — do not lift tentatively, as tentative scraping tears the crust rather than releasing it intact. - Flip, Cheese, and Stack
Flip each patty onto its uncooked side. Immediately place one slice of American cheese on top of each patty. Cook for exactly 60 more seconds — the second side does not need as long as the first because it has already been partially cooked through during the smash, and the objective is only to set the second side and melt the cheese rather than to develop a full second crust. American cheese is the only correct choice for a smash burger — its emulsified fat structure melts at the low temperature produced by the residual heat of the just-flipped patty without any additional heat source required. It flows smoothly over the crust’s irregular surface, coating it evenly. Natural cheeses require higher temperatures to melt and tend to separate their fat and protein rather than melting uniformly. Remove both patties. Place the first patty, cheese-side up, and immediately place the second patty directly on top of it, cheese-side up. The heat from both patties and the residual heat of the stacking causes the two cheese slices to begin to meld together slightly — this double-cheese, double-patty stack is the structural and textural heart of the double smash burger. - Toast the Buns
Without cleaning the pan, reduce the heat slightly and add a small amount of butter directly into the rendered beef fat remaining in the skillet. Place the buns cut-side down in the buttered fat and press gently with the spatula. Toast for 60–90 seconds until the cut surfaces are golden, slightly crisp, and saturated with the combined butter and beef fat from the pan. Toasting buns in the residual beef fat rather than fresh butter alone is not a minor upgrade — the beef fat carries the flavour compounds produced during the crust development directly into the bun’s surface, adding a savory, caramelised depth to what would otherwise be simply a toasted, buttery bun. Watch carefully — the residual beef fat and sugar in the bun can produce dark browning quickly at this temperature. - Assemble and Serve
Spread a generous amount of burger sauce on the inside face of the bottom bun. The sauce goes on the bottom rather than both buns because it needs to stay in contact with the beef — the juices running from the hot stacked patties will mix with the sauce during the brief rest, creating a combined burger-sauce-and-beef-juice layer that is the flavour foundation of every bite. Place the stacked double-patty directly onto the sauced bottom bun. Arrange the dill pickle planks — cut lengthwise into long, flat strips rather than rounds, so they cover the maximum surface area of the patty — over the cheese. Add the top bun. Allow the assembled burger to rest for 60–90 seconds before serving. During this brief rest, the cheese finishes melting fully, the sauce and beef juices begin to combine, and the steam pressure inside the burger equalises slightly. Serve immediately while the crust is still audible.
*Notes :
- The 75/25 fat ratio is specified and should not be substituted with leaner beef. The 25% fat content serves three distinct functions in a smash burger. During the smash and sear, the fat that contacts the pan surface melts and begins frying the exterior of the patty in its own fat — this self-basting effect is what produces the caramelised, almost lacquered quality of a proper smash burger crust. During eating, the fat provides the juiciness and richness that makes a thin, aggressively smashed patty satisfying rather than dry. And during the crust development, the fat that renders and collects in the pan’s surface is available for the next patty’s crust development and for the bun toasting step. Leaner beef at 80/20 or higher produces a noticeably drier, less caramelised smash burger with less of the beefy richness that makes the format work.
- The single-smash rule is absolute and physiological. Smashing the beef ball immediately on contact creates maximum surface area on the hot pan and initiates crust development across the entire patty surface simultaneously. Pressing again after the initial smash does nothing productive — the proteins have already set from the initial heat contact and the surface area has already been maximized. What pressing again does do is destructive: it squeezes the liquid fat and juices that are migrating toward the crust back into the interior and out the sides, actively making the burger drier and less flavorful. Smash once, immediately, and with maximum force. Then do not touch it again.
- The burger sauce can be made up to 3 days ahead and improves significantly over the first 24 hours as the raw onion softens in the Worcestershire’s acidity and the garlic fully integrates into the mayonnaise. Making it the night before is genuinely worth doing.
Why This Recipe Works
This recipe works because the smash technique and the 75/25 fat ratio address the fundamental challenge of making a thin, fast-cooked burger genuinely excellent. Standard burger patties require thickness to stay juicy because their surface cooks long before the interior is done. A smash burger solves this by maximising the ratio of crust surface to interior volume — every bite is mostly crust — and by using beef fat content high enough that the thin interior remains moist even at high-heat, rapid cooking.
The double patty provides enough total beef mass per serving to feel substantial while each individual patty remains thin enough for the crust technique to work. The sauce, pickles, and toasted bun are not accompaniments — they are essential structural components of the flavor architecture.
Ingredient Breakdown
75/25 Ground Beef
The fat ratio that makes the smash technique work — enough fat to self-baste the crust, keep the interior moist, and produce the caramelised flavour only beef fat can create.
American Cheese
The only cheese that melts correctly at the low-temperature conditions of a smash burger flip — emulsified fat structure, smooth melt, no separation.
Burger Sauce
The three-condiment base that covers all primary flavor registers — richness, sweetness-acidity, and sharp tang — amplified by Worcestershire umami, smoked paprika depth, and the briny punctuation of pickle and onion.
Dill Pickle Planks
Long, flat cuts that cover maximum surface area and deliver cold, sharp, sour acidity in every bite — the essential contrast to the hot, rich, fatty burger and sauce.
Toasted Brioche-Style Bun
Structural support and flavor carrier — toasted in the rendered beef fat from the pan for maximum flavour integration.
Flavor Structure Explained
This smash burger follows a layered balance model:
- Caramelized crust core (smashed beef patty)
- Creamy salty layer (American cheese)
- Sweet-tangy richness (burger sauce)
- Sharp acidic contrast (pickles)
- Soft neutral base (bun)
The crust defines the entire experience — deeply savory, intensely beefy, with slight bitterness from aggressive Maillard browning. American cheese softens that intensity with creamy, salty balance, preventing harshness. Burger sauce adds a sweet, tangy, slightly smoky layer that builds flavor beneath the beef. Pickles cut through everything with cold, briny acidity, resetting the palate between bites. The bun provides structure and subtle sweetness, holding all components together. The impact comes from all elements combined — contrast and balance engineered around the crust as the dominant event.
Common Mistakes to Avoid
- Under-heating the Pan – The single most consequential error. A pan that is not smoking before the beef goes in produces grey, soft, steamed beef with no crust. The pan must be at the threshold of smoking.
- Smashing Too Late – The smash must happen within the first 3–5 seconds of the beef making contact with the pan. After that, the proteins begin setting and the beef resists flattening. Smash immediately.
- Pressing After the Initial Smash – Pressing a second time squeezes juices out and produces a drier burger. Smash once, immediately, hard. Then do not touch it.
- Using Lean Beef – 80/20 or leaner produces a drier, less caramelised, less flavorful smash burger. 75/25 is the correct ratio.
- Not Toasting the Bun – An untoasted bun softens and disintegrates under the weight and heat of the burger within minutes. Always toast, ideally in the rendered beef fat.
- Skipping the Rest – 60–90 seconds of rest allows the cheese to fully melt and the internal steam to settle. Biting in immediately produces a burger that is hotter in the middle and has not yet reached its optimal texture.
Variations
Animal-Style
Add 30g of caramelised onions (cooked low and slow until deeply golden) on top of the cheese before closing the burger for a sweeter, more complex flavour layer.
Truffle Version
Add 5ml of truffle oil to the burger sauce and replace American cheese with Gruyère — melt with a small splash of water in a covered pan rather than relying on residual heat alone.
Bacon Smash Burger
Add two strips of crispy thin-cut bacon per burger between the bottom patty and the pickle planks for salt, crunch, and smoke.
Spicy Version
Add 10g of finely diced pickled jalapeños to the burger sauce and serve with a drizzle of hot sauce over the assembled patties for a heat-forward variation.
Breakfast Smash Burger
Replace the burger sauce with a fried egg pressed flat with the spatula and a smear of hot sauce on the bottom bun for a breakfast-appropriate variation.
Storage & Make-Ahead
Burger sauce can be refrigerated in an airtight container for up to 5 days. In fact, it improves over the first 24 hours, so you can make it ahead and keep it for the week.
Portioned beef balls can be prepared and refrigerated uncovered on a tray for up to 4 hours before cooking. Do not season them in advance, because salt draws moisture to the surface and that will hurt the final sear.
Cooked patties are best eaten immediately. Smash burgers do not reheat well, since the crust softens almost at once in any reheating environment, so they should be cooked fresh.
The burger should always be assembled right before serving. A pre-assembled smash burger will start to soften the bun and lose its crust texture within about 5 minutes.
Frequently Asked Questions
Why 75/25 fat ratio specifically?
The 25% fat content provides both the self-basting frying effect during the smash sear and the juiciness in the finished patty that leaner beef cannot deliver. 80/20 produces an acceptable but noticeably drier and less caramelised result.
Can I use a regular pan instead of cast iron?
A heavy stainless steel pan at maximum heat is an acceptable substitute. Avoid non-stick — it cannot be heated to the required temperature safely and produces no meaningful crust.
Do I need a burger press?
No — a heavy, flat-bottomed metal spatula pressed firmly with both hands produces equivalent results. What matters is downward force and speed, not the specific tool.
Why American cheese and not cheddar?
American cheese’s emulsified fat structure melts smoothly at low temperatures. Cheddar requires more heat to melt and separates its fat and protein rather than flowing uniformly across the irregular crust surface. For a smash burger specifically, American cheese is functionally superior.
Can I cook multiple burgers at once?
Yes — if your pan is large enough to fit two balls with room between them without crowding, cook two simultaneously. Each ball must have its own space to smash flat without touching the other. Never stack or overlap.
Nutrition Facts
( per serving )
Calories
~720 kcal
Protein
42 g
Fat
47 g
Carbs
28 g
Calories
~720 kcal
Protein
42 g
Fat
47 g
Carbs
28 g
Related Recipes
Related Recipes

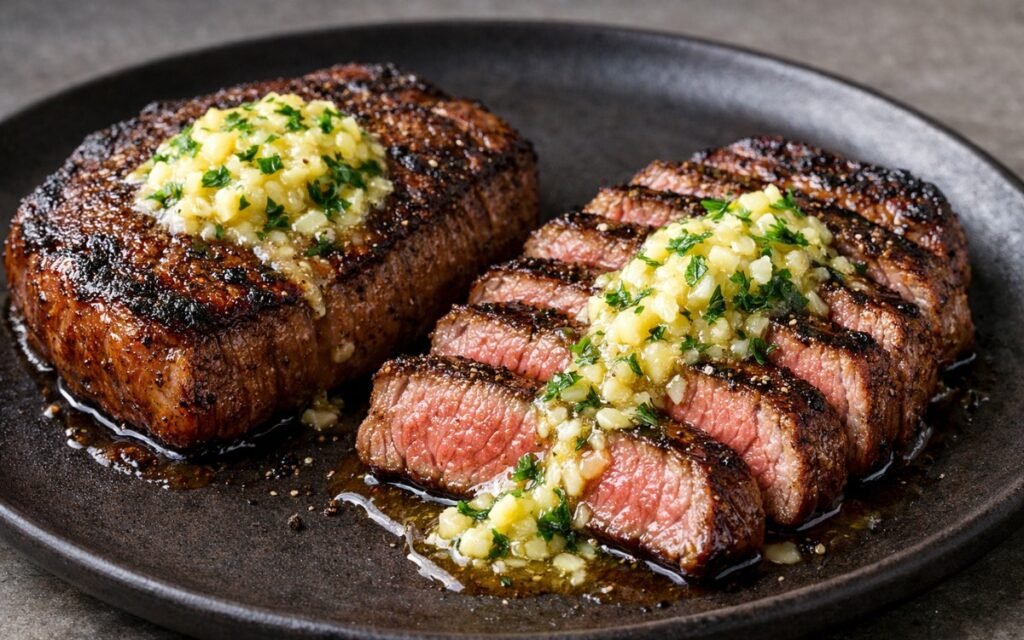
Garlic Butter Sirloin Steak
Pan-seared sirloin steak crowned with herb-infused garlic butter for restaurant-quality results.
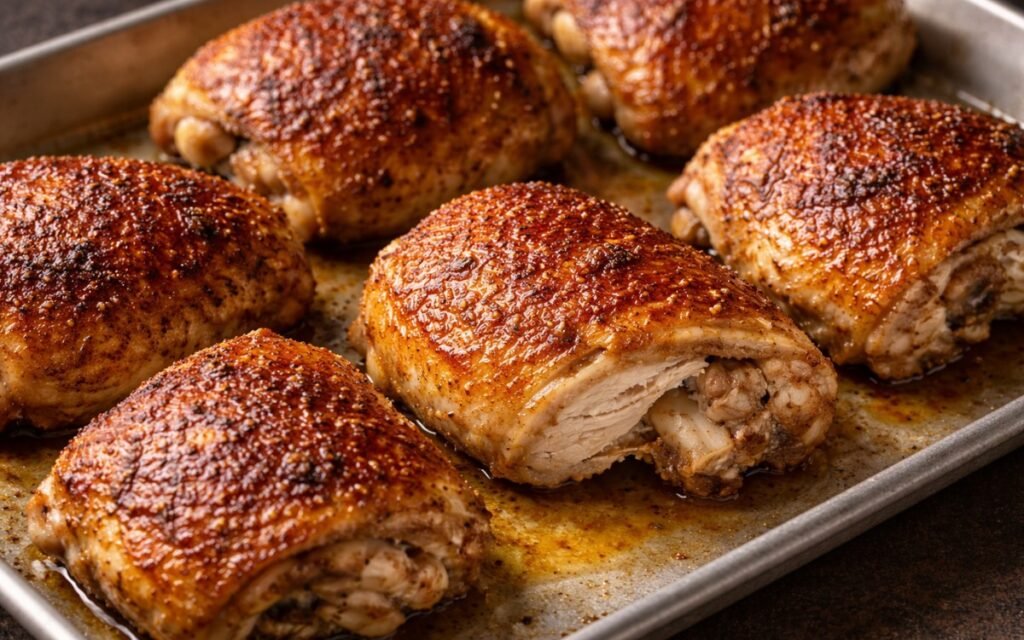
Cripsy Oven-Baked Chicken Thighs
Crispy-skinned chicken thighs baked with simple spices—the most forgiving and flavorful cut.
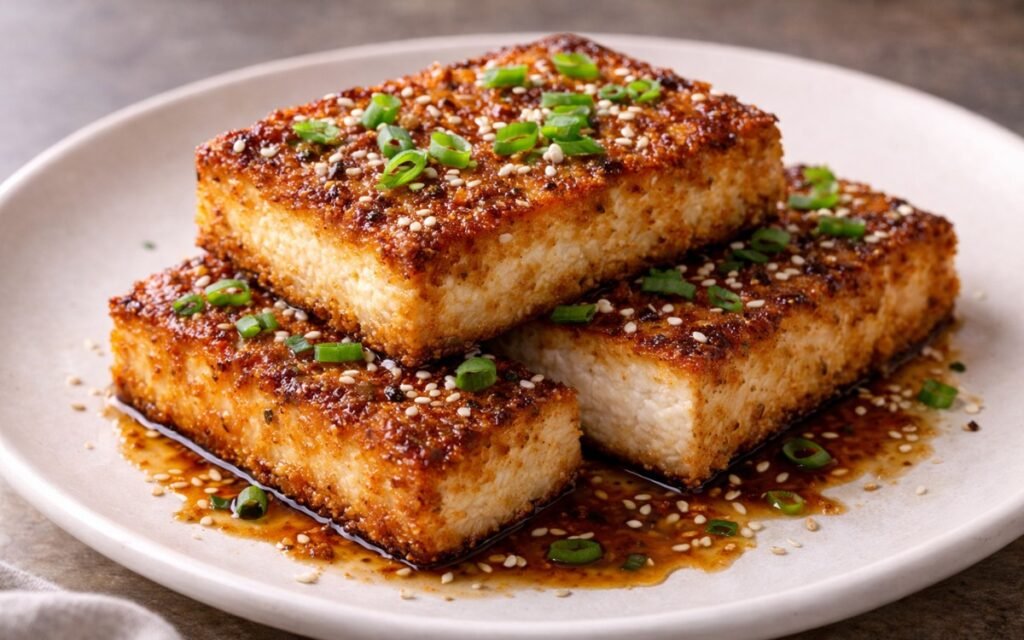
Crispy Tofu Steaks
Golden cornstarch-coated tofu steaks with savory soy-sesame marinade and ultra-crispy texture.
You might also like
You might also like
Pan-Seared Skirt Steak
Quick-seared skirt steak with garlic herb butter, sliced against the grain for maximum tenderness.
Lasagne alla Bolognese
Beef and veal Bolognese slow-braised 3 hours on pancetta fat and soffritto — layered with ricotta, mozzarella, and Parmesan, baked golden. The weekend lasagne worth every hour.
Baked Mac and Cheese
Cheddar, Gruyère, and mozzarella melted into a béchamel off the heat — layered with underdone macaroni, baked bubbling, broiled golden. Serves 12.

Double Smash Burger
Ingredients
Method
- In a small bowl, combine the mayonnaise, ketchup, yellow mustard, Worcestershire sauce, smoked paprika, finely diced pickle, finely diced onion, and grated garlic. Stir firmly until completely uniform — no visible streaks of individual ingredients should remain. The smoked paprika disperses into the fat of the mayonnaise as you mix, tinting the sauce a warm, deep orange-pink that is visually characteristic of a proper burger sauce. The sauce is built on a three-condiment base — mayo, ketchup, and mustard — that covers all three primary flavour registers simultaneously: richness from the mayo, sweetness and acidity from the ketchup, and sharp, fermented tang from the mustard. Worcestershire sauce adds the umami depth that the three condiments lack individually. Diced pickle provides briny punctuation and textural contrast. Finely diced sweet onion adds mild sweetness and crunch. Grated garlic — on a Microplane ideally, so it dissolves into the sauce completely — provides savory backbone without any detectable garlic pieces. Season with a small amount of kosher salt and freshly cracked black pepper, tasting as you go. Refrigerate until needed. This sauce is noticeably better after even 30 minutes in the refrigerator as the raw onion softens in the acid, the garlic mellows, and all components integrate into a cohesive sauce rather than tasting like individual ingredients combined.
- Divide the 680g of ground beef into 8 equal portions of approximately 85g each — two patties per burger, four burgers total. Handle the beef as minimally as possible. Roll each portion into a very loose ball shape without compacting it — the looser the ball, the more easily it smashes flat without resistance, and the more irregular and craggily textured the smashed patty’s edges will be. Irregular, craggy edges produce dramatically more surface area in contact with the hot pan, which means more Maillard browning, more crust, and more flavour than a smooth, evenly compacted ball produces. Do not form flat patties — the smashing technique requires a ball shape. Season the tops of the balls lightly with kosher salt and black pepper immediately before cooking — the seasoning goes on just before they hit the pan rather than in advance, because salt draws moisture to the surface and any moisture on the surface of the beef when it contacts the hot pan creates steam that inhibits the crust formation the entire technique depends on.
- Place a large cast iron skillet over medium-high to high heat and allow it to preheat for a full 3–4 minutes until you see faint wisps of smoke rising from the dry surface. The temperature of the cooking surface at the moment the beef makes contact is the single most important variable in smash burger cooking — it determines the entire quality of the crust. An under-heated surface produces grey, soft, steamed beef with minimal browning even when smashed thin. A correctly preheated surface at the threshold of smoking produces the immediate, aggressive Maillard browning that creates the deeply caramelised, lacy-edged crust that defines a proper smash burger. Cast iron is the correct material for this application because its thermal mass retains heat through the cold beef contact that would drop a thinner pan’s temperature below the effective searing threshold. Work in batches of 1–2 balls at a time to maintain the pan temperature. Each batch of two balls requires the pan to be smoking hot when they go in — allow 60–90 seconds of recovery time between batches if needed.
- Place one beef ball in the hot pan. Immediately place a piece of parchment paper or greaseproof paper over the ball and position a heavy, wide, flat spatula — or a dedicated burger press — directly over the centre. Apply firm, direct, downward pressure for 10–15 seconds, pressing as hard as you can, spreading the ball from its centre outward into a thin, roughly 12–14cm patty with irregular, thin, craggy edges. The smashing must happen within the first 5 seconds of the beef hitting the pan — once the proteins begin to set from the heat, the ball resists smashing and the benefit of the technique is lost. The craggy, irregular edges produced by hard smashing are not an accident or a flaw — they are the most important textural element of the technique. Those thin, irregular edges make direct contact with the pan over their entire surface, caramelising to a deep, crispy, almost lacy char that no other burger preparation technique produces. Season the top surface with an additional small amount of salt and pepper while the patty cooks. Repeat for the second ball if doing two at once.
- After smashing, put the spatula down and leave the patties completely undisturbed for 90 seconds to 2 minutes. The temptation to check the underside, to press again, or to move the patty must be resisted entirely. The crust forms through sustained, uninterrupted contact between the beef and the hot pan surface — every movement disrupts this contact and resets the browning process. You will know the crust is ready to release by two indicators: the edges of the patty will show visible browning and the beef will naturally release from the pan surface when you slide a thin spatula under it. If it sticks and requires force, it needs another 20–30 seconds. When the crust has fully developed and releases cleanly, scrape firmly under the entire patty in a single decisive motion — do not lift tentatively, as tentative scraping tears the crust rather than releasing it intact.
- Flip each patty onto its uncooked side. Immediately place one slice of American cheese on top of each patty. Cook for exactly 60 more seconds — the second side does not need as long as the first because it has already been partially cooked through during the smash, and the objective is only to set the second side and melt the cheese rather than to develop a full second crust. American cheese is the only correct choice for a smash burger — its emulsified fat structure melts at the low temperature produced by the residual heat of the just-flipped patty without any additional heat source required. It flows smoothly over the crust’s irregular surface, coating it evenly. Natural cheeses require higher temperatures to melt and tend to separate their fat and protein rather than melting uniformly. Remove both patties. Place the first patty, cheese-side up, and immediately place the second patty directly on top of it, cheese-side up. The heat from both patties and the residual heat of the stacking causes the two cheese slices to begin to meld together slightly — this double-cheese, double-patty stack is the structural and textural heart of the double smash burger.
- Without cleaning the pan, reduce the heat slightly and add a small amount of butter directly into the rendered beef fat remaining in the skillet. Place the buns cut-side down in the buttered fat and press gently with the spatula. Toast for 60–90 seconds until the cut surfaces are golden, slightly crisp, and saturated with the combined butter and beef fat from the pan. Toasting buns in the residual beef fat rather than fresh butter alone is not a minor upgrade — the beef fat carries the flavour compounds produced during the crust development directly into the bun’s surface, adding a savory, caramelised depth to what would otherwise be simply a toasted, buttery bun. Watch carefully — the residual beef fat and sugar in the bun can produce dark browning quickly at this temperature.
- Spread a generous amount of burger sauce on the inside face of the bottom bun. The sauce goes on the bottom rather than both buns because it needs to stay in contact with the beef — the juices running from the hot stacked patties will mix with the sauce during the brief rest, creating a combined burger-sauce-and-beef-juice layer that is the flavour foundation of every bite. Place the stacked double-patty directly onto the sauced bottom bun. Arrange the dill pickle planks — cut lengthwise into long, flat strips rather than rounds, so they cover the maximum surface area of the patty — over the cheese. Add the top bun. Allow the assembled burger to rest for 60–90 seconds before serving. During this brief rest, the cheese finishes melting fully, the sauce and beef juices begin to combine, and the steam pressure inside the burger equalises slightly. Serve immediately while the crust is still audible.