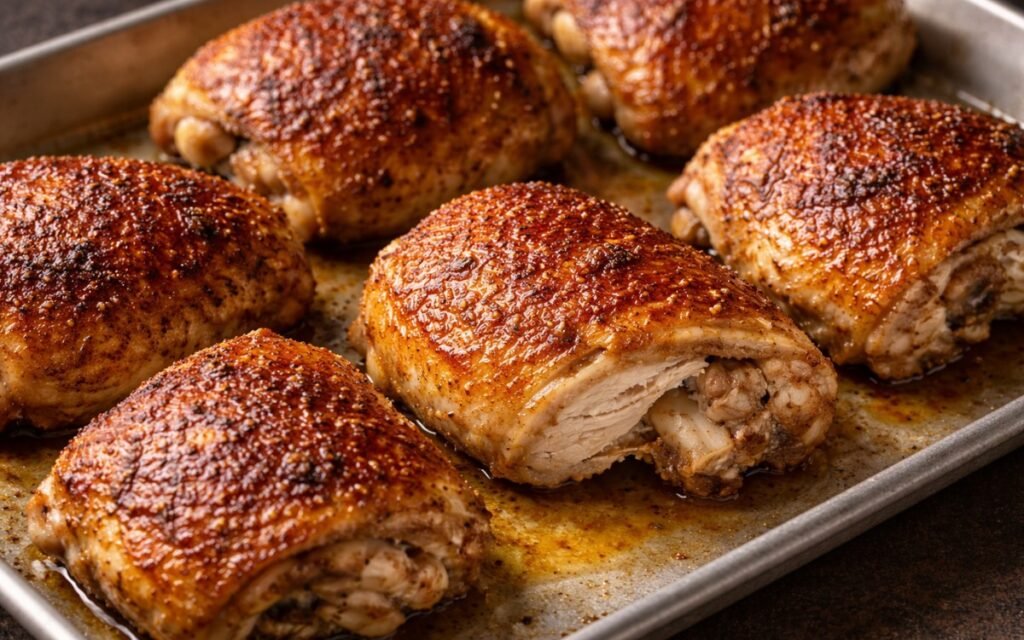
Crispy Oven-Baked Chicken Thighs
Crispy-skinned, deeply seasoned chicken thighs roasted at high heat to achieve maximum contrast — crackling exterior and juicy, tender interior. This method relies on moisture removal, fat rendering, and proper airflow rather than complexity, delivering consistent, repeatable results with minimal effort. No marinating, no brining, no special equipment. Just the right technique applied to the right cut.
Prep Time : 10 min
Cook Time : 40 min
Servings : 4
10 min
40 min
4
Ingredients
For the Seasoning Blend
• 10g fine sea salt — this one on Amazon
• 5g freshly ground black pepper
• 5g garlic powder
• 4g smoked paprika
• 3g dried thyme
• 2g onion powder
This post may contain affiliate links. As an Amazon Associate I earn from qualifying purchases, at no additional cost to you.
Directions
- Preheat for High-Heat Rendering
Preheat the oven to 220°C (425°F) and line a large rimmed baking sheet with aluminium foil. The high temperature is not aggressive — it is required. The goal of this recipe is a crispy, rendered, crackling skin, and that outcome is physically dependent on achieving sufficient surface temperature to drive off moisture and initiate Maillard browning before the fat beneath the skin can fully escape. At lower temperatures — 180°C or 190°C, which many recipes suggest for chicken — the fat renders slowly, the moisture evaporates slowly, and the result is skin that is pale, soft, and slightly greasy rather than deep golden and crisp. 220°C accelerates both processes simultaneously. Allow the oven to fully preheat before the chicken goes in — an under-temperature oven produces the same pale, soft result as a too-low oven setting. - Dry the Skin Completely
Remove the chicken thighs from their packaging and place them on a clean cutting board or tray. Take several layers of paper towels and press firmly over every surface of each piece — the skin, the underside, and all exposed meat surfaces. This is not a quick swipe. Apply firm, deliberate pressure and replace the paper towels as they become saturated. The objective is to remove as much surface moisture as possible from the skin specifically. The physical reason this step is non-negotiable: water evaporates at 100°C and this evaporation absorbs enormous amounts of thermal energy. As long as surface moisture is present, the skin’s surface temperature cannot exceed 100°C regardless of oven temperature — and browning requires temperatures of 140–165°C. Wet skin spends the first portion of its oven time simply evaporating water rather than browning, and if moisture is substantial, the entire 40-minute cook time is consumed by evaporation, producing skin that is pale and soft rather than golden and crisp. Dry skin begins browning from the moment it enters the oven. - Build the Seasoning Layer
In a small bowl, combine the fine sea salt, freshly ground black pepper, garlic powder, smoked paprika, dried thyme, and onion powder. Stir briefly to distribute all six components evenly — a non-uniform blend means some pieces receive more paprika, others more garlic, producing inconsistent flavor across the batch. Apply the seasoning blend to every surface of each chicken piece: the skin side, the underside, and all exposed meat edges. Lift the skin slightly on each piece and rub a small amount of seasoning directly onto the meat beneath — this direct contact with the meat ensures the salt penetrates the flesh during roasting rather than remaining entirely on the exterior. Press the seasoning firmly into the surfaces rather than simply dusting it on — pressing creates contact and adhesion that prevents the blend from falling off into the pan during the first minutes of roasting. - Apply Oil for Heat Transfer and Browning
Drizzle the olive oil over all the chicken pieces and rub it evenly across every skin surface with your hands. The oil performs two specific functions here. First, it improves thermal conduction between the oven’s hot air and the chicken’s surface — oil is a better heat conductor than air and creates more uniform contact between the skin and the heat source. Second, it provides a fat medium for the fat-soluble aromatic compounds in the smoked paprika, garlic powder, and dried thyme to dissolve into and distribute evenly across the skin surface, ensuring the seasoning contributes flavor across the entire skin rather than in spots where the dry powder made direct contact. Do not use excessive oil — a thin, even coat is correct. Too much oil creates a barrier that slows the evaporation of surface moisture and can make the skin greasy rather than crisp. - Arrange for Airflow
Place all the chicken thighs skin-side up on the prepared baking sheet with at least 3–4cm of space between each piece. The spacing is not for visual arrangement — it is a functional requirement for proper crisping. When chicken pieces are crowded together on a tray, the moisture evaporating from each piece’s surface accumulates as humid air between the pieces rather than dispersing into the oven’s larger atmosphere. This trapped humidity lowers the effective surface temperature of the adjacent pieces and re-deposits moisture onto surfaces that should be drying out. The result is the same as using too low an oven temperature: pale, soft, greasy skin on pieces that shared their space with others while the pieces at the edges of the tray crisped properly. If 8 pieces do not fit on a single tray with adequate spacing, use two trays on separate oven racks rather than crowding. Skin-side up is non-negotiable — the skin must face the oven’s heat source directly throughout the entire cooking time. - Roast Without Flipping
Place the tray in the centre of the fully preheated oven and roast for 35–40 minutes without opening the oven or flipping the chicken at any point. The roasting process involves two simultaneous mechanisms that both require uninterrupted time to complete. On the underside, the fat stored in the subcutaneous fat layer beneath the skin liquefies and begins to migrate upward through the skin as a liquid. On the upper side, the oven’s dry, hot air is evaporating the surface moisture and raising the skin’s surface temperature toward and above the browning threshold. When these two processes converge — melted fat rising through a surface that has been sufficiently dried by the oven heat — the fat effectively fries the skin from the inside while the oven’s radiant heat browns it from the outside. This dual mechanism is what produces proper crackling skin that would be impossible in a pan alone or in a low-temperature oven. Flipping the chicken interrupts the fat migration, resets the moisture evaporation, and produces uneven results. Do not flip. - Monitor Internal Temperature
At the 35-minute mark, use an instant-read thermometer to check the internal temperature at the thickest part of the largest piece, inserting the probe away from the bone — bone conducts heat and produces a false-high reading. The minimum safe internal temperature for chicken is 74°C (165°F), but chicken thighs specifically are a forgiving cut that improves with additional cooking beyond this threshold. The fat and connective tissue in dark thigh meat continue to render and soften between 74°C and 85°C, producing progressively more tender, more flavorful results without the moisture loss that would occur at these temperatures in lean white meat. Pull the thighs when the temperature reads 80–85°C for optimal texture — the skin will be deeply golden and fully rendered, and the meat will be at its most tender. A reading of 74°C is safe but the result will be slightly less developed than the recipe’s potential. - Rest and Serve
Remove the baking sheet from the oven and allow the chicken thighs to rest on the tray for 5 minutes before serving. The rest allows the juices driven toward the centre of each piece by the high oven heat to redistribute back through the meat’s fibre structure. Cut into a thigh immediately after removing from the oven and the juices pool immediately onto the cutting board — the meat is dry from that point. Allow 5 minutes and the same cut reveals moist, even flesh throughout. Serve with the pan drippings spooned over if desired — the rendered fat and juices collected on the foil-lined tray are deeply flavoured and excellent as a natural finishing sauce over the rested chicken.
*Notes :
- The physics of chicken skin crisping are straightforward once understood, and understanding them makes every related technique decision obvious. Skin is primarily composed of fat, collagen, and water. During roasting, three processes occur simultaneously: water evaporates from the surface, fat liquefies and migrates, and collagen denatures into gelatin. When water has evaporated sufficiently and fat is rendering freely, the skin surface temperature rises above 100°C and browning begins. The crackling texture develops as the denatured collagen structure dries out and becomes rigid while simultaneously being bathed in rendered fat — it is simultaneously fried and baked.
- The seasoning blend in this recipe is built around smoked paprika for a specific reason. Smoked paprika contains fat-soluble color pigments that dissolve into the olive oil and distribute evenly across the skin surface, producing the deep, even mahogany color characteristic of properly roasted chicken thighs. It also contributes a subtle smokiness that bridges the seasoning to the char-like flavour of the rendered, browned skin. Garlic powder is preferred over fresh garlic for this application because fresh garlic pieces on a skin surface at 220°C for 40 minutes will burn before the chicken is cooked — dried powder distributes invisibly and does not burn.
- For the absolute best results — the kind of crispiness that sounds audible when cut — season the chicken thighs the night before and refrigerate uncovered on a wire rack set over a plate. The overnight refrigeration in the cold, dry air of the refrigerator further dehydrates the skin’s surface, creating a pellicle that crisps almost immediately upon entering the hot oven. This technique, borrowed from duck confit and dry-aged meat preparation, produces skin that is noticeably crisper than even properly dried fresh chicken.
Why This Recipe Works
This recipe works because it correctly identifies the three physical requirements for crispy chicken skin — surface dryness, adequate rendering temperature, and free moisture escape — and addresses each deliberately. Thorough drying removes the evaporative barrier. High heat drives fat rendering and browning simultaneously.
Proper spacing ensures the escaped moisture leaves the oven environment rather than recondensing on the chicken surface. The six-spice blend provides complete, balanced flavor without any single note dominating. And the minimal intervention — no flipping, no basting, no covering — allows the natural physical processes to complete without interruption.
Ingredient Breakdown
Bone-in, Skin-on Chicken Thighs
The specific cut that makes this recipe possible — the bone regulates heat distribution during cooking, the fat layer beneath the skin renders to crisp it, and the dark meat stays moist at temperatures that would dry out breast meat.
Olive Oil
Thin heat-conducting layer that improves browning uniformity and dissolves fat-soluble spice compounds across the skin surface.
Fine Sea Salt
Primary seasoning and moisture-drawing agent — applied generously under and over the skin to season the meat throughout.
Smoked Paprika
The visual and aromatic signature of the spice blend — distributes color evenly across the skin and adds subtle smokiness that complements the rendered fat’s character.
Garlic Powder
Provides pervasive, evenly distributed garlic flavor without the burning risk of fresh garlic at high roasting temperatures.
Dried Thyme
Earthy, slightly floral herbal background note that grounds the spice blend and adds aromatic complexity.
Onion Powder
Subtle sweet savory depth that rounds the overall seasoning without any detectable onion presence in the finished dish.
Flavor Structure Explained
This dish follows a layered balance model:
- Crispy savory exterior (chicken skin)
- Juicy interior (chicken meat)
- Rendered fat richness (chicken fat)
- Concentrated spice layer (spice blend)
- Clean aromatic depth (under-skin seasoning)
The skin defines the first register — deeply savory, crisp, and slightly bitter at the edges from caramelisation, carrying the full intensity of the spice blend. The interior provides contrast, delivering juicy, clean chicken flavor with more restrained seasoning. Rendered fat adds richness and amplifies both layers, enhancing mouthfeel and flavor intensity. The spice blend concentrates on the exterior, while under-skin seasoning ensures the meat remains flavorful without overpowering. The experience comes from both registers together — crisp, intense skin giving way to moist, balanced meat in each bite.
Common Mistakes to Avoid
- Not Drying the Skin – The most common and most consequential error. Even lightly wet skin produces pale, soft results regardless of oven temperature. Dry thoroughly with paper towels, pressing firmly.
- Using Too Low an Oven Temperature – 180°C or lower cannot drive fat rendering and surface browning fast enough. 220°C is the minimum for properly crispy skin.
- Crowding the Tray – Trapped steam between pieces prevents crisping on the pieces sharing space. Always leave 3–4cm between each thigh.
- Flipping Mid-Cook – Flipping interrupts both the fat migration and the surface drying processes. Skin-side up for the entire cook, without exception.
- Pulling at 74°C Exactly – Safe but not optimal for thighs. 80–85°C produces measurably more tender, more flavourful dark meat with fully rendered skin.
- Not Resting – Five minutes of rest is the difference between moist meat and juice on the cutting board.
Variations
Lemon-Herb Oven-Baked Chicken Thighs
Add 5g of lemon zest and 3g of dried oregano to the spice blend, and squeeze fresh lemon juice over the rested chicken immediately before serving for a bright, Mediterranean-inspired variation.
Spicy Version
Add 3g of cayenne pepper and 3g of ground cumin to the seasoning blend for a heat-forward, Tex-Mex-inflected character that pairs well with cooling sauces.
Honey Glaze Oven-Baked Chicken Thighs
In the final 5 minutes of cooking, brush 30g of honey mixed with 10g of Dijon mustard over the skin surface and return to the oven. The sugars caramelise rapidly at 220°C, creating a lacquered, sweet-savory finish.
Sauce Variation
Serve with Classic Chimichurri Sauce spooned alongside — the herb oil’s acidity cuts through the rendered fat perfectly. Alternatively, Creamy Roasted Garlic Sauce makes a rich, mellow accompaniment that complements the smoked paprika’s depth.
Storage & Make-Ahead
Cooked chicken thighs can be refrigerated in an airtight container for up to 4 days. The skin will lose its crispness in the refrigerator because moisture from the meat softens it, and this is unavoidable.
The best way to restore crispy skin on leftover chicken thighs is to reheat them in a hot oven or air fryer. Place them on a wire rack and heat at 210°C for 10 to 12 minutes. This allows the skin to render again and become crisp, almost like it was originally. Microwaving will warm the chicken, but the skin will stay soft and the result is clearly worse.
For the best results, season the thighs the night before and refrigerate them uncovered on a wire rack overnight. The cold air in the refrigerator helps dry out the skin further, which leads to exceptional crispness the next day. Remove the chicken from the refrigerator 15 minutes before roasting.
Cooked chicken thighs can also be frozen for up to 3 months. Thaw them overnight in the refrigerator, then reheat them in a hot oven as described above. Avoid using a microwave, since it steams the skin instead of making it crisp.
Frequently Asked Questions
Can I use boneless, skinless thighs?
Yes, but the recipe changes significantly — without the skin there is nothing to crisp, and without the bone the cooking time reduces to approximately 25 minutes. Season and oil the same way, reduce the temperature slightly to 200°C, and pull at 74°C. The result is a well-seasoned, juicy thigh but a fundamentally different dish.
Why do my thighs stick to the foil?
Insufficient oil on the skin, or the foil is not smooth and flat. Ensure the foil is pressed flat against the tray with no gaps, and that the chicken surface is thoroughly coated in oil before placing.
Can I add vegetables to the tray?
Yes — cut root vegetables (potato, carrot, parsnip) into 2–3cm pieces, toss with olive oil and seasoning, and spread on the tray before placing the chicken on top. The rendered chicken fat will baste the vegetables during roasting, producing exceptional flavor. Ensure the vegetables are spread in a single layer and not touching the chicken pieces.
What should I serve with this?
Crispy Parmesan Smashed Potatoes are the natural pairing — both cooked at high heat, both built around crispy texture. Cilantro Lime Jasmine Rice works for a lighter, fresher bowl-style meal. For a sauce, Creamy Green Goddess Dressing alongside provides cooling herby contrast to the smoked paprika crust.
Why is my skin still not crispy after 40 minutes?
Three most likely causes: the skin was not dried thoroughly before seasoning, the oven was not fully preheated to 220°C before the chicken went in, or the pieces were too crowded on the tray. Address all three and the result will be consistently crispy every time.
Nutrition Facts
( per serving )
Calories
~384 kcal
Protein
45 g
Fat
23 g
Carbs
0 g
Calories
~384 kcal
Protein
45 g
Fat
23 g
Carbs
0 g
Related Recipes
Related Recipes

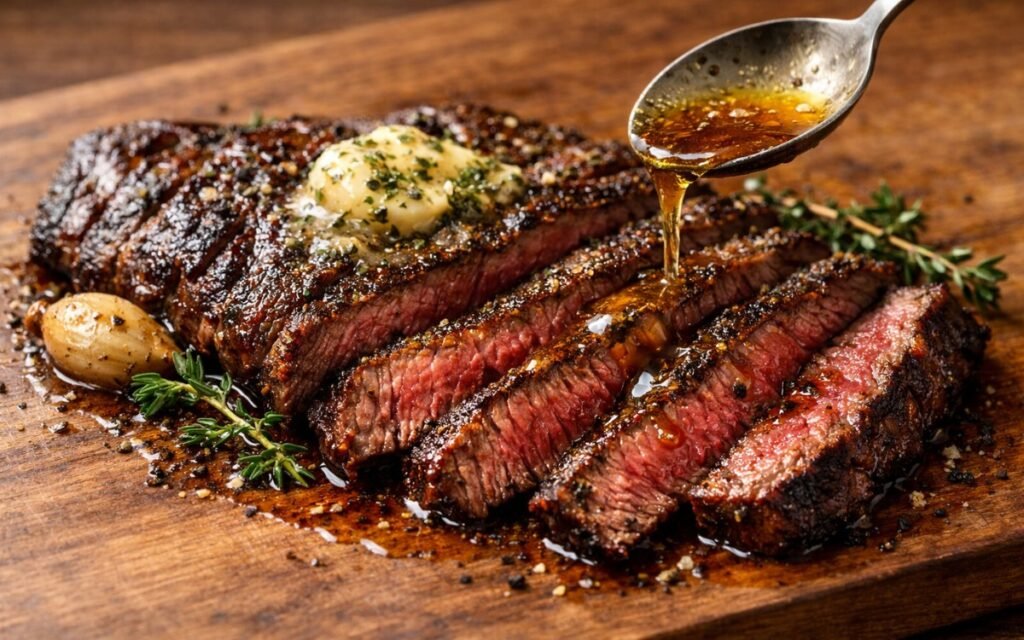
Pan-Seared Skirt Steak
Quick-seared skirt steak with garlic herb butter, sliced against the grain for maximum tenderness.
Classic Pork Chops
Bone-in pork chops seared golden with garlic butter—simple, juicy, and restaurant-worthy perfection.
Chicken Parmigiana
Crispy fried cutlets topped with homemade marinara, fresh mozzarella, and Parmesan, baked until bubbling and golden — the complete American-Italian classic from scratch in 55 minutes.


You might also like
You might also like
Bang Bang Chicken Rice Bowl
Crispy fried chicken in sweet-spicy bang bang sauce over jasmine rice with cucumber and scallions.
Fresh Lemon Chicken Orzo
Seared chicken thighs simmered in lemony stock with feta, spinach, and dill — one pan, 40 minutes.
Crispy Parmesan Smashed Potatoes
Ultra-crispy smashed potatoes roasted with Parmesan cheese – crunchy outside, fluffy inside perfection.


Cripsy Oven-Baked Chicken Thighs
Ingredients
Method
- Preheat the oven to 220°C (425°F) and line a large rimmed baking sheet with aluminium foil. The high temperature is not aggressive — it is required. The goal of this recipe is a crispy, rendered, crackling skin, and that outcome is physically dependent on achieving sufficient surface temperature to drive off moisture and initiate Maillard browning before the fat beneath the skin can fully escape. At lower temperatures — 180°C or 190°C, which many recipes suggest for chicken — the fat renders slowly, the moisture evaporates slowly, and the result is skin that is pale, soft, and slightly greasy rather than deep golden and crisp. 220°C accelerates both processes simultaneously. Allow the oven to fully preheat before the chicken goes in — an under-temperature oven produces the same pale, soft result as a too-low oven setting.
- Remove the chicken thighs from their packaging and place them on a clean cutting board or tray. Take several layers of paper towels and press firmly over every surface of each piece — the skin, the underside, and all exposed meat surfaces. This is not a quick swipe. Apply firm, deliberate pressure and replace the paper towels as they become saturated. The objective is to remove as much surface moisture as possible from the skin specifically. The physical reason this step is non-negotiable: water evaporates at 100°C and this evaporation absorbs enormous amounts of thermal energy. As long as surface moisture is present, the skin’s surface temperature cannot exceed 100°C regardless of oven temperature — and browning requires temperatures of 140–165°C. Wet skin spends the first portion of its oven time simply evaporating water rather than browning, and if moisture is substantial, the entire 40-minute cook time is consumed by evaporation, producing skin that is pale and soft rather than golden and crisp. Dry skin begins browning from the moment it enters the oven.
- In a small bowl, combine the fine sea salt, freshly ground black pepper, garlic powder, smoked paprika, dried thyme, and onion powder. Stir briefly to distribute all six components evenly — a non-uniform blend means some pieces receive more paprika, others more garlic, producing inconsistent flavor across the batch. Apply the seasoning blend to every surface of each chicken piece: the skin side, the underside, and all exposed meat edges. Lift the skin slightly on each piece and rub a small amount of seasoning directly onto the meat beneath — this direct contact with the meat ensures the salt penetrates the flesh during roasting rather than remaining entirely on the exterior. Press the seasoning firmly into the surfaces rather than simply dusting it on — pressing creates contact and adhesion that prevents the blend from falling off into the pan during the first minutes of roasting.
- Drizzle the olive oil over all the chicken pieces and rub it evenly across every skin surface with your hands. The oil performs two specific functions here. First, it improves thermal conduction between the oven’s hot air and the chicken’s surface — oil is a better heat conductor than air and creates more uniform contact between the skin and the heat source. Second, it provides a fat medium for the fat-soluble aromatic compounds in the smoked paprika, garlic powder, and dried thyme to dissolve into and distribute evenly across the skin surface, ensuring the seasoning contributes flavor across the entire skin rather than in spots where the dry powder made direct contact. Do not use excessive oil — a thin, even coat is correct. Too much oil creates a barrier that slows the evaporation of surface moisture and can make the skin greasy rather than crisp.
- Place all the chicken thighs skin-side up on the prepared baking sheet with at least 3–4cm of space between each piece. The spacing is not for visual arrangement — it is a functional requirement for proper crisping. When chicken pieces are crowded together on a tray, the moisture evaporating from each piece’s surface accumulates as humid air between the pieces rather than dispersing into the oven’s larger atmosphere. This trapped humidity lowers the effective surface temperature of the adjacent pieces and re-deposits moisture onto surfaces that should be drying out. The result is the same as using too low an oven temperature: pale, soft, greasy skin on pieces that shared their space with others while the pieces at the edges of the tray crisped properly. If 8 pieces do not fit on a single tray with adequate spacing, use two trays on separate oven racks rather than crowding. Skin-side up is non-negotiable — the skin must face the oven’s heat source directly throughout the entire cooking time.
- Place the tray in the centre of the fully preheated oven and roast for 35–40 minutes without opening the oven or flipping the chicken at any point. The roasting process involves two simultaneous mechanisms that both require uninterrupted time to complete. On the underside, the fat stored in the subcutaneous fat layer beneath the skin liquefies and begins to migrate upward through the skin as a liquid. On the upper side, the oven’s dry, hot air is evaporating the surface moisture and raising the skin’s surface temperature toward and above the browning threshold. When these two processes converge — melted fat rising through a surface that has been sufficiently dried by the oven heat — the fat effectively fries the skin from the inside while the oven’s radiant heat browns it from the outside. This dual mechanism is what produces proper crackling skin that would be impossible in a pan alone or in a low-temperature oven. Flipping the chicken interrupts the fat migration, resets the moisture evaporation, and produces uneven results. Do not flip.
- At the 35-minute mark, use an instant-read thermometer to check the internal temperature at the thickest part of the largest piece, inserting the probe away from the bone — bone conducts heat and produces a false-high reading. The minimum safe internal temperature for chicken is 74°C (165°F), but chicken thighs specifically are a forgiving cut that improves with additional cooking beyond this threshold. The fat and connective tissue in dark thigh meat continue to render and soften between 74°C and 85°C, producing progressively more tender, more flavorful results without the moisture loss that would occur at these temperatures in lean white meat. Pull the thighs when the temperature reads 80–85°C for optimal texture — the skin will be deeply golden and fully rendered, and the meat will be at its most tender. A reading of 74°C is safe but the result will be slightly less developed than the recipe’s potential.
- Remove the baking sheet from the oven and allow the chicken thighs to rest on the tray for 5 minutes before serving. The rest allows the juices driven toward the centre of each piece by the high oven heat to redistribute back through the meat’s fibre structure. Cut into a thigh immediately after removing from the oven and the juices pool immediately onto the cutting board — the meat is dry from that point. Allow 5 minutes and the same cut reveals moist, even flesh throughout. Serve with the pan drippings spooned over if desired — the rendered fat and juices collected on the foil-lined tray are deeply flavoured and excellent as a natural finishing sauce over the rested chicken.