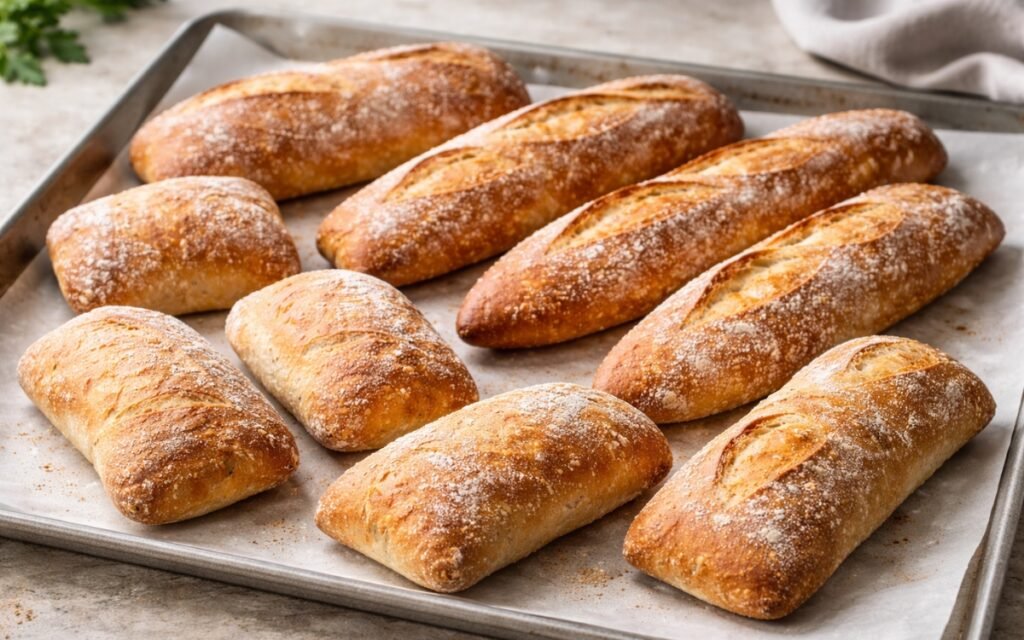
Ciabatta Rolls & Semi-Baguettes
Ciabatta is one of the great Italian breads — wildly open crumb, crackling thin crust, and a flavour that comes from a long, slow ferment with minimal yeast and a biga pre-ferment that does most of the work overnight. This recipe makes either 8 sandwich rolls or 4 larger semi-baguette lengths, and the choice dictates almost everything about how you use them. The rolls work for everyday lunches, packed sandwiches, and any occasion that calls for individual portions. The semi-baguettes are built for French dip, steak sandwiches, bruschetta, and crostini. Same dough, same method, different shape — and the shape changes everything.
Prep Time : 30 min
Cook Time : 22 min
Servings : 8 rolls
30 min
22 min
8 rolls
Ingredients
For the Biga (make 8–24 hours ahead)
• 120g high-quality bread flour
• 72g water, room temperature
• 0.2g active dry yeast, a very small pinch
For the Final Dough
• 280g high-quality bread flour — this one on Amazon
• 248g water, room temperature
• 8g fine sea salt
• 1.0g active dry yeast, about ⅓ tsp
• All of the biga from above
For Baking
• Several cups of ice cubes, for steam
• Flour, for dusting the shaped dough
• Light oil or cooking spray, for the bowl and hands
This post may contain affiliate links. As an Amazon Associate I earn from qualifying purchases, at no additional cost to you.
Directions
- Make the Biga (8–24 Hours Ahead)
In a medium bowl, combine the 120g bread flour, 72g room-temperature water, and the tiny pinch of yeast — 0.2g is an amount that barely dusts the surface of a measuring spoon, almost invisible in quantity. Stir vigorously until fully combined into a stiff, somewhat dry-feeling dough — at 60% hydration, the biga is considerably stiffer than the final dough will be, and it will feel like it needs more water. It does not. The low hydration of the biga is deliberate: a stiff biga ferments more slowly than a wet poolish, producing a longer window of gradual flavour development with a more pronounced nutty, slightly funky character. Cover the bowl tightly with plastic wrap and leave at room temperature for 8–24 hours. The biga is ready when its surface shows visible bubbles, it has expanded moderately, and it smells distinctly yeasty with a pleasant, slightly fermented, nutty depth. The longer the fermentation within the 24-hour window, the more pronounced and complex the flavour becomes. A biga left for the full 24 hours will produce a ciabatta with noticeably more depth than one used at 8 hours — both are excellent, the longer one is more interesting. - Mix the Final Dough
In a large bowl or the bowl of a stand mixer, combine the remaining 280g bread flour, 248g water, 8g salt, and 1.0g yeast. Break the biga into rough chunks and add it to the bowl — the biga’s stiff texture makes it resistant to incorporating into the wetter final dough, and breaking it into pieces rather than adding it whole makes the mixing process more efficient. Mix together by hand or on the stand mixer’s lowest speed until all ingredients are roughly combined into a shaggy, cohesive mass. The dough at this stage will be very wet and sticky — at 80% overall hydration, ciabatta dough is considerably wetter than most home bakers are accustomed to handling. This high hydration is the source of ciabatta’s characteristic enormous, irregular air bubbles and its thin, crackling crust, and it must not be reduced by adding flour. Continue mixing on medium-low in the stand mixer for 8–10 minutes, or knead by hand using the slap-and-fold technique — lift the dough from the counter, stretch it away from you, fold it back over itself, rotate 90 degrees, and repeat. The wet dough will be sticky throughout this process. A bench scraper is essential for managing it on the counter. Continue until the dough is smooth, elastic, and shows visible gluten development — it should stretch several inches without tearing rather than breaking immediately when pulled. - Bulk Fermentation with Stretch and Fold
Transfer the kneaded dough to a lightly oiled large bowl using a well-oiled dough scraper — the dough will cling to everything, and a well-oiled scraper is the only way to move it without losing significant dough to the sides of the bowl. Punch the dough gently in the centre once with your fist, then fold: wet your hand lightly, reach under one side of the dough, stretch it upward as far as it will go without tearing, and fold it over the centre. Rotate the bowl a quarter turn and repeat around all four sides. Cover the bowl with a kitchen towel or plastic wrap and allow to bulk ferment at room temperature for 2 hours total, performing a stretch and fold every 30 minutes — at the 30, 60, 90, and 120-minute marks, for a total of 4 stretch-and-fold cycles. Each stretch-and-fold session takes approximately 60 seconds. These repetitions are not incidental technique — they are the primary method by which a very wet, extensible dough like ciabatta develops its gluten structure. Standard kneading compresses and shears the dough aggressively; stretch and fold extends and aligns the gluten chains gently, producing a strong network without degassing the fermentation bubbles that are forming throughout the bulk rise. After each fold the dough will feel progressively tighter, more elastic, and less sticky, visually demonstrating the gluten development building over time. - Cold Fermentation
After the final stretch and fold at the 2-hour mark, cover the bowl tightly with plastic wrap and transfer to the refrigerator for a minimum of 3 hours and up to 24 hours. This cold fermentation stage is the flavour-development step that distinguishes a genuinely excellent ciabatta from an acceptable one. In the cold environment the yeast’s activity slows dramatically while the bacterial activity that produces the organic acids, esters, and complex aroma compounds responsible for the bread’s depth continues at a slower rate. The longer the cold fermentation within the 24-hour window, the more complex and interesting the flavour. A 3-hour cold ferment produces a clean, mild ciabatta. An 18–24 hour cold ferment produces one with a pleasantly complex, slightly sour, deeply nutty character. Both are correct — choose based on the time available and the intended flavour profile. - Temper and Divide
Remove the bowl from the refrigerator and allow the dough to rest at room temperature for 15–30 minutes. Do not attempt to handle or shape cold ciabatta dough directly from the refrigerator — the cold makes it stiff and resistant, and attempting to stretch it while cold will tear the gluten network and degas the fermentation. The 15–30 minutes of tempering at room temperature brings the dough to a more pliable, cooperative temperature without allowing significant additional fermentation. Lightly oil your hands — ciabatta dough at 80% hydration is aggressively sticky and oiled hands are not optional for clean handling. Gently fold the dough out of the bowl onto a lightly floured work surface. For 8 rolls: divide the dough into 8 equal pieces, each approximately 80g. For 4 semi-baguettes: divide into 4 equal pieces, each approximately 160g. Weighing is recommended for consistent results — unequal pieces bake at different rates. - Shape
Handling each piece with minimum pressure to preserve the gas structure built up during the long fermentation, gently stretch each piece into a rectangular shape. For rolls: approximately 6cm × 9cm (2.5 × 3.5 inches) — wide enough to hold sandwich fillings and compact enough to fit comfortably in one hand. For semi-baguettes: approximately 6cm × 18–20cm (2.5 × 7–8 inches) — the longer format suited for slicing vertically into crostini, slicing horizontally for French dip and steak sandwiches, or serving alongside soups and stews. The shaping should be minimal — no aggressive pressing, forming, or rolling. Ciabatta’s character depends on the irregular, open internal structure built during fermentation, and any aggressive handling at the shaping stage compresses the gas bubbles and produces a denser, less open crumb. The goal is to guide the dough into approximately the right shape with the lightest possible touch, not to produce perfectly uniform, tightly-shaped pieces. - Final Proof
Transfer the shaped pieces to baking sheets lined with parchment paper, spacing them with at least 5cm between each piece. Dust the tops lightly with flour — this prevents the covering from adhering and adds the characteristic lightly dusted appearance of authentic Italian ciabatta. Cover loosely with plastic wrap or a clean cloth and allow to proof at room temperature for 1 hour. The pieces should look visibly puffier than when shaped, with the surface showing small irregular bubbles and feeling light and airy when gently pressed. Toward the end of the proofing time, preheat the oven to 230°C (450°F). Place a baking sheet in the oven to preheat if using a hot sheet pan method, or position a baking stone on the middle rack and begin preheating it during the full proofing period for best results. Prepare the ice cubes — have several cups ready in a bowl beside the oven for the steam generation step. - Steam Bake
Working quickly to minimise heat loss, remove the preheated baking sheet from the oven and carefully slide the parchment paper with the proofed ciabatta pieces onto it. Immediately and optionally lightly spray or flick the surface of each piece with water — this additional moisture contributes to the steam environment and helps develop an even crispier crust. Return the sheet to the oven and immediately scatter the ice cubes into a large, shallow metal roasting pan, cast iron skillet, or rimmed baking sheet placed on the oven’s lowest rack. Do not use a glass dish — the thermal shock of ice on hot glass will shatter it. Close the oven door quickly to trap the steam generated by the rapidly melting ice. The ice cube method produces a sustained, dense steam environment more effectively than boiling water for this application: the ice melts progressively over 8–10 minutes, generating steam continuously throughout the critical first portion of baking when the crust needs to remain flexible for oven spring. Bake for 20–22 minutes for a golden result or 25 minutes for the deeper, darker colour that produces a more crackling, flavourful crust. The rolls and semi-baguettes are done when they are deep golden brown and sound hollow when tapped on the base, or when an instant-read thermometer inserted into the thickest part reads 96–99°C (205–210°F). - Cool on a Wire Rack
Transfer immediately to a wire rack and allow to cool for a minimum of 20 minutes before cutting. The internal temperature continues to rise slightly after the bread leaves the oven, and the moisture distribution equalises between crumb and crust during the cooling period. Cutting hot ciabatta produces a gummy, steam-compressed interior texture rather than the open, airy crumb that all the technique was designed to produce.
*Notes :
- Ciabatta — literally “slipper bread” in Italian — was developed in the Veneto region by baker Arnaldo Cavallari in 1982 as an Italian response to the popularity of French baguettes for sandwich use. Its extremely high hydration (typically 75–80%) produces the irregularly large air holes, thin crust, and chewy, slightly open crumb that make it distinctly different from any other Italian bread. Its relative youth as a bread tradition makes it unusual among classic Italian breads, but its immediate commercial and cultural success established it rapidly as a standard across Italian and international baking.
- The biga pre-ferment is the Italian equivalent of the French poolish in function — a portion of the recipe’s flour and water fermented with a tiny amount of yeast before the final dough is mixed — but differs in character. The biga’s lower hydration (60% compared to the poolish’s 100%) produces a slower, more bacterial-activity-forward fermentation that generates more acetic acid relative to lactic acid, giving the finished bread a nuttier, slightly more complex flavour with a more pronounced fermented character than a poolish-based bread.
- The stretch-and-fold technique used during bulk fermentation is the standard method for developing gluten in high-hydration doughs that are too wet to knead effectively by conventional means. At 80% hydration, ciabatta dough would absorb into itself and stick to every surface during standard kneading. Stretch and fold works because it uses the dough’s own weight and extensibility to align and tension the gluten chains without requiring the contact with a floured surface that would be necessary for conventional kneading.
Why This Recipe Works
This recipe works because it applies the three pre-ferment and long-fermentation principles that define Italian artisan bread: the biga for complex flavour foundation, the room-temperature bulk fermentation with stretch and fold for gluten development without degassing, and the cold retard for flavour deepening.
The ice-cube steam method maintains the steam environment sustainably throughout the critical first stage of baking. The minimal shaping technique preserves the gas structure built during fermentation. Each decision compounds on the previous one to produce a ciabatta with the open crumb, thin crust, and complex flavour that make it worth the planning required.
Ingredient Breakdown
Bread Flour (Both Stages)
Higher protein content produces the strong, extensible gluten network necessary for an 80% hydration dough to hold its structure and produce the open crumb. All-purpose flour at this hydration produces a slack, unworkable dough without sufficient gluten.
Biga (8–24 Hour Ferment at 60% Hydration)
The stiff pre-ferment that develops the nutty, complex flavour foundation of authentic ciabatta over slow, bacterial-dominant fermentation
80% Overall Hydration
The high moisture content that produces the enormous, irregular air pockets and thin, crackling crust of genuine ciabatta — cannot be reduced without changing the bread’s fundamental character.
Stretch and Fold (4 Times at 30-minute Intervals)
The gluten development method for high-hydration doughs — develops structure without degassing the fermentation bubbles.
Cold Fermentation (3–24 Hours)
Flavour deepening through slow, continued fermentation at low temperature — the longer the cold ferment within the window, the more complex the result.
Ice Cube Steam
Sustained steam generation throughout the first 8–10 minutes of baking — keeps the crust flexible for oven spring before drying to the characteristic crackling ciabatta crust.
Flavor Structure Explained
This ciabatta rolls follow a layered balance model:
- Wheaty base (flour)
- CFermented depth (biga, cold retard)
- Subtle tang (organic acids)
- Caramelized crust (baked exterior)
- Neutral open crumb (structure)
Flour defines the foundation with clean, wheaty nuttiness that leads the profile. Fermentation — through biga and cold retard — builds complexity, adding subtle tang and depth without heaviness. The crust provides contrast with a lightly caramelised, crackling layer that enhances flavor and texture. The open crumb remains mild and neutral, allowing the bread to function as both a standalone and a carrier. The balance stays restrained, with fermentation quietly amplifying rather than dominating the natural grain character.
Common Mistakes to Avoid
- Adding Flour to Manage the Stickiness – The 80% hydration is the source of ciabatta’s open crumb. Adding flour to make the dough easier to handle produces a denser, less characteristic bread. Oil your hands and use a bench scraper instead.
- Skipping the Stretch and Fold Cycles – Without the 4 stretch-and-fold sessions during bulk fermentation, the wet dough has insufficient gluten development to hold its structure during shaping and baking. Each cycle is essential.
- Shaping Aggressively – Heavy-handed shaping compresses the gas bubbles that built up during the long fermentation and produces a denser crumb. Handle with minimum pressure using lightly oiled hands.
- Handling Cold Dough Directly from the Refrigerator – Cold ciabatta dough tears and degasses when stretched. Always allow 15–30 minutes of room-temperature tempering after removing from the cold.
- Using a Glass Pan for the Ice – Glass shatters under the thermal shock of ice on hot glass. Always use metal — cast iron, roasting pan, or rimmed baking sheet.
Variations
Olive Oil and Herb Ciabatta
Add 20ml of good extra-virgin olive oil and 10g of finely chopped fresh rosemary to the final dough with the flour and water. The olive oil enriches the crumb slightly and the rosemary provides aromatic depth throughout.
Olive Ciabatta
Fold 100g of roughly chopped, pitted olives into the dough after the first stretch and fold, distributing them gently throughout without pressing. The olives provide pockets of salt, oil, and flavour within the open crumb.
Whole Grain Ciabatta
Replace 20% of the bread flour with whole wheat flour (approximately 80g of the 400g total). Reduce the water by 10ml to compensate for the higher absorption of the whole grain. The result is nuttier and slightly denser with a more complex, earthy flavour.
Storage & Make-Ahead
Ciabatta is at its best within the first 4 to 6 hours after baking, when the crust has its maximum crackle and the crumb has its ideal chewiness and open structure.
For short-term storage, keep it at room temperature in a paper bag or wrapped in cloth for up to 24 hours. Never use plastic, since it traps moisture and softens the crust almost immediately. Before serving, you can refresh the bread in a 180°C oven for about 5 minutes to bring back some of the crust.
Ciabatta also freezes well. Freeze the rolls or semi-baguettes individually on a tray until solid, then transfer them to sealed bags and store them for up to 1 month. To serve, thaw them at room temperature for 30 to 45 minutes, or place them straight from the freezer into a 180°C oven for 12 to 15 minutes, until heated through and re-crisped.
The biga can be prepared up to 24 hours in advance. After its room-temperature fermentation, it can be refrigerated to extend the make-ahead window. Let it come back to room temperature for about 30 minutes before adding it to the final dough.
The dough itself can also remain in the refrigerator for the full 24-hour maximum before shaping and final proofing without losing quality. During that time, it will simply continue to develop more flavor.
Frequently Asked Questions
What is a biga?
A biga is an Italian pre-ferment — a portion of the recipe’s flour and water combined with a very small amount of yeast and allowed to ferment for 8–24 hours before the final dough is mixed. At 60% hydration it is considerably stiffer than a French poolish (100% hydration) and produces a slightly different, nuttier, more complex fermentation character. It is the standard pre-ferment in Italian artisan bread and pizza baking.
Why is ciabatta dough so wet and sticky?
At 80% hydration — 80g of water per 100g of flour — ciabatta dough is significantly wetter than most bread doughs home bakers encounter. This high hydration is the source of the enormous, irregular air pockets that define ciabatta’s crumb. Managing it requires oiled hands, a bench scraper, and the confidence to work with a dough that will stick to everything until it is properly developed.
Can I make this without a stand mixer?
Yes — the stretch-and-fold technique during bulk fermentation does most of the gluten development work and is inherently a hand technique. The initial mixing requires some time working the biga into the wet final dough, but is achievable by hand with a bench scraper for 10–12 minutes.
What is the difference between rolls and semi-baguettes?
The shape determines the use. Rolls at 6 × 9cm are individual sandwich portions — compact, easy to handle, and the right size for packed lunches and casual sandwiches. Semi-baguettes at 6 × 18–20cm are the right format for French dip, steak sandwiches, and bruschetta where a longer format provides the structural base a roll cannot. Both come from the same dough divided and shaped differently.
How do I use the semi-baguettes?
Sliced horizontally but not quite fully — leaving a hinge along one side — they open as a single hinged piece for filling with sandwich ingredients for French dip and steak sandwiches. Sliced vertically into 1cm rounds they become crostini for toppings. Sliced diagonally at 2cm they become bruschetta bases. The same semi-baguette shape works for all three applications depending on how it is cut.
Nutrition Facts
( Per Roll — 8 roll format )
Calories
~225 kcal
Protein
7 g
Fat
1 g
Carbs
45 g
Calories
~225 kcal
Protein
7 g
Fat
1 g
Carbs
45 g
Related Recipes
Related Recipes

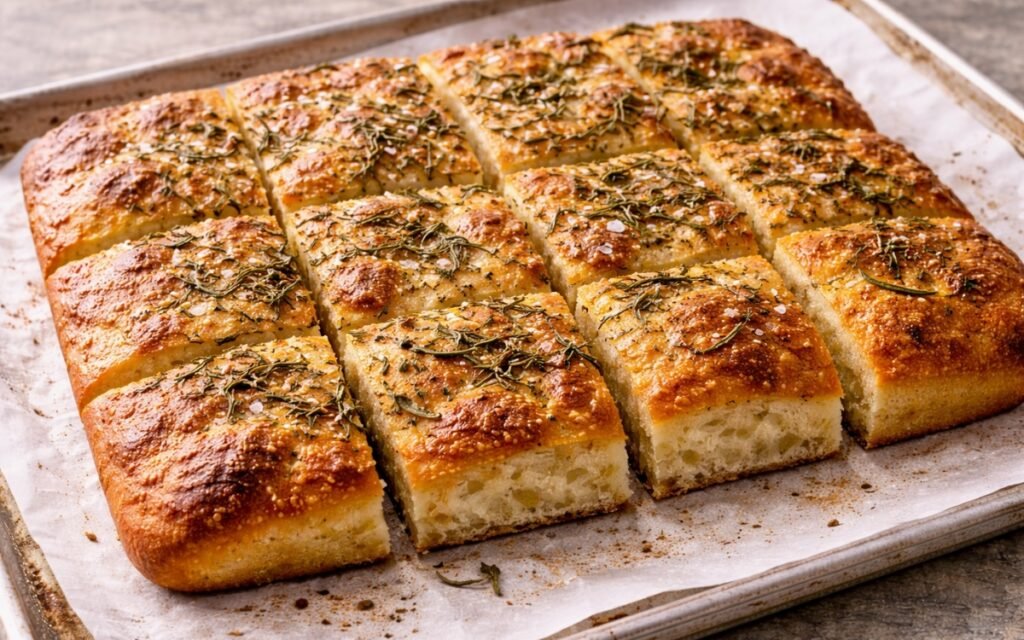
Focaccia
00 flour, semolina, and generous olive oil cold-fermented for 48–72 hours — focaccia with a crackling crust, cloud-soft interior, and the complex flavour only time can produce.
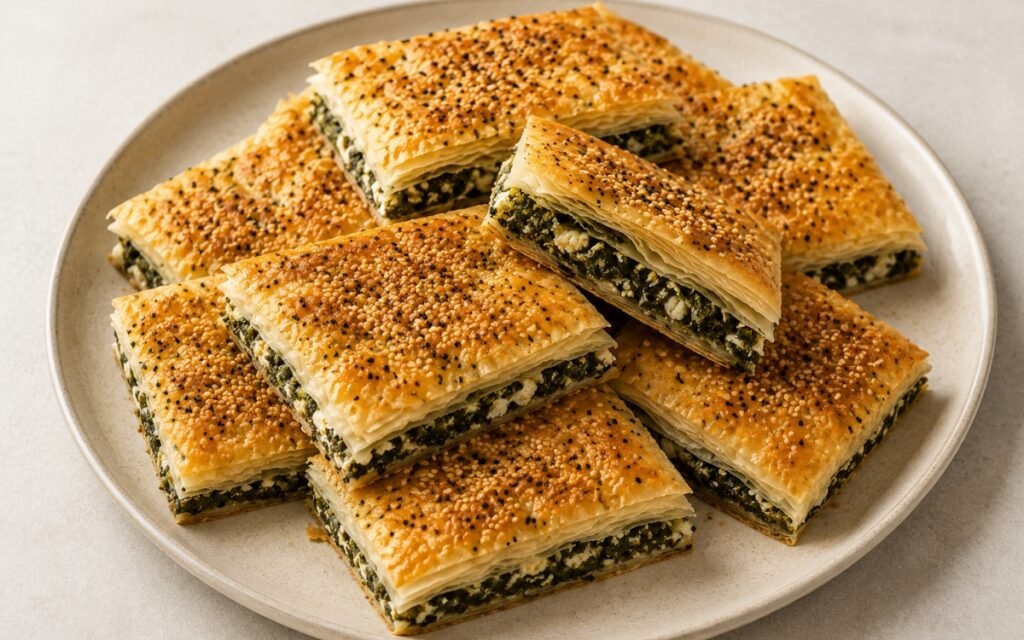
Turkish Börek — Spinach and Feta Borek
Pressed spinach and feta layered between phyllo sheets with a light milk-yogurt coating — pre-cut before baking, sesame and nigella seeds over egg wash, baked deeply golden. Crisp outside, soft custardy inside.
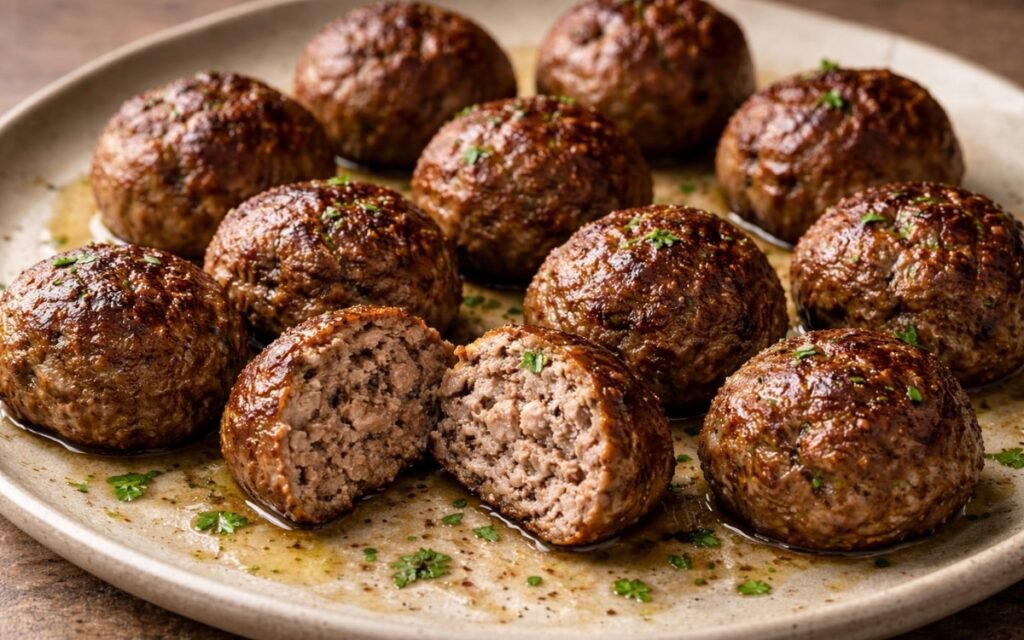
Juicy Beef Meatballs
Tender beef meatballs with golden crust, juicy center, and savory herbs—perfect for any meal.
You might also like
You might also like
Balsamic Dijon Dressing
Rich aged balsamic and sharp Dijon emulsify into a bold, timeless 5-minute dressing.
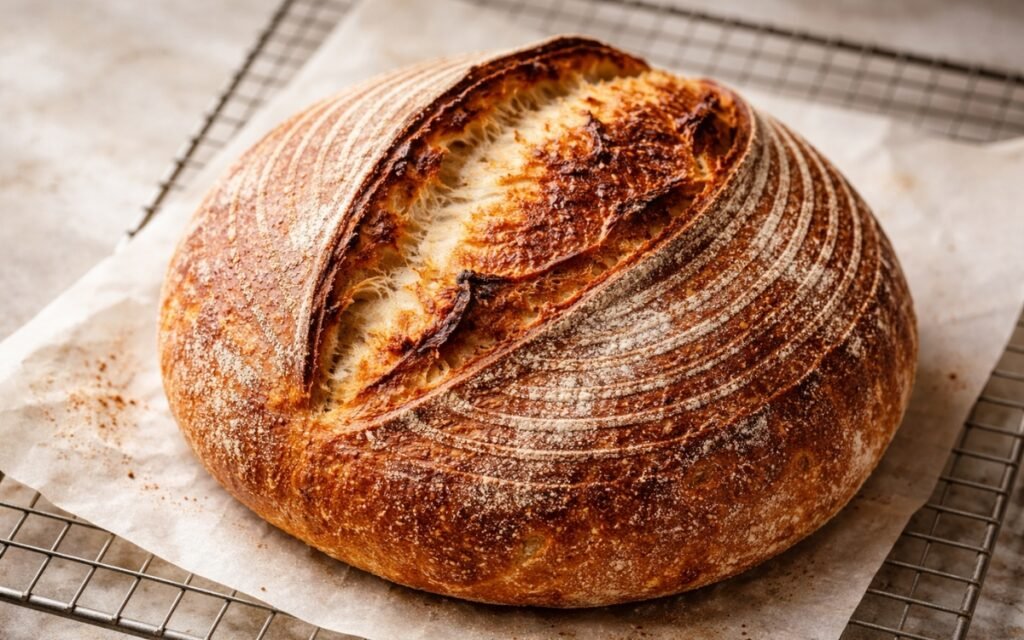
Sourdough Bread
Levain-built, cold-proofed, Dutch oven-baked sourdough with crackling crust and open crumb — the complete method with jalapeño cheddar, sun-dried tomato Parmesan, and olive rosemary variations.
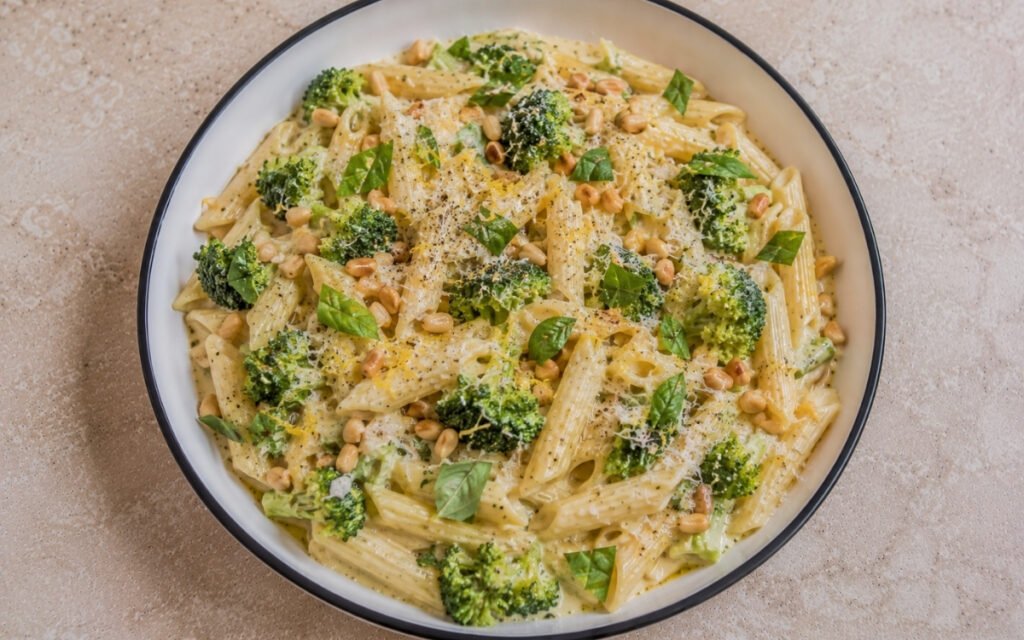
Creamy Broccoli Lemon Pasta
Pasta and broccoli cooked together, tossed in mascarpone double-lemon sauce in garlic butter — 30 minutes.

Ciabatta Rolls & Semi-Baguettes
Ingredients
Method
- In a medium bowl, combine the 120g bread flour, 72g room-temperature water, and the tiny pinch of yeast — 0.2g is an amount that barely dusts the surface of a measuring spoon, almost invisible in quantity. Stir vigorously until fully combined into a stiff, somewhat dry-feeling dough — at 60% hydration, the biga is considerably stiffer than the final dough will be, and it will feel like it needs more water. It does not. The low hydration of the biga is deliberate: a stiff biga ferments more slowly than a wet poolish, producing a longer window of gradual flavour development with a more pronounced nutty, slightly funky character. Cover the bowl tightly with plastic wrap and leave at room temperature for 8–24 hours. The biga is ready when its surface shows visible bubbles, it has expanded moderately, and it smells distinctly yeasty with a pleasant, slightly fermented, nutty depth. The longer the fermentation within the 24-hour window, the more pronounced and complex the flavour becomes. A biga left for the full 24 hours will produce a ciabatta with noticeably more depth than one used at 8 hours — both are excellent, the longer one is more interesting.
- In a large bowl or the bowl of a stand mixer, combine the remaining 280g bread flour, 248g water, 8g salt, and 1.0g yeast. Break the biga into rough chunks and add it to the bowl — the biga’s stiff texture makes it resistant to incorporating into the wetter final dough, and breaking it into pieces rather than adding it whole makes the mixing process more efficient. Mix together by hand or on the stand mixer’s lowest speed until all ingredients are roughly combined into a shaggy, cohesive mass. The dough at this stage will be very wet and sticky — at 80% overall hydration, ciabatta dough is considerably wetter than most home bakers are accustomed to handling. This high hydration is the source of ciabatta’s characteristic enormous, irregular air bubbles and its thin, crackling crust, and it must not be reduced by adding flour. Continue mixing on medium-low in the stand mixer for 8–10 minutes, or knead by hand using the slap-and-fold technique — lift the dough from the counter, stretch it away from you, fold it back over itself, rotate 90 degrees, and repeat. The wet dough will be sticky throughout this process. A bench scraper is essential for managing it on the counter. Continue until the dough is smooth, elastic, and shows visible gluten development — it should stretch several inches without tearing rather than breaking immediately when pulled.
- Transfer the kneaded dough to a lightly oiled large bowl using a well-oiled dough scraper — the dough will cling to everything, and a well-oiled scraper is the only way to move it without losing significant dough to the sides of the bowl. Punch the dough gently in the centre once with your fist, then fold: wet your hand lightly, reach under one side of the dough, stretch it upward as far as it will go without tearing, and fold it over the centre. Rotate the bowl a quarter turn and repeat around all four sides. Cover the bowl with a kitchen towel or plastic wrap and allow to bulk ferment at room temperature for 2 hours total, performing a stretch and fold every 30 minutes — at the 30, 60, 90, and 120-minute marks, for a total of 4 stretch-and-fold cycles. Each stretch-and-fold session takes approximately 60 seconds. These repetitions are not incidental technique — they are the primary method by which a very wet, extensible dough like ciabatta develops its gluten structure. Standard kneading compresses and shears the dough aggressively; stretch and fold extends and aligns the gluten chains gently, producing a strong network without degassing the fermentation bubbles that are forming throughout the bulk rise. After each fold the dough will feel progressively tighter, more elastic, and less sticky, visually demonstrating the gluten development building over time.
- After the final stretch and fold at the 2-hour mark, cover the bowl tightly with plastic wrap and transfer to the refrigerator for a minimum of 3 hours and up to 24 hours. This cold fermentation stage is the flavour-development step that distinguishes a genuinely excellent ciabatta from an acceptable one. In the cold environment the yeast’s activity slows dramatically while the bacterial activity that produces the organic acids, esters, and complex aroma compounds responsible for the bread’s depth continues at a slower rate. The longer the cold fermentation within the 24-hour window, the more complex and interesting the flavour. A 3-hour cold ferment produces a clean, mild ciabatta. An 18–24 hour cold ferment produces one with a pleasantly complex, slightly sour, deeply nutty character. Both are correct — choose based on the time available and the intended flavour profile.
- Remove the bowl from the refrigerator and allow the dough to rest at room temperature for 15–30 minutes. Do not attempt to handle or shape cold ciabatta dough directly from the refrigerator — the cold makes it stiff and resistant, and attempting to stretch it while cold will tear the gluten network and degas the fermentation. The 15–30 minutes of tempering at room temperature brings the dough to a more pliable, cooperative temperature without allowing significant additional fermentation. Lightly oil your hands — ciabatta dough at 80% hydration is aggressively sticky and oiled hands are not optional for clean handling. Gently fold the dough out of the bowl onto a lightly floured work surface. For 8 rolls: divide the dough into 8 equal pieces, each approximately 80g. For 4 semi-baguettes: divide into 4 equal pieces, each approximately 160g. Weighing is recommended for consistent results — unequal pieces bake at different rates.
- Handling each piece with minimum pressure to preserve the gas structure built up during the long fermentation, gently stretch each piece into a rectangular shape. For rolls: approximately 6cm × 9cm (2.5 × 3.5 inches) — wide enough to hold sandwich fillings and compact enough to fit comfortably in one hand. For semi-baguettes: approximately 6cm × 18–20cm (2.5 × 7–8 inches) — the longer format suited for slicing vertically into crostini, slicing horizontally for French dip and steak sandwiches, or serving alongside soups and stews. The shaping should be minimal — no aggressive pressing, forming, or rolling. Ciabatta’s character depends on the irregular, open internal structure built during fermentation, and any aggressive handling at the shaping stage compresses the gas bubbles and produces a denser, less open crumb. The goal is to guide the dough into approximately the right shape with the lightest possible touch, not to produce perfectly uniform, tightly-shaped pieces.
- Transfer the shaped pieces to baking sheets lined with parchment paper, spacing them with at least 5cm between each piece. Dust the tops lightly with flour — this prevents the covering from adhering and adds the characteristic lightly dusted appearance of authentic Italian ciabatta. Cover loosely with plastic wrap or a clean cloth and allow to proof at room temperature for 1 hour. The pieces should look visibly puffier than when shaped, with the surface showing small irregular bubbles and feeling light and airy when gently pressed. Toward the end of the proofing time, preheat the oven to 230°C (450°F). Place a baking sheet in the oven to preheat if using a hot sheet pan method, or position a baking stone on the middle rack and begin preheating it during the full proofing period for best results. Prepare the ice cubes — have several cups ready in a bowl beside the oven for the steam generation step.
- Working quickly to minimise heat loss, remove the preheated baking sheet from the oven and carefully slide the parchment paper with the proofed ciabatta pieces onto it. Immediately and optionally lightly spray or flick the surface of each piece with water — this additional moisture contributes to the steam environment and helps develop an even crispier crust. Return the sheet to the oven and immediately scatter the ice cubes into a large, shallow metal roasting pan, cast iron skillet, or rimmed baking sheet placed on the oven’s lowest rack. Do not use a glass dish — the thermal shock of ice on hot glass will shatter it. Close the oven door quickly to trap the steam generated by the rapidly melting ice. The ice cube method produces a sustained, dense steam environment more effectively than boiling water for this application: the ice melts progressively over 8–10 minutes, generating steam continuously throughout the critical first portion of baking when the crust needs to remain flexible for oven spring. Bake for 20–22 minutes for a golden result or 25 minutes for the deeper, darker colour that produces a more crackling, flavourful crust. The rolls and semi-baguettes are done when they are deep golden brown and sound hollow when tapped on the base, or when an instant-read thermometer inserted into the thickest part reads 96–99°C (205–210°F).
- Transfer immediately to a wire rack and allow to cool for a minimum of 20 minutes before cutting. The internal temperature continues to rise slightly after the bread leaves the oven, and the moisture distribution equalises between crumb and crust during the cooling period. Cutting hot ciabatta produces a gummy, steam-compressed interior texture rather than the open, airy crumb that all the technique was designed to produce.