
Jalapeño Poppers
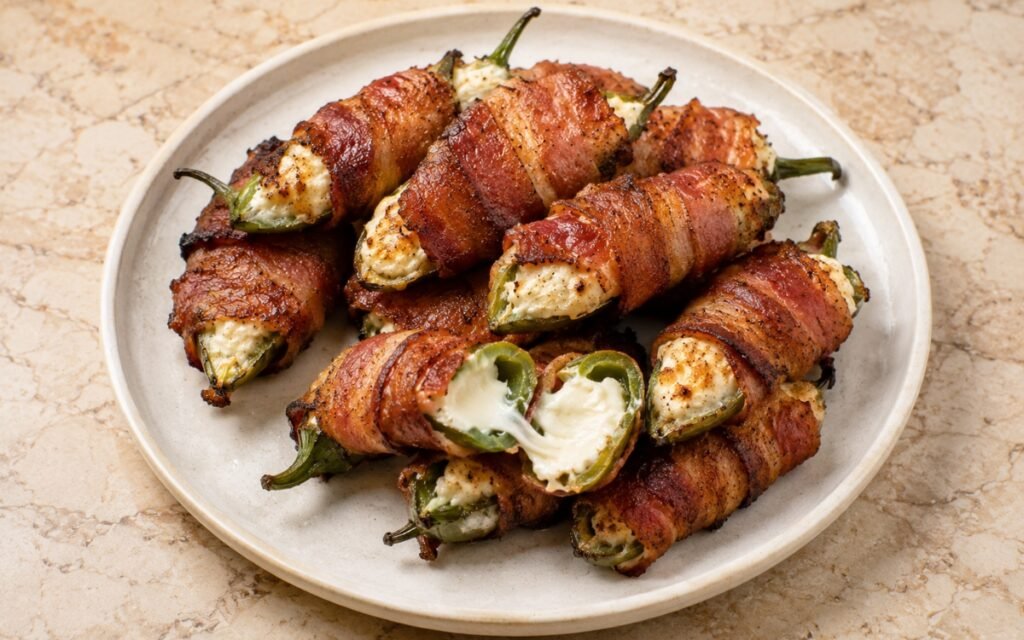
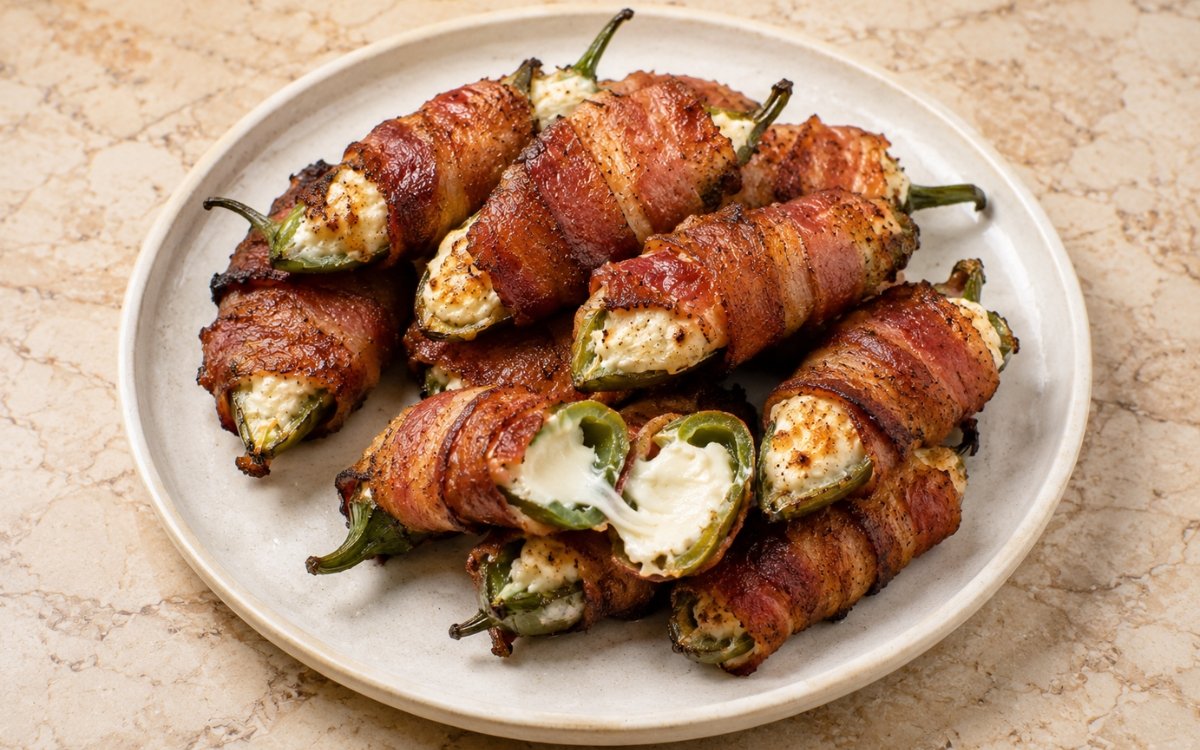
Halved jalapeños filled with a creamy sharp cheddar–cream cheese filling spiked with sriracha, garlic powder, and onion powder, then wrapped in bacon and baked until the peppers soften, the filling turns hot and creamy, and the bacon renders and crisps. Removing the seeds and white membranes thoroughly is the technique that controls this dish’s heat most directly — the membrane carries far more capsaicin than the flesh itself, so how completely it’s scraped away determines whether the finished popper reads as mild or genuinely spicy, the same membrane-management principle that governs heat level whenever a whole chile is stuffed and baked. Using a wire rack rather than a flat tray matters just as much, since it lets the bacon’s rendered fat drip away as it cooks instead of pooling underneath and steaming the bottom of each popper. Keeping the filling contained rather than heavily mounded protects the bacon’s crisping time, since overflowing cheese spills out before the bacon has a chance to fully render and brown. The payoff is a popper with a tender, still-intact jalapeño shell, a hot, creamy, fully melted filling, and crisp, rendered bacon holding everything together.
Prep Time : 20 min
Cook Time : 25–35 min
Servings : 4
20 min
25–35 min
4
Ingredients
For the Jalapeños
• 12 whole jalapeños
• 24 small toothpicks, optional, if needed for securing bacon
For the Filling
• 300g cream cheese, softened — this one on Amazon
• 120g sharp cheddar, shredded — this one on Amazon
• 1½ to 2 tbsp sriracha, or another hot sauce of choice
• 1 tsp garlic powder — this one on Amazon
• 1 tsp onion powder — this one on Amazon
• ¼ tsp fine sea salt, or to taste
• ¼ tsp freshly ground black pepper
For Wrapping
• 12 slices thin-cut bacon, cut in half crosswise (24 half-slices total, one for each jalapeño half)
• Orange peel twists
Directions
- Prepare the Jalapeños
Preheat the oven to 220°C. Line a baking tray with parchment, or preferably set a wire rack over a tray so the bacon can render and crisp more evenly. Slice each jalapeño in half lengthwise, keeping the stems attached for appearance and structure. Use a spoon or small knife to remove the seeds and white membranes from each half. Removing the membranes is what controls the heat level most directly. Leave a little membrane behind only if you want them spicier. Try not to tear the jalapeño walls, because intact halves hold the filling better during baking. The membrane, not the seeds themselves, is where the pepper’s capsaicin is most concentrated — scraping it out thoroughly is a far more effective way to tame the heat than simply removing the visible seeds alone. - Make the Filling
In a bowl, combine the softened cream cheese, shredded sharp cheddar, sriracha, garlic powder, onion powder, salt, and black pepper. Mix until fully combined and evenly smooth. The mixture should be thick, creamy, and spreadable, with the cheddar distributed throughout rather than sitting in clumps. The cream cheese needs to be properly softened before mixing. If it is still cold and firm, the filling stays lumpy and does not spread cleanly into the jalapeño halves. Cold cream cheese resists blending into a uniform mixture no matter how vigorously it’s stirred — softening it first is what allows the sharper cheddar and seasonings to distribute evenly throughout rather than sitting in separate pockets. - Fill the Jalapeños
Divide the filling evenly among the 24 jalapeño halves. Pack each half full, slightly mounding the filling, but do not overfill so much that it spills heavily once the cheese softens in the oven. Press the filling in so it sits snugly inside each pepper. The filling should reach close to the edges of each jalapeño half but still remain contained. Overfilling makes the cheese overflow before the bacon has time to crisp. Pressing the filling in snugly rather than simply spooning it on top is what keeps it anchored inside the pepper through the bake — loosely piled filling is more likely to slide or spill as the cheese softens and the bacon shrinks slightly while rendering. - Wrap with Bacon
Wrap each filled jalapeño half with one half-slice of bacon, starting at one end and spiraling around just enough to secure the filling while still leaving a little of the jalapeño and filling visible. If needed, secure the bacon with a toothpick, though with properly wrapped thin bacon this often is not necessary. Arrange the poppers seam-side down on the prepared rack or tray. Thin-cut bacon works best here. Thick-cut bacon often needs longer than the jalapeños and filling do, and can stay chewy before the poppers are otherwise finished. Placing each popper seam-side down uses the bacon’s own weight to help hold its spiral in place through the early part of baking, before the fat has rendered enough to set the wrap on its own. - Bake
Bake at 220°C for 25–35 minutes, depending on the thickness of the bacon and the size of the jalapeños. The poppers are done when the jalapeños are softened but still hold their shape, the cream cheese filling is fully hot, softened, and creamy, the cheddar has melted into the filling, and the bacon is rendered, browned, and crisp at the edges. If needed, finish under the broiler for 1–3 minutes at the end to crisp the bacon further, watching closely so the tops do not burn. The ideal finish is when the bacon is visibly crisp and the cheese is bubbling lightly, but the filling has not fully run out of the jalapeños. A wire rack elevates the poppers just enough that rendered bacon fat drips away freely rather than pooling around the base — pooled fat both stops the bacon from crisping evenly and can make the bottoms of the peppers greasy rather than tender. - Rest and Serve
Let the poppers rest for 5 minutes before serving. This gives the filling time to settle slightly so it stays creamy but does not immediately spill out. Serve hot. The final poppers should have tender jalapeños, extra-creamy molten filling, and crisp bacon with enough structure to hold each half together when picked up. Cheese straight out of the oven is at its most fluid; the brief rest lets it firm up just enough to stay contained within the pepper when picked up, while remaining fully melted and creamy when eaten.
*Notes :
- Controlling heat through the membrane rather than the seeds alone is worth understanding clearly, since it’s a common point of confusion. The white membrane running along the inside of a jalapeño carries a disproportionate share of the pepper’s capsaicin compared to the seeds themselves, which mostly just cling to that membrane rather than containing much heat on their own. Scraping the membrane out thoroughly is what actually tames the pepper toward mild; removing only the visible seeds while leaving membrane behind will still produce a noticeably spicier result than intended.
- The choice of thin-cut bacon over thick-cut is a genuine timing calculation rather than a simple preference. This recipe’s other components — the jalapeño’s tenderness and the filling’s melt — both reach their ideal point within a fairly narrow window at 220°C. Thick-cut bacon typically needs meaningfully longer than that window to fully render and crisp, which forces an uncomfortable choice between undercooked, chewy bacon or a jalapeño and filling pushed well past their own ideal doneness.
- Using a wire rack rather than a flat baking tray addresses a problem that’s easy to overlook until it’s already happened. As the bacon’s fat renders out during baking, it has to go somewhere — on a flat tray, that fat pools directly beneath each popper, and the bottom of the jalapeño essentially fries and steams in that pooled fat rather than staying tender and roasting cleanly. A rack lets that same fat drip away and collect on the tray below, keeping the peppers themselves from sitting in grease.
- The brief resting period after baking, though short, protects against one of the more common frustrations with jalapeño poppers — filling that spills out the moment they’re picked up. Cheese immediately out of a hot oven is at its loosest, most fluid state, and a few minutes of rest lets it firm up just enough to stay contained within the pepper’s shell, without cooling so much that it loses its creamy, molten quality.
Why This Recipe Works
This recipe works because heat, texture, and timing are all managed with real precision: the membrane is scraped out thoroughly to control spice level directly.
Thin-cut bacon is chosen specifically so it finishes rendering in the same window the jalapeño and filling need to reach their own ideal doneness, and a wire rack lets rendered fat drip away rather than pooling and steaming the peppers.
The filling is pressed in snugly rather than loosely piled to stay contained through baking, and a brief rest afterward lets the molten cheese firm up just enough to hold together once the poppers are picked up.
Ingredient Breakdown
Thoroughly Membrane-Cleaned Jalapeños
The heat-control step — removing the membrane, not just the seeds, is what most directly tames or preserves the pepper’s spice level.
Softened Cream Cheese Base
The filling’s foundation — properly softened before mixing so the cheddar and seasonings distribute evenly rather than staying lumpy.
Sriracha-Spiked Cheese Filling
The flavour core — cream cheese and sharp cheddar combined with hot sauce and aromatics for a creamy, spiced centre.
Thin-Cut Bacon
The specified wrapping — chosen specifically to finish rendering and crisping within the same window the filling and pepper need.
Wire Rack Baking Setup
The critical technique — elevates the poppers so rendered bacon fat drips away instead of pooling and steaming the peppers.
Flavor Structure Explained
This jalapeño poppers follow a layered balance model:
- Crisp smoky foundation (rendered bacon)
- Rich creamy centre (cream cheese and cheddar filling)
- Sharp spicy heat (jalapeño, sriracha)
- Warm savoury depth (garlic powder, onion powder)
- Salty finishing note (bacon, cheddar)
Crisp, rendered bacon provides a smoky, savoury exterior wrapped around every popper. The cream cheese and cheddar filling delivers rich, creamy warmth as the centrepiece, spiked with sriracha for genuine heat that layers on top of the jalapeño’s own spice. Garlic powder and onion powder add warm, savoury depth throughout the filling. The combined saltiness of the bacon and sharp cheddar rounds out every bite without needing much additional seasoning.
Common Mistakes to Avoid
- Leaving Membrane Behind While Trying to Make Them Mild – The membrane, not the seeds, carries most of the heat. Always scrape it out thoroughly if a milder result is the goal.
- Using Cold, Unsoftened Cream Cheese – This produces a lumpy filling that won’t spread cleanly into the jalapeño halves. Always let it soften fully before mixing.
- Overfilling the Jalapeño Halves – Excess filling spills out before the bacon has time to crisp. Always pack it in snugly without heavy mounding.
- Using Thick-Cut Bacon – This often needs longer than the jalapeños and filling do, risking chewy bacon or overcooked filling. Always use thin-cut bacon for this recipe.
- Baking on a Flat Tray Instead of a Wire Rack – Rendered bacon fat pools beneath the peppers, steaming rather than roasting them. Always use a rack set over a tray if possible.
Variations
Extra-Spicy Version
Leave a small amount of membrane in each jalapeño half for noticeably more heat throughout.
With Smoked Cheddar
Substitute smoked cheddar for sharp cheddar for an extra layer of smoky flavour in the filling.
Air Fryer Version
Cook the assembled poppers in a single layer in an air fryer at 200°C for 12–15 minutes, checking for doneness slightly earlier than the oven method.
With Cream Cheese and Bacon Bits in the Filling
Fold a tablespoon of finely chopped cooked bacon directly into the filling for extra smoky flavour throughout, in addition to the bacon wrap.
Storage & Make-Ahead
Filled, unwrapped jalapeño halves can be assembled and refrigerated for up to 24 hours before wrapping in bacon and baking.
Fully assembled, unbaked poppers (filled and bacon-wrapped) can be refrigerated for a few hours before baking.
Baked poppers can be refrigerated in an airtight container for up to 3 days; reheat in a 190°C oven for 8–10 minutes to restore some crispness rather than using a microwave.
Frequently Asked Questions
Why does removing the membrane matter more than removing the seeds for controlling heat?
The white membrane carries a disproportionate share of the jalapeño’s capsaicin, while the seeds themselves contain relatively little heat on their own — they mostly just cling to the membrane. Scraping the membrane out thoroughly is what actually tames the pepper toward mild.
Why is thin-cut bacon specified rather than thick-cut?
The jalapeño and filling both reach their ideal doneness within a fairly narrow baking window. Thick-cut bacon typically needs longer than that window to fully render and crisp, forcing a trade-off between chewy bacon and overcooked filling.
Why bake the poppers on a wire rack instead of directly on a tray?
As the bacon’s fat renders, it needs somewhere to go. On a flat tray, that fat pools beneath each popper and effectively steams the bottom of the jalapeño in grease. A rack lets the fat drip away, keeping the peppers roasting cleanly rather than sitting in pooled fat.
Why rest the poppers for 5 minutes before serving?
Cheese straight out of the oven is at its most fluid and prone to spilling out the moment the popper is picked up. A brief rest lets it firm up just enough to stay contained within the pepper while remaining creamy and molten when eaten.
Are there other bite-sized, creamy, or crispy appetizer recipes worth trying?
Sausages in Blankets, Homemade Chicken Nuggets, Brazilian Coxinha, and Homemade Mozzarella Sticks are all worth exploring if you enjoy this kind of bite-sized, creamy or crispy appetizer, each built around a different combination of crisp exterior and rich, warm centre.
Nutrition Facts
( per serving )
Calories
~560 kcal
Protein
24 g
Fat
48 g
Carbs
6 g
Calories
~560 kcal
Protein
24 g
Fat
48 g
Carbs
6 g
Related Recipes
Related Recipes

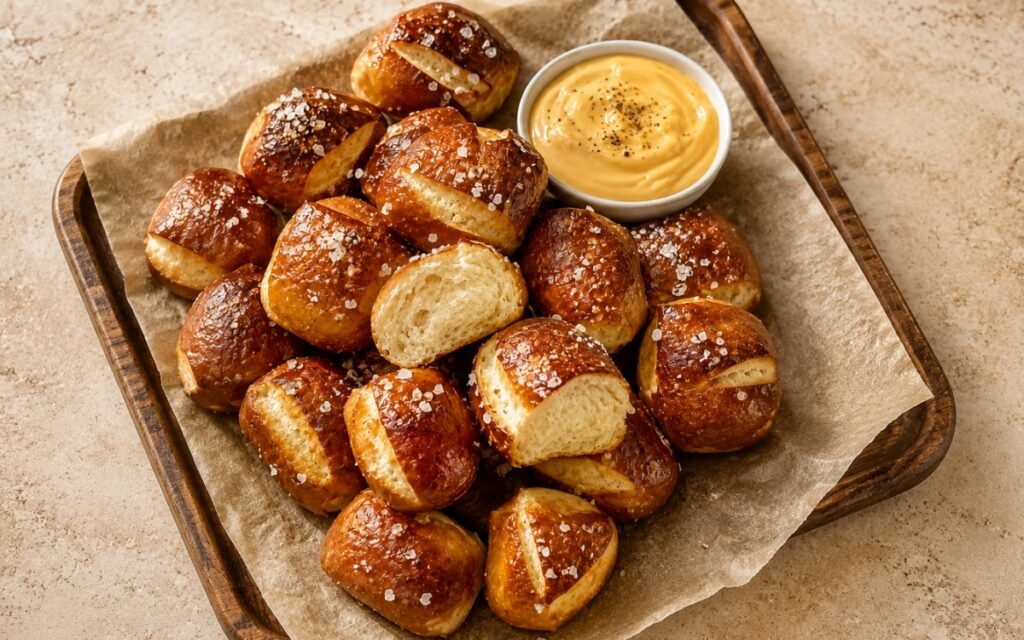
Homemade Pretzel Bites
Soft homemade pretzel bites with deep golden glossy crusts, a chewy outside, and a soft pale interior, served with warm cheese dip.
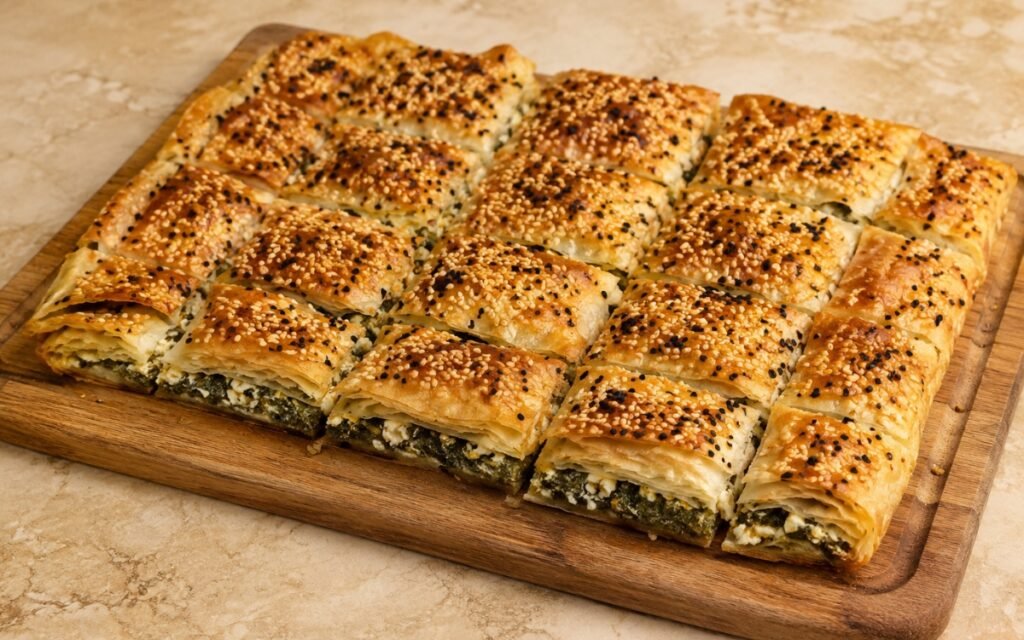
Turkish Börek — Spinach and Feta Borek
Pressed spinach and feta layered between phyllo sheets with a light milk-yogurt coating — pre-cut before baking, sesame and nigella seeds over egg wash, baked deeply golden. Crisp outside, soft custardy inside.
Fresh Peach Green Iced Tea
Green tea at 75–80°C for 2–3 minutes, raw peach slices cold-infused 30–45 minutes — strained promptly, honey, chilled. Light, clean, delicately fruity.

You might also like
You might also like
Homemade Chicken Nuggets
A juicy chicken-and-pork blend shaped into hand-formed nuggets, coated in a craggy panko-breadcrumb crust, and fried until deeply golden.
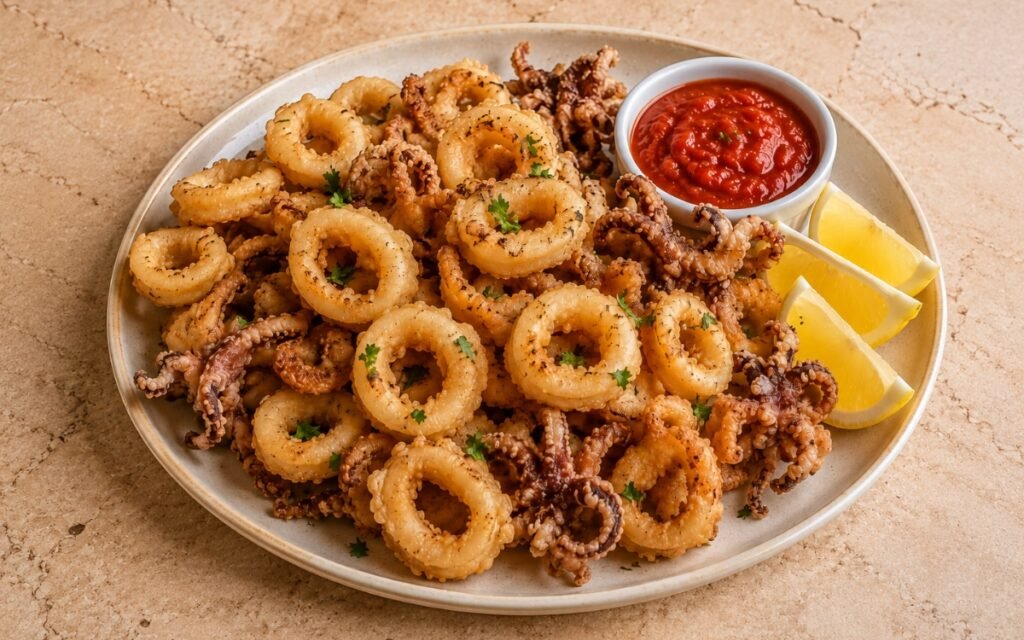
Deep Fried Calamari
Tender squid rings and tentacles lightly coated in flour and cornstarch, fried briefly until pale golden and crisp, served with marinara.
Southern Sweet Tea (Light Version)
Black tea at full boil for 5 minutes, white sugar dissolved into hot brew immediately — cooled, chilled 1–2 hours. Classic Southern character, lighter and more drinkable.


Jalapeño Poppers
Ingredients
Method
- Preheat the oven to 220°C. Line a baking tray with parchment, or preferably set a wire rack over a tray so the bacon can render and crisp more evenly. Slice each jalapeño in half lengthwise, keeping the stems attached for appearance and structure. Use a spoon or small knife to remove the seeds and white membranes from each half. Removing the membranes is what controls the heat level most directly. Leave a little membrane behind only if you want them spicier. Try not to tear the jalapeño walls, because intact halves hold the filling better during baking. The membrane, not the seeds themselves, is where the pepper’s capsaicin is most concentrated — scraping it out thoroughly is a far more effective way to tame the heat than simply removing the visible seeds alone.
- In a bowl, combine the softened cream cheese, shredded sharp cheddar, sriracha, garlic powder, onion powder, salt, and black pepper. Mix until fully combined and evenly smooth. The mixture should be thick, creamy, and spreadable, with the cheddar distributed throughout rather than sitting in clumps. The cream cheese needs to be properly softened before mixing. If it is still cold and firm, the filling stays lumpy and does not spread cleanly into the jalapeño halves. Cold cream cheese resists blending into a uniform mixture no matter how vigorously it’s stirred — softening it first is what allows the sharper cheddar and seasonings to distribute evenly throughout rather than sitting in separate pockets.
- Divide the filling evenly among the 24 jalapeño halves. Pack each half full, slightly mounding the filling, but do not overfill so much that it spills heavily once the cheese softens in the oven. Press the filling in so it sits snugly inside each pepper. The filling should reach close to the edges of each jalapeño half but still remain contained. Overfilling makes the cheese overflow before the bacon has time to crisp. Pressing the filling in snugly rather than simply spooning it on top is what keeps it anchored inside the pepper through the bake — loosely piled filling is more likely to slide or spill as the cheese softens and the bacon shrinks slightly while rendering.
- Wrap each filled jalapeño half with one half-slice of bacon, starting at one end and spiraling around just enough to secure the filling while still leaving a little of the jalapeño and filling visible. If needed, secure the bacon with a toothpick, though with properly wrapped thin bacon this often is not necessary. Arrange the poppers seam-side down on the prepared rack or tray. Thin-cut bacon works best here. Thick-cut bacon often needs longer than the jalapeños and filling do, and can stay chewy before the poppers are otherwise finished. Placing each popper seam-side down uses the bacon’s own weight to help hold its spiral in place through the early part of baking, before the fat has rendered enough to set the wrap on its own.
- Bake at 220°C for 25–35 minutes, depending on the thickness of the bacon and the size of the jalapeños. The poppers are done when the jalapeños are softened but still hold their shape, the cream cheese filling is fully hot, softened, and creamy, the cheddar has melted into the filling, and the bacon is rendered, browned, and crisp at the edges. If needed, finish under the broiler for 1–3 minutes at the end to crisp the bacon further, watching closely so the tops do not burn. The ideal finish is when the bacon is visibly crisp and the cheese is bubbling lightly, but the filling has not fully run out of the jalapeños. A wire rack elevates the poppers just enough that rendered bacon fat drips away freely rather than pooling around the base — pooled fat both stops the bacon from crisping evenly and can make the bottoms of the peppers greasy rather than tender.
- Let the poppers rest for 5 minutes before serving. This gives the filling time to settle slightly so it stays creamy but does not immediately spill out. Serve hot. The final poppers should have tender jalapeños, extra-creamy molten filling, and crisp bacon with enough structure to hold each half together when picked up. Cheese straight out of the oven is at its most fluid; the brief rest lets it firm up just enough to stay contained within the pepper when picked up, while remaining fully melted and creamy when eaten.