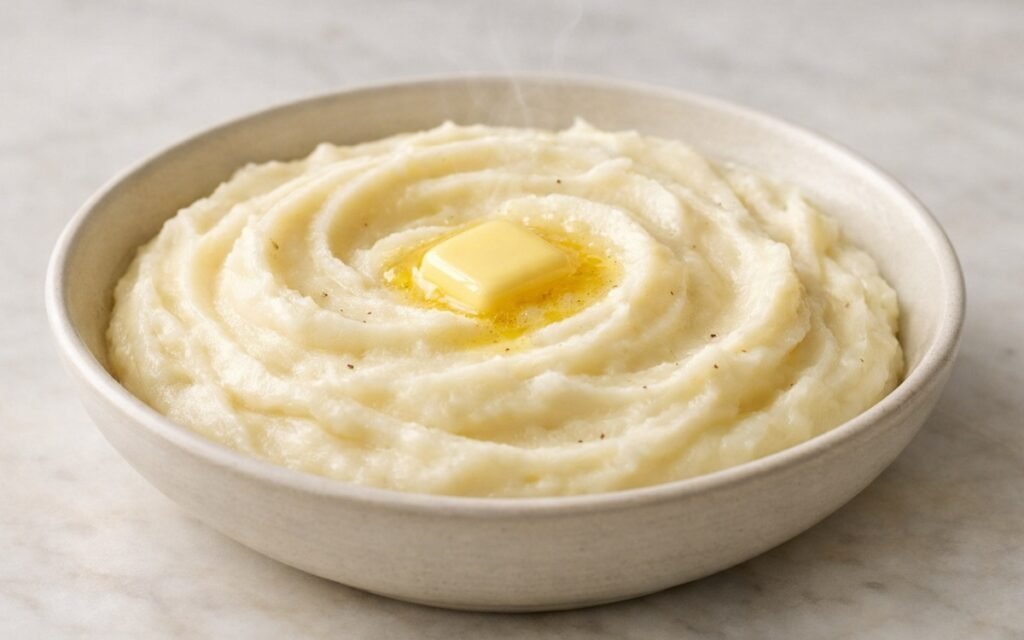
Classic Mashed Potatoes
These classic mashed potatoes are impossibly creamy, buttery, and smooth with a rich flavour that complements any main dish. The secret lies in starting the potatoes in cold water, drying them thoroughly before mashing, and warming every dairy ingredient before it touches the potato — three steps that take no extra effort and make all the difference between mashed potatoes that are silky and light and ones that are gluey and dense. Perfect comfort food that everyone will love.
Prep Time : 15 min
Cook Time : 20 min
Servings : 4
15 min
20 min
4
Ingredients
For the Potatoes
• 900g russet potatoes, peeled and cut into 5cm chunks
• 15g salt (for boiling water)
For the Mash
• 120ml whole milk, warmed
• 60ml heavy cream, warmed
• 60g unsalted butter, room temperature — this one on Amazon
• 5g sea salt — this one on Amazon
• 2g black pepper, freshly ground
This post may contain affiliate links. As an Amazon Associate I earn from qualifying purchases, at no additional cost to you.
Directions
- Start the Potatoes in Cold Water
Peel the russet potatoes and cut them into roughly uniform 5cm chunks — uniformity matters here because uneven pieces cook at different rates, leaving some overcooked and waterlogged while others remain underdone. Place the chunks in a large pot and cover with cold water by approximately 3cm. Add the 15g of salt directly to the cold water and stir briefly. Starting the potatoes in cold rather than boiling water is a deliberate and important technique decision. When potatoes are placed in already-boiling water, the outside surface of each chunk cooks rapidly and begins to break down before the interior has softened — this produces an uneven texture where the outer layer becomes mushy and waterlogged while the centre is still hard. Cold water allows the entire chunk to heat gradually and evenly from the outside in, producing uniform tenderness throughout with a firmer outer surface that does not fall apart during cooking. The salted water seasons the potato flesh throughout during cooking rather than only on the surface. - Boil to Proper Tenderness
Bring the pot to a full rolling boil over high heat. Once boiling, reduce to medium heat and simmer steadily for 15–18 minutes. The cooking is complete when a fork or skewer slides through the thickest piece of potato with absolutely no resistance — the fork should penetrate with the same ease as pushing through soft butter. This complete tenderness is the threshold that must be reached before mashing begins. Undercooked potato starch does not break down into the smooth, creamy texture mashed potatoes require — it produces grainy, slightly mealy patches in the finished mash that no amount of butter or cream can mask. If in doubt, cook for an additional 2 minutes and test again. While the potatoes cook, proceed with the dairy preparation so everything is ready simultaneously. - Warm the Dairy
Combine the whole milk and heavy cream in a small saucepan and heat over low heat for 3–4 minutes, stirring occasionally, until warm to the touch but not simmering or boiling. The dairy must be warm — ideally 60–70°C — when it contacts the mashed potato. This is not a step that can be skipped or approximated with room-temperature dairy without consequence. Cold milk or cold cream added to hot mashed potato causes two specific problems. First, the temperature shock causes the gelatinised starch granules in the mashed potato to retrogradre — to partially re-crystallise from their fluid, smooth state back toward a denser, firmer structure — which produces gluey, sticky, slightly pasty mash rather than the light, fluffy texture you are working toward. Second, cold dairy immediately lowers the temperature of the mash, making it harder to work with and requiring more aggressive stirring that further develops the gluten and produces a tougher, denser result. Keep the dairy warm on the lowest heat setting until needed. - Drain and Dry Thoroughly
Drain the cooked potatoes through a colander, shaking it firmly to remove all standing water from the surfaces of the chunks. Immediately return the drained potatoes to the hot, empty pot. Place the pot over low heat and let the potatoes sit in the dry pot for 1–2 minutes, shaking the pot occasionally. Steam will visibly rise from the potato pieces during this time — that steam is excess water evaporating from the surface and interior of the potato flesh. This drying step is what separates mashed potatoes with light, fluffy texture from watery, thin, flat-tasting ones. Potato flesh absorbs a significant amount of cooking water during boiling, and unless this water is driven out by heat before dairy is added, the finished mash is diluted — both in flavour and texture. The hot pot provides the gentle heat needed for evaporation without cooking the potatoes further. - Mash Until Completely Smooth
Remove the pot from heat. Using a potato ricer or potato masher, work through all the dried potato chunks until no lumps remain. A ricer produces the finest, most uniform result — the potato is forced through small holes under pressure, breaking the starch structure very cleanly without working it excessively. Pass through the ricer twice if you want the absolute smoothest texture possible. A standard potato masher requires more physical effort and produces a slightly more rustic texture with occasional small pieces remaining — this is not a fault, simply a different result that many cooks prefer. The critical rule applies to both tools: do not use a food processor, stand mixer, or electric hand mixer for mashing. These machines work the potato far beyond the breaking point of the starch structure, aggressively developing the starch cells and producing glue rather than mash. The texture becomes dense, sticky, and elastic — a consequence of over-processing that cannot be reversed. - Add the Butter
Add the room-temperature butter to the hot mashed potato and stir with a wooden spoon or flexible spatula using folding strokes — not aggressive beating — until the butter is completely melted and distributed throughout. Butter is added before the dairy for a specific and well-established reason in French mash technique: fat introduced before liquid coats the individual starch granules in a thin film that physically limits their ability to absorb the subsequent water-based dairy. This fat barrier is what allows the cream and milk to produce richness and lightness rather than causing the starch to bloat with liquid and turn dense. Adding butter after the dairy reverses this protective sequence and produces a heavier, denser mash. The butter should be at room temperature — cold butter melts unevenly and requires more mixing, which risks over-working the starch. - Add the Warm Dairy Gradually
Pour the warmed milk-cream mixture into the buttered mash in a thin, gradual stream while stirring gently and continuously. Do not add all the dairy at once — gradual addition allows you to monitor the consistency as it develops and stop at the exact moment the mash reaches your preferred texture. Some batches of potatoes absorb more dairy than others depending on the specific variety, size, and how thoroughly they were dried. Adding gradually gives you full control over the final consistency — whether you prefer a thick, sturdy mash that holds its shape on the plate, or a looser, more pourable mash that flows naturally. Stir until everything is uniformly incorporated and the mash looks smooth, glossy, and homogeneous with no streaks of butter or cream visible. - Season and Serve
Add the salt and freshly ground black pepper and stir to distribute evenly throughout. Taste carefully — the seasoning should feel complete, with the potato’s natural earthy flavour clearly present alongside the butter and cream richness. If it tastes flat, add more salt in small increments — flat mashed potato is almost always a seasoning problem rather than a technique problem. If the mash has cooled slightly below your preferred serving temperature, return the pot to very low heat and stir gently for 1–2 minutes. Serve immediately in a warm bowl or straight onto warm plates, with a small additional knob of butter placed in a well pressed into the surface of the mash if desired — it will melt into a visible pool of butter at the table, which is both aesthetically classic and delicious.
*Notes :
- Russet potatoes are specified because their starch composition is specifically suited to the mash method. Russets are high-starch, low-moisture potatoes — their starch cells are large, separate easily when cooked, and produce the light, fluffy, cloud-like texture that defines classic mashed potatoes. Yukon Gold potatoes are medium-starch, higher-moisture potatoes that produce a creamier, denser, naturally buttery-tasting mash — still excellent, but different in character and slightly heavier in texture. The choice between them is a matter of preference: russets for the lightest, fluffiest result; Yukon Golds for a more luxurious, denser mash.
- The rule against electric mixers is the most important technical note in this recipe and is frequently violated by home cooks who associate power tools with better results in the kitchen. In the specific case of mashed potatoes, the opposite is true. Potato starch granules, when cooked, swell with water and become fragile. A masher or ricer breaks the cells open gently by compressive force, releasing the internal starch in a way that produces separate, fluffy particles. An electric mixer applies rapid, repetitive shear force that literally tears the starch cells apart and releases their internal contents in a way that causes them to entangle and form long, sticky chains — exactly the mechanism that produces glue. The more powerful and longer the mixing, the worse the result.
- For the most luxurious possible mashed potatoes, replace the whole milk entirely with additional heavy cream and increase the butter to 90g. The result is closer to the French pommes purée — an extraordinarily rich, smooth preparation that is more akin to a potato sauce than a traditional mash.
Why This Recipe Works
This recipe works because each step addresses a specific mechanism of mash quality. Cold-water cooking produces evenly tender potatoes. Thorough drying removes the diluting cooking water. Butter before dairy coats the starch to prevent bloating. Warm dairy prevents retrogradation and maintains working temperature.
Minimal mechanical action preserves the starch cell structure for light, fluffy texture rather than gluey density. Every instruction exists because skipping it produces a measurably worse result — this is a technique-driven recipe where the method is as important as the ingredients.
Ingredient Breakdown
Russet Potatoes
High-starch, low-moisture variety — their starch cells separate cleanly when cooked and produce the light, fluffy texture that defines classic mashed potatoes.
Salted Boiling Water
The first seasoning layer — salt penetrates the potato flesh during cooking rather than sitting only on the surface.
Whole Milk
The primary liquid component — provides the protein and water base that gives the mash its smooth, pourable quality.
Heavy Cream
The richness component — higher fat content than milk, contributing the luxurious creaminess and body that whole milk alone cannot provide.
Unsalted Butter
The fat barrier — introduced before dairy to coat starch granules and produce a lighter, fluffier texture. Also provides the primary flavour depth of the dish.
Salt and Black Pepper
The seasoning that brings the potato’s natural earthy flavour forward — inadequate seasoning is the most common reason for flat, disappointing mashed potatoes.
Flavor Structure Explained
This dish follows a layered balance model:
- Earthy starchy base (potatoes)
- CRich dairy fat (butter)
- Creamy body (cream)
- Flavor activation (salt)
- Subtle heat (black pepper)
Potatoes establish the foundation with mild earthiness and natural sweetness that define the dish. Butter builds richness, amplifying and deepening the potato flavor. Cream adds additional body and a soft, rounded sweetness that enhances texture. Salt acts as the activator, sharpening and elevating all other elements without standing out on its own. Black pepper finishes with gentle heat, adding contrast that prevents the richness from feeling flat or one-dimensional.
Common Mistakes to Avoid
- Starting in Boiling Water – Potatoes added to boiling water cook unevenly — the outside breaks down before the interior is done. Always start in cold, salted water.
- Skipping the Drying Step – Water retained in the potato after draining dilutes both the flavour and the texture. Return to the hot pot and allow the steam to escape for 1–2 minutes.
- Using Cold Dairy – Cold milk or cream causes the starch to retrogradrate and produces gluey, dense, slightly sticky mash. Always warm the dairy before adding.
- Adding Dairy Before Butter – Butter must go in first to coat the starch granules before the water-based dairy causes them to bloat. Reversing this order produces a heavier, denser result.
- Using an Electric Mixer – The most destructive error — electric mixing shears the starch cells into chains and produces inescapably gluey mash. Always use a masher or ricer.
- Under-seasoning – Flat, disappointing mashed potatoes are almost always a salt deficiency. Taste and season generously.
Variations
Yukon Gold Version
Replace russet potatoes with the same weight of Yukon Golds for a naturally creamier, slightly more yellow, denser mash with a buttery flavour note that requires less added butter to achieve similar richness.
Garlic Mashed Potatoes
Add 4 roasted garlic cloves, squeezed from their skins and mashed into the butter before adding the dairy, for a sweet, deeply savory garlic-infused variation.
Herb Mashed Potatoes
Fold 20g of finely chopped fresh chives and 10g of fresh flat-leaf parsley into the finished mash just before serving for a vibrant, aromatic variation.
Truffle Mashed Potatoes
Add 10ml of white truffle oil with the butter for an extraordinary, luxurious variation. Use sparingly — truffle oil is potent and easily overdone.
Vegan Version
Replace butter with a high-quality vegan butter, whole milk with full-fat oat milk, and cream with canned coconut cream. The technique remains identical and the result is a rich, flavourful mash with a slightly different character.
Storage & Make-Ahead
Cooked mashed potatoes can be refrigerated in an airtight container for up to 3 days. When chilled, they will become firmer and stiffer as the starch retrogrades, which is completely normal and can be reversed.
To reheat them, warm the mashed potatoes gently in a saucepan over low heat with a splash of warm milk and a small extra knob of butter, stirring frequently. Do not bring them to a boil, since aggressive heat and stirring can create the same gluey texture caused by overmixing. With gentle reheating, the mash will return to its original smooth consistency.
If you are making them ahead for entertaining, prepare the mashed potatoes as directed and transfer them to a slow cooker on the warm setting for up to 2 hours. Stir occasionally and add small amounts of warm milk as needed to keep the consistency right. This is one of the most practical ways to serve mashed potatoes for a dinner party without timing stress.
Mashed potatoes can also be frozen for up to 1 month. After thawing, the texture may be slightly less fluffy, but you can restore some of the richness by folding in a little extra warm butter and cream while reheating.
Frequently Asked Questions
Why are my mashed potatoes gluey?
The three most common causes: the potatoes were not dried before mashing, cold dairy was added to hot potatoes, or an electric mixer was used. All three cause the same result — over-worked, starch-chain-tangled mash. Address whichever applies and the problem resolves.
Can I make these ahead and reheat?
Yes — see the Storage section above. The slow cooker method is particularly effective for entertaining. Always reheat with additional warm dairy and low heat.
What is a potato ricer and do I need one?
A ricer is a kitchen tool that forces cooked potato through small holes under pressure, producing extremely fine, uniform mash. It produces the smoothest possible result but is not essential — a standard masher produces excellent mash with more texture. A food mill is an equivalent alternative to a ricer.
Can I use other potato varieties?
Any starchy or medium-starch potato works. Avoid waxy varieties like red potatoes or fingerlings — their low starch content produces a dense, slightly sticky mash that does not achieve the light, fluffy texture this recipe is built around.
What is the best way to keep mashed potatoes warm for serving?
Transfer to a heatproof bowl set over a pot of barely simmering water (bain-marie) for up to 45 minutes, stirring occasionally. Alternatively, use the slow cooker method described in the Storage section. Both methods maintain temperature without continuing to cook the potatoes.
What should I serve with this?
For a natural pairing: Classic Pork Chops, Pan-Seared Chicken Breast, Braised Beef Chuck Steak, or Classic Ribeye Steak all complement mashed potatoes by adding rich, savory depth that the creamy texture absorbs beautifully. For a more complete plate, serve with Roasted Vegetables or a Fresh Herb Green Salad to balance the heaviness and add freshness.
Nutrition Facts
( per serving )
Calories
~340 kcal
Protein
6 g
Fat
18 g
Carbs
41 g
Calories
~340 kcal
Protein
6 g
Fat
18 g
Carbs
41 g
Related Recipes
Related Recipes

Crispy Zucchini Fritters
Golden, crispy zucchini fritters with Parmesan and herbs—perfectly crunchy and flavorful.
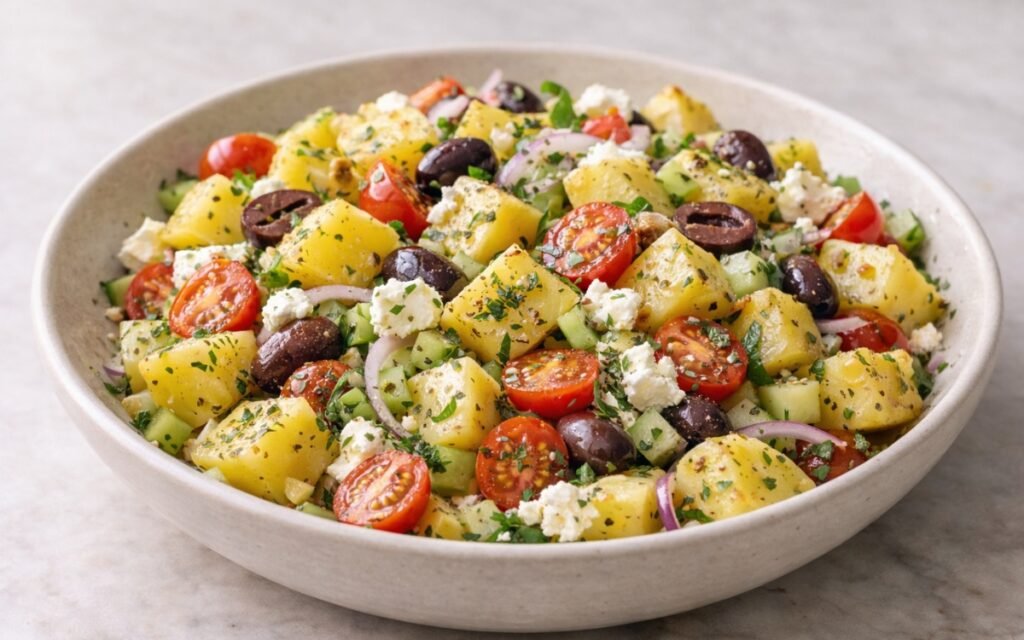
Greek-Style Potato Salad
Fresh Greek potato salad with feta, olives, and lemon-oregano dressing – a lighter Mediterranean twist.
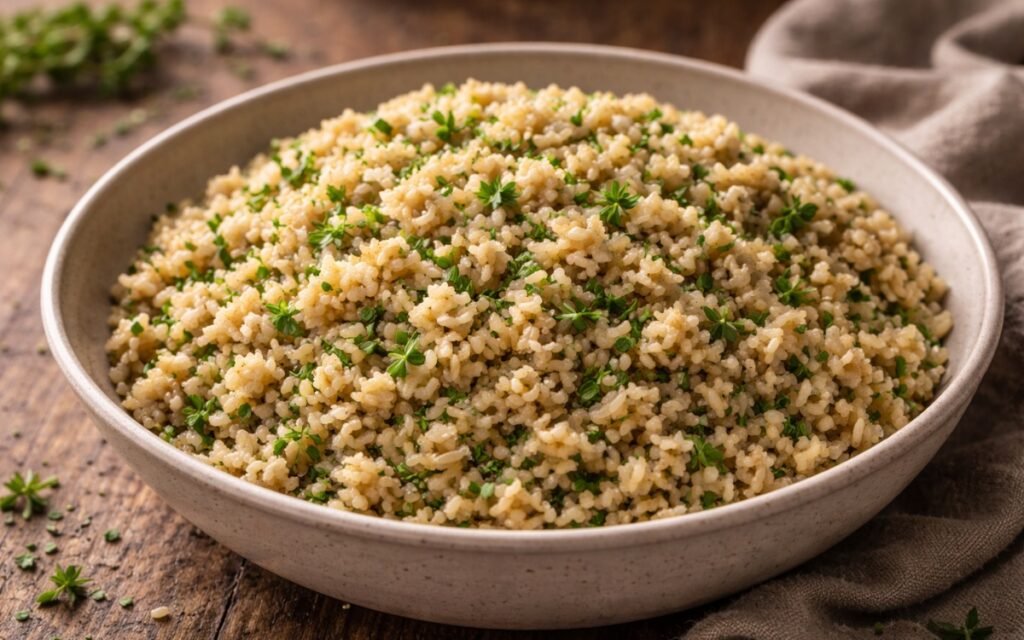
Herbed Brown Rice
Nutty brown rice with fresh herbs, garlic, and olive oil creates a wholesome, flavorful side dish.

You might also like
You might also like
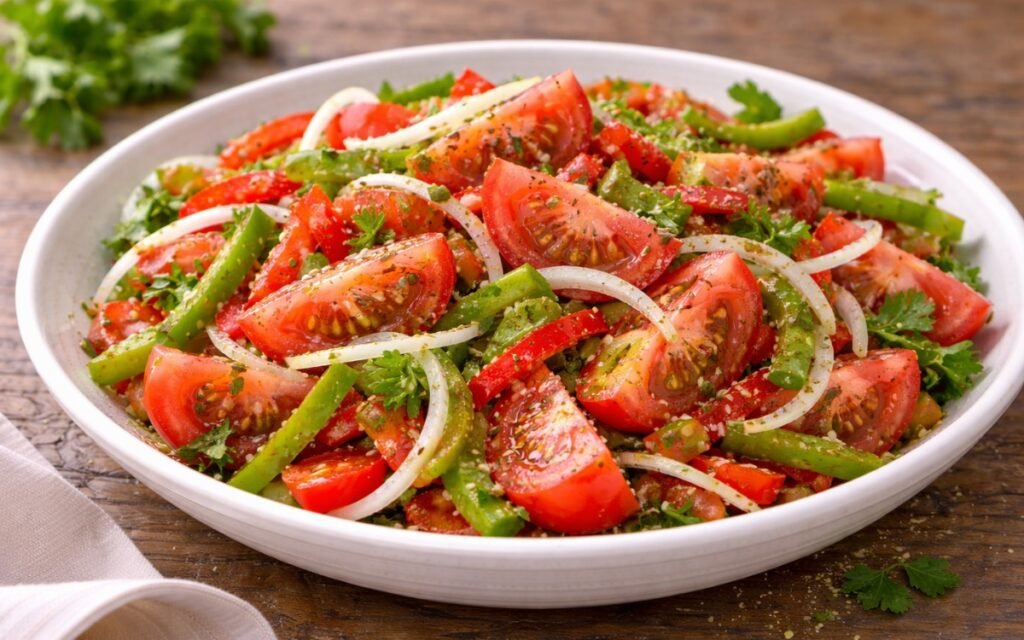
Authentic Argentine Criolla Salad
Classic Argentine salad with sliced tomatoes, onions, and peppers dressed in olive oil and vinegar.
Peruvian Chopped Salad
Bright and flavorful Peruvian chopped salad with sweet corn, creamy avocado, and a zesty lime dressing with a hint of aji amarillo.
Carrot Cumin Salad
Ribboned carrots tossed with toasted cumin, lemon, and pumpkin seeds for earthy, bright flavors.

Classic Mashed Potatoes
Ingredients
Method
- Peel the russet potatoes and cut them into roughly uniform 5cm chunks — uniformity matters here because uneven pieces cook at different rates, leaving some overcooked and waterlogged while others remain underdone. Place the chunks in a large pot and cover with cold water by approximately 3cm. Add the 15g of salt directly to the cold water and stir briefly. Starting the potatoes in cold rather than boiling water is a deliberate and important technique decision. When potatoes are placed in already-boiling water, the outside surface of each chunk cooks rapidly and begins to break down before the interior has softened — this produces an uneven texture where the outer layer becomes mushy and waterlogged while the centre is still hard. Cold water allows the entire chunk to heat gradually and evenly from the outside in, producing uniform tenderness throughout with a firmer outer surface that does not fall apart during cooking. The salted water seasons the potato flesh throughout during cooking rather than only on the surface.
- Bring the pot to a full rolling boil over high heat. Once boiling, reduce to medium heat and simmer steadily for 15–18 minutes. The cooking is complete when a fork or skewer slides through the thickest piece of potato with absolutely no resistance — the fork should penetrate with the same ease as pushing through soft butter. This complete tenderness is the threshold that must be reached before mashing begins. Undercooked potato starch does not break down into the smooth, creamy texture mashed potatoes require — it produces grainy, slightly mealy patches in the finished mash that no amount of butter or cream can mask. If in doubt, cook for an additional 2 minutes and test again. While the potatoes cook, proceed with the dairy preparation so everything is ready simultaneously.
- Combine the whole milk and heavy cream in a small saucepan and heat over low heat for 3–4 minutes, stirring occasionally, until warm to the touch but not simmering or boiling. The dairy must be warm — ideally 60–70°C — when it contacts the mashed potato. This is not a step that can be skipped or approximated with room-temperature dairy without consequence. Cold milk or cold cream added to hot mashed potato causes two specific problems. First, the temperature shock causes the gelatinised starch granules in the mashed potato to retrogradre — to partially re-crystallise from their fluid, smooth state back toward a denser, firmer structure — which produces gluey, sticky, slightly pasty mash rather than the light, fluffy texture you are working toward. Second, cold dairy immediately lowers the temperature of the mash, making it harder to work with and requiring more aggressive stirring that further develops the gluten and produces a tougher, denser result. Keep the dairy warm on the lowest heat setting until needed.
- Drain the cooked potatoes through a colander, shaking it firmly to remove all standing water from the surfaces of the chunks. Immediately return the drained potatoes to the hot, empty pot. Place the pot over low heat and let the potatoes sit in the dry pot for 1–2 minutes, shaking the pot occasionally. Steam will visibly rise from the potato pieces during this time — that steam is excess water evaporating from the surface and interior of the potato flesh. This drying step is what separates mashed potatoes with light, fluffy texture from watery, thin, flat-tasting ones. Potato flesh absorbs a significant amount of cooking water during boiling, and unless this water is driven out by heat before dairy is added, the finished mash is diluted — both in flavour and texture. The hot pot provides the gentle heat needed for evaporation without cooking the potatoes further.
- Remove the pot from heat. Using a potato ricer or potato masher, work through all the dried potato chunks until no lumps remain. A ricer produces the finest, most uniform result — the potato is forced through small holes under pressure, breaking the starch structure very cleanly without working it excessively. Pass through the ricer twice if you want the absolute smoothest texture possible. A standard potato masher requires more physical effort and produces a slightly more rustic texture with occasional small pieces remaining — this is not a fault, simply a different result that many cooks prefer. The critical rule applies to both tools: do not use a food processor, stand mixer, or electric hand mixer for mashing. These machines work the potato far beyond the breaking point of the starch structure, aggressively developing the starch cells and producing glue rather than mash. The texture becomes dense, sticky, and elastic — a consequence of over-processing that cannot be reversed.
- Add the room-temperature butter to the hot mashed potato and stir with a wooden spoon or flexible spatula using folding strokes — not aggressive beating — until the butter is completely melted and distributed throughout. Butter is added before the dairy for a specific and well-established reason in French mash technique: fat introduced before liquid coats the individual starch granules in a thin film that physically limits their ability to absorb the subsequent water-based dairy. This fat barrier is what allows the cream and milk to produce richness and lightness rather than causing the starch to bloat with liquid and turn dense. Adding butter after the dairy reverses this protective sequence and produces a heavier, denser mash. The butter should be at room temperature — cold butter melts unevenly and requires more mixing, which risks over-working the starch.
- Pour the warmed milk-cream mixture into the buttered mash in a thin, gradual stream while stirring gently and continuously. Do not add all the dairy at once — gradual addition allows you to monitor the consistency as it develops and stop at the exact moment the mash reaches your preferred texture. Some batches of potatoes absorb more dairy than others depending on the specific variety, size, and how thoroughly they were dried. Adding gradually gives you full control over the final consistency — whether you prefer a thick, sturdy mash that holds its shape on the plate, or a looser, more pourable mash that flows naturally. Stir until everything is uniformly incorporated and the mash looks smooth, glossy, and homogeneous with no streaks of butter or cream visible.
- Add the salt and freshly ground black pepper and stir to distribute evenly throughout. Taste carefully — the seasoning should feel complete, with the potato’s natural earthy flavour clearly present alongside the butter and cream richness. If it tastes flat, add more salt in small increments — flat mashed potato is almost always a seasoning problem rather than a technique problem. If the mash has cooled slightly below your preferred serving temperature, return the pot to very low heat and stir gently for 1–2 minutes. Serve immediately in a warm bowl or straight onto warm plates, with a small additional knob of butter placed in a well pressed into the surface of the mash if desired — it will melt into a visible pool of butter at the table, which is both aesthetically classic and delicious.