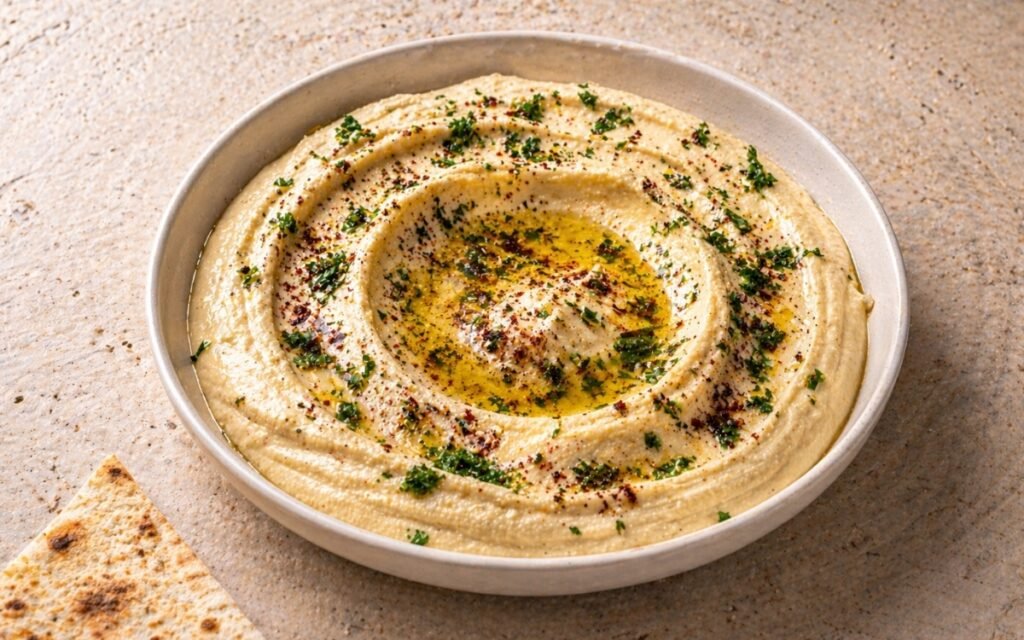
Classic Hummus
The base recipe — the one that everything else is built on. Dried chickpeas soaked overnight and cooked with baking soda until completely soft, processed while still warm with tahini, lemon, garlic, cumin, and enough ice-cold water to reach the consistency you want. This is the technical foundation for every flavoured hummus that follows: the Chipotle and Lime Hummus, the Harissa and Mint Hummus, the Sun-Dried Tomato and Basil Hummus, and the Roasted Garlic Hummus. Get this one right and all of them become straightforward. Serve with warm Homemade Lavash or fresh pita bread.
Prep Time : 10 min
Cook Time : 35 min
Servings : 8
10 min
35 min
8
Ingredients
For the Chickpeas
• 225g (8oz) dried chickpeas
• 1 tsp baking soda, divided — ½ tsp for soaking, ½ tsp for cooking
For the Hummus
• 140g tahini paste — this one on Amazon
• Juice of 1½ lemons
• Zest of half a lemon
• 2 medium garlic cloves, smashed with a knife
• 1 tsp ground cumin — this one on Amazon
• Fine sea salt to taste, starting conservatively
• Freshly ground black pepper to taste
• 100ml ice-cold water, added gradually — amount varies by preferred consistency
To Serve
• Za’atar seasoning or sumac, for garnish — this one on Amazon
• Fresh flat-leaf parsley, roughly chopped
This post may contain affiliate links. As an Amazon Associate I earn from qualifying purchases, at no additional cost to you.
Directions
- Soak the Chickpeas Overnight
Place the dried chickpeas in a large bowl and cover with cold water by at least 5–6cm — the chickpeas will absorb a significant amount of water and swell considerably, roughly doubling in size. Add ½ tsp of baking soda to the soaking water and stir briefly to dissolve. The baking soda in the soaking water begins the softening process before cooking even starts. It raises the pH of the water slightly, which weakens the pectin in the chickpea skins and begins to soften the cell walls — producing chickpeas that will cook more quickly and more completely than those soaked in plain water. Allow to soak for 8 hours at room temperature, or overnight. After soaking, drain the chickpeas thoroughly through a colander and discard the soaking water — it contains released starches, oligosaccharides, and the dissolved baking soda. Do not use it for cooking. - Cook the Chickpeas with Baking Soda
Transfer the drained, soaked chickpeas to a large pot. Cover with fresh cold water by approximately 5cm and add the remaining ½ tsp of baking soda. Bring to a boil over medium-high heat. As the water approaches and reaches a boil, a greyish foam will accumulate on the surface — this is coagulated proteins and dissolved starches. Skim it off with a large spoon as it forms, in the same way you would skim a stock. Once the boil is established and the foam has been removed, reduce to medium-low heat, cover with a lid, and cook for approximately 30 minutes. Begin checking at the 25-minute mark by removing a single chickpea from the pot and pressing it firmly between your fingers or with the back of a fork. The chickpea should crush completely and immediately under minimal pressure — if it offers any resistance, it needs more cooking. The baking soda in the cooking water continues the skin-softening work begun during the soaking and produces chickpeas that are cooked throughout to a uniformly soft, creamy consistency rather than soft at the edges with a firm, grainy centre. This complete softness is the foundation of genuinely smooth hummus — any residual firmness in the chickpeas will produce a grainy, slightly rough texture in the finished hummus regardless of how long the food processor runs. Drain the cooked chickpeas. Reserve a small amount of the cooking liquid if desired — it can be used to thin the hummus in place of or alongside the ice water. - Process the Warm Chickpeas First
Transfer the drained chickpeas to the food processor while they are still warm — this is an important timing decision. Warm chickpeas process significantly more smoothly than cold ones. The heat keeps the starch in a gelatinised, fluid state that blends into a uniform mass easily. Cold chickpeas have starch that has partially retrogradrated back toward a firmer, more crystalline structure that resists smooth processing and produces a grainier result at the same processing time. Begin processing immediately, stopping every 30–45 seconds to scrape down the sides and bottom of the bowl with a spatula — any chickpea mass stuck to the sides is not being processed and will remain as coarser pieces in the finished hummus. Process for 2–3 minutes until the chickpeas have broken down into a thick, fairly smooth paste. The paste will look dry and stiff at this stage — this is correct. The tahini, lemon, and water are added progressively in subsequent steps and the consistency will transform significantly. - Add the Tahini, Lemon, Garlic, and Spices
With the food processor running, add the tahini paste in a steady stream — not all at once. Adding tahini while the machine runs incorporates it more evenly than adding it to a stationary paste. Add the lemon juice, lemon zest, smashed garlic cloves, ground cumin, a conservative starting amount of fine sea salt, and a small amount of freshly ground black pepper. The garlic is smashed rather than minced for this application — smashing opens the clove and allows its aromatic compounds to release into the hummus during processing, but the smashed pieces process more evenly than large whole cloves and less intensely than pre-minced garlic, which can produce sharp, raw garlic pockets in the finished hummus. Process everything together for 2–3 minutes, scraping down the sides frequently. At this stage the hummus will look thick and slightly grainy — this is normal before the ice water is added. - Add Ice-Cold Water Gradually
With the food processor running, begin adding the ice-cold water one tablespoon at a time, allowing each addition to fully incorporate before adding the next. Cold water — specifically ice-cold — is the technique detail that separates commercial-quality smooth hummus from good home hummus. When cold water is added to the blended chickpea-tahini mass while the processor runs, it creates a temporary emulsification effect: the fat molecules in the tahini are dispersed by the mechanical action of the blade and the cold water stabilises this dispersion, producing a lighter, creamier, more aerated texture. Warm water does not produce the same effect — the fat re-aggregates more quickly and the result is denser and heavier. Continue adding water and processing until you reach your preferred consistency. At approximately 50ml the hummus will be thick and dense — a paste that holds a shape firmly on a plate. At 100ml it will be smooth and creamy with a texture that flows slowly from a spoon. At more than 100ml it becomes noticeably thinner and lighter in flavour — the dilution with water reduces the flavour intensity proportionally. There is no single correct answer — choose the consistency that suits your intended use. - Taste and Calibrate
Stop the processor and taste the hummus thoroughly. This step is the most important and most frequently rushed step in the recipe. Evaluate four specific dimensions: if the hummus tastes flat and one-dimensional, it needs salt — add in small increments and process briefly to distribute, tasting after each addition until the flavours of the tahini and chickpea sharpen and come forward. If it tastes heavy, rich, and slightly dull, it needs more lemon juice — acid is the brightening element that makes hummus taste alive rather than dense. If it tastes bland despite salt and lemon, it needs more cumin and black pepper — earthy warmth and mild heat that provide the background complexity that prevents hummus from tasting like a plain paste. If it tastes too strongly of raw garlic, the garlic pieces may not have fully processed — continue running the machine for 60 more seconds. Continue adjusting in small increments and tasting after each until the hummus tastes balanced, complex, and genuinely good. - Serve
Transfer the finished hummus to a wide, shallow serving bowl. Use the back of a spoon to create a swooping circular well in the surface — starting from the centre and sweeping outward in a single smooth motion. This well collects the olive oil and garnishes and is the visual presentation style of authentic hummus. Drizzle a generous amount of extra-virgin olive oil into the well and across the surface. Scatter za’atar seasoning or sumac generously — sumac provides a fruity, tangy garnish note that brightens the surface and introduces a visual pop of deep red; za’atar provides earthy, herby complexity. Sprinkle the chopped fresh parsley across the top. Serve immediately with warm Homemade Lavash or fresh pita bread — both provide the right combination of warmth, softness, and neutral flavour to complement the hummus without competing with it.
*Notes :
- Dried chickpeas versus canned is the most significant quality decision in this recipe, and the difference in the finished hummus is immediately and obviously apparent. Dried chickpeas soaked and cooked with baking soda produce a hummus with a creamier, more coherent texture and a richer, more developed chickpea flavour than canned chickpeas provide. Canned chickpeas are pre-cooked, and the heat-processing and canning liquid affect both the chickpea’s internal starch structure and the skin’s integrity — they produce a slightly grainier result and a flatter flavour. If using canned chickpeas as a convenience shortcut, drain and rinse them thoroughly, then heat in a small amount of water with ¼ tsp of baking soda over low heat for 15–20 minutes before draining and processing while warm — this improves the texture substantially over simply draining cold canned chickpeas and processing directly.
- The double baking soda method — ½ tsp in the soaking water and ½ tsp in the cooking water — is the technique most responsible for the ultra-smooth texture this recipe achieves. Baking soda’s alkalinity weakens the pectin matrix in the chickpea skins and cell walls progressively through the soaking and cooking stages, producing chickpeas that are so completely softened that their skins blend invisibly into the final hummus rather than creating the flecked, slightly gritty texture that intact skins produce. Some recipes call for hand-peeling the chickpeas after cooking to remove the skins — an effective but extremely tedious process for 225g of chickpeas. The baking soda method achieves a comparable or superior result without any manual skin removal.
- This classic hummus is the technical foundation for the four flavoured variations in the hummus collection. Each variation uses this base recipe’s chickpea preparation and processing technique, adding its specific flavour element at the stage where it can be most effectively incorporated. Understanding the base recipe’s technique thoroughly makes every subsequent flavoured variation straightforward — the only change is what goes in alongside the tahini and lemon.
Why This Recipe Works
This recipe works because it addresses the three variables that most determine hummus quality — chickpea cooking, processing temperature, and emulsification technique — with specific techniques for each. Baking soda in both the soak and the cook ensures the chickpeas are soft enough to blend invisibly. Processing while warm ensures the starch stays gelatinised and smooth.
Adding ice-cold water while the processor runs creates the temporary emulsification that produces the light, creamy texture. The tahini quantity — 140g for 225g of dried chickpeas — is at the generous end, producing a tahini-forward hummus with pronounced sesame depth rather than the thin, chickpea-watery versions that under-tahini hummus produces.
Ingredient Breakdown
Dried Chickpeas with Baking Soda
The foundation — completely softened through double baking soda treatment, producing the uniformly creamy chickpea base that smooth hummus requires.
Tahini (140g)
The flavour and fat backbone — at this generous quantity it produces a prominently nutty, sesame-forward hummus with real depth. The fat in the tahini is what emulsifies with the ice water to produce the light, creamy texture.
Ice-Cold Water
The emulsification agent — cold temperature stabilises the tahini fat dispersion during processing, producing a lighter, creamier texture than warm water.
Lemon Juice and Zest
The brightening acid layer — juice for clean sharpness, zest for aromatic citrus complexity. The brightness that makes hummus taste alive rather than dense.
Smashed Garlic
Background savory depth — smashed for even distribution of aromatic compounds without raw garlic intensity.
Ground Cumin
Earthy, warm spice background — present as depth rather than a prominent flavour, preventing the hummus from tasting one-dimensionally bland.
Za’atar or Sumac
The finishing garnish — za’atar for herby, earthy complexity; sumac for fruity, tangy brightness and visual drama.
Flavor Structure Explained
This hummus follows a layered balance model:
- Earthy nutty base (chickpeas, tahini)
- Bright savory lift (lemon, garlic)
- Warm spice depth (cumin, black pepper)
- Smooth finishing richness (olive oil)
- Aromatic top note (za’atar or sumac)
Chickpeas and tahini establish the foundation with dense, rich, slightly nutty depth. Lemon and garlic cut through that base, adding brightness and sharp aromatic contrast that keeps the hummus from feeling heavy. Cumin and black pepper sit underneath as a warm, earthy layer that adds quiet complexity. Olive oil finishes the structure with smooth, fruity richness that enhances texture and cohesion. Za’atar or sumac provide the final top note — either herbal or acidic — adding variation and lift to each bite. Salt runs through all layers, sharpening and amplifying the entire profile.
Common Mistakes to Avoid
- Not Cooking Chickpeas Completely Soft – Any residual firmness in the chickpeas produces graininess in the final hummus that processing cannot fully eliminate. The chickpea must crush immediately under finger pressure with zero resistance.
- Processing Cold Chickpeas – Cold chickpeas have retrogradrated starch that resists smooth processing. Always process immediately while still warm from the cooking pot.
- Using Warm Water Instead of Ice-Cold – Warm water does not create the emulsification effect that produces creamy, light hummus. Always use ice-cold water — adding a few ice cubes to the water jug is a practical way to ensure it is genuinely cold throughout the process.
- Adding All the Water at Once – Consistency is personal and the amount of water needed varies by chickpea batch and tahini brand. Add one tablespoon at a time, assess after each addition, and stop when you reach the desired texture.
- Under-seasoning – Hummus requires bold salt to make its flavours come forward. Start conservatively and adjust incrementally — flat hummus is almost always a salt deficiency.
- Not Scraping Down the Bowl – Any mass stuck to the sides of the food processor remains unprocessed. Scrape down every 30–45 seconds for a uniformly smooth result.
Variations
Chipotle and Lime Hummus
Bold, smoky, and heat-forward — chipotle peppers in adobo blended into the classic base with lime juice replacing lemon, producing a deep, fruity, slightly spicy hummus with Mexican character. Serves as an excellent dip for tortilla chips, a spread for fajita wraps, and a sauce base for grain bowls. Full recipe at Chipotle and Lime Hummus.
Harissa and Mint Hummus
Warm, complex, and aromatic — North African harissa paste blended into the classic base and finished with fresh mint, producing a spiced, fragrant hummus with both heat and herbal freshness. Pairs specifically well with grilled lamb, kofta skewers, and Middle Eastern flatbreads. Full recipe at Harissa and Mint Hummus.
Sun-Dried Tomato and Basil Hummus
Rich, sweet-acidic, and Mediterranean — oil-packed sun-dried tomatoes and fresh basil blended into the classic base, producing a vibrant, deep-red hummus with Italian character. Excellent as a bruschetta spread, a pasta sauce base, and alongside roasted vegetables. Full recipe at Sun-Dried Tomato and Basil Hummus.
Roasted Garlic Hummus
Deep, mellow, and sweet-savory — a full head of roasted garlic replacing the raw garlic in the classic base, producing a hummus where garlic’s sharp rawness has been transformed into caramelised, almost sweet, deeply savory warmth. The most universally appealing variation and the one that works as both a standalone dip and a component in composed dishes. Full recipe at Roasted Garlic Hummus.
Storage & Make-Ahead
Store in an airtight container in the refrigerator for up to 5 days. Press a sheet of plastic wrap directly onto the hummus surface before sealing — direct contact with the plastic slows surface oxidation and prevents the darkening that can occur at exposed surfaces. The hummus will thicken considerably when cold as the starch retrogradrates — bring to room temperature for 20–30 minutes before serving and stir in a small amount of cold water if needed to restore the original consistency. Drizzle fresh olive oil and re-garnish with za’atar and parsley immediately before serving from the refrigerator. Hummus freezes adequately for up to 2 months — freeze without garnish, thaw overnight in the refrigerator, and stir well with a small addition of cold water before serving.
Frequently Asked Questions
Can I use canned chickpeas instead of dried?
Yes, but the texture and flavour will be noticeably less smooth and less complex. If using canned, drain and rinse 2 cans (approximately 480g drained weight), heat briefly with a small amount of water and ¼ tsp of baking soda for 15 minutes before processing while warm. The result will still be good hummus — just not quite as exceptional as the dried chickpea version.
Why does my hummus taste bland even after seasoning?
The most common cause is insufficient salt — avocado and chickpea both have high fat content that requires bold seasoning to make their flavours come forward. Add salt incrementally and taste after each addition until the chickpea’s own character becomes vivid. Secondary causes are insufficient lemon (add more juice) or insufficient tahini (use more on the next batch).
Why is my hummus grainy rather than smooth?
The chickpeas were either not cooked completely soft, were processed cold rather than warm, or the food processor was not stopped and scraped down frequently enough during processing. All three produce graininess that extra processing time cannot fully correct once the hummus is cold.
What should I serve hummus with?
Warm Homemade Lavash is the most natural pairing — the soft, warm flatbread and creamy hummus is the foundational Middle Eastern combination. Fresh pita bread is the most classic accompaniment globally. For vegetables: cucumber, carrot, celery, radish, and cherry tomatoes all work well as dipping vehicles. As a spread in grain bowls, wraps, and sandwiches.
How long does hummus keep?
Refrigerated in an airtight container with plastic film pressed onto the surface, up to 5 days. The flavour is best on days 1–3. By day 5 the garlic intensifies and the freshness of the lemon diminishes — still edible but noticeably less vibrant than fresh.
Nutrition Facts
( per serving — approximately 4 tbsp)
Calories
~185 kcal
Protein
8 g
Fat
10 g
Carbs
19 g
Calories
~185 kcal
Protein
8 g
Fat
10 g
Carbs
19 g
Related Recipes
Related Recipes

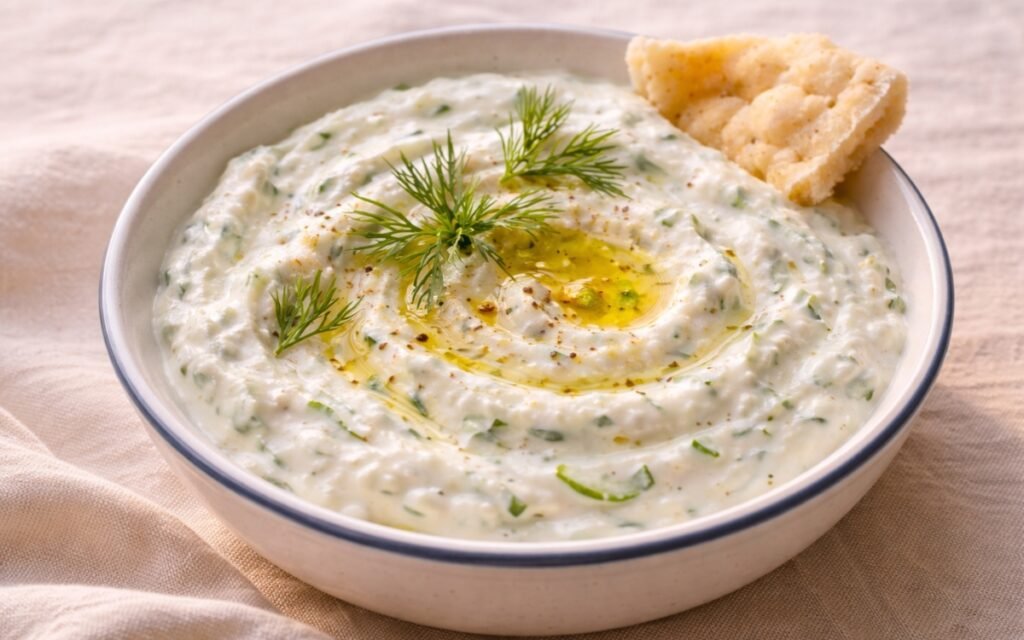
Authetnic Tzatziki
Thick, creamy Greek tzatziki with squeezed cucumber, fresh dill, mint, and lemon — the real thing in 30 minutes.
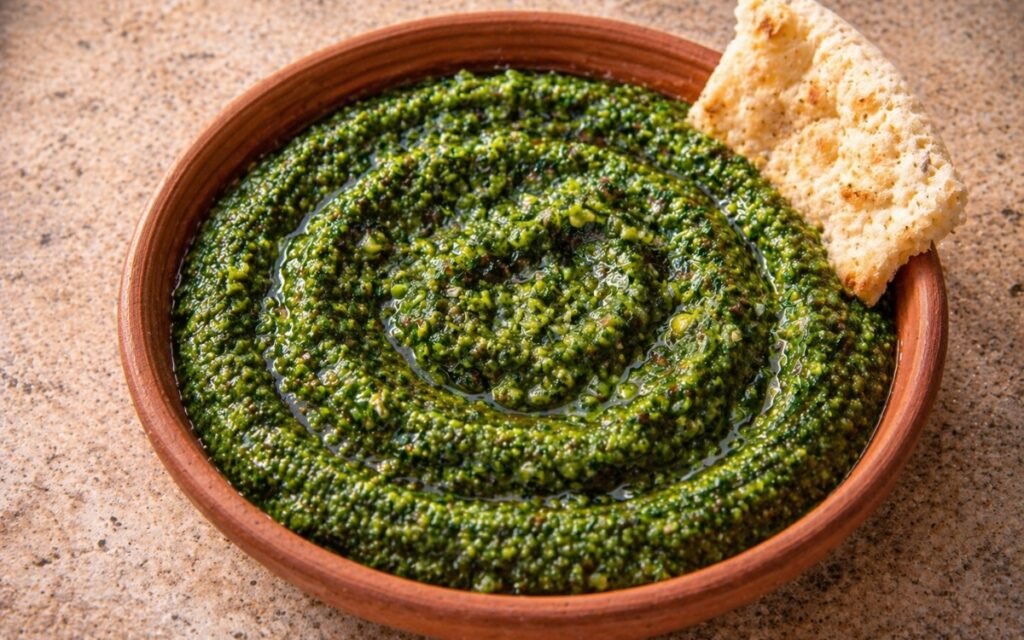
Green Zhoug
Fresh jalapeños, a whole bunch of cilantro, mint, garlic, and lime pulsed into a thick, coarse Yemeni herb sauce — ten minutes, no cooking, and the condiment that improves everything it touches.
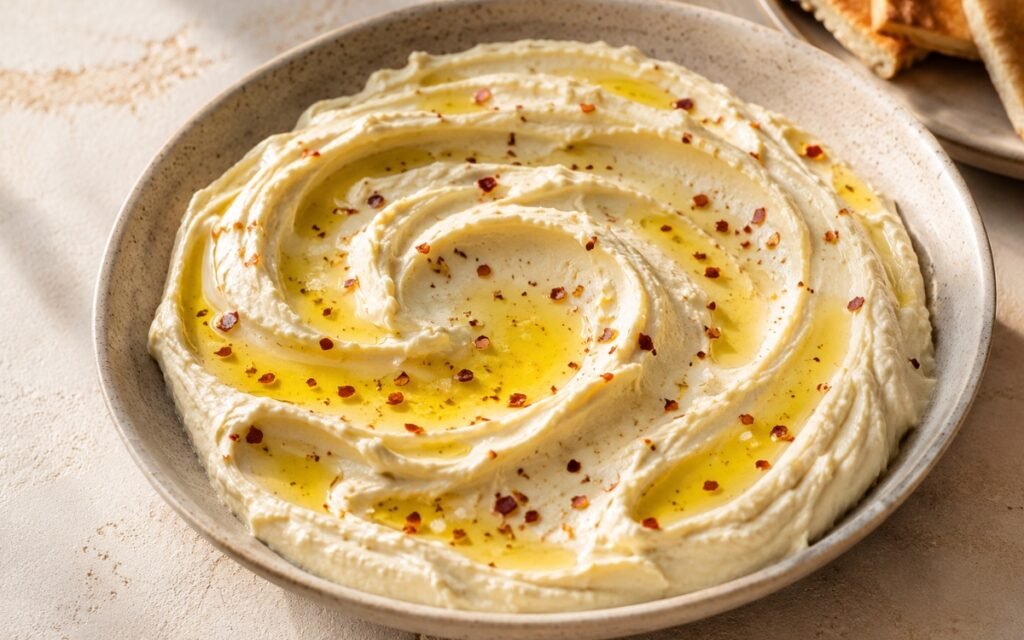
Whipped Feta with Spiced Honey
Greek feta blended completely smooth with garlic-and-Aleppo-infused honey, lemon, and olive oil — swooped in a bowl, finished with olive oil, chili flakes, and flaky sea salt. 25 minutes.
You might also like
You might also like
Fresh Mango Lemonade
Mango simmered at medium-low heat with lime zest, ginger off heat exactly 2 minutes — lemon and lime juice added cold, chilled. Tropical, golden, and bright.
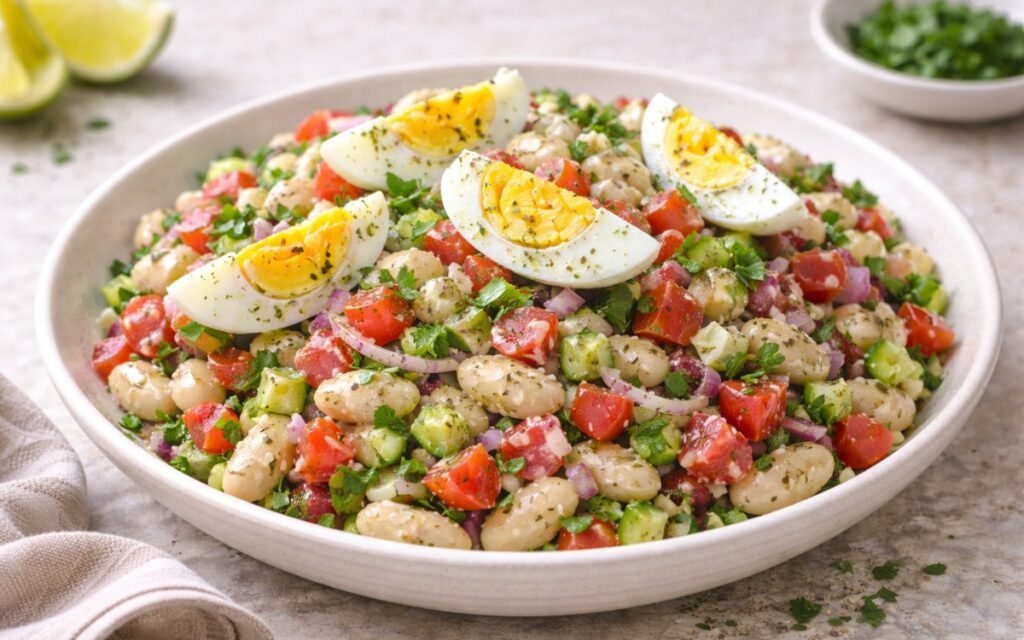
Turkish Piyaz Bean Salad
Traditional Turkish white bean salad with tomatoes, onions, eggs, and tangy sumac dressing.
Peach White Tea Spritzer Mocktail
Peaches simmered in thin slices, white tea steeped at 70–85°C with thyme — honey dissolved while warm, topped with club soda. Light, floral, and refined.


Classic Hummus
Ingredients
Method
- Place the dried chickpeas in a large bowl and cover with cold water by at least 5–6cm — the chickpeas will absorb a significant amount of water and swell considerably, roughly doubling in size. Add ½ tsp of baking soda to the soaking water and stir briefly to dissolve. The baking soda in the soaking water begins the softening process before cooking even starts. It raises the pH of the water slightly, which weakens the pectin in the chickpea skins and begins to soften the cell walls — producing chickpeas that will cook more quickly and more completely than those soaked in plain water. Allow to soak for 8 hours at room temperature, or overnight. After soaking, drain the chickpeas thoroughly through a colander and discard the soaking water — it contains released starches, oligosaccharides, and the dissolved baking soda. Do not use it for cooking.
- Transfer the drained, soaked chickpeas to a large pot. Cover with fresh cold water by approximately 5cm and add the remaining ½ tsp of baking soda. Bring to a boil over medium-high heat. As the water approaches and reaches a boil, a greyish foam will accumulate on the surface — this is coagulated proteins and dissolved starches. Skim it off with a large spoon as it forms, in the same way you would skim a stock. Once the boil is established and the foam has been removed, reduce to medium-low heat, cover with a lid, and cook for approximately 30 minutes. Begin checking at the 25-minute mark by removing a single chickpea from the pot and pressing it firmly between your fingers or with the back of a fork. The chickpea should crush completely and immediately under minimal pressure — if it offers any resistance, it needs more cooking. The baking soda in the cooking water continues the skin-softening work begun during the soaking and produces chickpeas that are cooked throughout to a uniformly soft, creamy consistency rather than soft at the edges with a firm, grainy centre. This complete softness is the foundation of genuinely smooth hummus — any residual firmness in the chickpeas will produce a grainy, slightly rough texture in the finished hummus regardless of how long the food processor runs. Drain the cooked chickpeas. Reserve a small amount of the cooking liquid if desired — it can be used to thin the hummus in place of or alongside the ice water.
- Transfer the drained chickpeas to the food processor while they are still warm — this is an important timing decision. Warm chickpeas process significantly more smoothly than cold ones. The heat keeps the starch in a gelatinised, fluid state that blends into a uniform mass easily. Cold chickpeas have starch that has partially retrogradrated back toward a firmer, more crystalline structure that resists smooth processing and produces a grainier result at the same processing time. Begin processing immediately, stopping every 30–45 seconds to scrape down the sides and bottom of the bowl with a spatula — any chickpea mass stuck to the sides is not being processed and will remain as coarser pieces in the finished hummus. Process for 2–3 minutes until the chickpeas have broken down into a thick, fairly smooth paste. The paste will look dry and stiff at this stage — this is correct. The tahini, lemon, and water are added progressively in subsequent steps and the consistency will transform significantly.
- With the food processor running, add the tahini paste in a steady stream — not all at once. Adding tahini while the machine runs incorporates it more evenly than adding it to a stationary paste. Add the lemon juice, lemon zest, smashed garlic cloves, ground cumin, a conservative starting amount of fine sea salt, and a small amount of freshly ground black pepper. The garlic is smashed rather than minced for this application — smashing opens the clove and allows its aromatic compounds to release into the hummus during processing, but the smashed pieces process more evenly than large whole cloves and less intensely than pre-minced garlic, which can produce sharp, raw garlic pockets in the finished hummus. Process everything together for 2–3 minutes, scraping down the sides frequently. At this stage the hummus will look thick and slightly grainy — this is normal before the ice water is added.
- With the food processor running, begin adding the ice-cold water one tablespoon at a time, allowing each addition to fully incorporate before adding the next. Cold water — specifically ice-cold — is the technique detail that separates commercial-quality smooth hummus from good home hummus. When cold water is added to the blended chickpea-tahini mass while the processor runs, it creates a temporary emulsification effect: the fat molecules in the tahini are dispersed by the mechanical action of the blade and the cold water stabilises this dispersion, producing a lighter, creamier, more aerated texture. Warm water does not produce the same effect — the fat re-aggregates more quickly and the result is denser and heavier. Continue adding water and processing until you reach your preferred consistency. At approximately 50ml the hummus will be thick and dense — a paste that holds a shape firmly on a plate. At 100ml it will be smooth and creamy with a texture that flows slowly from a spoon. At more than 100ml it becomes noticeably thinner and lighter in flavour — the dilution with water reduces the flavour intensity proportionally. There is no single correct answer — choose the consistency that suits your intended use.
- Stop the processor and taste the hummus thoroughly. This step is the most important and most frequently rushed step in the recipe. Evaluate four specific dimensions: if the hummus tastes flat and one-dimensional, it needs salt — add in small increments and process briefly to distribute, tasting after each addition until the flavours of the tahini and chickpea sharpen and come forward. If it tastes heavy, rich, and slightly dull, it needs more lemon juice — acid is the brightening element that makes hummus taste alive rather than dense. If it tastes bland despite salt and lemon, it needs more cumin and black pepper — earthy warmth and mild heat that provide the background complexity that prevents hummus from tasting like a plain paste. If it tastes too strongly of raw garlic, the garlic pieces may not have fully processed — continue running the machine for 60 more seconds. Continue adjusting in small increments and tasting after each until the hummus tastes balanced, complex, and genuinely good.
- Transfer the finished hummus to a wide, shallow serving bowl. Use the back of a spoon to create a swooping circular well in the surface — starting from the centre and sweeping outward in a single smooth motion. This well collects the olive oil and garnishes and is the visual presentation style of authentic hummus. Drizzle a generous amount of extra-virgin olive oil into the well and across the surface. Scatter za’atar seasoning or sumac generously — sumac provides a fruity, tangy garnish note that brightens the surface and introduces a visual pop of deep red; za’atar provides earthy, herby complexity. Sprinkle the chopped fresh parsley across the top. Serve immediately with warm Homemade Lavash or fresh pita bread — both provide the right combination of warmth, softness, and neutral flavour to complement the hummus without competing with it.