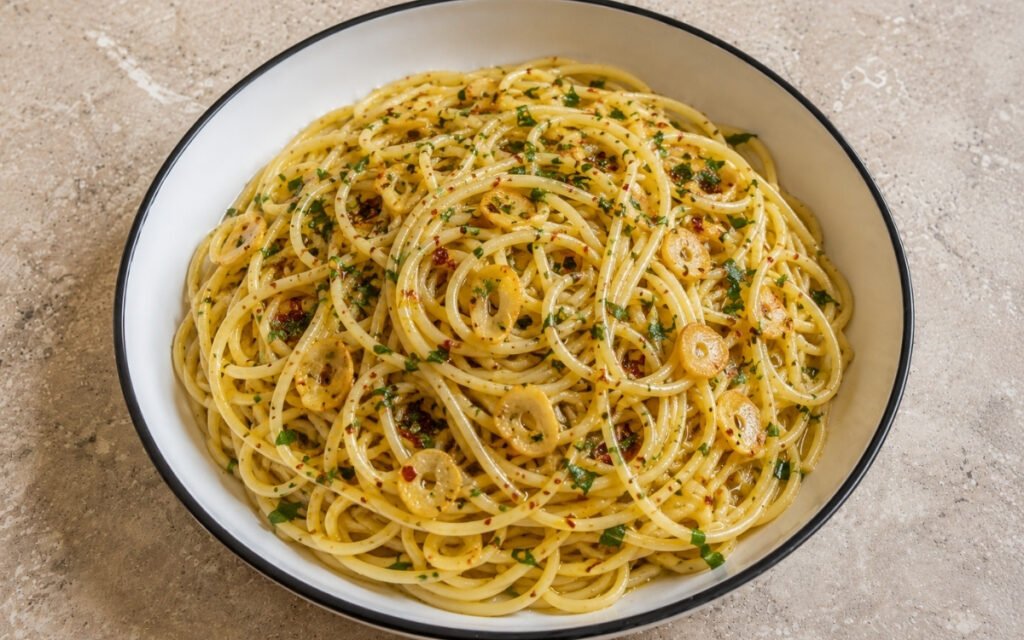
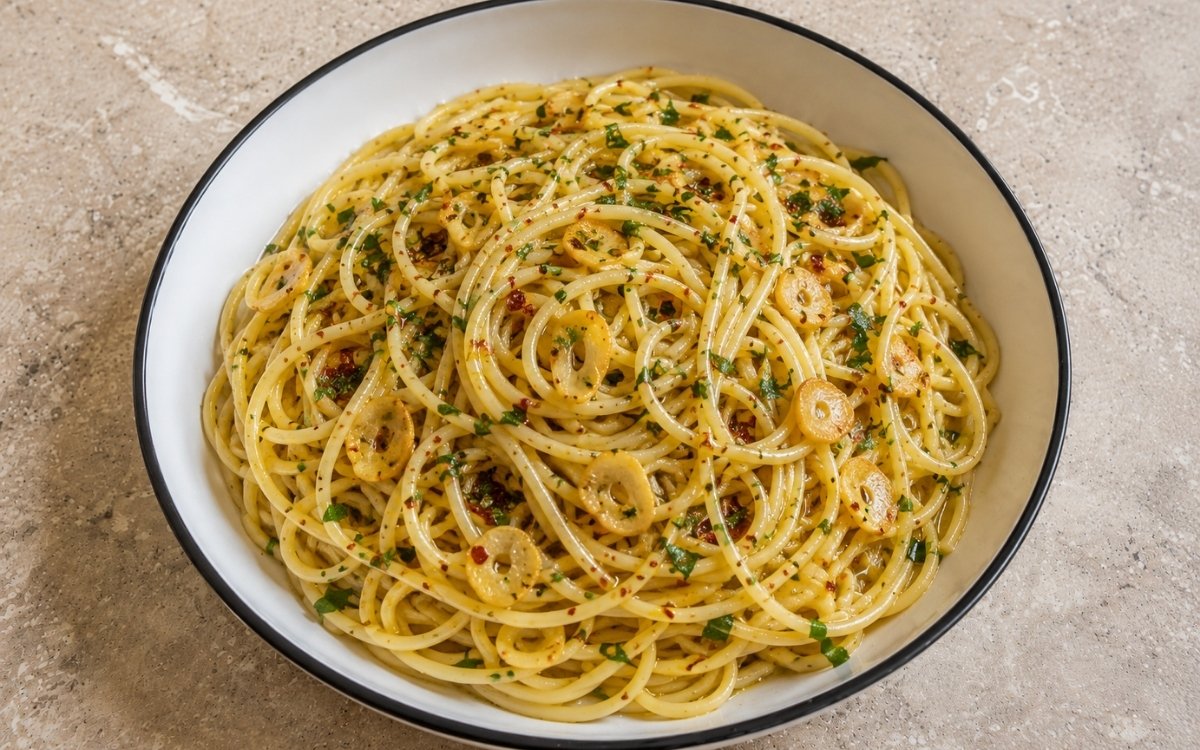
4-Ingredient Aglio e Olio Pasta
The pasta that proves quality and technique matter more than ingredient count. Spaghetti, garlic, olive oil, and red pepper flakes — nothing else — transformed by one specific technique into a glossy, fragrant, silky-coated plate that is simultaneously the simplest and the most technically instructive pasta in Italian cooking. The garlic must be sliced paper-thin and coaxed to pale gold at medium-low heat without a single slice burning. The pasta water must be added at the right moment to create the emulsion that turns separate oil and starch into a unified, clinging sauce. And the tossing must be vigorous and continuous until the coating is glossy rather than oily. Get all three right and twenty minutes produces something genuinely extraordinary. There is no cheese — it is considered sacrilege in this Roman classic, and the dish does not need it.
Prep Time : 5 min
Cook Time : 15 min
Servings : 4
5 min
15 min
4
Ingredients
For the Pasta
• 450g spaghetti or spaghettoni — this one on Amazon
• 15g kosher salt (for pasta water)
For the Sauce
• 120ml extra-virgin olive oil (preferably Sicilian or Ligurian) — this one on Amazon
• 40g garlic cloves (about 10-12 cloves), sliced paper-thin
• 3g red pepper flakes (about 1½ teaspoons)
For Finishing
• 20g fresh flat-leaf parsley, roughly chopped (optional but traditional)
• Extra-virgin olive oil for drizzling
This post may contain affiliate links. As an Amazon Associate I earn from qualifying purchases, at no additional cost to you.
Directions
- Cook the Pasta
Bring 4 litres of water to a full rolling boil in your largest pot. Add the 15g of kosher salt — the water should taste assertively of the sea. Add the spaghetti and stir immediately for the first 30 seconds to prevent the strands from sticking together as the starches on their surfaces hydrate and become adhesive in the first moments of cooking. Cook until exactly 2 minutes shy of the package directions’ al dente time — the pasta will finish cooking in the skillet during the tossing step and must be significantly underdone when it leaves the boiling water. Before transferring the pasta, reserve at least 240ml of pasta cooking water in a heatproof jug. The pasta water is not optional and not interchangeable with plain water — its dissolved starch content is the emulsifying agent that allows the olive oil to combine with water into a unified, coating sauce rather than remaining as separate, oily droplets that pool at the bottom of the bowl. Reserve it warm and keep it accessible throughout the sauce-making step. - Slice the Garlic Paper-Thin
While the pasta cooks, prepare the garlic. Peel all the cloves and slice each one lengthwise into thin, translucent sheets — the thinnest you can produce with a sharp knife, or use a mandoline for the most consistent result. Paper-thin means approximately 1mm or less — thin enough to see light through when held up. This specific thickness is not aesthetic but functional. Uniformly thin garlic slices cook at the same rate throughout their entire cross-section — by the time the outside surface reaches the correct pale golden colour, the inside is equally cooked. Thicker pieces cook unevenly: the exterior browns while the interior remains sharp, raw, and pungent. A single burnt slice among pale golden ones will introduce bitterness into the oil that distributes through the entire sauce — the difference between aglio e olio that tastes fragrant and sweet and aglio e olio that tastes bitter. Take the 3–4 minutes of careful slicing — or use a mandoline — and the cooking step becomes significantly more forgiving. - Build the Garlic Oil Base at Low Heat
Approximately 4 minutes before the pasta will be ready for transfer, heat the 120ml of extra-virgin olive oil in your largest skillet over medium-low heat. The skillet size matters — you need enough surface area to eventually toss 450g of spaghetti without it piling above the rim. Add the paper-thin garlic slices and the red pepper flakes simultaneously to the oil before it reaches high heat — adding garlic to already-hot oil causes the thin slices to brown on one side before they can be turned, while cold-oil starting brings the garlic up to temperature slowly and evenly. The red pepper flakes added at this stage bloom their fat-soluble capsaicin and aromatic compounds into the surrounding oil during the 3–4 minute cooking period, producing a pervasive, even warmth throughout the sauce rather than concentrated heat only where a flake is encountered. Cook over medium-low heat, swirling the pan frequently rather than stirring — swirling moves the garlic slices through the oil without breaking the thin slices as a spatula might. The garlic should sizzle very gently — a soft, continuous sizzle rather than an aggressive, spattering fry. Watch every second from the 2-minute mark onward. The target colour is pale champagne gold — very light golden with slightly crisper, darker edges on the thinner end of each slice, but with most of the slice remaining pale. If any slices are browning too quickly, pull the pan off the heat immediately and allow the residual heat to continue the cooking more gently. The difference between pale champagne gold and medium golden brown is approximately 30 seconds at medium-low heat — this is not a step to walk away from. - Add the Pasta Water and Build the Emulsion
When the garlic reaches the correct pale gold colour with lightly crisped edges, add 120ml of the reserved hot pasta water to the skillet. The addition will splutter and steam dramatically — this is expected and is not a problem. Swirl or stir vigorously immediately after the water hits the oil. The starch in the hot pasta water begins to combine with the olive oil under the mechanical action of swirling, creating the initial emulsification that produces the cloudy, slightly creamy-looking liquid that will become the sauce’s coating base. The transformation from clear oil floating on top of water to a partially unified, opaque emulsion happens quickly with vigorous movement. Keep the heat at medium-low and continue swirling for 30–45 seconds until the liquid looks uniformly cloudy and slightly thickened rather than having distinct oil pools floating on clear water. - Transfer the Pasta and Emulsify
Using tongs, transfer the pasta directly from the boiling water to the skillet — do not drain through a colander. The direct transfer with tongs brings a small but beneficial amount of boiling pasta water with the strands, maintaining the sauce’s temperature and adding additional starch to the emulsification. Increase the heat to medium-high. Begin tossing the pasta continuously and vigorously — lift from the bottom of the skillet and fold over the top, rotating the pan slightly with each toss to ensure the pasta at the outside of the pan cycles to the centre. The vigorous tossing motion is the emulsification mechanism: the mechanical action breaks the oil into progressively smaller droplets and distributes them evenly throughout the starchy water, producing the glossy, clinging sauce that makes the dish. Toss continuously for 90 seconds, adding more pasta water in 30ml increments whenever the pan looks dry or the pasta begins to stick together. The correct finished consistency is a glossy, lightly creamy coating that clings visibly to every strand — the sauce should not pool oily at the bottom of the skillet and should not look watery. If it looks oily, add more pasta water and toss more vigorously. If it looks watery, continue tossing over higher heat until the emulsion tightens. - Finish and Serve
Cut the heat completely. Add the roughly chopped fresh parsley if using and toss for 10 seconds — the residual heat wilts the parsley gently, releasing its aromatic oils without cooking it to dark, flavour-depleted softness. Taste for salt and adjust. Divide among four warm bowls immediately — aglio e olio tightens and the oil begins to separate from the starch emulsion as it cools, so the window between leaving the pan and the first bite is short. Drizzle a thin stream of your best finishing extra-virgin olive oil over each bowl — this final raw drizzle adds the fresh, uncooked fruity-peppery character of quality olive oil that the cooking process modifies. Do not add cheese. The dish is complete as it is.
*Notes :
- Aglio e olio is the pasta that Italian cooking instructors use to teach technique precisely because it has nowhere to hide — with four ingredients, the quality of each and the correctness of the technique are the entire dish. Extra-virgin olive oil quality is more critical in this recipe than in any other pasta in the collection because the oil is not a medium but a flavour ingredient in a sauce where nothing else provides flavour of comparable prominence. Fruity, grassy Ligurian oils add a sweet, delicate character that allows the garlic to be the dominant note. Peppery, assertive Tuscan or Sicilian oils add their own intensity alongside the garlic, producing a more complex, more robust result. Both approaches are excellent — the choice is a matter of the flavour profile you prefer. What does not work is a low-quality, neutral extra-virgin olive oil — the result will be flat, oily, and disappointing regardless of how correctly the technique is applied.
- The absence of cheese in aglio e olio is traditional and functional rather than arbitrary. Pecorino or Parmigiano added to the garlic oil base would immediately break the oil-water emulsion that the pasta water starch has built, producing a grainy, separated sauce rather than the glossy coating the dish requires. More fundamentally, the clean, unadorned flavour of garlic-infused olive oil is the point — adding cheese would introduce a dairy richness and saltiness that would mask the garlic’s specific sweet, toasted character that is the entire flavour story.
- The spaghettoni — a slightly thicker version of spaghetti — is worth seeking out for this specific dish. Its greater surface area and slight additional thickness provide a more satisfying coating-to-pasta ratio and produces more textural presence in the finished bowl than standard spaghetti. Both are correct; spaghettoni is the slightly better choice for a sauce this simple.
Why This Recipe Works
This recipe works because it treats the emulsification step as the primary technique challenge and organises everything around it. The paper-thin garlic slices cook evenly and produce the sweet, toasted garlic oil without any bitterness from uneven browning. The pasta water added to the hot oil begins the emulsification before the pasta is added.
The direct tong transfer maintains the sauce’s temperature. The continuous vigorous tossing completes the emulsification mechanically and coats every strand. The finishing drizzle of raw olive oil adds the uncooked flavour note that cooking modifies away. Every step is in service of the single emulsification goal.
Ingredient Breakdown
Extra-Virgin Olive Oil (120ml)
The primary flavour ingredient — not a cooking medium but the sauce itself. Quality matters more here than in any other recipe in the collection.
Garlic (Paper-Thin Sliced, Cold-Oil Start)
The aromatic foundation — paper-thin for even cooking, cold-oil start for gradual, sweet, toasted development without bitterness.
Red Pepper Flakes (Bloomed in Oil)
Background warmth distributed evenly through fat-soluble capsaicin migration during the 3–4 minute blooming period.
Reserved Pasta Water (Starchy, Hot)
The emulsifying agent — dissolved starch that allows the olive oil to combine with water into a unified, clinging sauce rather than remaining separate.
Fresh Parsley
The finishing aromatic — wilted briefly in residual heat, adding a clean, slightly bitter herbal note that provides the single contrast to the garlic oil’s richness.
Finishing Olive Oil Drizzle
Raw, uncooked olive oil’s fruity-peppery character added at serving — the flavour that cooking at medium-low heat partially modifies away.
Flavor Structure Explained
This Aglio e Olio follows a layered balance model:
- Sweet toasted core (cooked garlic)
- Fresh fruity base (extra-virgin olive oil)
- Gentle heat (red pepper flakes)
- Fresh herbal lift (parsley)
- Minimalist precision (tight flavor spectrum)
Garlic defines the core, transforming through controlled cooking into a sweet, nutty, mellow flavor rather than sharp pungency. Olive oil provides both body and contrast — partially warmed for depth, partially fresh for grassy brightness. Red pepper flakes run underneath as steady heat, adding dimension without overpowering. Parsley finishes the profile with a clean, fresh note that prevents heaviness. The structure is extremely tight — every element exposed, balanced, and essential, with no room for error.
Common Mistakes to Avoid
- Browning the Garlic Too Dark – The most common and most consequential error — browned garlic introduces bitterness that distributes through the entire oil and cannot be corrected. Pale champagne gold only. Remove the pan from heat the moment any slice looks like it might continue browning uncontrollably.
- Slicing the Garlic Unevenly or Too Thick – Thick slices cook unevenly — burnt outside, raw inside. Take the time for truly paper-thin, consistent slices or use a mandoline.
- Not Reserving Enough Pasta Water – The pasta water is the entire emulsification mechanism. Reserve 240ml minimum and keep it warm throughout.
- Adding Pasta Water to Cold Oil – The emulsification requires the oil to be at the correct temperature when the water is added — the hot water hitting warm, garlic-infused oil creates the initial emulsification immediately. Cold oil produces separation.
- Not Tossing Vigorously Enough – A gentle stir does not create the mechanical emulsification that vigorous tossing does. Toss continuously and aggressively for the full 90 seconds.
- Adding Cheese – Breaks the emulsion and masks the garlic oil’s specific sweet character. Never in this dish.
Variations
Anchovy Version
Add 4–5 finely minced anchovy fillets to the oil alongside the garlic — the anchovies melt completely and invisibly into the oil during cooking, adding a deep, savoury umami depth that makes the sauce taste more complex without tasting of anchovy. One of the most popular Roman additions.
Lemon Version
Add the zest of one lemon to the oil in the final 60 seconds of garlic cooking and finish with a squeeze of lemon juice alongside the parsley. The citrus adds brightness and a fragrant top note that specifically complements the garlic’s sweetness.
Caper and Olive Version
Add 2 tablespoons of rinsed capers and 60g of pitted, roughly chopped green or black olives to the garlic oil alongside the pasta water. The briny, salty elements add complexity and substance that transforms the dish toward a more substantial, more flavoured result.
Breadcrumb Version (Aglio, Olio e Pangrattato)
Toast 60g of coarse breadcrumbs in 1 tablespoon of olive oil until deeply golden and scatter over the finished pasta at serving in place of cheese — the crunchy, toasted crumbs provide textural contrast and a mild, wheaty depth. The traditional Southern Italian preparation that substitutes for Parmesan in regions where it was historically unaffordable.
Storage & Make-Ahead
Aglio e olio is one of the dishes least suited to storage — the oil-water emulsion separates during refrigeration and the pasta absorbs the sauce, producing an oily, dry result that cannot be meaningfully restored. Make only the quantity needed and serve immediately. If leftovers must be stored, refrigerate for up to 1 day and reheat in a pan over low heat with 2–3 tablespoons of water per portion, tossing gently — the result will be acceptable but the emulsion will be noticeably less glossy than fresh.
Frequently Asked Questions
Why no cheese in aglio e olio?
Two reasons — tradition and technique. Traditionally, aglio e olio is a Roman preparation specifically without cheese, where the garlic oil is the complete flavour statement. Technically, adding Pecorino or Parmigiano to the oil-water emulsion breaks the starch-fat interface that the pasta water created, producing a grainy, separated sauce rather than the glossy coating the dish requires.
How do I know when the garlic is the correct colour?
Pale champagne — the colour of very light golden straw, with very slightly darker, crisped edges on the thinnest parts of each slice. The slices should be fragrant, slightly translucent where thinnest, and show no brown patches anywhere on the main body of each slice. If any slice has brown patches, it has gone slightly too far — not ruined, but slightly more bitter than the ideal.
What olive oil should I use?
The best extra-virgin olive oil you can reasonably afford, specifically for this recipe. Ligurian oils are delicate, fruity, and grassy — they allow the garlic to be the dominant flavour. Sicilian oils are more robust, slightly peppery — they add their own flavour alongside the garlic. Either is excellent. A low-quality olive oil produces a flat, oily, disappointing aglio e olio regardless of perfect technique.
Why spaghettoni rather than regular spaghetti?
Spaghettoni’s slightly larger diameter provides more surface area for the coating sauce to cling to and more pasta presence per strand — for a sauce this simple and this oil-forward, more pasta-to-sauce contact per forkful produces a more balanced eating experience. Regular spaghetti works excellently — spaghettoni is simply the slightly better-suited format.
Can I make this with butter instead of olive oil?
Butter produces a completely different dish with a dairy richness that changes the fundamental character. Aglio e olio’s identity is the specific fruity-peppery-grassy character of extra-virgin olive oil — butter cannot substitute for it in this specific preparation.
Nutrition Facts
( per serving )
Calories
~742 kcal
Protein
14 g
Fat
31 g
Carbs
88 g
Calories
~742 kcal
Protein
14 g
Fat
31 g
Carbs
88 g
Related Recipes
Related Recipes

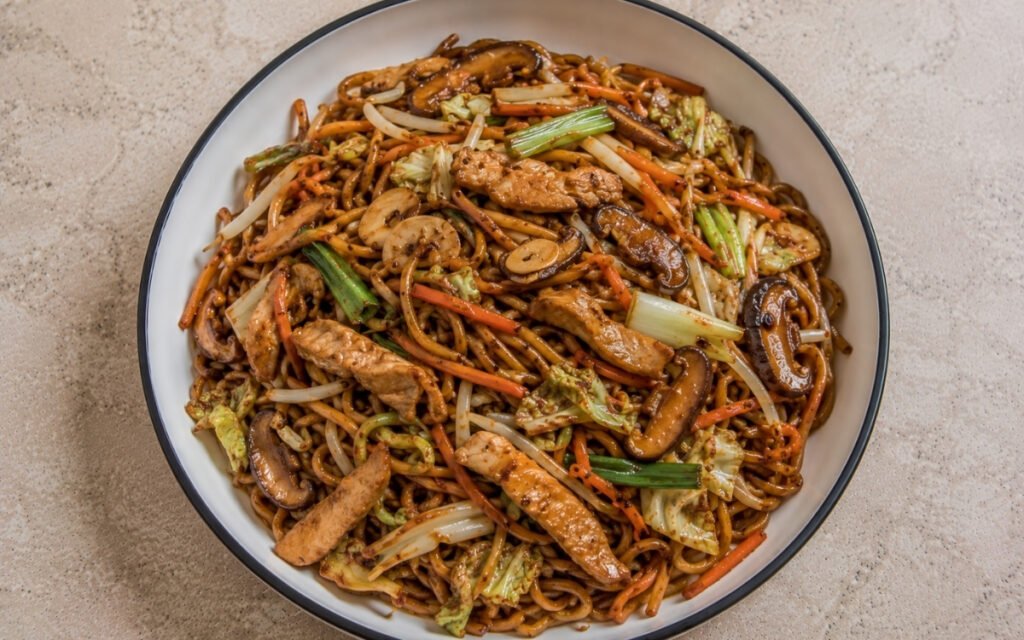
Easy Chicken Chow Mein Noodles
Hong Kong egg noodles crisped in a smoking-hot wok with seared chicken and vegetables — four-component soy sauce, cornstarch glaze, 35 minutes.
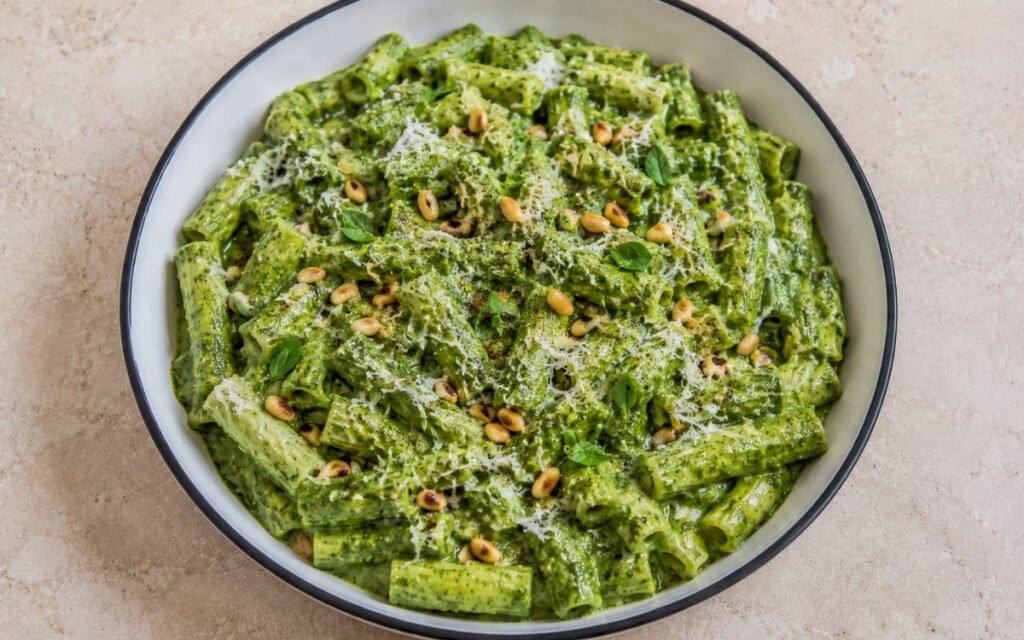
Creamy Spinach & Herb Green Sauce Pasta
Four herbs blended raw with cream cheese and Parmigiano — vivid green, rich, and ready in 35 minutes.
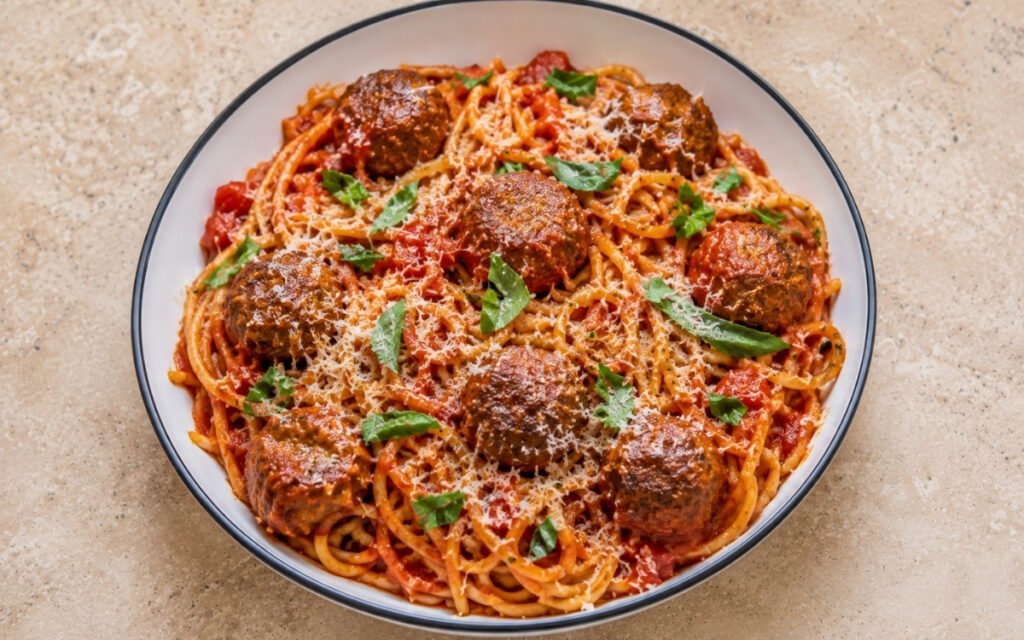
Easy Spaghetti and Meatballs
Beef and pork meatballs on a panade, deeply browned, simmered in San Marzano marinara — 60 minutes.
You might also like
You might also like
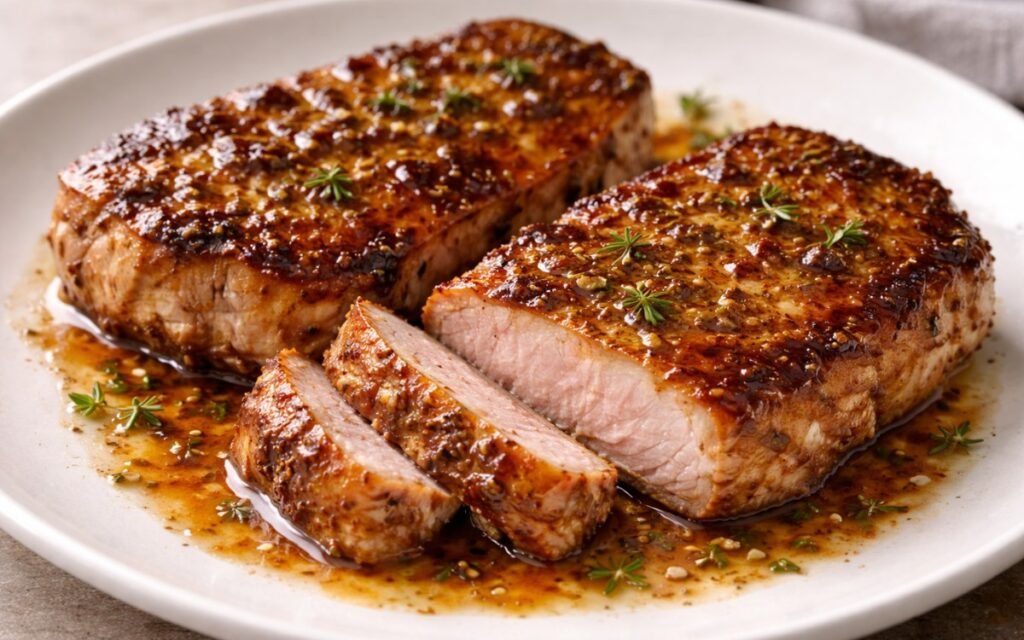
Honey Mustard Pork Chops
Sweet and tangy pork chops with caramelized honey mustard glaze, ready in under 30 minutes.
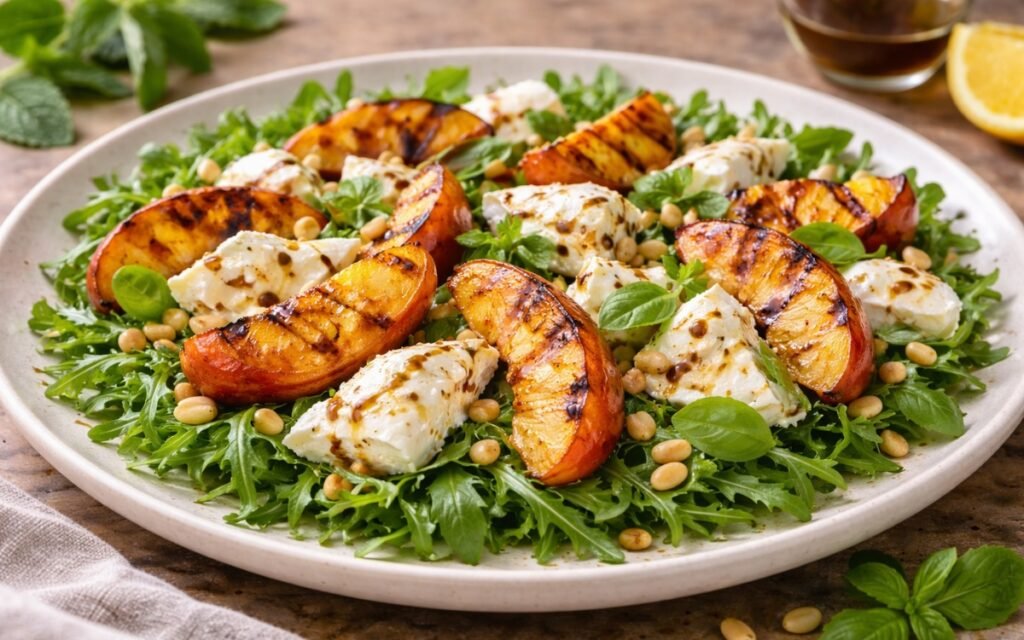
Grilled Peach and Burrata Salad
Caramelized grilled peaches with creamy burrata, arugula, and honey balsamic drizzle for summer.
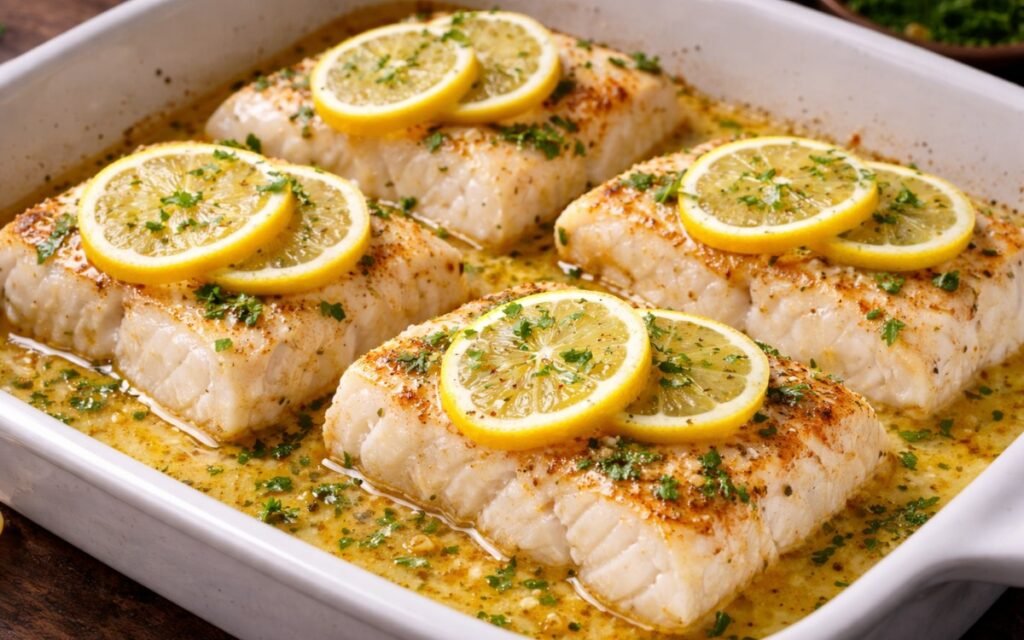
Lemon Butter Baked Cod
Tender cod baked in garlicky lemon butter—restaurant-quality seafood ready in under 30 minutes.
4-Ingredient Aglio e Olio Pasta
Ingredients
Method
- Bring 4 litres of water to a full rolling boil in your largest pot. Add the 15g of kosher salt — the water should taste assertively of the sea. Add the spaghetti and stir immediately for the first 30 seconds to prevent the strands from sticking together as the starches on their surfaces hydrate and become adhesive in the first moments of cooking. Cook until exactly 2 minutes shy of the package directions’ al dente time — the pasta will finish cooking in the skillet during the tossing step and must be significantly underdone when it leaves the boiling water. Before transferring the pasta, reserve at least 240ml of pasta cooking water in a heatproof jug. The pasta water is not optional and not interchangeable with plain water — its dissolved starch content is the emulsifying agent that allows the olive oil to combine with water into a unified, coating sauce rather than remaining as separate, oily droplets that pool at the bottom of the bowl. Reserve it warm and keep it accessible throughout the sauce-making step.
- While the pasta cooks, prepare the garlic. Peel all the cloves and slice each one lengthwise into thin, translucent sheets — the thinnest you can produce with a sharp knife, or use a mandoline for the most consistent result. Paper-thin means approximately 1mm or less — thin enough to see light through when held up. This specific thickness is not aesthetic but functional. Uniformly thin garlic slices cook at the same rate throughout their entire cross-section — by the time the outside surface reaches the correct pale golden colour, the inside is equally cooked. Thicker pieces cook unevenly: the exterior browns while the interior remains sharp, raw, and pungent. A single burnt slice among pale golden ones will introduce bitterness into the oil that distributes through the entire sauce — the difference between aglio e olio that tastes fragrant and sweet and aglio e olio that tastes bitter. Take the 3–4 minutes of careful slicing — or use a mandoline — and the cooking step becomes significantly more forgiving.
- Approximately 4 minutes before the pasta will be ready for transfer, heat the 120ml of extra-virgin olive oil in your largest skillet over medium-low heat. The skillet size matters — you need enough surface area to eventually toss 450g of spaghetti without it piling above the rim. Add the paper-thin garlic slices and the red pepper flakes simultaneously to the oil before it reaches high heat — adding garlic to already-hot oil causes the thin slices to brown on one side before they can be turned, while cold-oil starting brings the garlic up to temperature slowly and evenly. The red pepper flakes added at this stage bloom their fat-soluble capsaicin and aromatic compounds into the surrounding oil during the 3–4 minute cooking period, producing a pervasive, even warmth throughout the sauce rather than concentrated heat only where a flake is encountered. Cook over medium-low heat, swirling the pan frequently rather than stirring — swirling moves the garlic slices through the oil without breaking the thin slices as a spatula might. The garlic should sizzle very gently — a soft, continuous sizzle rather than an aggressive, spattering fry. Watch every second from the 2-minute mark onward. The target colour is pale champagne gold — very light golden with slightly crisper, darker edges on the thinner end of each slice, but with most of the slice remaining pale. If any slices are browning too quickly, pull the pan off the heat immediately and allow the residual heat to continue the cooking more gently. The difference between pale champagne gold and medium golden brown is approximately 30 seconds at medium-low heat — this is not a step to walk away from.
- When the garlic reaches the correct pale gold colour with lightly crisped edges, add 120ml of the reserved hot pasta water to the skillet. The addition will splutter and steam dramatically — this is expected and is not a problem. Swirl or stir vigorously immediately after the water hits the oil. The starch in the hot pasta water begins to combine with the olive oil under the mechanical action of swirling, creating the initial emulsification that produces the cloudy, slightly creamy-looking liquid that will become the sauce’s coating base. The transformation from clear oil floating on top of water to a partially unified, opaque emulsion happens quickly with vigorous movement. Keep the heat at medium-low and continue swirling for 30–45 seconds until the liquid looks uniformly cloudy and slightly thickened rather than having distinct oil pools floating on clear water.
- Using tongs, transfer the pasta directly from the boiling water to the skillet — do not drain through a colander. The direct transfer with tongs brings a small but beneficial amount of boiling pasta water with the strands, maintaining the sauce’s temperature and adding additional starch to the emulsification. Increase the heat to medium-high. Begin tossing the pasta continuously and vigorously — lift from the bottom of the skillet and fold over the top, rotating the pan slightly with each toss to ensure the pasta at the outside of the pan cycles to the centre. The vigorous tossing motion is the emulsification mechanism: the mechanical action breaks the oil into progressively smaller droplets and distributes them evenly throughout the starchy water, producing the glossy, clinging sauce that makes the dish. Toss continuously for 90 seconds, adding more pasta water in 30ml increments whenever the pan looks dry or the pasta begins to stick together. The correct finished consistency is a glossy, lightly creamy coating that clings visibly to every strand — the sauce should not pool oily at the bottom of the skillet and should not look watery. If it looks oily, add more pasta water and toss more vigorously. If it looks watery, continue tossing over higher heat until the emulsion tightens.
- Cut the heat completely. Add the roughly chopped fresh parsley if using and toss for 10 seconds — the residual heat wilts the parsley gently, releasing its aromatic oils without cooking it to dark, flavour-depleted softness. Taste for salt and adjust. Divide among four warm bowls immediately — aglio e olio tightens and the oil begins to separate from the starch emulsion as it cools, so the window between leaving the pan and the first bite is short. Drizzle a thin stream of your best finishing extra-virgin olive oil over each bowl — this final raw drizzle adds the fresh, uncooked fruity-peppery character of quality olive oil that the cooking process modifies. Do not add cheese. The dish is complete as it is.