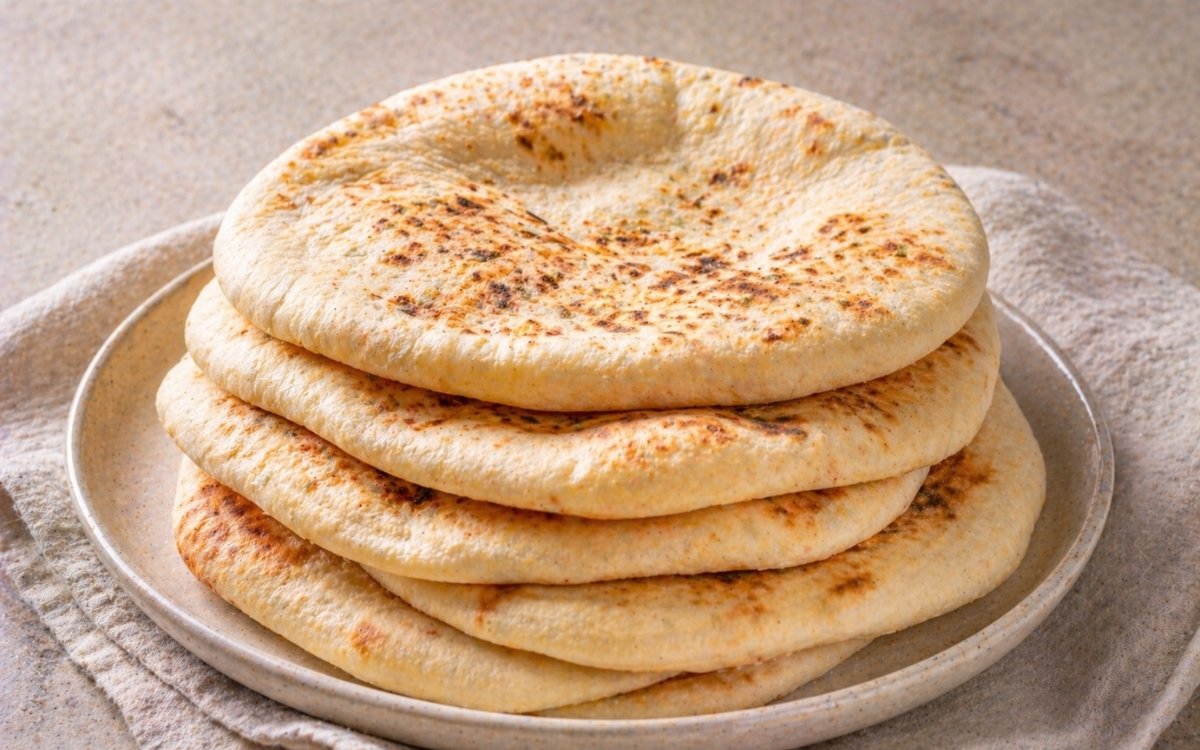
Homemade Pita Flatbread
Soft, pillowy, pocket-forming pita flatbread made from scratch — the foundational Middle Eastern and Mediterranean flatbread that has accompanied grilled meats, dips, and mezze for thousands of years. The dough is simple: all-purpose flour, instant yeast, olive oil, and warm water, mixed and kneaded to a smooth, elastic dough and rested until doubled. The technique is what matters: a scorching-hot surface, even rolling, and the right moment to pull from the heat. Done correctly, the pita puffs into a perfect steam-filled balloon — the pocket that makes it uniquely suited to stuffing with fillings or tearing into pieces for dipping. Two methods are given — the oven method for a full balloon pocket, and the cast iron pan method for a more charred, slightly toasted result. Both are excellent and both are genuinely better than any packaged version.

Prep Time : 20 min
Cook Time : 20 min
Servings : 8
20 min
20 min
8
Ingredients
For The Homemade Pita
• 400g all-purpose flour — this one on Amazon
• 7g fine sea salt
• 8g sugar
• 5g instant dry yeast
• 20g extra-virgin olive oil — this one on Amazon
• 270g warm water, 24–27°C
This post may contain affiliate links. As an Amazon Associate I earn from qualifying purchases, at no additional cost to you.
Directions
- Combine the Dry Ingredients
In a large bowl, combine the all-purpose flour, fine sea salt, sugar, and instant dry yeast. Stir briefly to distribute all four dry components evenly through the flour before any liquid is added. Even distribution prevents localised salt concentration in direct contact with the yeast before the liquid dilutes both. Sugar at 8g provides yeast food for an active rise and contributes to the Maillard browning on the pita surface during cooking — at this quantity it adds no perceptible sweetness but makes a measurable difference to the depth of colour and the slight caramelised note at the char spots produced by direct pan contact. All-purpose flour is specified because its moderate protein content produces the correct balance of structure and extensibility for pita — enough gluten to hold the steam bubble during puffing, soft enough to produce a pliable, foldable flatbread after cooking. Higher-protein bread flour produces a pita that puffs well but can be chewier and less pliable than the soft, yielding texture a pita should have. - Mix and Form the Dough
Add the warm water and olive oil to the dry ingredients. Mix with your hand or a wooden spoon, working from the edges of the bowl inward, until a rough, shaggy dough forms with no dry flour remaining at the bottom of the bowl. The olive oil lubricates the developing gluten strands during the subsequent kneading and contributes to the pita’s characteristic slightly tender, pliable texture — olive oil is the fat of choice in traditional pita not only for flavour but because its monounsaturated fat composition specifically softens the gluten network in a way that produces the pliable, foldable flatbread character rather than the crispier result that no fat produces. - Knead to Full Gluten Development
Transfer the rough dough to a clean work surface and knead for 6–8 minutes by hand, or use a stand mixer fitted with a dough hook at medium-low speed for 6 minutes. The dough will feel slightly tacky at the start of kneading — soft and slightly moist on the surface but not genuinely sticky. This tackiness is correct and should not be corrected with flour addition. As the gluten network develops through kneading, the dough becomes progressively smoother, more elastic, and less tacky — the surface changes from rough and moist to smooth and slightly glossy. The finished dough should feel soft and supple, spring back slowly when pressed with a finger, and stretch a few centimetres between your fingers without tearing. This gluten development is the structural requirement for the puffing step — the interconnected gluten network is what traps the steam bubble created by the dough’s interior moisture flashing to steam in the hot oven or pan, inflating the pita into its characteristic balloon. Under-developed gluten tears rather than inflating, producing pita that partially puffs with openings rather than forming a complete, sealed pocket. - First Rise
Shape the kneaded dough into a smooth ball and transfer to a lightly oiled bowl. Turn once to coat all surfaces in a thin film of oil, which prevents the surface from drying and cracking during the rise. Cover with plastic wrap or a damp kitchen towel and allow to rise at room temperature — ideally 24–26°C — for 60–90 minutes until clearly doubled in size. The fermentation during this rise develops the faint, pleasant yeasty depth that distinguishes a properly fermented pita from an unleavened flatbread, while the CO2 produced opens the crumb structure and contributes to the lightness of the finished bread. - Divide, Ball, and Rest
Turn the risen dough out onto a lightly floured surface. Divide into 8 equal portions — each approximately 88g. Weigh them for consistency: unequal portions produce pitas of different thickness when rolled to the same target diameter, and uneven thickness is the most common reason for partial rather than full puffing. Roll each portion into a smooth, tight ball using the cupped-hand circular rolling technique — the smoother and tighter the ball’s surface, the more evenly the pita will roll out. Place all the balls on a lightly floured surface, cover with a damp cloth or plastic wrap, and rest for 10–15 minutes. This bench rest allows the gluten tensioned during balling to relax — without it the dough springs back aggressively when rolled and cannot be thinned to the correct even thickness. - Roll to Even Thickness
Working with one ball at a time while keeping the others covered to prevent drying, roll each ball into a round approximately 15–20cm (6–8 inches) in diameter. Use a rolling pin and work from the centre outward in all directions, rotating the dough a quarter turn after every few passes to maintain an even round shape. The key requirement is uniform thickness throughout — approximately 3–4mm, thin enough for rapid steam inflation but thick enough to have a proper pocket interior. Thin spots in an unevenly rolled pita will cook faster than thick spots, and the uneven steam pressure during inflation will push toward the thin areas and potentially burst rather than inflating the entire pita uniformly. Hold the rolled pita up to a light source — you should see a relatively consistent level of translucency throughout rather than clearly thinner and thicker patches. Do not stack rolled pitas on top of each other — they will stick together and deflate. Keep each one flat on a lightly floured surface as you work. - Oven Method (Full Balloon Pocket)
Preheat the oven to 250–270°C (480–520°F) with a baking stone, baking steel, or heavy upturned baking tray positioned on the middle rack — inside the oven from the beginning of preheating. Allow a minimum of 30–40 minutes of preheating after the oven reaches temperature to ensure the stone or tray is fully saturated with heat. The extreme heat is the non-negotiable requirement for full pita puffing: when the rolled pita makes contact with the scorching surface, the moisture in the dough’s interior is vaporised almost instantly into steam. The steam expands rapidly and, if the gluten network is properly developed and the surface is properly sealed, inflates the entire pita into a balloon-like pocket in 30–60 seconds. A surface that is only moderately hot produces steam more slowly and unevenly — the result is partial puffing or no puffing at all as the dough dries and sets before the steam can fully inflate it. Use a pizza peel or flat-edged baking sheet to slide the rolled pitas directly onto the preheated surface — place them carefully and close the oven immediately to prevent heat loss. Bake for 2–4 minutes. The pita should fully inflate into a balloon shape within the first 60–90 seconds. Remove immediately when it is lightly golden with very faint colour — do not wait for deeper browning, as even 30 seconds of additional baking past this point will crisp the pita and it will no longer be pliable after cooling. - Cast Iron Pan Method (Charred Spots, Partial Pocket)
Heat a large cast iron skillet, carbon steel pan, or heavy stainless steel pan over the highest heat your burner produces for a full 3 minutes until it is smoking. The pan must be genuinely hot — a moderately warm pan produces a dry, stiff flatbread rather than a puffed pita. Place one rolled pita flat on the hot, dry surface without any oil. Cook for 1–2 minutes until the underside shows golden-brown to dark char spots where the dough contacts the hot metal — these char marks are the signature visual feature of pan-cooked pita. Flip with tongs or a thin spatula when the surface shows bubbles forming and the edges look slightly set. Cook the second side for 1–2 minutes. During the second side, press very lightly on the surface of the pita with the back of a spatula — this light pressure encourages steam to distribute through the interior and inflates the pita. The pan method produces a more toasted, more charred pita with a slightly smokier flavour than the oven method — the pocket will form partially rather than into the full balloon of the oven version, but the pita is fully usable for both stuffing and tearing and dipping. Cook one pita at a time — the pan’s temperature drops when cold dough is added, and a second pita added before the pan has recovered will not char or puff as well as the first. - Stack and Cover Immediately
Transfer each cooked pita directly to a clean towel-lined plate or basket. Fold the towel over the pita and add each subsequent piece on top, always covering the stack after each addition. The stack-and-cover method creates the steam environment that keeps every pita soft and pliable as it cools — the residual heat from each freshly cooked pita generates steam that circulates within the covered stack, preventing the surface of any piece from drying and stiffening. A pita left uncovered for even 2–3 minutes after cooking will begin to crisp at the surface and lose its pliability. Always cover immediately. Allow the stack to steam under the towel for at least 5 minutes before serving — this final steam ensures every pita, including the first-cooked which has had the most cooling time, is at its softest.
*Notes :
- The puffing mechanism is worth understanding fully because it explains every technique decision in this recipe. When the rolled pita contacts the extremely hot baking surface, two layers of the dough are rapidly dried and set simultaneously — the underside from direct contact with the hot surface, and the upper surface from the oven’s ambient heat. Once both surfaces are set, they form a sealed envelope. The residual moisture in the dough’s interior — distributed as liquid water throughout the crumb — is then vaporised by the continuing heat and trapped between the two sealed surfaces. This pressurised steam inflates the sealed envelope into the characteristic balloon. If either surface sets before the other — which happens with uneven thickness or insufficient heat — the envelope is not properly sealed and steam escapes rather than inflating the pita. This explains why even rolling, extreme heat, and proper gluten development are not optional: each one is directly required by the puffing mechanism.
- Pita bread is one of the oldest leavened breads in the world — archaeological evidence of similar flatbreads dates to the ancient Middle East approximately 4,000 years ago. The distinctive pocket is not a designed feature but a consequence of the rapid high-heat cooking method: the steam inflation separates the two layers of the relatively thin dough, creating the pocket that becomes the defining functional characteristic of the finished bread.
- The olive oil in this recipe is both flavour and structure. Extra-virgin olive oil contributes its characteristic slightly fruity, slightly peppery flavour throughout the crumb — present as a background warmth rather than a prominent note. At 20g for 400g of flour it is a light enrichment that softens the gluten network just enough to produce a pliable, foldable result.
Why This Recipe Works
This recipe works because it addresses the three physical requirements for pita puffing — proper gluten development, even dough thickness, and extremely high cooking surface temperature — as direct technique requirements rather than optional refinements. The 6–8 minutes of kneading produces the gluten network needed to trap steam. The bench rest after balling relaxes the gluten enough for even rolling.
The 30–40 minute preheat for the baking surface ensures the temperature is at the threshold where dough moisture flashes immediately to steam. And the stack-and-cover after cooking preserves the pliability that the baking process temporarily reduces. Every step serves the same outcome.
Ingredient Breakdown
All-Purpose Flour
Moderate protein content produces the correct balance of gluten strength for steam trapping and softness for pliable texture — bread flour would produce a chewier, less pliable pita.
Instant Dry Yeast
The leavening agent — contributes CO2 for a light, open crumb and the subtle fermentation depth that distinguishes yeasted pita from unleavened flatbread.
Olive Oil
Gluten softener and flavour contributor — softens the crumb for pliability and adds the characteristic mild olive oil warmth throughout.
Sugar
Yeast food and browning agent — at 8g contributes to an active rise and the slightly caramelised spots at the char points during cooking.
Warm Water
The hydration medium — at 270g for 400g flour (67.5% hydration) produces a dough soft enough to roll thin while maintaining sufficient structure for steam inflation.
Flavor Structure Explained
This pita follows a layered balance model:
- Mild wheaty base (pita crumb)
- Subtle yeast character (fermentation)
- Light olive oil warmth (dough)
- Charred surface notes (pan contact)
- Soft steamed interior (pocket)
The crumb establishes the foundation with a soft, mildly wheaty and faintly yeasty profile that remains intentionally restrained. Olive oil adds a gentle warmth, rounding the flavor without making it rich. Direct heat creates char spots that introduce a light smoky, caramelised contrast on the surface. The interior pocket retains a soft, slightly steamed texture that keeps the bread tender and neutral. The overall structure is deliberately minimal — balanced to support fillings and dips without competing for attention.
Common Mistakes to Avoid
- Not Rolling to Even Thickness – Uneven thickness is the most common cause of partial or failed puffing. Thin spots set before thick spots, breaking the steam seal. Roll consistently throughout and check by holding up to light.
- Insufficient Preheat of the Baking Surface – A surface that is not fully saturated with heat at 250°C+ cannot generate the instant steam needed for inflation. Preheat the stone or tray for at least 30–40 minutes after the oven reaches temperature.
- Over-baking – Pita removed 30 seconds past the ideal point will crisp rather than remaining pliable. Pull the moment it is lightly golden — it continues cooking briefly from residual heat after removal.
- Not Covering Immediately After Cooking – Uncovered pita loses pliability within minutes as surface moisture evaporates. Always stack under a towel immediately.
- Under-kneading – Insufficient gluten development means the dough tears rather than inflating when steam pressure builds. Knead for the full 6–8 minutes.
- Stacking Raw Rolled Pitas – Rolled pitas stacked on each other stick together and deflate. Keep each flat on a floured surface until ready to cook.
Variations
Whole Wheat Pita
Replace 100g of the all-purpose flour with 100g of whole wheat flour. Increase the water by 15ml to compensate for whole wheat’s higher absorption. The result is nuttier, slightly denser, and with a more pronounced grain flavour — puffs slightly less dramatically than the all-white version but still forms a pocket.
Za’atar Pita
After rolling each pita, brush lightly with olive oil and scatter a generous amount of za’atar seasoning across the surface before placing on the hot cooking surface. The za’atar toasts during cooking and produces an aromatic, herb-and-sesame-flavoured surface — particularly suited to serving alongside hummus and mezze spreads.
Garlic Herb Pita
Brush each rolled pita with a mixture of 2 tbsp olive oil, 2 tsp minced garlic, and 5g chopped fresh parsley before cooking. The garlic and herb toast on the hot surface and produce a fragrant, savoury surface layer.
Mini Pitas
Divide the dough into 16 equal portions of approximately 44g each and roll to 10–12cm rounds. Reduce cooking time by approximately 30–45 seconds for both methods. Mini pitas are ideal for individual mezze portions, party dipping, and stuffing with single-bite fillings.
Storage & Make-Ahead
Cooked pitas can be stored in a sealed bag or wrapped in a clean cloth at room temperature for up to 2 days. To restore their softness, reheat them in a dry skillet for 20 to 30 seconds per side, or wrap the stack in foil and warm it in a 160°C oven for 8 to 10 minutes.
Pitas can also be frozen for up to 2 months. Place parchment paper between each one before freezing so they do not stick together, then store them in a sealed bag. When ready to use, reheat them directly from frozen in a dry skillet for 45 to 60 seconds per side or in a 180°C oven for about 8 minutes. The pocket will stay intact after freezing and reheating.
For a make-ahead option, let the dough complete its first rise, then divide it into portions and shape them into balls. Place them on a floured tray, cover tightly, and refrigerate for up to 24 hours before rolling and cooking. The slow cold fermentation will add more flavor. Before rolling, remove the dough from the refrigerator and let it rest at room temperature for 15 to 20 minutes.
Frequently Asked Questions
Why didn’t my pita puff?
Three most likely causes: the baking surface was not hot enough — preheat for the full 30–40 minutes and use the highest oven temperature; the dough was not rolled to even thickness — thin spots break the steam seal; or the gluten was under-developed from insufficient kneading — knead for the full 6–8 minutes.
Can I make pita without a baking stone?
Yes — a heavy, upturned metal baking tray preheated in the oven produces comparable results. The tray must be metal and must be preheated with the oven for at least 30 minutes to achieve sufficient heat retention. A glass dish will not work.
Is the cast iron or oven method better?
Neither is objectively superior — they produce different results suited to different uses. The oven method produces a fuller pocket more consistently suited to stuffing. The pan method produces a more charred, toasted surface with more visual char character suited to dipping and tearing.
What should I serve pita with?
Pita is specifically paired with Classic Hummus and all its flavoured variations as the primary dipping vehicle. It also works alongside Harissa and Mint Hummus, as a wrap for Greek Chicken Souvlaki with Sumac Onions Salad and Tzatziki, and alongside Beef Kofta Skewers. It is the universal bread of Middle Eastern and Mediterranean cooking — compatible with virtually every dip, spread, and grilled protein the cuisine produces.
How do I stuff a pita without tearing it?
Allow the pita to cool for 2–3 minutes after cooking so the pocket sets and the bread is handleable without immediate tearing. Hold it at one end and gently open the pocket with a finger from the cut or natural opening end. The steam-inflated pocket should open cleanly. Fill loosely rather than overpacking — a pita stretched to capacity tears at the seams.
Nutrition Facts
( Per Pita )
Calories
~215 kcal
Protein
6 g
Fat
3 g
Carbs
41 g
Calories
~215 kcal
Protein
6 g
Fat
3 g
Carbs
41 g
Related Recipes
Related Recipes

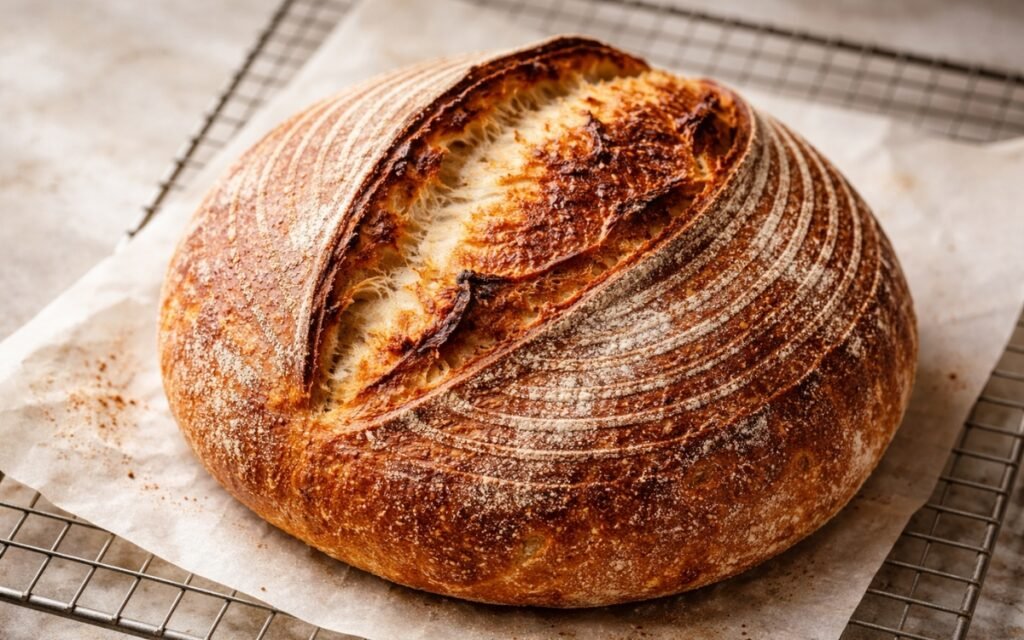
Sourdough Bread
Levain-built, cold-proofed, Dutch oven-baked sourdough with crackling crust and open crumb — the complete method with jalapeño cheddar, sun-dried tomato Parmesan, and olive rosemary variations.
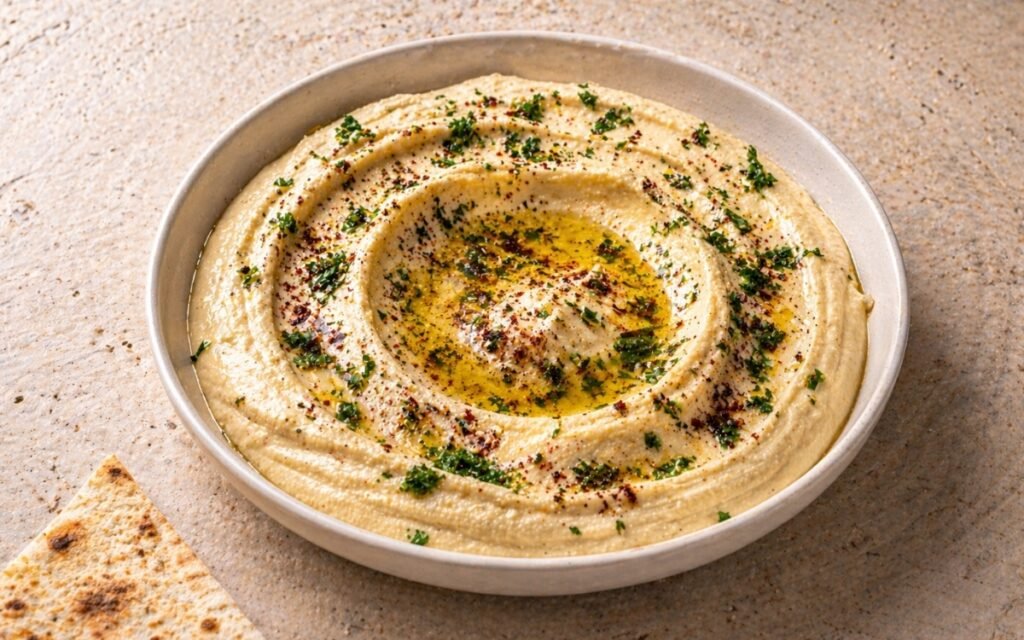
Classic Hummus
Dried chickpeas cooked with baking soda, processed warm with tahini, lemon, and garlic, emulsified with ice-cold water — the ultra-smooth base hummus that every flavoured variation is built on.
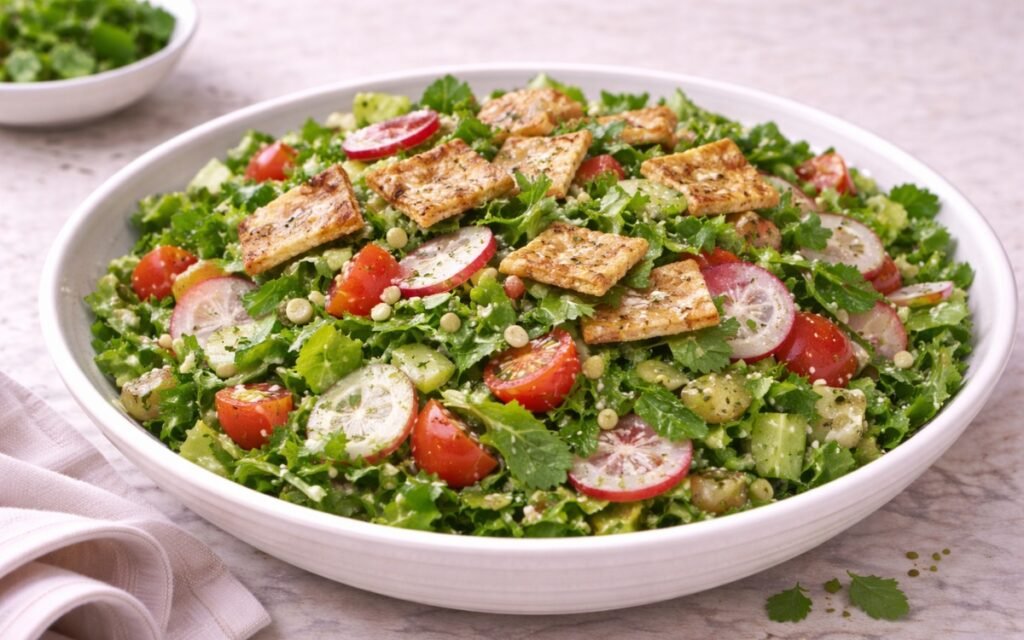
Lebanese Fattoush Salad
Crispy pita bread salad with fresh vegetables, herbs, and tangy sumac pomegranate dressing.
You might also like
You might also like
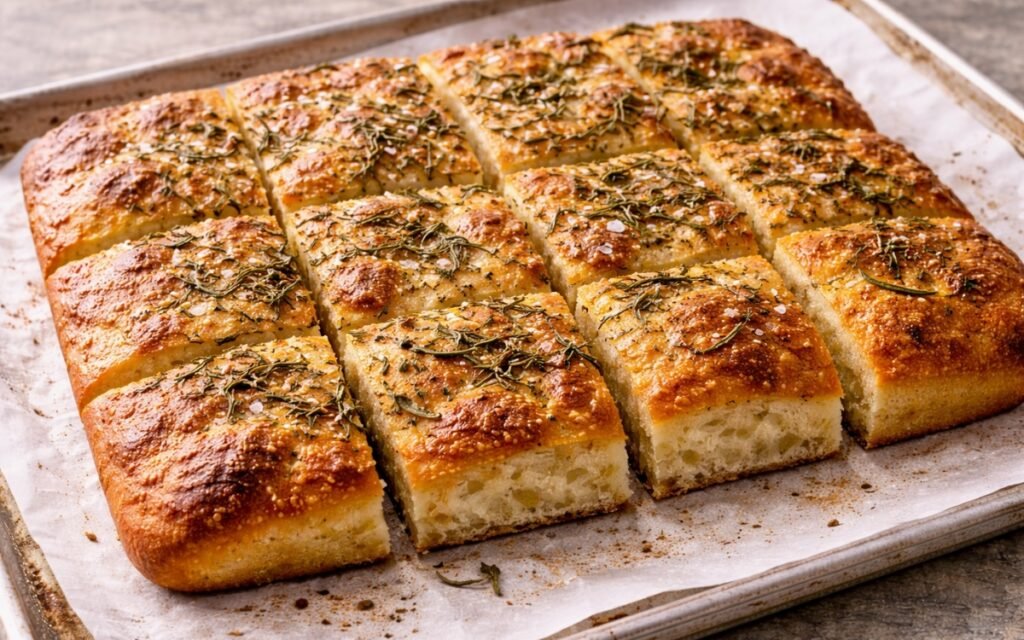
Focaccia
00 flour, semolina, and generous olive oil cold-fermented for 48–72 hours — focaccia with a crackling crust, cloud-soft interior, and the complex flavour only time can produce.
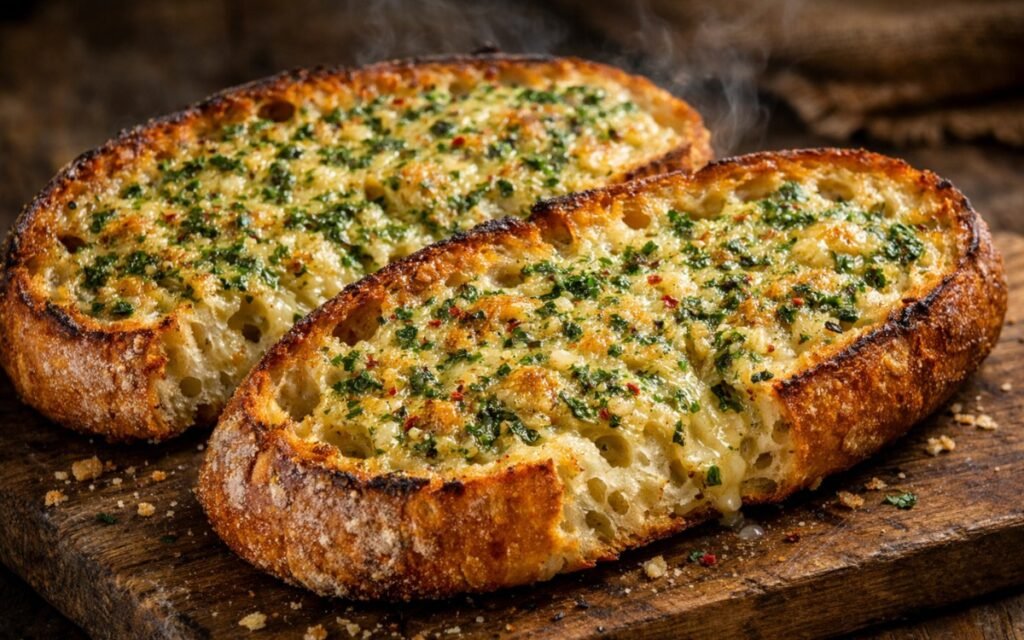
Sourdough Garlic Bread
Crusty sourdough bread with garlic herb butter, toasted until golden and perfectly crispy.
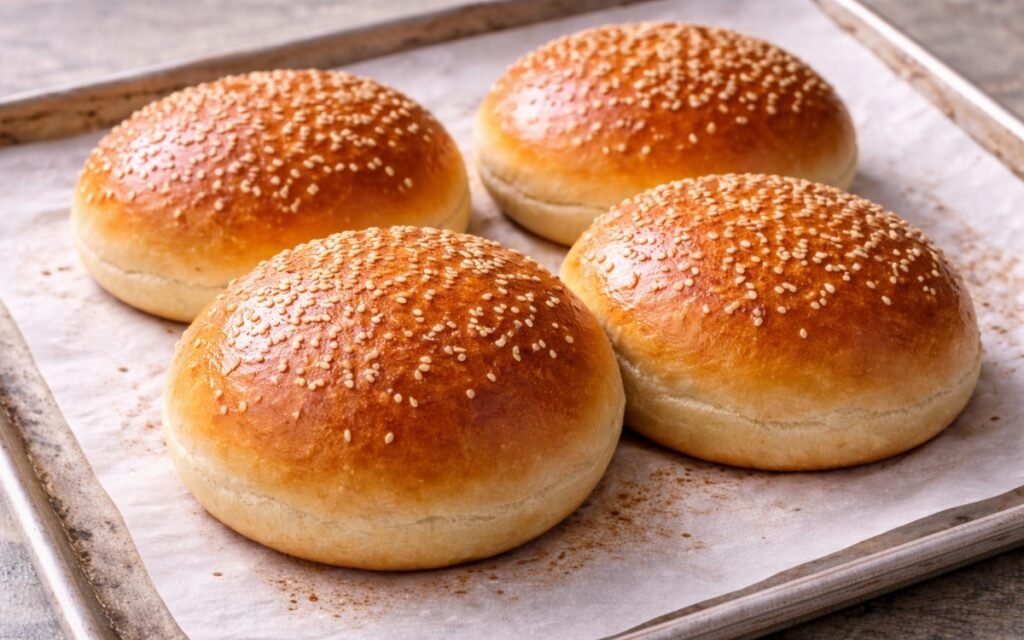
Classic Burger Buns
Soft, neutral, sesame-seeded classic burger buns with a golden egg-washed finish — the structural bun for smash burgers and fried chicken sandwiches, made from scratch in 2.5 hours.
Homemade Pita Flatbread
Ingredients
Method
- In a large bowl, combine the all-purpose flour, fine sea salt, sugar, and instant dry yeast. Stir briefly to distribute all four dry components evenly through the flour before any liquid is added. Even distribution prevents localised salt concentration in direct contact with the yeast before the liquid dilutes both. Sugar at 8g provides yeast food for an active rise and contributes to the Maillard browning on the pita surface during cooking — at this quantity it adds no perceptible sweetness but makes a measurable difference to the depth of colour and the slight caramelised note at the char spots produced by direct pan contact. All-purpose flour is specified because its moderate protein content produces the correct balance of structure and extensibility for pita — enough gluten to hold the steam bubble during puffing, soft enough to produce a pliable, foldable flatbread after cooking. Higher-protein bread flour produces a pita that puffs well but can be chewier and less pliable than the soft, yielding texture a pita should have.
- Add the warm water and olive oil to the dry ingredients. Mix with your hand or a wooden spoon, working from the edges of the bowl inward, until a rough, shaggy dough forms with no dry flour remaining at the bottom of the bowl. The olive oil lubricates the developing gluten strands during the subsequent kneading and contributes to the pita’s characteristic slightly tender, pliable texture — olive oil is the fat of choice in traditional pita not only for flavour but because its monounsaturated fat composition specifically softens the gluten network in a way that produces the pliable, foldable flatbread character rather than the crispier result that no fat produces.
- Transfer the rough dough to a clean work surface and knead for 6–8 minutes by hand, or use a stand mixer fitted with a dough hook at medium-low speed for 6 minutes. The dough will feel slightly tacky at the start of kneading — soft and slightly moist on the surface but not genuinely sticky. This tackiness is correct and should not be corrected with flour addition. As the gluten network develops through kneading, the dough becomes progressively smoother, more elastic, and less tacky — the surface changes from rough and moist to smooth and slightly glossy. The finished dough should feel soft and supple, spring back slowly when pressed with a finger, and stretch a few centimetres between your fingers without tearing. This gluten development is the structural requirement for the puffing step — the interconnected gluten network is what traps the steam bubble created by the dough’s interior moisture flashing to steam in the hot oven or pan, inflating the pita into its characteristic balloon. Under-developed gluten tears rather than inflating, producing pita that partially puffs with openings rather than forming a complete, sealed pocket.
- Shape the kneaded dough into a smooth ball and transfer to a lightly oiled bowl. Turn once to coat all surfaces in a thin film of oil, which prevents the surface from drying and cracking during the rise. Cover with plastic wrap or a damp kitchen towel and allow to rise at room temperature — ideally 24–26°C — for 60–90 minutes until clearly doubled in size. The fermentation during this rise develops the faint, pleasant yeasty depth that distinguishes a properly fermented pita from an unleavened flatbread, while the CO2 produced opens the crumb structure and contributes to the lightness of the finished bread.
- Turn the risen dough out onto a lightly floured surface. Divide into 8 equal portions — each approximately 88g. Weigh them for consistency: unequal portions produce pitas of different thickness when rolled to the same target diameter, and uneven thickness is the most common reason for partial rather than full puffing. Roll each portion into a smooth, tight ball using the cupped-hand circular rolling technique — the smoother and tighter the ball’s surface, the more evenly the pita will roll out. Place all the balls on a lightly floured surface, cover with a damp cloth or plastic wrap, and rest for 10–15 minutes. This bench rest allows the gluten tensioned during balling to relax — without it the dough springs back aggressively when rolled and cannot be thinned to the correct even thickness.
- Working with one ball at a time while keeping the others covered to prevent drying, roll each ball into a round approximately 15–20cm (6–8 inches) in diameter. Use a rolling pin and work from the centre outward in all directions, rotating the dough a quarter turn after every few passes to maintain an even round shape. The key requirement is uniform thickness throughout — approximately 3–4mm, thin enough for rapid steam inflation but thick enough to have a proper pocket interior. Thin spots in an unevenly rolled pita will cook faster than thick spots, and the uneven steam pressure during inflation will push toward the thin areas and potentially burst rather than inflating the entire pita uniformly. Hold the rolled pita up to a light source — you should see a relatively consistent level of translucency throughout rather than clearly thinner and thicker patches. Do not stack rolled pitas on top of each other — they will stick together and deflate. Keep each one flat on a lightly floured surface as you work.
- Preheat the oven to 250–270°C (480–520°F) with a baking stone, baking steel, or heavy upturned baking tray positioned on the middle rack — inside the oven from the beginning of preheating. Allow a minimum of 30–40 minutes of preheating after the oven reaches temperature to ensure the stone or tray is fully saturated with heat. The extreme heat is the non-negotiable requirement for full pita puffing: when the rolled pita makes contact with the scorching surface, the moisture in the dough’s interior is vaporised almost instantly into steam. The steam expands rapidly and, if the gluten network is properly developed and the surface is properly sealed, inflates the entire pita into a balloon-like pocket in 30–60 seconds. A surface that is only moderately hot produces steam more slowly and unevenly — the result is partial puffing or no puffing at all as the dough dries and sets before the steam can fully inflate it. Use a pizza peel or flat-edged baking sheet to slide the rolled pitas directly onto the preheated surface — place them carefully and close the oven immediately to prevent heat loss. Bake for 2–4 minutes. The pita should fully inflate into a balloon shape within the first 60–90 seconds. Remove immediately when it is lightly golden with very faint colour — do not wait for deeper browning, as even 30 seconds of additional baking past this point will crisp the pita and it will no longer be pliable after cooling.
- Heat a large cast iron skillet, carbon steel pan, or heavy stainless steel pan over the highest heat your burner produces for a full 3 minutes until it is smoking. The pan must be genuinely hot — a moderately warm pan produces a dry, stiff flatbread rather than a puffed pita. Place one rolled pita flat on the hot, dry surface without any oil. Cook for 1–2 minutes until the underside shows golden-brown to dark char spots where the dough contacts the hot metal — these char marks are the signature visual feature of pan-cooked pita. Flip with tongs or a thin spatula when the surface shows bubbles forming and the edges look slightly set. Cook the second side for 1–2 minutes. During the second side, press very lightly on the surface of the pita with the back of a spatula — this light pressure encourages steam to distribute through the interior and inflates the pita. The pan method produces a more toasted, more charred pita with a slightly smokier flavour than the oven method — the pocket will form partially rather than into the full balloon of the oven version, but the pita is fully usable for both stuffing and tearing and dipping. Cook one pita at a time — the pan’s temperature drops when cold dough is added, and a second pita added before the pan has recovered will not char or puff as well as the first.
- Transfer each cooked pita directly to a clean towel-lined plate or basket. Fold the towel over the pita and add each subsequent piece on top, always covering the stack after each addition. The stack-and-cover method creates the steam environment that keeps every pita soft and pliable as it cools — the residual heat from each freshly cooked pita generates steam that circulates within the covered stack, preventing the surface of any piece from drying and stiffening. A pita left uncovered for even 2–3 minutes after cooking will begin to crisp at the surface and lose its pliability. Always cover immediately. Allow the stack to steam under the towel for at least 5 minutes before serving — this final steam ensures every pita, including the first-cooked which has had the most cooling time, is at its softest.