
Carnitas Tacos with Pickled Red Onion
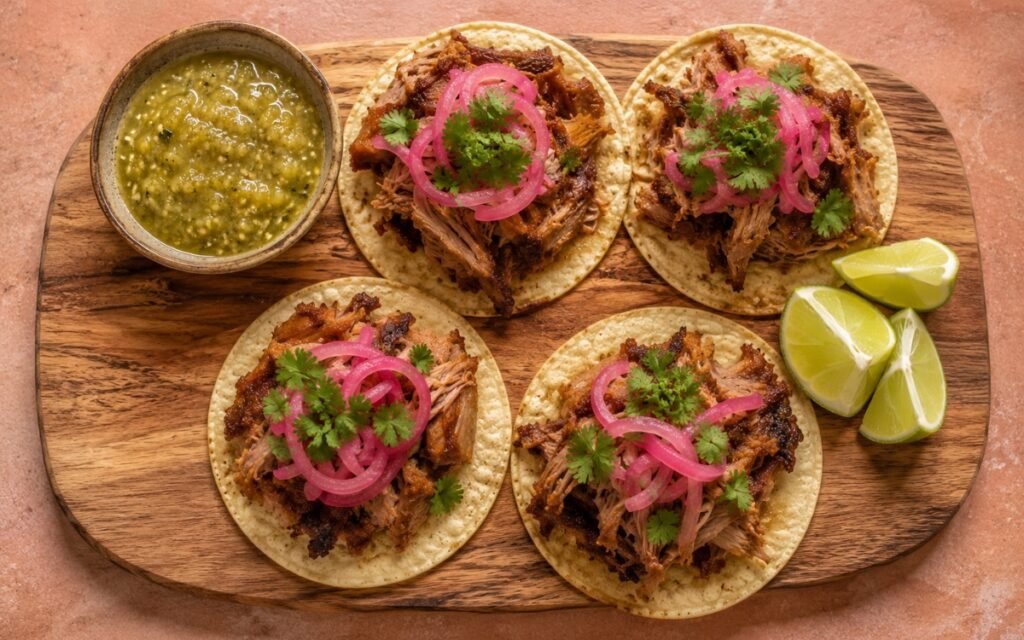
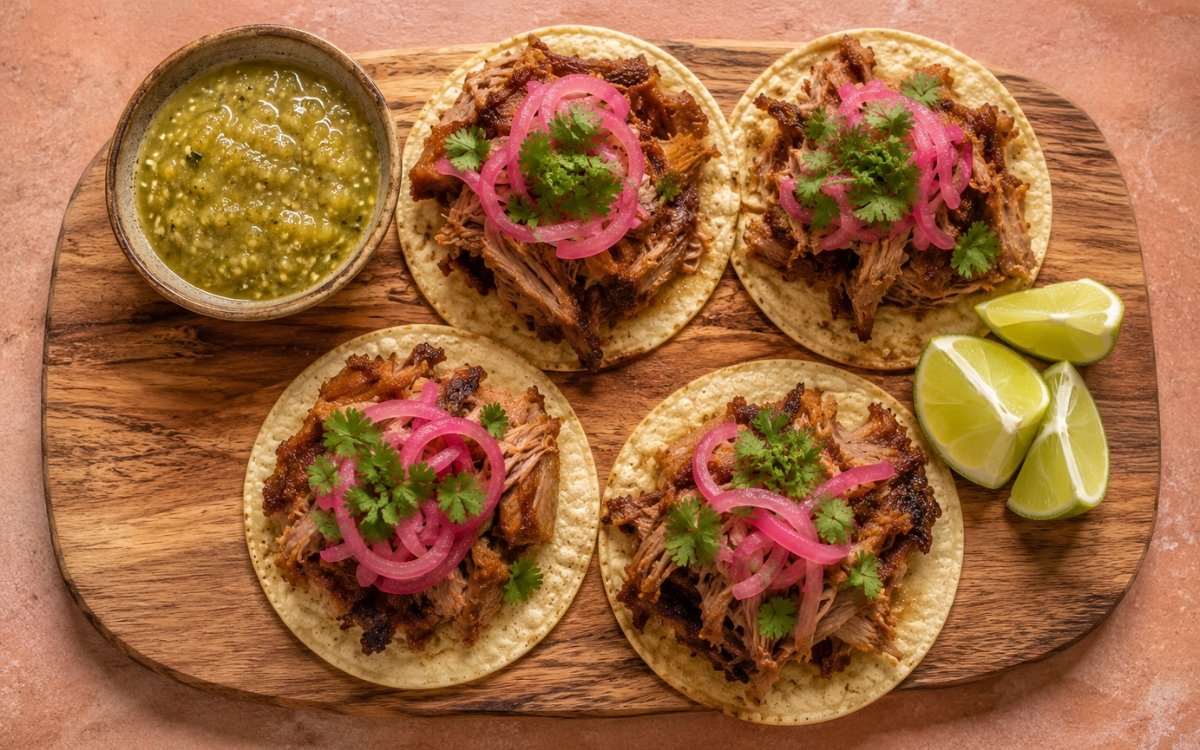
Small corn tortillas filled with crispy-edged pulled carnitas pork — golden-brown, juicy, and caramelised at the edges — topped with vivid pink quick pickled red onion and fresh cilantro, served with salsa verde in a small bowl or drizzled over the tacos, plus lime wedges. The two-stage cook is the entire point of carnitas: a long, gentle braise in orange juice, lime, and lard first tenderises the pork and builds a deeply flavoured cooking liquid, then a hard skillet-crisp afterward is what turns tender braised pork into actual carnitas — braising alone, however long, never produces the caramelised, crispy edges this dish is named for, the same two-stage principle used elsewhere in this collection whenever a braised meat needs a distinct textural finish. Browning the pork thoroughly before it ever meets the braising liquid matters just as much, since pale, unbrowned pork going into the pot produces noticeably flatter carnitas regardless of how well the braise itself goes. The quick pickled onion is drained before topping specifically to keep its sharp vinegar from soaking into and softening the tortillas. The payoff is a taco with genuine textural range — juicy, tender pork studded with crisp caramelised edges, against sharp pink pickled onion and a tangy, optional drizzle of salsa verde.
Prep Time : 35 min
Cook Time : 2 hr, 45 min
Servings : 4
35 min
2 hr, 45 min
4
Ingredients
For the Carnitas
• 1kg boneless pork shoulder, cut into 6–8cm chunks
• 12g kosher salt
• 3g freshly cracked black pepper
• 20ml neutral oil
• 120g white onion, roughly chopped
• 5 garlic cloves, peeled and lightly smashed
• 180ml fresh orange juice
• 45ml fresh lime juice
• 250ml water or chicken stock
• 2 bay leaves
• 4g dried Mexican oregano — this one on Amazon
• 4g ground cumin — this one on Amazon
• 1g ground cinnamon
• 60g lard or pork fat, plus more if needed for crisping
For the Homemade Corn Tortillas — ⅔ batch; (Full recipe — see Homemade Corn Tortillas)
• 160g masa harina — this one on Amazon
• 2g fine sea salt
• 200g warm water, approximately 40°C
For The Salsa Verde — (Full recipe — see Salsa Verde Mexican)
• 10–12 tomatillos, husked and washed
• 1 large sweet onion, cut into 8 wedges
• 2 green jalapeños, deseeded, cut into 4 chunks each
• 3 garlic cloves, peeled and lightly smashed
• 2 tbsp extra-virgin olive oil — this one on Amazon
• Salt to taste
• Large bunch of fresh cilantro, leaves and stems included
• Juice of 1 lime
• 3 tbsp water, plus more if needed to adjust consistency
For the Quick Pickled Red Onion
• 1 large red onion, thinly sliced
• 120ml apple cider vinegar or white vinegar
• 120ml hot water
• 12g sugar
• 6g kosher salt
• 15ml fresh lime juice
For Garnishing and Serving
• 35g fresh cilantro, chopped or leaves picked
• 2 limes, cut into wedges
• Salsa verde, from above
This post may contain affiliate links. As an Amazon Associate I earn from qualifying purchases, at no additional cost to you.
Directions
- Prepare the Quick Pickled Red Onion
Combine the vinegar, hot water, sugar, salt, and lime juice in a bowl or jar. Stir until the sugar and salt dissolve. Add the thinly sliced red onion and press it down so it is mostly submerged. Let pickle for at least 30 minutes while the pork cooks. The onion should turn bright pink, soften slightly, and stay sharp-crisp. Drain before using so the tacos do not become wet. The hot water speeds up the pickle considerably compared to a cold brine — dissolving the sugar and salt fully and gently softening the onion’s surface within the 30-minute window, which is what produces that vivid pink colour so quickly. - Prepare the Small Corn Tortillas
Prepare the Homemade Corn Tortilla dough according to its separate recipe, using 160g masa harina, 2g salt, and 200g warm water. Mix until soft and hydrated, then rest covered for 20–30 minutes. Divide into 16 equal balls of about 22–23g each. Keep the dough covered at all times so the masa does not dry out. Press each tortilla to about 11.4cm / 4.5 inches diameter and cook on a dry hot skillet or comal until lightly charred, flexible, and cooked through. Stack immediately under a towel so the tortillas steam and stay soft. Covering the dough balls and finished tortillas continuously, rather than only at the end, is what keeps every single one pliable — even a few minutes of open air exposure is enough for the edges to start drying and cracking later when folded. - Season and Brown the Pork
Pat the pork shoulder chunks dry with paper towels. Season all over with kosher salt and black pepper. Heat the neutral oil in a heavy Dutch oven or wide pot over medium-high heat. Sear the pork in batches for 3–4 minutes per side, until deeply browned. Do not crowd the pot. The goal is a strong golden-brown crust and browned fond on the bottom of the pot. Pale pork now means weaker carnitas later. This initial browning is building flavour in two places at once — directly into the meat’s surface and into the fond left on the pot, which the onion and garlic will scrape up and carry into the braising liquid moments later. - Braise the Carnitas
Reduce the heat to medium. Add the onion and garlic to the pot and cook for 2–3 minutes, scraping the browned bits from the bottom. Add the orange juice, lime juice, water or stock, bay leaves, oregano, cumin, cinnamon, and lard. Return the pork and any juices to the pot. Bring to a simmer, then reduce the heat to low. Cover and cook gently for 2 hours to 2 hours 15 minutes, turning the pork every 40 minutes, until the meat is fork-tender and pulls apart easily. The liquid should bubble gently, not boil hard. If the pot gets dry before the pork is tender, add water 100ml at a time. The lard added directly to the braising liquid isn’t just for richness — it’s what eventually crisps the shredded pork later, since the fat rendered and infused with the braise’s citrus and spice flavours becomes the exact medium the pork is finished in. - Reduce and Shred the Pork
Transfer the pork to a tray and rest for 10 minutes. Discard the bay leaves. Simmer the remaining liquid uncovered for 8–12 minutes until reduced, glossy, and slightly fatty. Shred the pork into medium pieces, keeping some chunks and fatty edges. Do not shred it into dry strings. Toss the pork with enough reduced cooking liquid to coat it lightly. Keeping some larger chunks and fatty edges rather than shredding uniformly fine is what gives the finished carnitas real textural variety — very finely shredded pork crisps evenly but loses the contrast between tender interior and crackling edge that makes carnitas interesting to eat. - Crisp the Carnitas
Heat a large skillet or griddle over medium-high heat. Add a spoonful of reserved pork fat or lard. Add the shredded pork in a single layer and cook undisturbed for 2–3 minutes, until the underside becomes deeply golden and crisp. Turn in sections and cook another 2–3 minutes. The carnitas should be juicy inside with caramelised crisp edges. Do this in batches if needed. Crowding the pan will steam the pork and destroy the texture. This skillet stage is the actual defining step of carnitas as a dish rather than simply braised pulled pork — cooking in the reserved fat at real heat is what caramelises the exposed edges of the shredded meat while the interior stays moist from the earlier braise. - Prepare the Salsa Verde
Toss the tomatillos, onion wedges, jalapeños, and garlic with olive oil and salt. Broil or roast on a hot tray until the tomatillos soften, collapse slightly, and develop charred spots, about 8–12 minutes depending on broiler strength. Transfer everything to a blender with the cilantro, lime juice, and 3 tbsp water. Blend until spoonable but still slightly textured. Add more water only if needed. Taste and adjust with salt or extra lime juice. The salsa should be vivid green, tangy, and loose enough to drizzle. Broiling rather than boiling the tomatillos develops a light char that adds a subtle smokiness the aromatics wouldn’t get from simmering in water, producing a noticeably brighter, more complex final salsa. - Warm the Tortillas
Just before serving, rewarm the tortillas on a dry skillet or comal for 10–15 seconds per side until soft and flexible. Keep covered in a towel. This is a brief warm-through rather than a second cook, restoring pliability and heat right before the tacos are assembled. - Assemble the Tacos
Place 4 warm corn tortillas per serving on plates or a board. Add a generous portion of crispy carnitas to each tortilla, keeping some browned edges visible. Add bright pink pickled red onion on top. Scatter with fresh cilantro. Keeping some of the pork’s caramelised, browned edges visibly on top rather than buried is what signals the crisping stage was done properly — it’s as much a visual cue of good technique as it is a textural one. - Serve
Serve with salsa verde in a small bowl beside the tacos, or drizzle a little salsa verde directly over each taco. Add lime wedges on the side and squeeze fresh lime over the tacos just before eating. Serve immediately while the pork is hot and crisp at the edges, the tortillas are soft, and the pickled onion is still vivid pink. Serving without delay protects the pork’s crisp edges above all else — even a short wait under the salsa’s moisture will begin softening the exact texture the skillet-crisping stage was built to create.
*Notes :
- The two-stage cooking method — a long, gentle braise followed by a hard skillet finish — is genuinely non-negotiable for carnitas rather than an optional flourish. Braised pork shoulder alone, however tender and flavourful, is soft and uniform throughout, with nothing to distinguish one bite from another. It’s specifically the second stage, cooking the shredded meat hot and undisturbed in its own reserved fat, that produces the caramelised, crispy edges against a juicy interior that define carnitas as a dish separate from simple pulled pork.
- Browning the pork thoroughly before braising is a step that’s easy to rush but costs real flavour if skipped or shortened. A dark, well-developed crust and the resulting fond on the bottom of the pot both carry directly into the braising liquid once the onion and garlic are added and the pot is deglazed — pork that goes into the braise pale, without that initial sear, produces a noticeably flatter, less complex final flavour even after the same amount of braising time.
- The citrus-and-lard braising liquid does more than one job simultaneously. The orange and lime juice both tenderise the meat and contribute bright acidity that balances the pork’s richness, while the lard added directly to the liquid renders and infuses with those same citrus and spice flavours over the long braise — that same fat then becomes the exact cooking medium used in the final crisping stage, carrying the braise’s flavour directly into the crisped exterior.
- Draining the pickled onion before it goes on the tacos is a small step with an outsized effect on the finished dish. Quick pickled onion straight from its brine carries a meaningful amount of liquid, and left undrained, that vinegar liquid will soak into and soften the warm tortillas from the top down, undermining their texture before the taco is even eaten.
Why This Recipe Works
This recipe works because it treats carnitas’ texture as a two-part construction: a long, gentle citrus-and-lard braise tenderises the pork and builds deep flavour into both the meat and its cooking liquid, while a hard, fast skillet finish in that same reserved fat caramelises the shredded pork’s exposed edges without drying out its juicy interior.
Thorough browning before braising, restrained shredding that preserves some larger chunks, and a quickly pickled, well-drained red onion together produce a taco with real textural and flavour contrast rather than a single soft, uniform filling.
Ingredient Breakdown
Pork Shoulder (Not Loin)
The specified cut — its fat and connective tissue are what allow the meat to become tender and shreddable through the long braise while staying juicy.
Orange Juice, Lime Juice, and Lard Braising Liquid
The dual-purpose base — citrus tenderises and brightens the pork, while the lard renders into the exact fat later used for crisping.
Reserved Braising Fat (for Crisping)
The finishing medium — carries the braise’s citrus and spice flavour directly into the caramelised, crisped exterior of the shredded pork.
Chunky, Restrained Shredding
The texture specification — keeping some larger pieces and fatty edges rather than shredding uniformly fine, preserving contrast between tender interior and crisp edge.
Quick Pickled Red Onion (Drained)
The sharp, bright topping — vinegar-pickled for vivid colour and crunch, drained before serving to avoid softening the tortillas.
Flavor Structure Explained
This carnitas taco follows a layered balance model:
- Rich caramelised foundation (crisped braised pork)
- Bright citrus depth (orange and lime braising liquid)
- Warm earthy spice (cumin, cinnamon, oregano)
- Sharp tangy contrast (pickled red onion)
- Fresh herbal finish (cilantro, salsa verde, lime)
The crisped carnitas define the dish with rich, caramelised savouriness from the skillet finish, balanced by bright citrus notes carried over from the braise. Warm background spice from cumin, cinnamon, and oregano gives the pork depth without overwhelming its own flavour. The quick pickled red onion cuts sharply through that richness with vinegar tang and a satisfying crisp bite. Fresh cilantro, a squeeze of lime, and the optional tangy salsa verde finish each taco with clean, bright acidity that keeps the whole plate balanced.
Common Mistakes to Avoid
- Skipping or Rushing the Initial Sear – Pale, unbrowned pork produces noticeably flatter carnitas even after a full braise. Always sear in batches until deeply golden-brown before braising.
- Boiling the Braise Instead of Simmering – A hard boil toughens the meat and can make the liquid cloudy rather than glossy. Always keep the braise at a gentle simmer.
- Shredding the Pork Too Finely – Over-shredded pork loses the contrast between tender chunks and crispy edges that defines carnitas. Always keep some larger pieces and fatty edges intact.
- Skipping the Final Skillet-Crisping Stage – Braised pork alone is tender but texturally flat and doesn’t read as genuine carnitas. Always finish the shredded pork hot and undisturbed in a skillet.
- Topping the Tacos with Undrained Pickled Onion – Excess vinegar liquid soaks into and softens the warm tortillas. Always drain the pickled onion thoroughly before using it as a topping.
Variations
Spicier Version
Add a whole dried chile de árbol to the braising liquid for a subtle background heat that builds throughout the pork as it cooks.
Orange-Forward Carnitas Tacos
Increase the orange juice to 240ml and add the zest of one orange to the braising liquid for a more pronounced citrus character throughout the meat.
Carnitas Bowl
Skip the tortillas and serve the crisped carnitas over rice with the pickled onion, cilantro, and salsa verde spooned on top for a bowl-style presentation.
Extra-Crispy Version
After the initial skillet crisping, spread the shredded pork on a sheet pan and broil for 2–3 minutes, watching closely, for an even deeper, more shatter-crisp exterior.
Storage & Make-Ahead
Braised, unshredded pork can be refrigerated in its cooking liquid for up to 4 days, or frozen for up to 3 months. Shredded pork, tossed with reduced cooking liquid but not yet crisped, can be refrigerated for up to 3 days. Crisp it fresh in a hot skillet just before serving.
Quick pickled red onion can be refrigerated in its brine for up to 2 weeks; it continues to soften and deepen in colour the longer it sits. Crisped carnitas are best eaten fresh; they lose their crisp edges within an hour and are best re-crisped in a hot skillet rather than microwaved if reheating.
Tortilla dough is best used fresh the same day; pressed, cooked tortillas can be stacked and refrigerated for up to 2 days before rewarming. Salsa verde can be refrigerated in a sealed container for up to 5 days.
Frequently Asked Questions
Why does the pork need to be braised and then separately crisped, rather than just braised until tender?
A braise alone produces tender but texturally uniform pork with no crispy element at all. The final skillet stage, cooking the shredded meat hot and undisturbed in its own reserved fat, is specifically what produces the caramelised, crispy edges that define carnitas as distinct from simple pulled pork.
Why brown the pork so thoroughly before it goes into the braising liquid?
A deep, well-developed sear builds a fond on the bottom of the pot that gets scraped up and carried directly into the braising liquid once the aromatics are added. Pork that skips this step or goes in pale produces a noticeably flatter, less complex flavour even after the full braising time.
Why does the lard go directly into the braising liquid instead of being added only at the crisping stage?
Lard added to the braise renders slowly and becomes infused with the citrus and spice flavours of the liquid over the long cook. That same flavoured fat is then reserved and used to crisp the shredded pork later, carrying the braise’s flavour directly into the caramelised exterior.
Why drain the pickled onion before topping the tacos?
Quick pickled onion holds a meaningful amount of vinegar brine. Left undrained, that liquid soaks into the warm tortilla from the top down and softens it before the taco is eaten. Draining thoroughly keeps the onion sharp and the tortilla intact.
What can I add to these tacos for a more complex bite?
A couple of classic additions layer in extra freshness and richness without competing with the pork. Pico de Gallo adds a raw, bright tomato-onion element that echoes the pickled onion already on the taco while bringing its own fresh acidity. Classic Guacamole brings a cool, creamy contrast that plays especially well against the crisp, caramelised edges of the carnitas.
Nutrition Facts
( per serving )
Calories
~640 kcal
Protein
38 g
Fat
34 g
Carbs
48 g
Calories
~640 kcal
Protein
38 g
Fat
34 g
Carbs
48 g
Related Recipes
Related Recipes

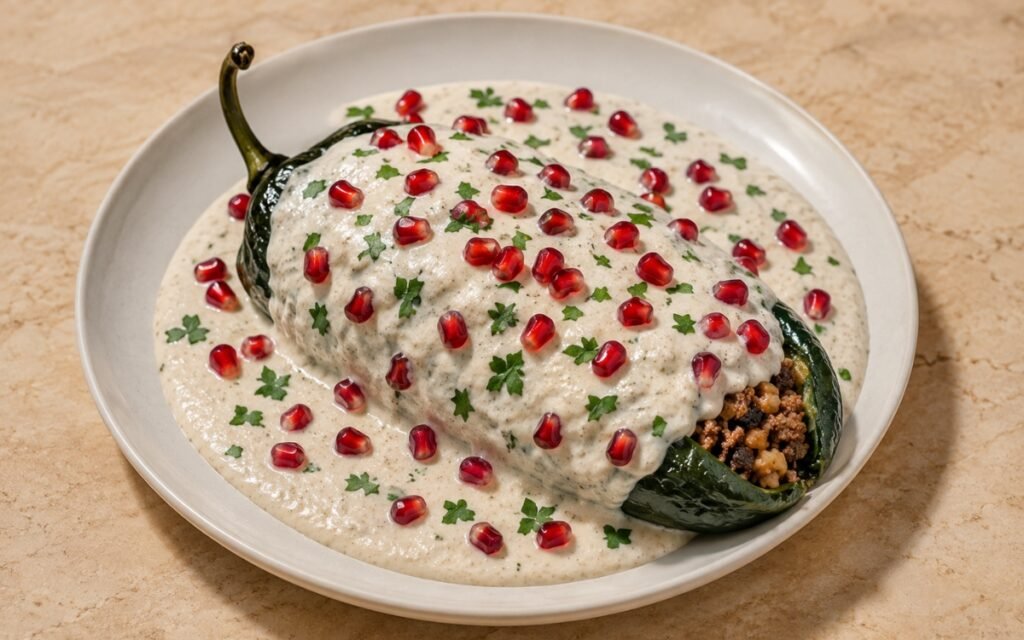
Chiles en Nogada
Roasted poblano peppers stuffed with a savoury-sweet pork and beef picadillo, covered in creamy white walnut sauce, and finished with pomegranate seeds.
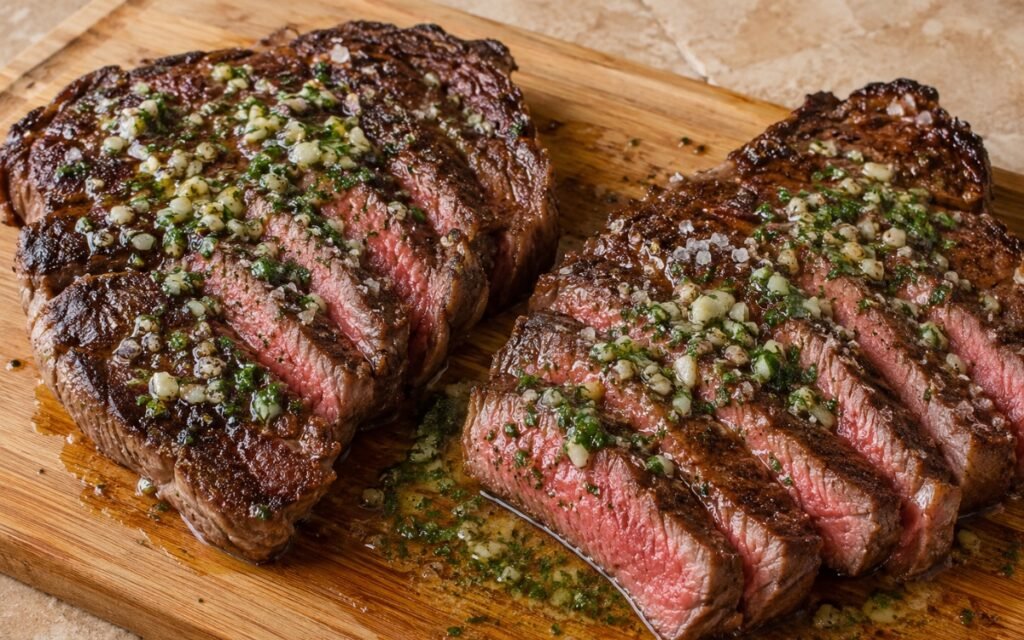
Garlic Butter Sirloin Steak
Sirloin steak tempered and seared 3 minutes per side, garlic parsley butter melted on off the heat — rested and sliced. Tender and restaurant-quality.
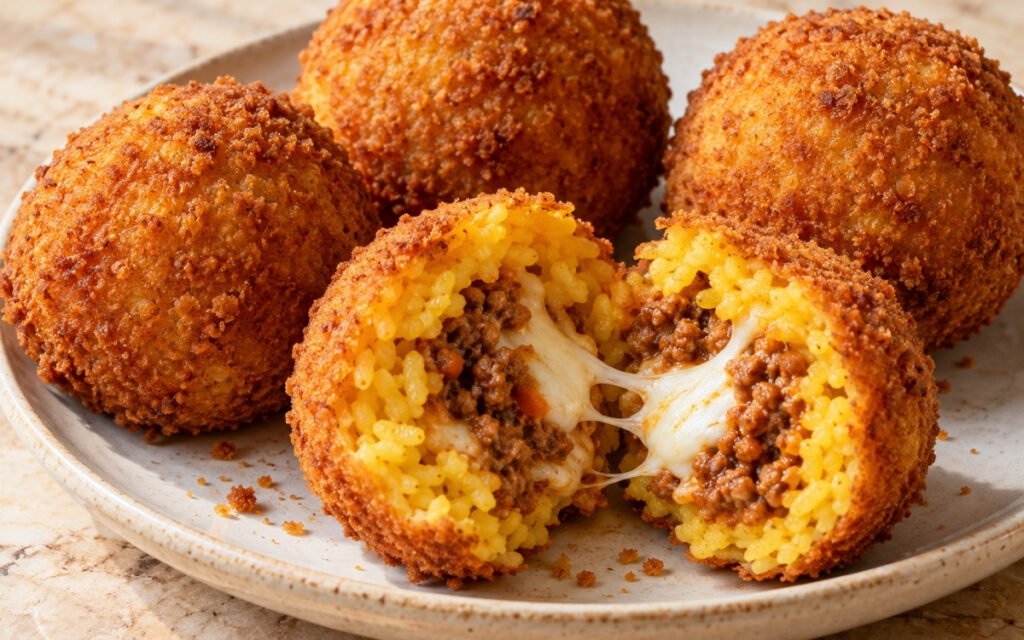
Arancini
Saffron-scented rice, a thick meat filling of ground beef and pork, a melty mozzarella center, and a crisp breadcrumb shell fried until deeply golden.
You might also like
You might also like
Cuban Picadillo
Seasoned ground beef simmered in a savory tomato sauce with green olives, raisins, and tender diced potatoes.
Cochinita Pibil Tacos
Pork shoulder braised in a smooth achiote marinade until fork-tender and glossy, served on corn tortillas with pickled red onion and habanero salsa.
Chilaquiles Verdes
Crispy tortilla chips folded into hot, broiled salsa verde, topped with a runny-yolk fried egg, avocado, cotija, and crema drizzle.
Carnitas Tacos with Pickled Red Onion
Ingredients
Method
- Combine the vinegar, hot water, sugar, salt, and lime juice in a bowl or jar. Stir until the sugar and salt dissolve. Add the thinly sliced red onion and press it down so it is mostly submerged. Let pickle for at least 30 minutes while the pork cooks. The onion should turn bright pink, soften slightly, and stay sharp-crisp. Drain before using so the tacos do not become wet. The hot water speeds up the pickle considerably compared to a cold brine — dissolving the sugar and salt fully and gently softening the onion’s surface within the 30-minute window, which is what produces that vivid pink colour so quickly.
- Prepare the Homemade Corn Tortilla dough according to its separate recipe, using 160g masa harina, 2g salt, and 200g warm water. Mix until soft and hydrated, then rest covered for 20–30 minutes. Divide into 16 equal balls of about 22–23g each. Keep the dough covered at all times so the masa does not dry out. Press each tortilla to about 11.4cm / 4.5 inches diameter and cook on a dry hot skillet or comal until lightly charred, flexible, and cooked through. Stack immediately under a towel so the tortillas steam and stay soft. Covering the dough balls and finished tortillas continuously, rather than only at the end, is what keeps every single one pliable — even a few minutes of open air exposure is enough for the edges to start drying and cracking later when folded.
- Pat the pork shoulder chunks dry with paper towels. Season all over with kosher salt and black pepper. Heat the neutral oil in a heavy Dutch oven or wide pot over medium-high heat. Sear the pork in batches for 3–4 minutes per side, until deeply browned. Do not crowd the pot. The goal is a strong golden-brown crust and browned fond on the bottom of the pot. Pale pork now means weaker carnitas later. This initial browning is building flavour in two places at once — directly into the meat’s surface and into the fond left on the pot, which the onion and garlic will scrape up and carry into the braising liquid moments later.
- Reduce the heat to medium. Add the onion and garlic to the pot and cook for 2–3 minutes, scraping the browned bits from the bottom. Add the orange juice, lime juice, water or stock, bay leaves, oregano, cumin, cinnamon, and lard. Return the pork and any juices to the pot. Bring to a simmer, then reduce the heat to low. Cover and cook gently for 2 hours to 2 hours 15 minutes, turning the pork every 40 minutes, until the meat is fork-tender and pulls apart easily. The liquid should bubble gently, not boil hard. If the pot gets dry before the pork is tender, add water 100ml at a time. The lard added directly to the braising liquid isn’t just for richness — it’s what eventually crisps the shredded pork later, since the fat rendered and infused with the braise’s citrus and spice flavours becomes the exact medium the pork is finished in.
- Transfer the pork to a tray and rest for 10 minutes. Discard the bay leaves. Simmer the remaining liquid uncovered for 8–12 minutes until reduced, glossy, and slightly fatty. Shred the pork into medium pieces, keeping some chunks and fatty edges. Do not shred it into dry strings. Toss the pork with enough reduced cooking liquid to coat it lightly. Keeping some larger chunks and fatty edges rather than shredding uniformly fine is what gives the finished carnitas real textural variety — very finely shredded pork crisps evenly but loses the contrast between tender interior and crackling edge that makes carnitas interesting to eat.
- Heat a large skillet or griddle over medium-high heat. Add a spoonful of reserved pork fat or lard. Add the shredded pork in a single layer and cook undisturbed for 2–3 minutes, until the underside becomes deeply golden and crisp. Turn in sections and cook another 2–3 minutes. The carnitas should be juicy inside with caramelised crisp edges. Do this in batches if needed. Crowding the pan will steam the pork and destroy the texture. This skillet stage is the actual defining step of carnitas as a dish rather than simply braised pulled pork — cooking in the reserved fat at real heat is what caramelises the exposed edges of the shredded meat while the interior stays moist from the earlier braise.
- Toss the tomatillos, onion wedges, jalapeños, and garlic with olive oil and salt. Broil or roast on a hot tray until the tomatillos soften, collapse slightly, and develop charred spots, about 8–12 minutes depending on broiler strength. Transfer everything to a blender with the cilantro, lime juice, and 3 tbsp water. Blend until spoonable but still slightly textured. Add more water only if needed. Taste and adjust with salt or extra lime juice. The salsa should be vivid green, tangy, and loose enough to drizzle. Broiling rather than boiling the tomatillos develops a light char that adds a subtle smokiness the aromatics wouldn’t get from simmering in water, producing a noticeably brighter, more complex final salsa.
- Just before serving, rewarm the tortillas on a dry skillet or comal for 10–15 seconds per side until soft and flexible. Keep covered in a towel. This is a brief warm-through rather than a second cook, restoring pliability and heat right before the tacos are assembled.
- Place 4 warm corn tortillas per serving on plates or a board. Add a generous portion of crispy carnitas to each tortilla, keeping some browned edges visible. Add bright pink pickled red onion on top. Scatter with fresh cilantro. Keeping some of the pork’s caramelised, browned edges visibly on top rather than buried is what signals the crisping stage was done properly — it’s as much a visual cue of good technique as it is a textural one.
- Serve with salsa verde in a small bowl beside the tacos, or drizzle a little salsa verde directly over each taco. Add lime wedges on the side and squeeze fresh lime over the tacos just before eating. Serve immediately while the pork is hot and crisp at the edges, the tortillas are soft, and the pickled onion is still vivid pink. Serving without delay protects the pork’s crisp edges above all else — even a short wait under the salsa’s moisture will begin softening the exact texture the skillet-crisping stage was built to create.