
Kung Pao Chicken
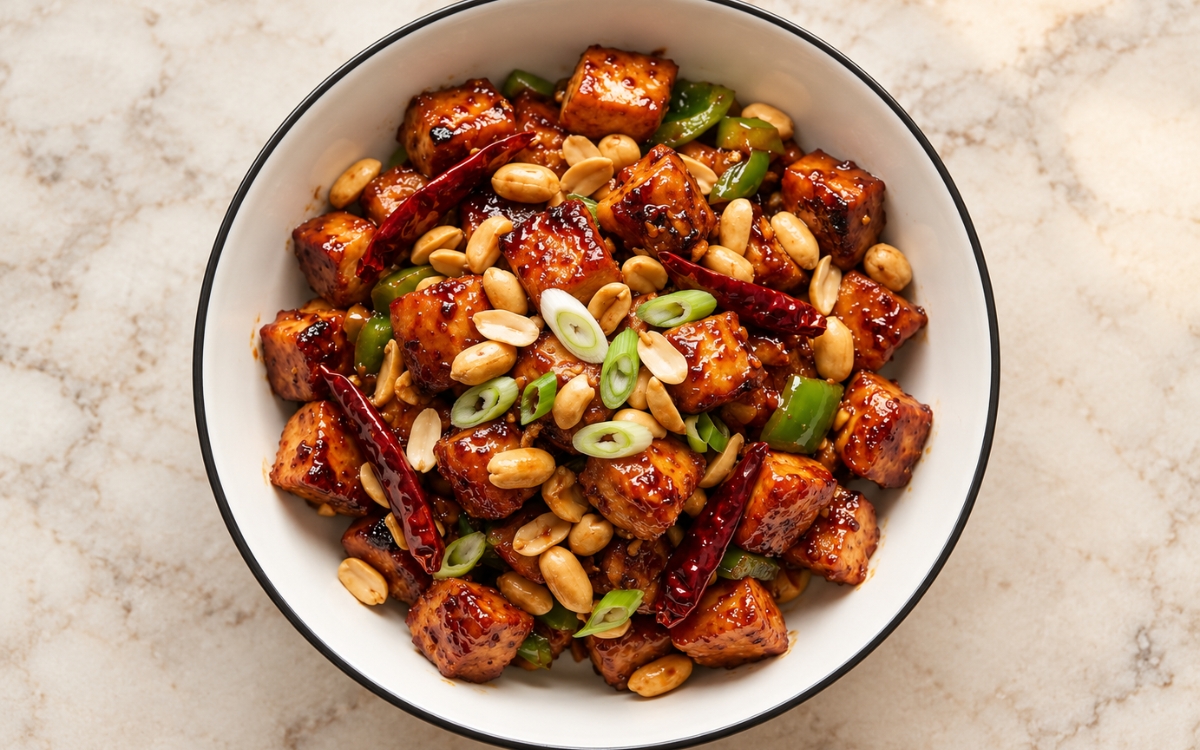
A classic Sichuan-style stir-fry of small seared chicken cubes in a glossy, savoury-sweet soy-chili sauce, tossed with dried red chilies, Sichuan peppercorns, roasted peanuts, scallions and small green bell pepper pieces, the key being a sticky, shiny glaze that clings to lightly caramelised edges while the vegetables stay crisp-tender. Searing the chicken in small, even cubes over very high heat, in batches, rather than crowding it all into the pan at once, is the technique this whole dish depends on for its browned edges and juicy centres — a crowded pan loses heat and steams the meat pale and grey, while a very hot wok builds a caramelised crust in minutes, the same sear-hot-and-fast principle used whenever a stir-fry needs both colour and tenderness. Blooming the dried chilies and Sichuan peppercorns in hot oil for only seconds is what releases their fragrance and a lightly red-tinted oil without turning them bitter. Boiling the sauce in the wok at the very end is what turns a thin liquid into a sticky glaze that coats every cube. The payoff is a Kung Pao Chicken with real, layered intensity — juicy caramelised chicken, a tangy-sweet shiny glaze, crunchy peanuts, crisp-tender green pepper and a warm, numbing tingle of Sichuan pepper in every bite.

Prep Time : 20 min
Total Time : 55 min
Servings : 4
20 min
55 min
4
Ingredients
For the Chicken and Marinade
• 800g boneless skinless chicken thighs, cut into small 2cm cubes
• 1 tbsp light soy sauce
• 1 tbsp Shaoxing wine
• 1 tsp cornstarch
• 1 tsp neutral oil
• ¼ tsp salt
• ⅛ tsp white pepper
For the Stir-Fry Components
• 60g roasted peanuts, unsalted
• 10–14 dried red chilies, cut in half, seeds shaken out for slightly less heat
• 1½ tsp whole Sichuan peppercorns
• 4 scallions, separated into white and light green parts and dark green parts, sliced on the bias
• 1 small green bell pepper, cut into small bite-size pieces
• 4 garlic cloves, finely chopped
• 20g fresh ginger, finely chopped
• 3 tbsp neutral oil, divided between searing the chicken and blooming the aromatics
For the Sauce
• 2 tbsp light soy sauce
• 1 tbsp dark soy sauce
• 1½ tbsp Chinese black vinegar
• 1½ tbsp Shaoxing wine
• 1½ tbsp sugar
• 80ml chicken stock or water
• 1 tsp cornstarch
For the Finish and Garnish
• A small handful of extra sliced scallion greens, to garnish
• A few extra roasted peanuts, to garnish
Directions
- Marinate the Chicken
Cut the 800g chicken thighs into small, even cubes of about 2cm, trimming away any large pieces of fat so every cube cooks at the same pace. Combine them in a bowl with the 1 tbsp light soy sauce, 1 tbsp Shaoxing wine, 1 tsp cornstarch, 1 tsp neutral oil, ¼ tsp salt and ⅛ tsp white pepper, then mix with your hands until each cube is lightly and evenly coated. The marinade should cling as a thin film rather than sit wet in the bottom of the bowl. Cover and leave the chicken to stand for 20 minutes. That thin cornstarch coating is what gives the chicken a velvety interior and helps the glaze cling later. - Prepare the Sauce
Whisk together the 2 tbsp light soy sauce, 1 tbsp dark soy sauce, 1½ tbsp Chinese black vinegar, 1½ tbsp Shaoxing wine, 1½ tbsp sugar, 80ml chicken stock or water and 1 tsp cornstarch in a small bowl until the sugar dissolves and no cornstarch lumps remain. Taste a drop: it should read savoury first, then lightly sweet and tangy, without tasting harshly salty. Keep the dark soy to the stated 1 tbsp, since it is there for colour and depth rather than saltiness. Set the bowl beside the stove. That reminder to stir it again right before use is what stops the settled cornstarch from leaving a thin, watery sauce. - Set Up the Mise en Place
Arrange the 60g peanuts, the halved dried chilies, the 1½ tsp Sichuan peppercorns, the scallion whites and light green parts, the dark green parts, the bell pepper, the 4 chopped garlic cloves and the 20g chopped ginger in separate piles beside the stove. Slice the 4 scallions on the bias, keeping the whites and dark greens apart because they go in at different times, and cut the bell pepper into small pieces about the size of the chicken cubes. Measure out the 3 tbsp oil: 2 tbsp for searing and 1 tbsp for the aromatics. That full setup matters because once the wok is hot, the stir-fry moves in seconds and cannot wait for chopping. - Sear the Chicken
Heat a wok or large skillet over high heat until very hot and just beginning to smoke lightly, then add 1 tbsp of the searing oil. Add half the chicken in a single layer and leave it undisturbed for 30–45 seconds so the underside browns, then stir-fry for about 3–4 minutes in total, until the outside is genuinely browned and caramelised and the chicken is just cooked through, about 74°C. Transfer it to a plate, reheat the pan briefly, add the second 1 tbsp of searing oil and repeat with the remaining chicken. Thigh meat is ready when it is fully opaque and springy but still juicy. That batch-by-batch sear is what browns the cubes instead of steaming them, and the slight under-cook leaves room for the final toss. - Bloom the Chilies and Aromatics
Lower the heat slightly to medium-high and add the remaining 1 tbsp oil. Add the halved dried chilies and 1½ tsp Sichuan peppercorns and stir-fry for 10–20 seconds, until fragrant and the oil turns lightly red-tinted, before the chilies darken. Add the scallion whites and light green parts, the garlic and the ginger and stir-fry for another 15–20 seconds, until genuinely aromatic. Add the bell pepper and toss for 30–45 seconds, until bright green and still crisp-tender. If the chilies begin to blacken, lift the pan off the heat for a few seconds. That brief bloom is what flavours the oil without letting the chilies turn bitter. - Combine and Glaze
Return the chicken and any resting juices from the plate to the wok, add the 60g peanuts and toss for about 10 seconds. Stir the sauce again, then pour it in and toss continuously over high heat for 30–60 seconds, until it boils, thickens and clings to every piece of chicken. The glaze should look glossy and sticky, not watery. If it reduces too far, loosen it with a small splash of water, and if it looks thin, let it boil a little longer while tossing. Add the dark green scallion parts and toss once more. That final high-heat toss is what turns a thin sauce into a glaze and keeps the peanuts distinct and crunchy. - Serve
Transfer the Kung Pao Chicken immediately to a warm serving bowl, scraping in any glaze left in the wok. Garnish with the extra sliced scallion greens and a few extra roasted peanuts. The finished dish should show glossy chicken cubes, whole peanuts, dried red chilies, scallions and green pepper pieces, with the sauce clinging rather than pooling in the bowl. The whole chilies are there mainly for fragrance, so diners can push them aside. That immediate serving is what keeps the glaze shiny and the peanuts crisp.
*Notes :
- Searing the chicken in small batches deserves genuine recognition as the technique most directly responsible for the browned, juicy texture of the finished dish. The recipe’s own warning that an overcrowded pan makes the chicken “steam instead of sear” reflects how crowded meat releases moisture faster than the pan can evaporate it, leaving pale, grey cubes instead of caramelised ones.
- Blooming the dried chilies and Sichuan peppercorns deserves the same genuine attention that fast-bloomed spices receive throughout other Sichuan stir-fries, because they turn from fragrant to acrid within seconds. The recipe’s own reminder that “burnt chilies turn bitter very fast” is why the heat is lowered to medium-high and the spices are timed to just 10–20 seconds.
- The cornstarch in both the marinade and the sauce deserves genuine respect as the detail most directly responsible for a velvety interior and a clinging glaze. The recipe notes that it creates “the thin protective coating” on the meat, and because the sauce slurry settles quickly, it must be stirred again right before it goes into the wok.
- The sauce consistency deserves attention as a genuine, checkable readiness cue rather than a loose approximation. The recipe’s own standard that the finished sauce should be “glossy and sticky, not watery” is easy to read in the wok — a sauce that clings to every cube is ready, while one that pools at the bottom needs another few seconds of boiling and tossing.
Why This Recipe Works
This recipe works because each stage protects either the texture of the chicken or the balance of the glaze. Small cubes in a cornstarch coating sear quickly and stay juicy, and cooking them in two batches keeps the wok hot enough to brown rather than steam. Dried chilies and Sichuan peppercorns bloomed for only seconds flavour the oil without turning bitter, while black vinegar, sugar and soy sauce give the sauce its tangy, savoury-sweet balance. Boiling the sauce briefly at the end sets a sticky glaze, and late-added peanuts stay crunchy. The result is genuinely glossy, fragrant chicken with a lightly numbing heat.
Ingredient Breakdown
Small, Even Chicken Cubes (2cm)
The critical technique — uniform pieces sear fast and cook through together, so none dries out while others lag.
Cornstarch-Coated Thighs
The critical ingredient choice — juicy thigh meat survives high heat, and the thin coating gives a velvety interior and helps the glaze cling.
Bloomed Chilies and Sichuan Pepper
The core flavour-building stage — seconds in hot oil release fragrance and numbing heat before burning turns them bitter.
Light and Dark Soy Sauce
The structural foundation — light soy brings salt and savoury depth, while a little dark soy adds colour and a rounded finish.
Chinese Black Vinegar
The defining flavour ingredient — its mellow, malty tang cuts through sugar and soy, keeping the glaze balanced.
Late-Added Roasted Peanuts
The finishing touch — tossed in only at the end, they stay whole and crunchy against the soft, sticky chicken.
Flavor Structure Explained
This Kung Pao chicken follows a layered balance model:
- Savoury, glossy foundation (light and dark soy sauce, seared chicken thighs)
- Tangy, sweet balance (Chinese black vinegar, sugar, Shaoxing wine)
- Fiery, numbing heat (dried red chilies, Sichuan peppercorns)
- Aromatic depth (garlic, ginger, scallion whites)
- Crunchy, fresh finish (roasted peanuts, green bell pepper, scallion greens)
Seared chicken and the soy-based glaze provide the savoury, glossy foundation that carries the whole dish. Black vinegar, sugar and Shaoxing wine balance that depth with a tangy-sweet lift, while the dried chilies and Sichuan peppercorns add genuinely fiery, numbing heat. Garlic, ginger and scallion whites bring aromatic depth beneath it all, so every bite smells as good as it tastes. Peanuts, bell pepper and scallion greens land as the crunchy, fresh finish that ties this Kung Pao chicken together.
Common Mistakes to Avoid
- Crowding the Wok – This drops the temperature so the chicken steams and turns pale instead of browning. Always sear in two batches and give each cube room in a single layer.
- Burning the Dried Chilies and Peppercorns – This turns the oil acrid and the whole dish bitter within seconds. Always lower the heat to medium-high and lift the pan away the moment they smell fragrant.
- Skipping the Second Stir of the Sauce – This sends the settled cornstarch to the bottom, leaving a genuinely thin, watery sauce that never clings. Always whisk the sauce again right before pouring it into the wok.
- Leaving the Peanuts in the Wok Too Long – This softens them in the steam and sauce until they lose their crunch. Always add them only moments before the sauce and serve immediately.
- Cutting Uneven Pieces – This means small cubes overcook and dry out while larger ones stay undercooked in the centre. Always cut the thighs to a consistent 2cm size and match the bell pepper pieces to them.
Variations
Extra Málà Version
Increase the Sichuan peppercorns from 1½ tsp to 2 tsp, as the recipe suggests for a stronger málà character, for a more prominent numbing tingle alongside the dried chilies.
Chicken Breast Version
Swap the thighs for boneless skinless chicken breast cut to the same 2cm cubes and shorten the searing time slightly, watching closely, as the recipe notes, because breast meat dries out quickly.
Milder Heat Version
Halve the dried chilies and shake out all their seeds before cooking, as the ingredient list allows, for a gentler heat that keeps the fragrance of the chilies without the full fire.
Steamed Rice Version
Serve the Kung Pao Chicken over plain steamed rice, as the recipe recommends, so the soft grains soak up the sticky glaze and temper the heat of every spoonful.
Storage & Make-Ahead
Choose boneless skinless chicken thighs rather than breast for the juiciest texture, and look for Chinese black vinegar and Shaoxing wine at a Chinese grocer, since they give the sauce its classic balance.
Cut the chicken, whisk the sauce and prep the aromatics up to 24 hours ahead, keeping each covered in the fridge, then marinate the chicken for the final 20 minutes before cooking.
The dish is best served immediately, while the glaze is shiny and the peanuts are genuinely crisp, ideally with plain steamed rice cooked separately and kept warm beside it for the first 10–15 minutes.
Leftovers keep in an airtight container in the fridge for up to 2 days, though the peanuts soften and the glaze tightens as it cools, so expect a less crunchy texture.
Reheat in a wok or skillet over medium-high heat with a splash of water for 2–3 minutes until steaming hot throughout, then refresh with a few extra peanuts and sliced scallion greens.
Frequently Asked Questions
Why is the chicken cut into small 2cm cubes?
Small, even pieces sear in minutes and cook through at the same moment, so the outside caramelises before the inside dries out. They also give each bite plenty of glaze-coated surface and match the size of the bell pepper pieces.
Why is the chicken seared in two batches rather than all at once?
Too much cold meat drops the wok temperature, so moisture pools and the chicken steams instead of browning. Two batches keep the pan hot enough for lightly caramelised edges, and the chicken stays genuinely juicy.
Why are the dried chilies and Sichuan peppercorns fried for only 10–20 seconds?
Seconds in hot oil release their fragrance and tint the oil lightly red. Any longer and they darken, and burnt chilies turn bitter very quickly, which would spoil the entire dish.
Why does the sauce need stirring again just before it goes into the wok?
The cornstarch settles to the bottom of the bowl as the sauce stands. Stirring it back in makes sure the sauce thickens evenly into a sticky glaze rather than staying thin and watery.
Are there other classic Sichuan, chicken rice bowl, or noodle dishes worth trying?
Mapo Tofu offers another classic Sichuan direction worth exploring alongside this one. General Tso’s Chicken Rice Bowl and Thai Cashew Chicken Rice Bowl are also worth trying for other saucy chicken rice bowls, and Dan Dan Noodles and Simple Fried Rice (No Protein) offer other noodle and rice dishes worth exploring.
Nutrition Facts
( Per Serving )
Calories
~460 kcal
Protein
43 g
Fat
24 g
Carbs
18 g
Calories
~460 kcal
Protein
43 g
Fat
24 g
Carbs
18 g
Related Recipes
Related Recipes
-

Indonesian Nasi Goreng
An Indonesian fried rice of cold jasmine rice, chicken, shallot-chilli paste and kecap manis, topped with a fried egg, fried shallots and fresh vegetables.
-
Malaysian Laksa Noodle Soup
Chicken thighs and rice noodles in a rich orange coconut curry broth, finished with cilantro, sliced red chilli and fresh lime.
-
Teriyaki Chicken Rice Bowl
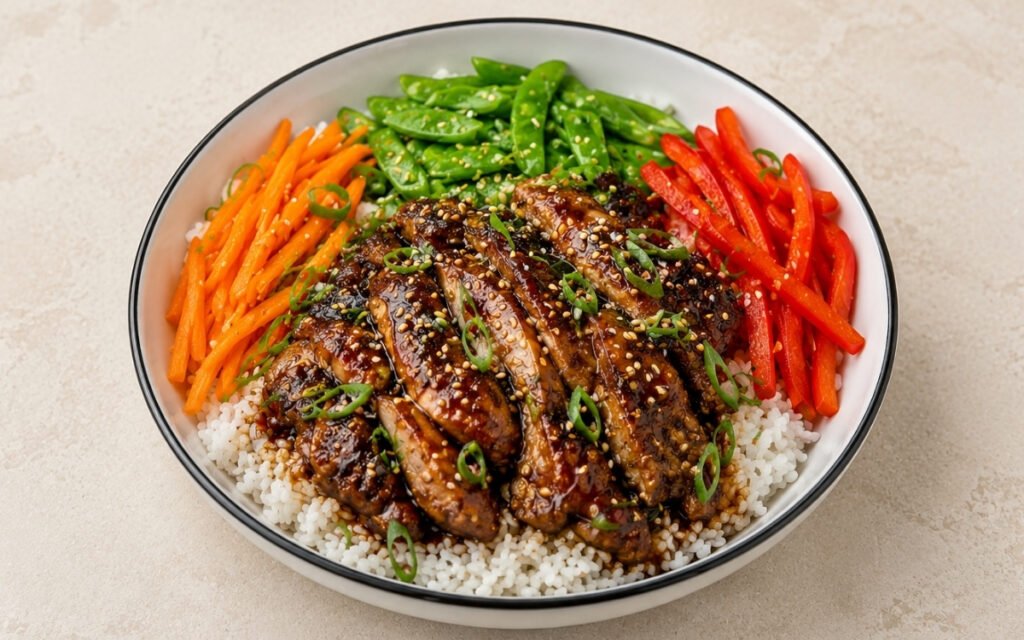
Chicken thighs seared and glazed in homemade soy-mirin-sake-ginger teriyaki — reduced until sticky and glossy over jasmine rice with crisp stir-fried vegetables. 40 minutes.


You might also like
You might also like
-
Peruvian Chicken Rice Bowl / Pollo a la Brasa Inspired
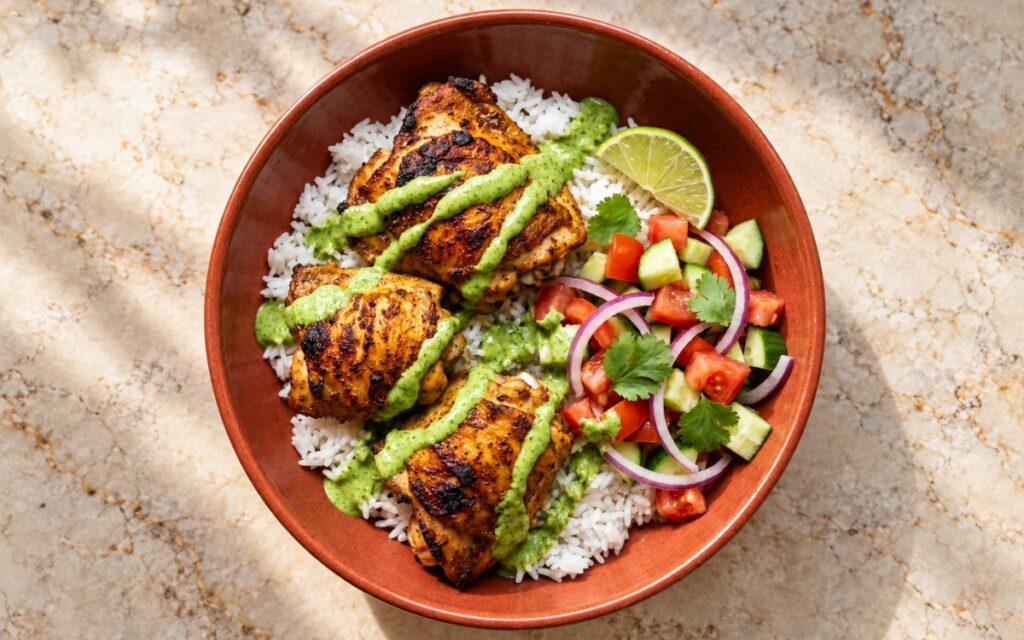
Dark roasted garlic-cumin chicken thighs over fluffy white rice with a fresh tomato-cucumber salad, cilantro, lime wedges, and creamy green ají verde.
-
Thai Peanut Chicken Noodle Bowl
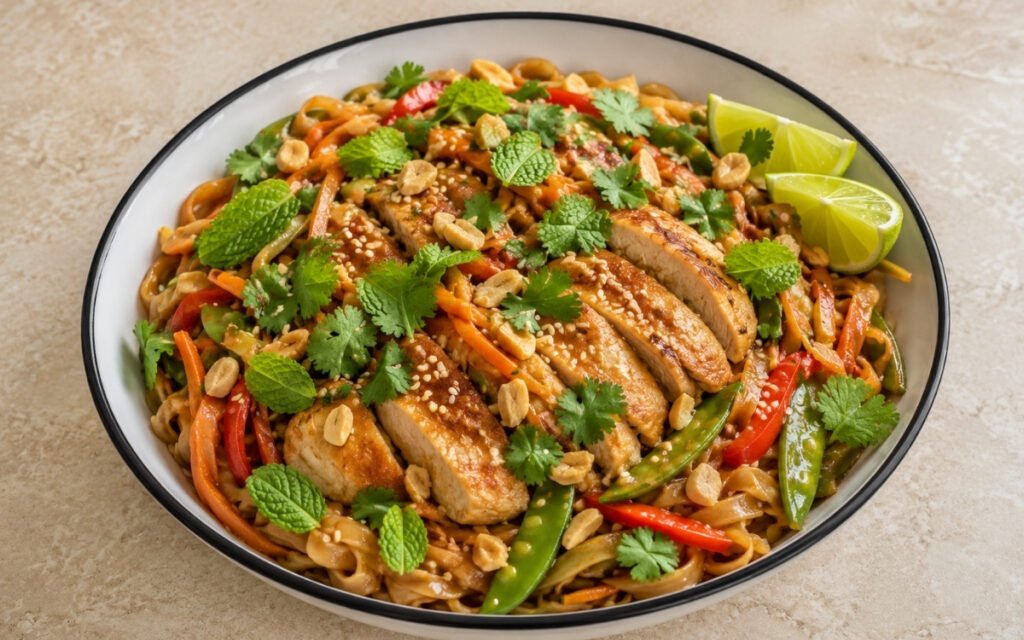
Seared chicken and flat rice noodles tossed in sriracha-ginger peanut sauce with stir-fried vegetables — cilantro, mint, crushed peanuts, and lime over the top. 45 minutes.
-
Blackened Salmon Tacos
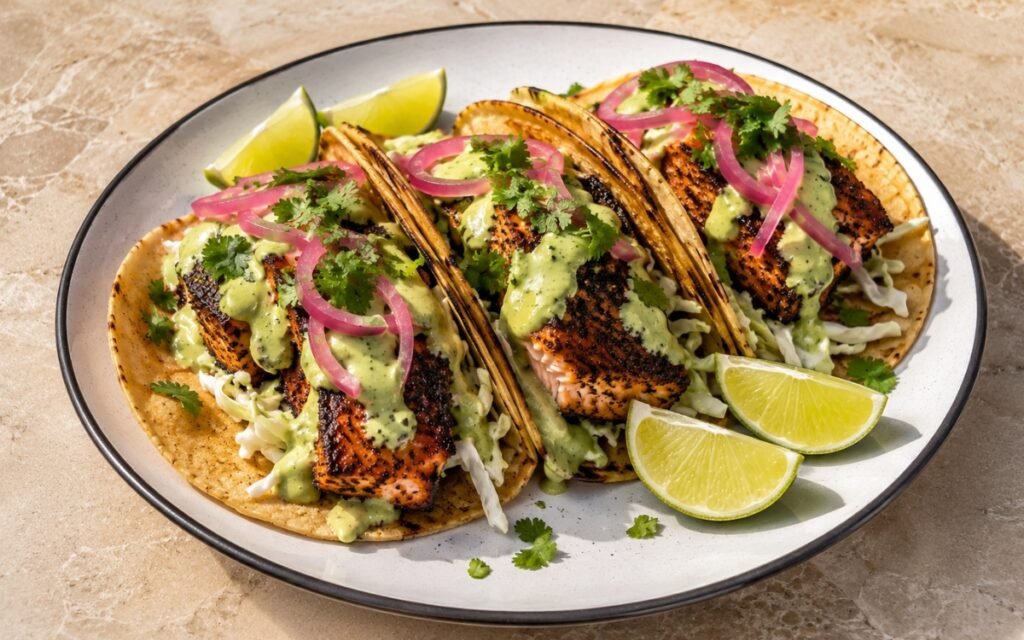
Homemade corn tortillas filled with flaky blackened salmon, cabbage, avocado crema, pickled red onion, and cilantro.
Kung Pao Chicken
Ingredients
Method
- Cut the 800g chicken thighs into small, even cubes of about 2cm, trimming away any large pieces of fat so every cube cooks at the same pace. Combine them in a bowl with the 1 tbsp light soy sauce, 1 tbsp Shaoxing wine, 1 tsp cornstarch, 1 tsp neutral oil, ¼ tsp salt and ⅛ tsp white pepper, then mix with your hands until each cube is lightly and evenly coated. The marinade should cling as a thin film rather than sit wet in the bottom of the bowl. Cover and leave the chicken to stand for 20 minutes. That thin cornstarch coating is what gives the chicken a velvety interior and helps the glaze cling later.
- Whisk together the 2 tbsp light soy sauce, 1 tbsp dark soy sauce, 1½ tbsp Chinese black vinegar, 1½ tbsp Shaoxing wine, 1½ tbsp sugar, 80ml chicken stock or water and 1 tsp cornstarch in a small bowl until the sugar dissolves and no cornstarch lumps remain. Taste a drop: it should read savoury first, then lightly sweet and tangy, without tasting harshly salty. Keep the dark soy to the stated 1 tbsp, since it is there for colour and depth rather than saltiness. Set the bowl beside the stove. That reminder to stir it again right before use is what stops the settled cornstarch from leaving a thin, watery sauce.
- Arrange the 60g peanuts, the halved dried chilies, the 1½ tsp Sichuan peppercorns, the scallion whites and light green parts, the dark green parts, the bell pepper, the 4 chopped garlic cloves and the 20g chopped ginger in separate piles beside the stove. Slice the 4 scallions on the bias, keeping the whites and dark greens apart because they go in at different times, and cut the bell pepper into small pieces about the size of the chicken cubes. Measure out the 3 tbsp oil: 2 tbsp for searing and 1 tbsp for the aromatics. That full setup matters because once the wok is hot, the stir-fry moves in seconds and cannot wait for chopping.
- Heat a wok or large skillet over high heat until very hot and just beginning to smoke lightly, then add 1 tbsp of the searing oil. Add half the chicken in a single layer and leave it undisturbed for 30–45 seconds so the underside browns, then stir-fry for about 3–4 minutes in total, until the outside is genuinely browned and caramelised and the chicken is just cooked through, about 74°C. Transfer it to a plate, reheat the pan briefly, add the second 1 tbsp of searing oil and repeat with the remaining chicken. Thigh meat is ready when it is fully opaque and springy but still juicy. That batch-by-batch sear is what browns the cubes instead of steaming them, and the slight under-cook leaves room for the final toss.
- Lower the heat slightly to medium-high and add the remaining 1 tbsp oil. Add the halved dried chilies and 1½ tsp Sichuan peppercorns and stir-fry for 10–20 seconds, until fragrant and the oil turns lightly red-tinted, before the chilies darken. Add the scallion whites and light green parts, the garlic and the ginger and stir-fry for another 15–20 seconds, until genuinely aromatic. Add the bell pepper and toss for 30–45 seconds, until bright green and still crisp-tender. If the chilies begin to blacken, lift the pan off the heat for a few seconds. That brief bloom is what flavours the oil without letting the chilies turn bitter.
- Return the chicken and any resting juices from the plate to the wok, add the 60g peanuts and toss for about 10 seconds. Stir the sauce again, then pour it in and toss continuously over high heat for 30–60 seconds, until it boils, thickens and clings to every piece of chicken. The glaze should look glossy and sticky, not watery. If it reduces too far, loosen it with a small splash of water, and if it looks thin, let it boil a little longer while tossing. Add the dark green scallion parts and toss once more. That final high-heat toss is what turns a thin sauce into a glaze and keeps the peanuts distinct and crunchy.
- Transfer the Kung Pao Chicken immediately to a warm serving bowl, scraping in any glaze left in the wok. Garnish with the extra sliced scallion greens and a few extra roasted peanuts. The finished dish should show glossy chicken cubes, whole peanuts, dried red chilies, scallions and green pepper pieces, with the sauce clinging rather than pooling in the bowl. The whole chilies are there mainly for fragrance, so diners can push them aside. That immediate serving is what keeps the glaze shiny and the peanuts crisp.