
Bao Buns — Braised Pork Belly (Gua Bao)
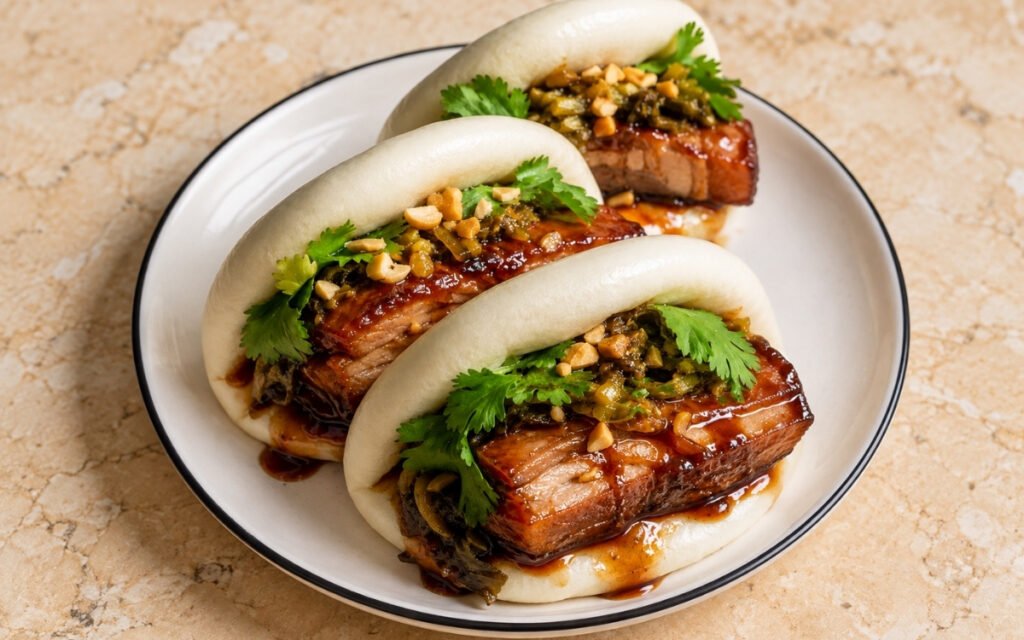
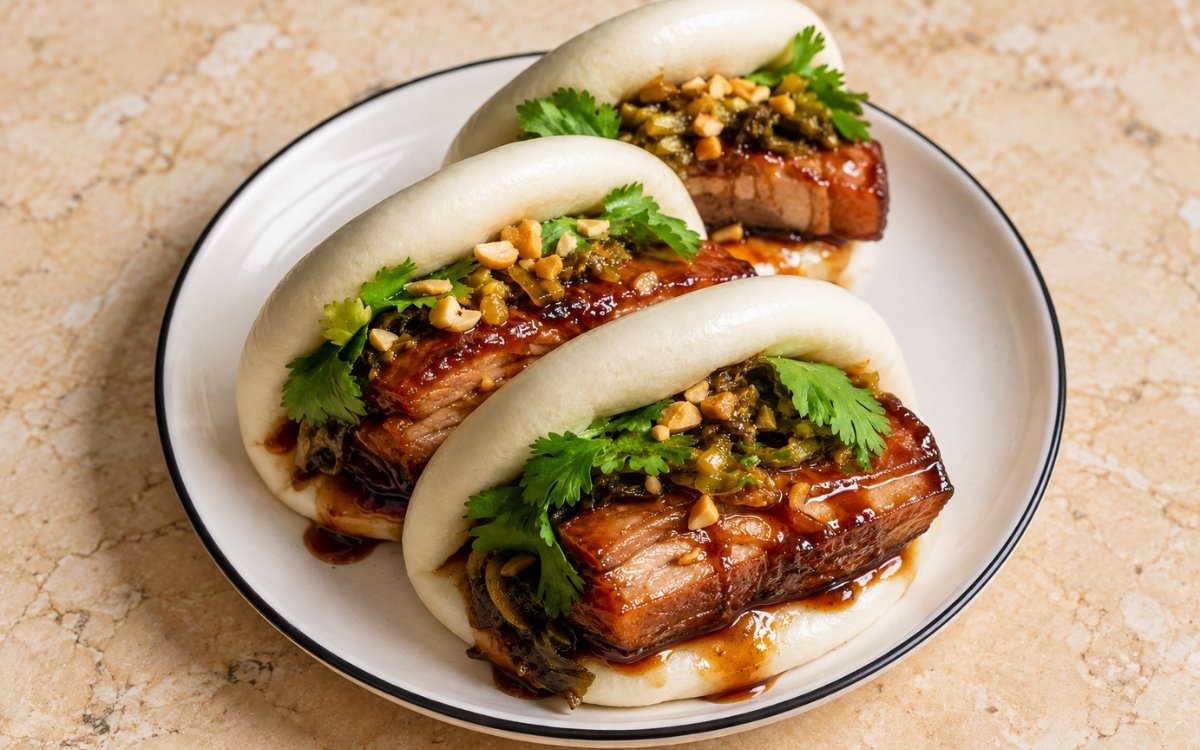
Classic Taiwanese-style gua bao with soft folded steamed bao buns filled with glossy dark-braised pork belly, pickled mustard greens, crushed sweet-salty peanuts, cilantro and reduced braising glaze, the pork tender enough to bite cleanly but still holding its thick slab shape inside the bun. Blanching the pork belly before it ever goes into the braise is the technique this whole dish depends on for a genuinely clean, glossy glaze — that brief boil removes real impurities and harsh porky foam the meat would otherwise release directly into the braising liquid, the same blanch-first-for-clean-sauce principle used elsewhere in this collection whenever a rich, fatty cut needs its surface impurities removed before it ever joins a long-simmered braise. Caramelizing the sugar only to amber, never dark brown, is what protects the finished braise from tasting bitter. Squeezing the pickled mustard greens genuinely dry before cooking is what protects the pork’s own glaze from being diluted inside the finished bun. The payoff is a bao with real, layered Taiwanese contrast — soft, pillowy bun around glossy, fatty-salty pork belly, sharp pickled greens, sweet crunchy peanuts, and fresh cilantro.
Prep Time : 1 hr
Cook Time : 2 hr, 30 min
Servings : 4
1 hr
2 hr, 30 min
4
Ingredients
For the Bao Buns
• 500g all-purpose flour or bao flour — this one on Amazon
• 50g sugar
• 7g instant yeast
• 8g baking powder
• 6g fine salt
• 260ml lukewarm milk or water, 28–32°C
• 30ml neutral oil
• Extra neutral oil, for brushing before folding
For the Braised Pork Belly
• 600g pork belly, preferably skin-on, cut into 12 thick pieces, about 50g each
• 1 tbsp neutral oil
• 30g ginger, sliced
• 5 garlic cloves, lightly crushed
• 4 scallions, cut into large pieces
• 60g rock sugar or light brown sugar — this one on Amazon
• 80ml light soy sauce
• 25ml dark soy sauce — this one on Amazon
• 60ml Shaoxing wine — this one on Amazon
• 1 lemon, thinly sliced
• 1 star anise
• 1 small cinnamon stick
• 2 bay leaves
• ½ tsp five-spice powder, optional but useful — this one on Amazon
• ½ tsp white pepper — this one on Amazon
• 600–750ml water, enough to mostly cover the pork
For the Pickled Mustard Greens
• 180g pickled mustard greens / suan cai, rinsed if very salty, squeezed dry and chopped
• 1 tsp neutral oil
• 1 garlic clove, minced
• 1 tsp sugar
• 1 tsp soy sauce, only if needed
• 1 small red chili, finely sliced, optional
For the Peanut Topping
• 80g roasted peanuts
• 12g sugar
• Pinch of fine salt
For Finishing
• Fresh cilantro leaves
• Extra thinly sliced scallions, optional
• Reduced pork braising glaze
This post may contain affiliate links. As an Amazon Associate I earn from qualifying purchases, at no additional cost to you.
Directions
- Make the Bao Dough
In the bowl of a stand mixer, combine flour, sugar, instant yeast, baking powder and salt. Add the lukewarm milk or water and neutral oil. Knead with the dough hook for 8–10 minutes, until smooth, soft and elastic. Cover and proof for 60–75 minutes, until about doubled. The dough should be smooth before proofing. If it looks rough or tears easily, knead longer. Smooth dough gives smoother bao. That thorough kneading, worked until genuinely smooth, is what builds enough gluten structure to prevent the pleated, folded bun from wrinkling once it’s actually steamed. - Shape the Bao Buns
Punch down the dough and divide into 12 equal pieces, about 70g each. Roll each piece into a smooth ball. Rest covered for 10 minutes. Roll each ball into an oval about 12–13cm long. Brush the surface lightly with neutral oil, then fold in half without sealing. Place each folded bun on a small square of parchment. Cover and proof for 25–35 minutes, until slightly puffed and airy. Do not overproof. Bao should be puffy but still structured. Overproofed buns wrinkle and collapse after steaming. Brushing the oiled surface before folding, rather than leaving the dough bare, is what keeps the two folded layers from actually sealing together during steaming, letting the bun open cleanly once it’s time to fill. - Blanch the Pork Belly
Place the pork belly pieces in a pot, cover with cold water and bring to a boil. Boil for 5 minutes, skimming any foam. Drain, rinse the pork, and pat dry. Blanching gives a cleaner braising sauce and removes harsh porky foam. Do not skip it if you want a clean glossy glaze. That upfront removal of impurities protects the entire braise still to come — any released proteins and foam left unaddressed would carry straight through into the finished glaze, muddying the flavour every later stage depends on. - Brown and Caramelize
Heat neutral oil in a heavy pot over medium heat. Add the pork belly pieces and brown lightly on the fatty sides, about 3–5 minutes total. Remove the pork briefly. Add the ginger, garlic and scallions and fry for 1 minute. Add the sugar and let it melt into the aromatics until it begins to turn amber and syrupy. Return the pork to the pot and coat it in the caramel. Caramelize the sugar only to amber, not dark brown. Burnt sugar makes the braise bitter. That specific, watched colour target protects the entire braise from a real, common risk — sugar pushed even slightly past amber crosses quickly into a genuine bitterness that would carry directly through into the finished glaze. - Braise the Pork Belly
Add light soy sauce, dark soy sauce, Shaoxing wine, star anise, cinnamon, bay leaves, five-spice if using, white pepper and enough water to mostly cover the pork. Bring to a boil, then reduce to a gentle simmer. Cover partially and braise for 1 hr 45 min to 2 hr 15 min, turning the pork occasionally. The pork is ready when a chopstick or skewer slides through the lean and fat with little resistance, but the pieces still hold their shape. The pork should be tender, glossy and sliceable, not falling apart into shreds. If it collapses, it has gone too far for clean gua bao presentation. That genuinely gentle simmer, maintained patiently over hours, is what lets the pork’s own fat and connective tissue soften properly without breaking the pieces down past the point of holding their own clean, sliceable shape. - Reduce the Glaze
Remove the pork pieces carefully and keep warm. Strain the braising liquid if you want a cleaner glaze, then simmer it uncovered until reduced to a glossy, spoon-coating sauce. Return the pork to the glaze and coat gently. The sauce should cling to the pork and drip slowly. If it is watery, the bun will become soggy and the pork will look dull. That real, deliberate reduction concentrates the braising liquid’s own flavour, converting it from a thinner liquid into the glossy, clinging glaze this dish depends on for coating the pork properly without soaking through the bun. - Prepare the Pickled Mustard Greens
Heat oil in a small pan. Add garlic and cook for 20–30 seconds. Add chopped pickled mustard greens, sugar and optional chili. Stir-fry for 2–3 minutes, until fragrant and slightly glossy. Taste. Add a little soy sauce only if the greens need more salt. Squeeze the mustard greens dry before cooking. Wet greens dilute the pork glaze inside the bao. That thorough squeezing removes real, considerable moisture the greens would otherwise release directly into the assembled bun, protecting the pork’s own carefully reduced glaze from being watered down. - Make the Peanut Topping
Pulse or crush the roasted peanuts into coarse crumbs. Mix with sugar and a pinch of salt. The texture should be sandy with some small crunchy pieces, not a smooth powder. That deliberately coarse crush protects the topping’s own real, distinct crunch — pulsed into a fine powder, it would lose exactly the textural contrast this classic gua bao garnish is meant to provide. - Steam the Bao
Bring a steamer to a steady simmer. Steam the bao buns in batches for 8–10 minutes, leaving space between them. Turn off the heat and let them sit covered for 2 minutes before opening the lid. Keep warm under a clean towel. Do not open the steamer immediately after cooking. Sudden cooling can wrinkle the buns. That brief, covered rest after the heat is off lets the buns’ own internal temperature settle gradually, protecting their smooth surface from the real risk of wrinkling under a sudden shift from hot, humid steam to open air. - Assemble the Gua Bao
Open each warm bao bun gently. Fill each bun with 1 glazed pork belly piece, a spoonful of pickled mustard greens, crushed sweet-salty peanuts, fresh cilantro leaves, a small drizzle of reduced braising glaze, and sliced scallions if using. Serve immediately. Assembling only at this final, immediate stage protects every carefully built component — the bun’s own softness, the pork’s glossy glaze, the greens’ sharp bite — from compromising each other before the bao ever reaches the table.
*Notes :
- Blanching the pork belly before it ever goes into the long braise deserves genuine recognition as the technique responsible for whether the finished glaze stays clean or turns murky. That brief simmer removes real, measurable impurities the pork would otherwise release directly into the braising liquid, protecting the flavour of every stage that follows.
- Caramelizing the sugar only to a genuine amber, watched carefully to avoid dark brown, deserves the same respect this technique receives throughout this collection’s other braises built on a caramel base. The recipe’s own explicit warning that “burnt sugar makes the braise bitter” reflects real, narrow margins this early stage depends on getting right — sugar pushed even slightly further crosses quickly into a bitterness that carries straight through into the finished glaze.
- Squeezing the pickled mustard greens genuinely dry before cooking deserves attention as a real, functional safeguard rather than a minor step. The recipe’s own explicit warning that “wet greens dilute the pork glaze inside the bao” reflects a real, immediate risk — any residual moisture left in the greens transfers directly onto the pork’s carefully reduced glaze the moment the bun is assembled.
- The recipe’s own explicit distinction between properly braised pork — tender, glossy and sliceable — and pork that’s fallen apart into shreds deserves genuine attention as a real, checkable doneness target specific to this dish’s own presentation. Gua bao depends on the pork holding a distinct, thick slab shape inside the bun, and pushing the braise even slightly past this point compromises that whole classic look.
Why This Recipe Works
This recipe works because the pork belly is blanched first, protecting the entire braising liquid from murkiness. The sugar is caramelized only to amber, protecting the braise from bitterness.
A genuinely gentle simmer over hours tenderizes the pork while still keeping the pieces intact and sliceable, and the finished braising liquid is reduced into a real, glossy, clinging glaze.
The pickled mustard greens are squeezed thoroughly dry, protecting that glaze from dilution once assembled, and every component — bun, pork, greens, peanuts, cilantro — is brought together only right before serving, delivering the dish’s whole intended contrast.
Ingredient Breakdown
Blanched Pork Belly
The critical technique — removes real impurities before the long braise, protecting the liquid’s own clarity and flavour.
Amber-Caramelized Sugar
The critical technique — watched carefully to protect the braise from the bitterness dark brown sugar would introduce.
Genuinely Gentle, Hours-Long Braise
The critical technique — tenderizes the pork’s fat and connective tissue while keeping the pieces intact and sliceable.
Reduced, Glossy Braising Glaze
The critical technique — concentrates real flavour into a clinging sauce that coats the pork without soaking the bun.
Thoroughly Squeezed Pickled Mustard Greens
The critical technique — protects the pork’s carefully reduced glaze from being diluted once assembled.
Oil-Brushed, Unsealed Folded Buns
The critical technique — keeps the folded dough layers from sealing shut, letting the bun open cleanly once steamed.
Flavor Structure Explained
This gua bao follows a layered balance model:
- Soft, pillowy foundation (steamed, unsealed folded bun)
- Rich, glossy centrepiece (blanched, caramelized, long-braised pork belly)
- Sharp, cutting accent (squeezed pickled mustard greens)
- Sweet, crunchy contrast (peanut topping)
- Fresh finishing note (cilantro, scallions)
A soft, genuinely pillowy steamed bun provides this dish’s foundational texture. Blanched, caramelized, and long-braised pork belly serves as the rich, glossy centrepiece, its texture protected through careful, patient cooking. Squeezed, thoroughly dry pickled mustard greens add a sharp, cutting accent that balances the pork’s own richness. A coarse, sweet-salty peanut topping contributes real, crunchy contrast. Fresh cilantro and optional scallions finish the bao with a bright, aromatic note that ties every layer of this classic Taiwanese dish together.
Common Mistakes to Avoid
- Skipping the Pork’s Blanching Step – This risks a murky, less clean braising liquid. Always blanch and rinse the pork belly first.
- Letting the Caramelized Sugar Go Past Amber – This introduces real bitterness into the braise. Always watch closely and pull it at amber.
- Boiling the Braise Hard Instead of Keeping It Gentle – This risks the pork falling apart past the point of holding its shape. Always maintain a genuine, patient simmer.
- Skipping the Mustard Greens’ Squeezing Step – This dilutes the pork’s own glaze inside the assembled bun. Always squeeze them thoroughly dry before cooking.
- Assembling the Bao Too Far in Advance – This softens the bun and lets the components compromise each other. Always assemble only right before serving.
Variations
Skin-On Pork Belly Version
Use skin-on pork belly specifically if available, per the recipe’s own note on it giving the classic gelatinous texture, for the most traditional gua bao result.
Extra-Peanut Version
Increase the crushed peanut topping generously, per the recipe’s own emphasis on it being far more than a simple garnish, for a more pronounced sweet-salty crunch in every bite.
Extra-Spicy Version
Include the optional sliced red chili in the pickled mustard greens for a sharper, more assertive heat that cuts through the pork’s own richness.
Fried Chicken Bao Pairing Version
Serve alongside Crispy Fried Chicken Bao Buns, per the recipe’s own related dish sharing the same dough base, for a spread offering two distinct classic bao fillings.
Storage & Make-Ahead
Pork belly pieces around 50g each give the right visual and eating size for this dish, feeling generous while still fitting comfortably inside the folded bao once assembled.
Skin-on pork belly is best for classic texture if available, since the skin becomes soft and gelatinous after the long braise, though skinless pork belly still works well as an alternative.
Dark soy sauce is used here mostly for colour, so don’t replace all of the light soy sauce with dark, since that would make the finished sauce heavy and slightly bitter rather than properly balanced.
The pickled mustard greens are genuinely essential for balance, cutting through the pork’s own richness and keeping the bao from tasting overly heavy, and the sweet-salty peanut crumb is likewise not just garnish but central to gua bao’s classic aroma and texture.
Keep the bao covered after steaming so they stay soft, warm, and slightly glossy rather than drying out, and always assemble right before serving, since the pork glaze and mustard greens will soften the bun considerably if left to sit too long.
Frequently Asked Questions
Why does the pork belly need to be blanched before the long braise even begins?
That brief simmer removes real impurities the pork would otherwise release directly into the braising liquid. Skipping it risks a noticeably murkier, less clean glaze throughout the whole dish.
Why does the caramelized sugar need to be watched so closely, stopping at amber?
Sugar pushed past amber into dark brown territory turns genuinely bitter, and that bitterness carries directly through into the finished braising sauce. Amber is the specific, checkable point where the caramel’s own flavour is at its best.
Why do the pickled mustard greens need to be squeezed so thoroughly dry before cooking?
Wet greens release real moisture directly into the assembled bun, diluting the pork’s own carefully reduced glaze. Thorough squeezing protects that glaze’s intended richness once everything is finally combined.
Why does the pork need to stay tender and sliceable rather than falling apart into shreds?
Gua bao depends on the pork holding a distinct, thick slab shape inside the folded bun. Braising it past that point compromises the classic, structured presentation this dish is specifically known for.
Are there other classic bao, roasted pork, or Chinese braised pork dishes worth trying?
Crispy Fried Chicken Bao Buns offers another classic bao filling worth exploring using the same dough base. Char Siu over Rice and Roujiamo Sandwich (Chinese Burger) are also worth trying for other classic Chinese braised and roasted pork directions, and Steam-Roasted Pork Belly with Herb Sauce and Baked Char Siu Bao offer other satisfying pork belly and bao dishes worth exploring.
Nutrition Facts
( Per Serving — 3 gua bao )
Calories
~880 kcal
Protein
32 g
Fat
44 g
Carbs
88 g
Calories
~880 kcal
Protein
32 g
Fat
44 g
Carbs
88 g
Related Recipes
Related Recipes

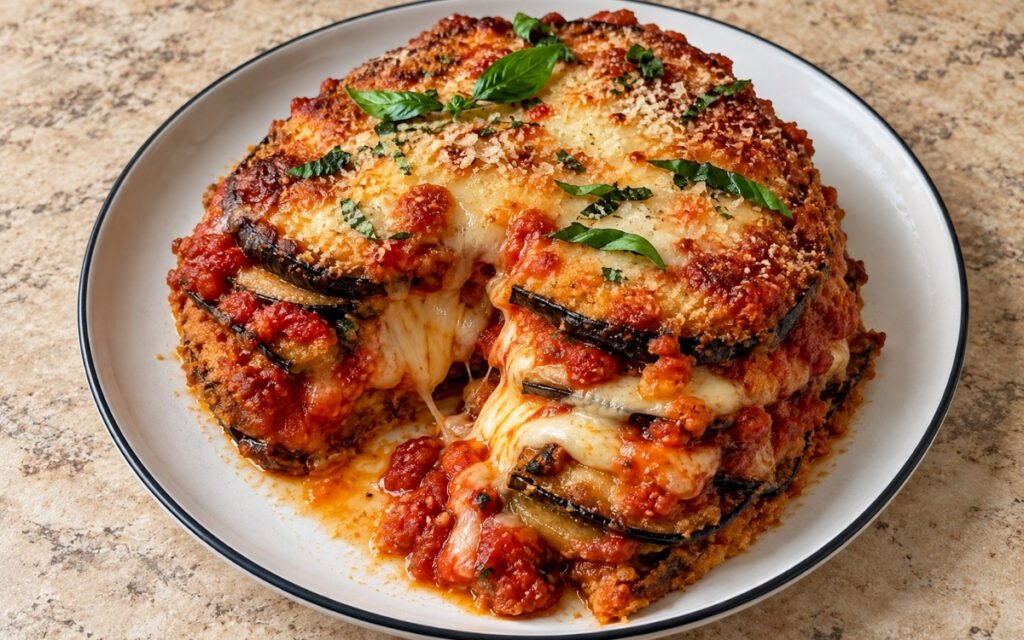
Eggplant Parmesan
Breaded fried eggplant slices layered with tomato sauce, mozzarella, Parmesan, and basil, then baked until bubbling and deeply flavorful.
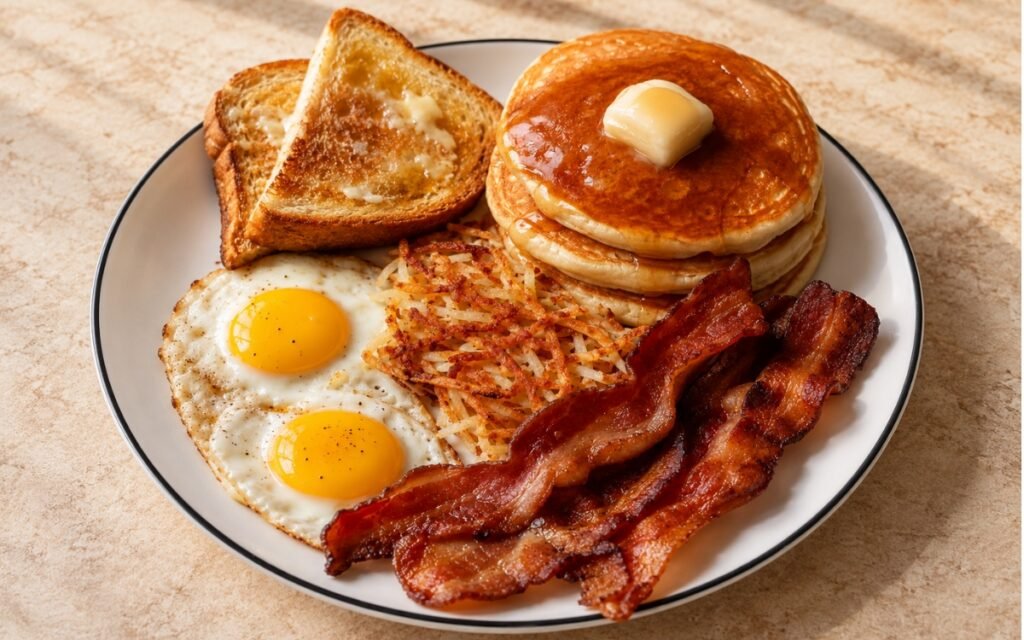
Classic American Breakfast Plate
Sunny-side-up eggs, crispy bacon, golden hash browns, buttered toast, and a small stack of fluffy buttermilk pancakes with maple syrup.
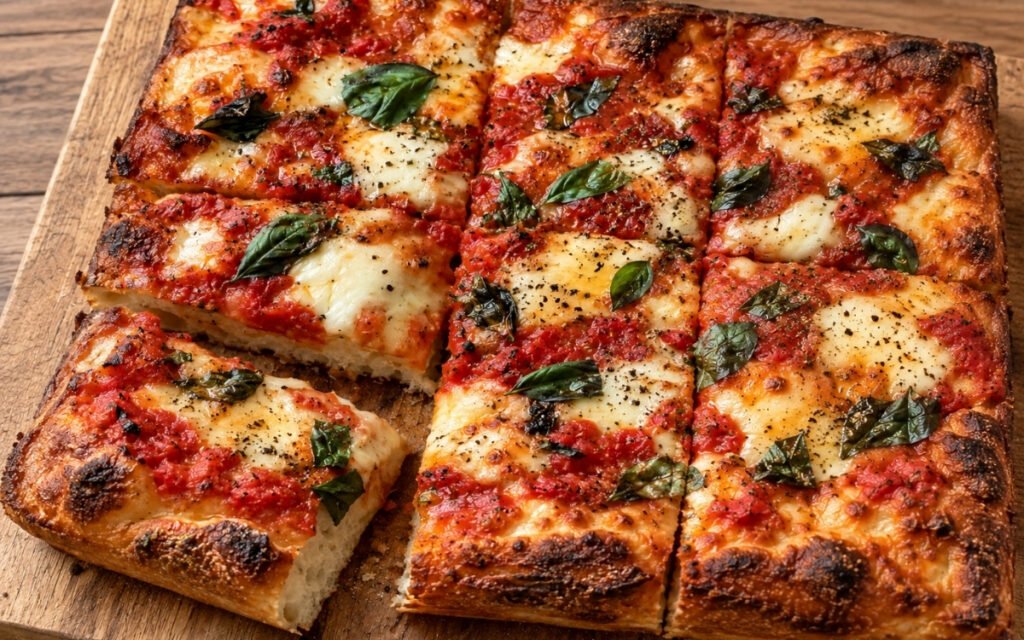
Focaccia Pizza with Tomato and Mozzarella
Thick, airy focaccia-style pizza with a crisp, olive-oil-rich bottom, soft cloud-like interior, thick tomato sauce, melted mozzarella, and fresh basil.
You might also like
You might also like
Bao Buns with Crispy Fried Chicken
Soft steamed bao buns filled with extremely crisp fried chicken, quick-pickled cucumber ribbons, scallions, sesame seeds, and glossy sriracha mayo.
Enfrijoladas
Soft corn tortillas lightly fried, dipped in glossy black bean sauce, folded around queso fresco, and finished with more cheese, crema, onion, and avocado.
Korean BBQ Chicken Wings
Double-fried wings glazed in sticky gochujang barbecue deliver shattering crunch with sweet-heat intensity and garlic depth.
Bao Buns — Braised Pork Belly (Gua Bao)
Ingredients
Method
- In the bowl of a stand mixer, combine flour, sugar, instant yeast, baking powder and salt. Add the lukewarm milk or water and neutral oil. Knead with the dough hook for 8–10 minutes, until smooth, soft and elastic. Cover and proof for 60–75 minutes, until about doubled. The dough should be smooth before proofing. If it looks rough or tears easily, knead longer. Smooth dough gives smoother bao. That thorough kneading, worked until genuinely smooth, is what builds enough gluten structure to prevent the pleated, folded bun from wrinkling once it’s actually steamed.
- Punch down the dough and divide into 12 equal pieces, about 70g each. Roll each piece into a smooth ball. Rest covered for 10 minutes. Roll each ball into an oval about 12–13cm long. Brush the surface lightly with neutral oil, then fold in half without sealing. Place each folded bun on a small square of parchment. Cover and proof for 25–35 minutes, until slightly puffed and airy. Do not overproof. Bao should be puffy but still structured. Overproofed buns wrinkle and collapse after steaming. Brushing the oiled surface before folding, rather than leaving the dough bare, is what keeps the two folded layers from actually sealing together during steaming, letting the bun open cleanly once it’s time to fill.
- Place the pork belly pieces in a pot, cover with cold water and bring to a boil. Boil for 5 minutes, skimming any foam. Drain, rinse the pork, and pat dry. Blanching gives a cleaner braising sauce and removes harsh porky foam. Do not skip it if you want a clean glossy glaze. That upfront removal of impurities protects the entire braise still to come — any released proteins and foam left unaddressed would carry straight through into the finished glaze, muddying the flavour every later stage depends on.
- Heat neutral oil in a heavy pot over medium heat. Add the pork belly pieces and brown lightly on the fatty sides, about 3–5 minutes total. Remove the pork briefly. Add the ginger, garlic and scallions and fry for 1 minute. Add the sugar and let it melt into the aromatics until it begins to turn amber and syrupy. Return the pork to the pot and coat it in the caramel. Caramelize the sugar only to amber, not dark brown. Burnt sugar makes the braise bitter. That specific, watched colour target protects the entire braise from a real, common risk — sugar pushed even slightly past amber crosses quickly into a genuine bitterness that would carry directly through into the finished glaze.
- Add light soy sauce, dark soy sauce, Shaoxing wine, star anise, cinnamon, bay leaves, five-spice if using, white pepper and enough water to mostly cover the pork. Bring to a boil, then reduce to a gentle simmer. Cover partially and braise for 1 hr 45 min to 2 hr 15 min, turning the pork occasionally. The pork is ready when a chopstick or skewer slides through the lean and fat with little resistance, but the pieces still hold their shape. The pork should be tender, glossy and sliceable, not falling apart into shreds. If it collapses, it has gone too far for clean gua bao presentation. That genuinely gentle simmer, maintained patiently over hours, is what lets the pork’s own fat and connective tissue soften properly without breaking the pieces down past the point of holding their own clean, sliceable shape.
- Remove the pork pieces carefully and keep warm. Strain the braising liquid if you want a cleaner glaze, then simmer it uncovered until reduced to a glossy, spoon-coating sauce. Return the pork to the glaze and coat gently. The sauce should cling to the pork and drip slowly. If it is watery, the bun will become soggy and the pork will look dull. That real, deliberate reduction concentrates the braising liquid’s own flavour, converting it from a thinner liquid into the glossy, clinging glaze this dish depends on for coating the pork properly without soaking through the bun.
- Heat oil in a small pan. Add garlic and cook for 20–30 seconds. Add chopped pickled mustard greens, sugar and optional chili. Stir-fry for 2–3 minutes, until fragrant and slightly glossy. Taste. Add a little soy sauce only if the greens need more salt. Squeeze the mustard greens dry before cooking. Wet greens dilute the pork glaze inside the bao. That thorough squeezing removes real, considerable moisture the greens would otherwise release directly into the assembled bun, protecting the pork’s own carefully reduced glaze from being watered down.
- Pulse or crush the roasted peanuts into coarse crumbs. Mix with sugar and a pinch of salt. The texture should be sandy with some small crunchy pieces, not a smooth powder. That deliberately coarse crush protects the topping’s own real, distinct crunch — pulsed into a fine powder, it would lose exactly the textural contrast this classic gua bao garnish is meant to provide.
- Bring a steamer to a steady simmer. Steam the bao buns in batches for 8–10 minutes, leaving space between them. Turn off the heat and let them sit covered for 2 minutes before opening the lid. Keep warm under a clean towel. Do not open the steamer immediately after cooking. Sudden cooling can wrinkle the buns. That brief, covered rest after the heat is off lets the buns’ own internal temperature settle gradually, protecting their smooth surface from the real risk of wrinkling under a sudden shift from hot, humid steam to open air.
- Open each warm bao bun gently. Fill each bun with 1 glazed pork belly piece, a spoonful of pickled mustard greens, crushed sweet-salty peanuts, fresh cilantro leaves, a small drizzle of reduced braising glaze, and sliced scallions if using. Serve immediately. Assembling only at this final, immediate stage protects every carefully built component — the bun’s own softness, the pork’s glossy glaze, the greens’ sharp bite — from compromising each other before the bao ever reaches the table.