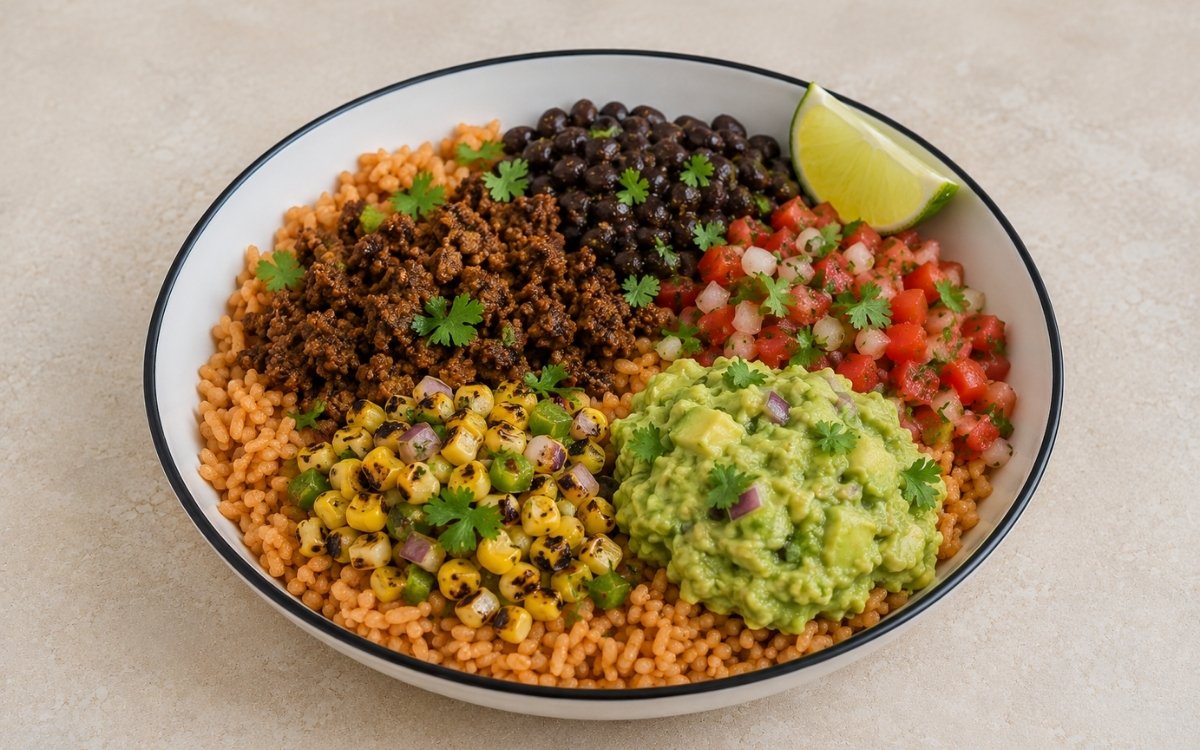
Beef Burrito Rice Bowl
Ground beef pressed into a single flat layer across the entire cast iron surface like a patty — left completely undisturbed until the bottom is deeply brown and crispy — then sliced with a spatula and flipped to sear the second side before being broken down into smaller pieces and seasoned. The technique produces something fundamentally better than beef that is immediately crumbled and stirred: a caramelised, slightly textured ground beef with concentrated Maillard depth on every piece rather than the grey, steamed result that comes from breaking raw beef apart into a pan. Everything else — the Mexican rice, the pico de gallo, the charred corn salad, the guacamole — is built around this beef while it sears. Fifty minutes, the most satisfying Mexican-inspired bowl in this collection.

Prep Time : 20 min
Cook Time : 30 min
Servings : 5
20 min
30 min
5
Ingredients
For the Ground Beef
• 600g ground beef, 80/20 fat ratio
• 3g smoked paprika — about 1 tsp — this one on Amazon
• 3g ground cumin — about 1 tsp
• 7g fine sea salt
• 3g garlic powder — about 1 tsp
• 15ml olive oil, for the cast iron — this one on Amazon
For the Spiced Black Beans
• 400g canned black beans, drained and rinsed
• 2g ground cumin — this one on Amazon
• 3g smoked paprika
• 3g fine sea salt
For the Mexican Style Rice (Full recipe — see Mexican Style Rice)
• 300g long-grain white rice
• 400ml chicken stock
• 200ml tomato sauce or blended fresh tomatoes
• ½ white onion, finely diced
• 3 garlic cloves, minced
• 15ml vegetable oil
• 3g ground cumin
• 3g fine salt
For the Pico de Gallo (Full recipe — see Pico de Gallo)
• 4 Roma tomatoes, finely diced
• ½ white onion, finely diced
• 1 jalapeño, finely diced
• 30g fresh cilantro, roughly chopped
• 30ml fresh lime juice
• 3g fine salt
For the Classic Guacamole (Full recipe — see Classic Guacamole)
• 3 ripe avocados
• 30ml fresh lime juice
• ½ white onion, finely diced
• 1 jalapeño, finely diced
• 20g fresh cilantro, roughly chopped
• 3g fine salt
• 1 garlic clove, minced
For the Mexican Grilled Corn Salad (Full recipe — see Mexican Grilled Corn Salad)
• 400g corn kernels, fresh or frozen
• 1 jalapeño, finely diced
• 1½ red onion, finely diced
• 30g fresh cilantro, roughly chopped
• 30ml fresh lime juice
• 60g cotija or feta cheese, crumbled — this one on Amazon
• 3g chili powder — this one on Amazon
• 2g fine salt
For Finishing
• 100g Mexican cheese blend, approximately 25g per bowl
This post may contain affiliate links. As an Amazon Associate I earn from qualifying purchases, at no additional cost to you.
Directions
- Start the Mexican Style Rice
The rice goes on first — its 20-minute cook time plus 5-minute rest covers the entire preparation window for every other component. For the complete technique — including the toasting method, the tomato incorporation, and the correct stock ratio — follow the full Mexican Style Rice recipe. Summary: heat the 15ml of vegetable oil in a medium saucepan over medium heat. Add the 300g of rinsed long-grain rice and toast, stirring continuously, for 2–3 minutes until the grains turn lightly golden and smell nutty — the toasting is what produces the Mexican rice’s specific separate-grain character and prevents sticking during simmering. Add the garlic and diced onion and cook for 1 minute until fragrant. Pour in the 200ml of tomato sauce — stir immediately. Add the 400ml of chicken stock, 3g of cumin, and 3g of salt. Bring to a boil, reduce to the lowest heat, cover tightly, and simmer for 18–20 minutes until all liquid is absorbed. Remove from heat and rest covered for 5 minutes. Fluff with a fork — the rice should be fluffy, separate, and a deep golden-orange from the tomato. - Sear the Ground Beef Using the Cast Iron Method
This is the technique step that defines this recipe and distinguishes it from standard taco-night ground beef. Heat a large cast iron skillet over medium-high heat for 2–3 minutes until genuinely hot. Add the 15ml of olive oil and swirl to coat the entire surface. Add the 600g of ground beef as a single mass and immediately use a spatula to press and spread it across the entire surface of the cast iron in an even, flat layer — as though making a large, thin patty that covers the pan from edge to edge. The surface contact is the critical factor: ground beef pressed flat against the entire surface of a smoking-hot cast iron creates the maximum possible direct Maillard contact area simultaneously, rather than the small surface areas produced by immediately crumbling the beef. Leave completely undisturbed for 4–5 minutes. The fat from the 80/20 beef renders progressively into the cast iron surface during this undisturbed period while the beef’s surface proteins caramelise — producing a deeply browned, almost crusty bottom layer across the entire pan’s width. The 80/20 fat ratio is specified rather than leaner beef because the fat content is what enables the caramelisation — leaner beef produces insufficient rendered fat and drier, less flavourful seared surfaces. After 4–5 minutes, the bottom should be visibly deeply browned with a crust that releases naturally from the cast iron. Using a wide spatula, slice through the flat beef layer into 4–6 large sections and flip each section over. Allow the second side to sear undisturbed for 3–4 minutes — the top surface that was facing up during the first sear is now against the hot surface and will develop its own crust in this second phase. Once both sides have developed deep caramelisation, begin breaking the seared beef into smaller pieces using a firm spatula or a potato masher — pressing and breaking the caramelised sections into irregular, smaller crumbles. The goal is not fine, uniform crumbles but slightly irregular, textured pieces where some surfaces retain their seared character. Add the 3g of smoked paprika, 3g of cumin, 7g of salt, and 3g of garlic powder directly to the broken beef and fold and mix continuously for 1–2 minutes until the spices are evenly distributed through every piece. The spices bloom in the residual beef fat in the hot pan during this final mixing, distributing their aromatic compounds through the beef evenly rather than remaining as uncooked powder concentrated in pockets. - Make the Pico de Gallo
While the beef sears undisturbed, begin the pico. For the complete technique — including the tomato preparation, the correct salting and resting method, and the balance — follow the full Pico de Gallo recipe. Summary: finely dice the 4 Roma tomatoes, ½ white onion, and 1 jalapeño into uniform, small pieces — approximately 5mm dice throughout. Combine in a bowl with the 30g of roughly chopped cilantro, 30ml of lime juice, and 3g of salt. Toss and allow to rest at room temperature for at least 10 minutes — the resting period draws moisture from the tomatoes and onion and mellows the onion’s raw sharpness into a cleaner, more balanced salsa. The correct pico is bright, evenly seasoned, and has a moderate amount of liquid from the tomatoes and lime rather than being watery or dry. Taste and adjust — additional lime juice for brightness, additional salt for seasoning. - Make the Mexican Grilled Corn Salad
For the complete technique — including the char method and the full dressing — follow the full Mexican Grilled Corn Salad recipe. Summary: after the beef has been removed or while the second side of the beef sears in the cast iron, heat a separate large heavy skillet over high heat until smoking. Add the 400g of corn kernels directly to the dry pan in a single layer without oil. Leave completely undisturbed for 2–3 minutes — the corn’s natural sugars caramelise and char at the direct contact points, producing the smoky-sweet charred corn character that defines the salad. Stir once and cook for a further 1–2 minutes. Transfer to a bowl and allow to cool slightly. Add the diced jalapeño, diced red onion, chopped cilantro, 30ml of lime juice, 60g of crumbled cotija or feta, and 3g of chili powder. Toss and season with 2g of salt. Set aside at room temperature. - Make the Guacamole
For the complete technique — including the correct avocado preparation, the mashing method, and the balance — follow the full Classic Guacamole recipe. Make this step last among the cold components to minimise oxidation time before serving. Summary: halve the 3 ripe avocados, remove the stones, and scoop the flesh into a bowl. Add the 30ml of lime juice immediately — the acid slows the enzymatic browning from the moment of contact. Add the minced garlic, finely diced onion, diced jalapeño, chopped cilantro, and 3g of salt. Mash to a partially chunky consistency — some avocado pieces remaining is the correct texture for a bowl component. Taste and adjust with additional lime or salt. Press plastic wrap directly against the surface if not serving immediately. - Warm the Spiced Black Beans
Heat the drained and rinsed 400g of black beans in a small saucepan over medium heat. Add the 2g of cumin, 3g of smoked paprika, and 3g of salt. Add a small splash of water — approximately 30ml — to prevent sticking and to create the light coating that carries the spices evenly around every bean. Heat for 3–4 minutes, stirring occasionally, until the beans are thoroughly warmed through and the spices have bloomed into the surrounding moisture. The beans should taste specifically and assertively seasoned — the cumin and smoked paprika clearly present rather than subtle. Taste and adjust with additional salt. - Assemble the Bowls
Assemble all four bowls in rapid succession — the beef is at its best warm and the guacamole begins to oxidise once exposed. Divide the Mexican rice as the base of each bowl — a generous mound that covers the bowl’s surface and forms the platform for every component above. Working around the rice base, place each component in its own distinct section: the seasoned ground beef in the centre or the largest section, the spiced black beans alongside, the pico de gallo in its own section, the grilled corn salad adjacent, and the guacamole in the final section. Distinct placement is both visually more appealing and practically better — the pico’s moisture does not prematurely soften the corn salad, and the guacamole’s lime does not begin breaking down the other components before the bowl is eaten. Over each assembled bowl, scatter 25g of the Mexican cheese blend in equal portions. The residual heat from the warm rice and beef partially melts the cheese into the bowl without any additional heat — the cheese should appear as half-melted, slightly pulled strings rather than a fully melted layer. Serve immediately.
*Notes :
- The single-layer sear technique for ground beef is the specific innovation in this recipe that makes it worth making over any standard taco-meat preparation. Standard ground beef crumbled immediately into a pan undergoes a steaming phase as the moisture released from the beef is trapped between the moving pieces — the pieces grey and soften before the moisture fully evaporates and browning can begin. By the time proper browning occurs, the beef is overcooked and dry. The flat-patty technique eliminates this problem entirely: the beef is pressed into contact with the hot surface before any moisture has been released, maximum Maillard contact occurs immediately, and the moisture released during cooking drains away from the flat surface rather than steaming the pieces. The result — deeply caramelised, textured, slightly crispy in places — is specifically more satisfying than standard crumbled beef and is the technique difference that makes restaurant-quality ground beef distinctly better than home versions.
- The 80/20 fat ratio is non-negotiable for this technique. The 20% fat content renders into the pan during the sear, both lubricating the surface and participating in the caramelisation that produces the crust. Leaner beef — 90/10 or 85/15 — does not render sufficient fat and produces a drier, less flavourful sear with a tendency to stick to the cast iron rather than releasing naturally after 4–5 minutes.
- The corn salad, pico, and guacamole together provide the specific fresh, acid, and creamy registers that make the bowl feel complete rather than simply protein over rice. See the linked full recipes for each — Mexican Grilled Corn Salad, Pico de Gallo, Classic Guacamole — for the technique details that produce restaurant-quality versions of each component.
Why This Recipe Works
This recipe works because the flat-layer sear technique is applied to ground beef in the same way that undisturbed contact is applied to chicken, steak, and salmon in other recipes in this collection — sustained contact with a hot surface is what produces caramelisation, and caramelisation is what produces depth. The 80/20 fat content provides the fat the sear requires.
The delayed spice addition — after the beef is broken down rather than before — means the spices bloom in hot rendered beef fat rather than steaming with raw moisture. And the five companion components each provide the specific flavour dimension — tomato-base rice, fresh acid pico, smoky-sweet corn, creamy guacamole, salty beans — that together produce the complete burrito composition.
Ingredient Breakdown
Ground Beef 80/20 (Flat-Patty Sear Technique)
The bowl’s protein — the flat-layer technique produces the maximum Maillard caramelisation from ground beef; 80/20 fat ratio provides the rendering fat the technique requires.
Delayed Spice Addition (Post-Break)
The seasoning technique — spices added to broken, caramelised beef bloom in rendered fat rather than steaming with raw moisture, distributing more evenly and more intensely.
Mexican Style Rice (Tomato-Toasted)
The flavoured base — toasted in oil for separate-grain texture, coloured and seasoned with tomato and cumin; the platform for every other component.
Spiced Black Beans (Cumin, Paprika, Salt)
The protein-and-substance element — bloomed spices in warm water produce specifically seasoned beans that carry their own flavour identity in the bowl.
Pico de Gallo (Rested 10 Minutes)
The fresh acid element — the resting period converts raw assembled ingredients into a cohesive, balanced salsa.
Charred Corn Salad (Dry Pan, Undisturbed)
The sweet-smoky textural element — undisturbed dry-pan charring produces the caramelised corn character that no other method replicates.
Classic Guacamole (Made Last)
The creamy cooling richness — made last to minimise oxidation; lime added immediately to the cut avocado.
Mexican Cheese Blend (25g, Partially Melted)
The finishing layer — partially melted by bowl heat, providing the mild, stringy, slightly salty element that ties all components together.
Flavor Structure Explained
This Beef burrito rice bowl follows a layered balance model:
- Savory spiced core (caramelised ground beef)
- Warm seasoned base (tomato-spice rice)
- Fresh acidic contrast (pico de gallo)
- Sweet-smoky layer (corn salad)
- Creamy cooling richness (guacamole, cheese)
Ground beef defines the dominant character with deeply savory richness intensified by caramelisation, rendered fat, cumin, and smoked paprika. The tomato-seasoned rice provides a warm, cohesive foundation that carries the spices throughout the bowl. Pico de gallo cuts through the richness with bright lime acidity and fresh tomato sharpness. Corn salad adds sweetness and smoky contrast that broadens the flavor profile. Guacamole and melted cheese smooth and cool the stronger elements, tying everything together into a balanced, fully integrated bowl where all registers hit simultaneously.
Common Mistakes to Avoid
- Breaking the Beef Before it Sears – The flat patty must have sustained, undisturbed contact with the hot surface for 4–5 minutes before any breaking begins. Any movement during this window produces steamed, grey beef rather than the caramelised sear.
- Using Lean Ground Beef – 80/20 fat ratio is specifically required — the 20% fat renders into the pan and enables the caramelisation. Leaner beef produces a drier sear with less flavour depth.
- Adding Spices Before Breaking – Spices added to raw or barely-cooked beef steam with the meat’s moisture rather than blooming in fat. Always break the beef down after both sear stages before adding spices.
- Not Toasting the Rice Before Adding Liquid – The toasting step produces the Mexican rice’s specific separate-grain, slightly nutty character. Skipping it produces ordinary boiled rice.
- Not Resting the Pico – Freshly made pico tastes sharp and raw. The 10-minute rest makes the difference between assembled raw ingredients and a cohesive salsa.
- Making the Guacamole Too Early – Guacamole oxidises within 15–20 minutes of exposure. Always make it last.
- Not Moving the Beef Between the Cast Iron and a Separate Pan for the Corn Salad – If only one heavy pan is available, complete the beef first and allow the pan to return to smoking temperature before charring the corn — both require genuine high heat and a hot surface.
Variations
Beef Burrito Rice Bowl With Sour Cream
Add a 30g dollop of sour cream alongside the guacamole at assembly — its tanginess provides a different dairy note alongside the cheese that moves the bowl further toward the Tex-Mex tradition.
With Pickled Jalapeños
Add 30g of sliced pickled jalapeños as an additional topping — the vinegary, moderately spiced heat complements the fresh jalapeño in the pico and corn salad.
Spicier Version
Add 1g of cayenne pepper alongside the smoked paprika in the beef seasoning for a version where the heat is more prominent — the cayenne’s immediate heat compounds with the smoked paprika’s slow warmth.
Burrito Version
Use the assembled bowl components as a large flour tortilla filling — warm the tortilla, layer rice first, then beef and beans, add the cold components, fold and roll. The bowl becomes a proper burrito.
Storage & Make-Ahead
Cooked seasoned beef can be refrigerated for up to 4 days and is one of the best make-ahead proteins in this collection. To bring back some of its caramelized texture, reheat it in a hot, dry cast-iron skillet for 3 to 4 minutes.
Mexican rice can also be refrigerated for up to 4 days. Reheat it covered with a splash of water. Spiced black beans will keep for up to 4 days as well and should be reheated with a little water to loosen them if needed.
Pico de gallo can be refrigerated for up to 3 days, and its flavor will deepen overnight. Drain off any excess liquid before serving. Grilled corn salad can also be refrigerated for up to 3 days and is best served at room temperature.
Guacamole is best made fresh, so it should not be prepared too far in advance. Assembled bowls are not suitable for storage either, so only assemble the amount that will be eaten immediately.
Frequently Asked Questions
Why press the ground beef flat rather than crumbling it immediately?
Immediately crumbled ground beef releases moisture rapidly into the pan, creating a steaming environment where the beef greys and softens before browning can begin. Pressed flat against the hot surface, the beef caramelises before moisture accumulates — producing the deep, slightly crispy sear that makes this beef’s flavour specifically more intense. The technique applies the same principle as searing any protein: sustained undisturbed contact with a hot surface is what produces Maillard browning.
Why 80/20 and not leaner beef?
The 20% fat content renders into the pan during the sear, both lubricating the cast iron surface and contributing to the caramelisation that produces the crust. Leaner beef renders insufficient fat, produces a drier sear, and is more likely to stick. The rendered fat also carries the spices evenly through the beef when they are added after breaking.
Why are the spices added after breaking rather than before?
Spices added to raw or barely-cooked ground beef steam with the meat’s moisture as it releases during cooking — producing a muted, distributed seasoning throughout. Added after the sear, the spices bloom in the hot rendered fat that remains from the caramelisation — distributing more evenly, more intensely, and with more vibrant flavour than pre-sear seasoning.
Can I use a regular skillet instead of cast iron?
A heavy stainless steel skillet produces a comparable result. Non-stick is specifically not recommended — it does not reach the temperature required for the flat-patty sear technique and its surface prevents the Maillard reaction that produces the beef’s caramelised character.
Why five separate component recipes?
Each component — the rice, the pico, the corn salad, and the guacamole — has its own specific technique that produces a better result than a simplified version. The Mexican Style Rice, Pico de Gallo, Mexican Grilled Corn Salad, and Classic Guacamole recipes each warrant their own preparation. All five components can be completed within the beef’s active cooking window.
Nutrition Facts
( per serving )
Calories
~1070 kcal
Protein
46 g
Fat
59 g
Carbs
94 g
Calories
~1070 kcal
Protein
46 g
Fat
59 g
Carbs
94 g
Related Recipes
Related Recipes

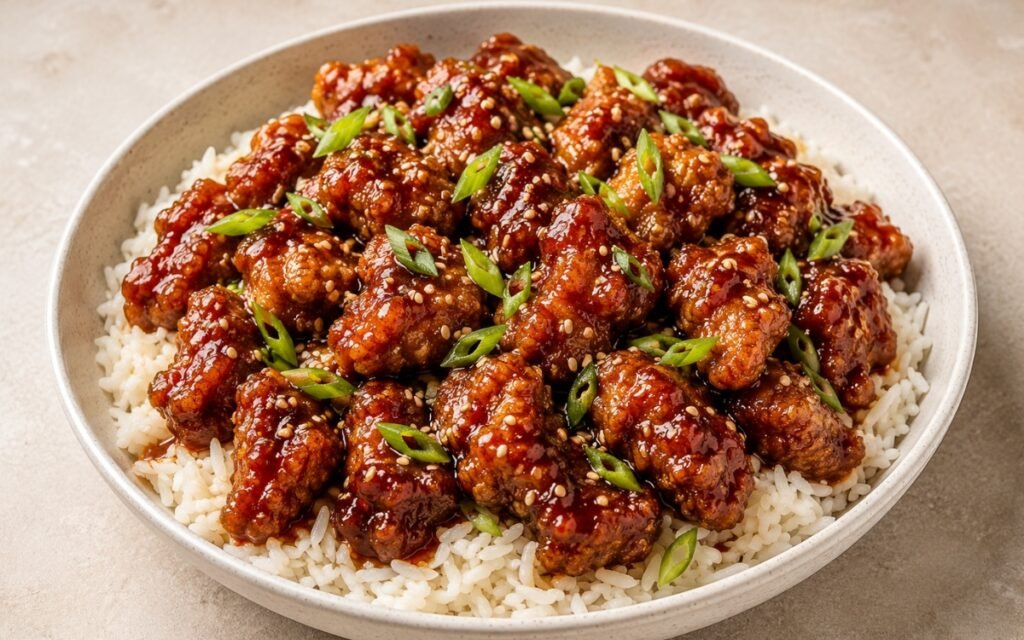
General Tso’s Chicken Rice Bowl
Chicken thighs marinated in Shaoxing wine and soy, dredged in 1:1 cornstarch and flour, fried golden, and tossed in a glossy brown sugar-soy-hoisin-dried chili sauce. Over jasmine rice with scallions and sesame seeds.
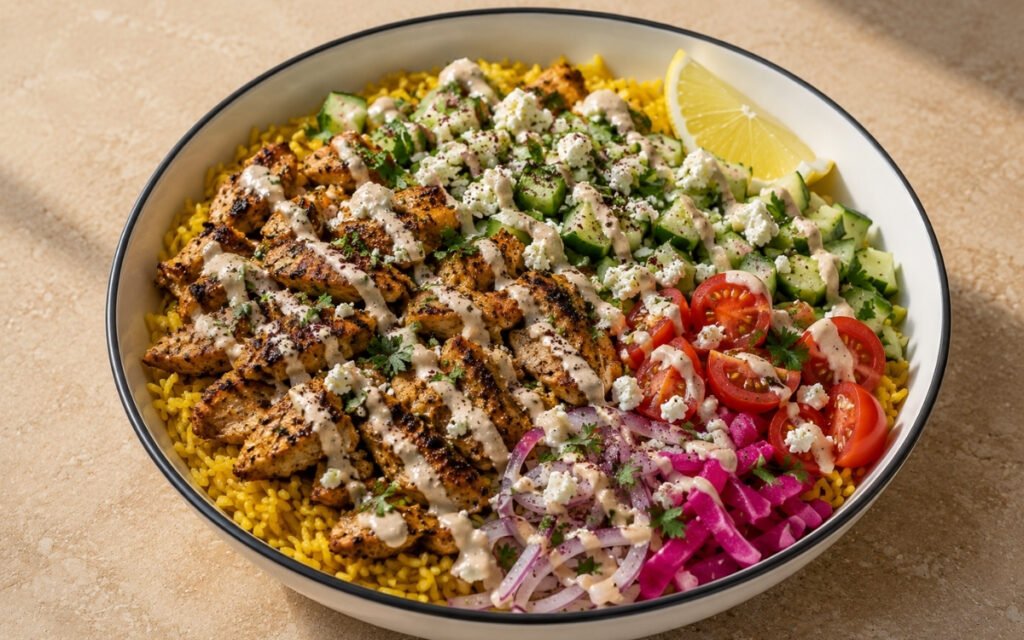
Lebanese Chicken Shawarma Rice Bowl
Chicken thighs marinated in yogurt and seven Lebanese spices, charred undisturbed in cast iron — over turmeric rice with cold-whisked tahini sauce and pickled turnips. 45 minutes.
Korean Beef Bulgogi Rice Bowl
Paper-thin ribeye marinated with Asian pear and seared in two undisturbed batches for the caramelised bulgogi crust — over rice with pickled cucumbers, kimchi, and runny egg.

You might also like
You might also like
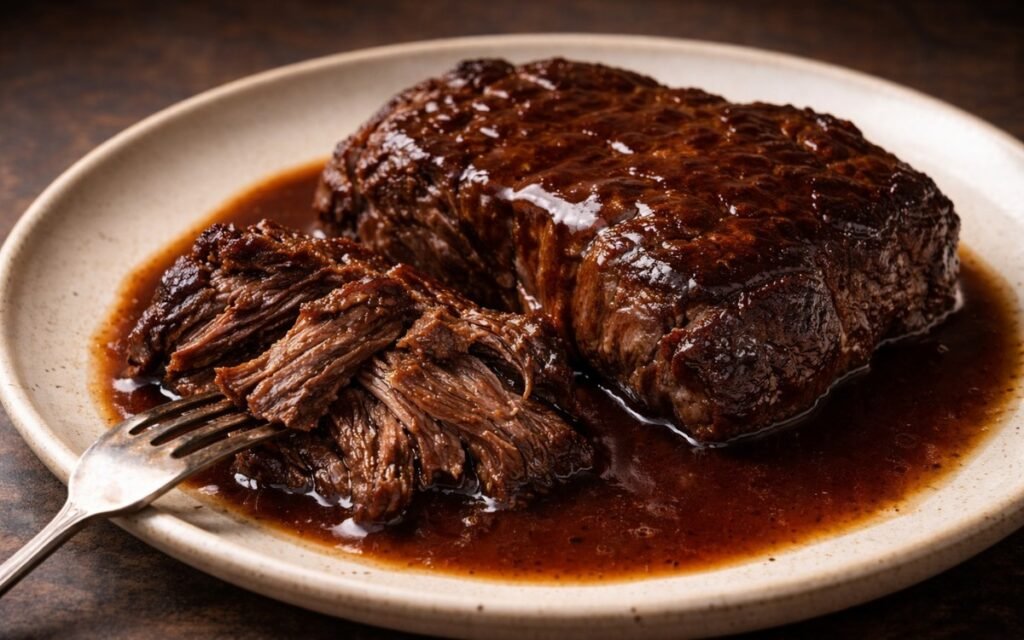
Braised Beef Chuck Steak
Tough chuck steak transforms into fork-tender perfection through slow braising with wine and aromatics.
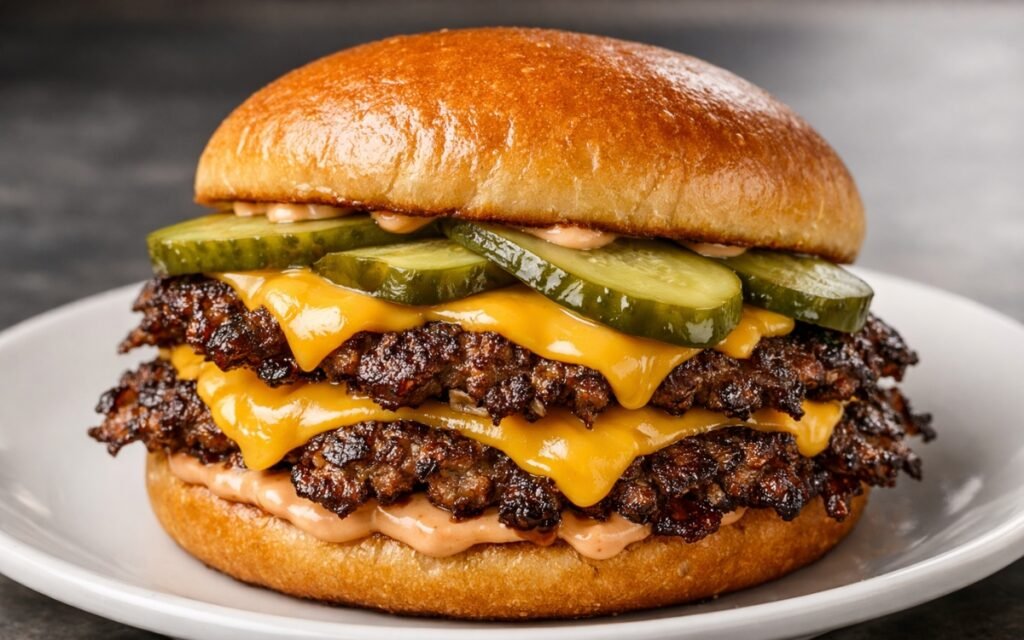
Double Smash Burger
Ultra-crispy beef patties with molten cheese, buttery bun, and tangy sauce channel classic diner indulgence.
Garlic Butter Sirloin Steak
Pan-seared sirloin steak crowned with herb-infused garlic butter for restaurant-quality results.
Beef Burrito Rice Bowl
Ingredients
Method
- The rice goes on first — its 20-minute cook time plus 5-minute rest covers the entire preparation window for every other component. For the complete technique — including the toasting method, the tomato incorporation, and the correct stock ratio — follow the full Mexican Style Rice recipe. Summary: heat the 15ml of vegetable oil in a medium saucepan over medium heat. Add the 300g of rinsed long-grain rice and toast, stirring continuously, for 2–3 minutes until the grains turn lightly golden and smell nutty — the toasting is what produces the Mexican rice’s specific separate-grain character and prevents sticking during simmering. Add the garlic and diced onion and cook for 1 minute until fragrant. Pour in the 200ml of tomato sauce — stir immediately. Add the 400ml of chicken stock, 3g of cumin, and 3g of salt. Bring to a boil, reduce to the lowest heat, cover tightly, and simmer for 18–20 minutes until all liquid is absorbed. Remove from heat and rest covered for 5 minutes. Fluff with a fork — the rice should be fluffy, separate, and a deep golden-orange from the tomato.
- This is the technique step that defines this recipe and distinguishes it from standard taco-night ground beef. Heat a large cast iron skillet over medium-high heat for 2–3 minutes until genuinely hot. Add the 15ml of olive oil and swirl to coat the entire surface. Add the 600g of ground beef as a single mass and immediately use a spatula to press and spread it across the entire surface of the cast iron in an even, flat layer — as though making a large, thin patty that covers the pan from edge to edge. The surface contact is the critical factor: ground beef pressed flat against the entire surface of a smoking-hot cast iron creates the maximum possible direct Maillard contact area simultaneously, rather than the small surface areas produced by immediately crumbling the beef. Leave completely undisturbed for 4–5 minutes. The fat from the 80/20 beef renders progressively into the cast iron surface during this undisturbed period while the beef’s surface proteins caramelise — producing a deeply browned, almost crusty bottom layer across the entire pan’s width. The 80/20 fat ratio is specified rather than leaner beef because the fat content is what enables the caramelisation — leaner beef produces insufficient rendered fat and drier, less flavourful seared surfaces. After 4–5 minutes, the bottom should be visibly deeply browned with a crust that releases naturally from the cast iron. Using a wide spatula, slice through the flat beef layer into 4–6 large sections and flip each section over. Allow the second side to sear undisturbed for 3–4 minutes — the top surface that was facing up during the first sear is now against the hot surface and will develop its own crust in this second phase. Once both sides have developed deep caramelisation, begin breaking the seared beef into smaller pieces using a firm spatula or a potato masher — pressing and breaking the caramelised sections into irregular, smaller crumbles. The goal is not fine, uniform crumbles but slightly irregular, textured pieces where some surfaces retain their seared character. Add the 3g of smoked paprika, 3g of cumin, 7g of salt, and 3g of garlic powder directly to the broken beef and fold and mix continuously for 1–2 minutes until the spices are evenly distributed through every piece. The spices bloom in the residual beef fat in the hot pan during this final mixing, distributing their aromatic compounds through the beef evenly rather than remaining as uncooked powder concentrated in pockets.
- While the beef sears undisturbed, begin the pico. For the complete technique — including the tomato preparation, the correct salting and resting method, and the balance — follow the full Pico de Gallo recipe. Summary: finely dice the 4 Roma tomatoes, ½ white onion, and 1 jalapeño into uniform, small pieces — approximately 5mm dice throughout. Combine in a bowl with the 30g of roughly chopped cilantro, 30ml of lime juice, and 3g of salt. Toss and allow to rest at room temperature for at least 10 minutes — the resting period draws moisture from the tomatoes and onion and mellows the onion’s raw sharpness into a cleaner, more balanced salsa. The correct pico is bright, evenly seasoned, and has a moderate amount of liquid from the tomatoes and lime rather than being watery or dry. Taste and adjust — additional lime juice for brightness, additional salt for seasoning.
- For the complete technique — including the char method and the full dressing — follow the full Mexican Grilled Corn Salad recipe. Summary: after the beef has been removed or while the second side of the beef sears in the cast iron, heat a separate large heavy skillet over high heat until smoking. Add the 400g of corn kernels directly to the dry pan in a single layer without oil. Leave completely undisturbed for 2–3 minutes — the corn’s natural sugars caramelise and char at the direct contact points, producing the smoky-sweet charred corn character that defines the salad. Stir once and cook for a further 1–2 minutes. Transfer to a bowl and allow to cool slightly. Add the diced jalapeño, diced red onion, chopped cilantro, 30ml of lime juice, 60g of crumbled cotija or feta, and 3g of chili powder. Toss and season with 2g of salt. Set aside at room temperature.
- For the complete technique — including the correct avocado preparation, the mashing method, and the balance — follow the full Classic Guacamole recipe. Make this step last among the cold components to minimise oxidation time before serving. Summary: halve the 3 ripe avocados, remove the stones, and scoop the flesh into a bowl. Add the 30ml of lime juice immediately — the acid slows the enzymatic browning from the moment of contact. Add the minced garlic, finely diced onion, diced jalapeño, chopped cilantro, and 3g of salt. Mash to a partially chunky consistency — some avocado pieces remaining is the correct texture for a bowl component. Taste and adjust with additional lime or salt. Press plastic wrap directly against the surface if not serving immediately.
- Heat the drained and rinsed 400g of black beans in a small saucepan over medium heat. Add the 2g of cumin, 3g of smoked paprika, and 3g of salt. Add a small splash of water — approximately 30ml — to prevent sticking and to create the light coating that carries the spices evenly around every bean. Heat for 3–4 minutes, stirring occasionally, until the beans are thoroughly warmed through and the spices have bloomed into the surrounding moisture. The beans should taste specifically and assertively seasoned — the cumin and smoked paprika clearly present rather than subtle. Taste and adjust with additional salt.
- Assemble all four bowls in rapid succession — the beef is at its best warm and the guacamole begins to oxidise once exposed. Divide the Mexican rice as the base of each bowl — a generous mound that covers the bowl’s surface and forms the platform for every component above. Working around the rice base, place each component in its own distinct section: the seasoned ground beef in the centre or the largest section, the spiced black beans alongside, the pico de gallo in its own section, the grilled corn salad adjacent, and the guacamole in the final section. Distinct placement is both visually more appealing and practically better — the pico’s moisture does not prematurely soften the corn salad, and the guacamole’s lime does not begin breaking down the other components before the bowl is eaten. Over each assembled bowl, scatter 25g of the Mexican cheese blend in equal portions. The residual heat from the warm rice and beef partially melts the cheese into the bowl without any additional heat — the cheese should appear as half-melted, slightly pulled strings rather than a fully melted layer. Serve immediately.