
Greek Ladenia with Tomato and Red Onion
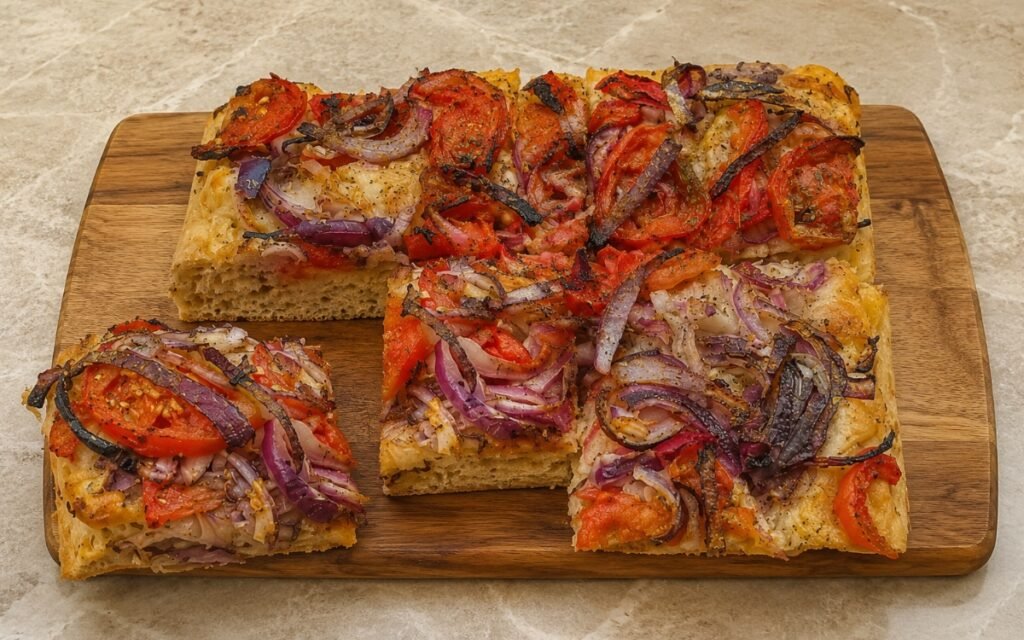
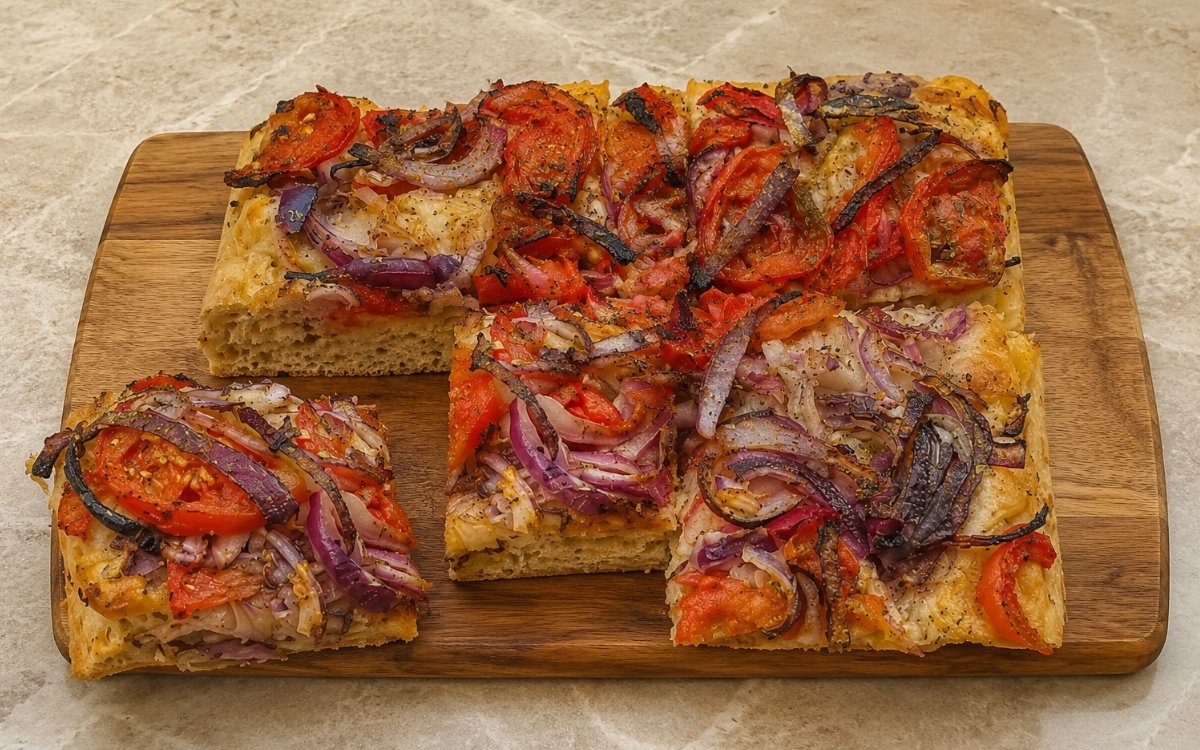
A classic Greek ladenia-style flatbread with a long-risen, focaccia-like dough baked in a tray until crisp underneath and soft, airy inside, then generously topped with ripe tomato slices, feathered red onion, dried oregano, flaky sea salt, and plenty of olive oil. It is simple, rustic, and highly olive-oil-forward, with a caramelized top and golden crisp edges. Cold-fermenting the dough for a full 12–18 hours is the technique this whole bread depends on for its airy, flavourful crumb — that extended, slow rise develops real depth of flavour and a genuinely open structure that a quick rise simply can’t replicate, the same long-cold-ferment principle used elsewhere in this collection whenever a bread’s flavour and texture depend on time rather than speed. Dimpling the dough only lightly rather than pressing aggressively is what keeps as much of that hard-won gas in the dough as possible, preserving the airy interior the long rise built. Feathering the red onion thin, rather than dicing it, is what gives the topping its classic tangled look and lets the edges properly caramelise in the oven. The payoff is a flatbread with real structural contrast — a crisp, deeply golden base and edges giving way to a soft, open, airy crumb, generously topped with slightly roasted tomato and caramelised onion.
Prep Time : 25 min
Cook Time : 30-35 min
Servings : 6
25 min
30-35 min
6
Ingredients
For the Dough
• 400g bread flour — this one on Amazon
• 340g water, room temperature
• 4g active dry yeast
• 8g fine sea salt
• 20g extra-virgin olive oil — this one on Amazon
For the Pan and Top
• 30–40g extra-virgin olive oil, for the pan and finishing
• 3–4 medium ripe tomatoes, sliced not too thin, about 5–7mm thick
• 1 large red onion, halved and thinly feathered
• 2–2½ tsp dried oregano — this one on Amazon
• Flaky sea salt, to taste
• Freshly ground black pepper, to taste
This post may contain affiliate links. As an Amazon Associate I earn from qualifying purchases, at no additional cost to you.
Directions
- Mix the Dough
In a large bowl, combine the water and active dry yeast. Stir and leave for 5 minutes so the yeast hydrates. Add the bread flour and mix until no dry flour remains. Add the fine sea salt and olive oil, then mix again until a shaggy, sticky dough forms. Cover and leave to rest for 15 minutes. After the rest, perform the first stretch and fold directly in the bowl: wet your hand, lift one side of the dough, stretch it upward, and fold it back over itself. Rotate the bowl and repeat until you have completed 4 folds. Cover and rest 15 minutes, then repeat 2 more rounds of stretch-and-folds. The dough starts rough and sticky, but after the folds it should feel smoother, more elastic, and noticeably stronger while still remaining soft and fairly loose. Performing these folds directly in the bowl, rather than on a floured surface, is what lets this genuinely high-hydration dough build gluten strength gradually without needing extra flour worked in — additional flour at this stage would compromise the airy, open crumb this recipe depends on. - Long Rise
Cover the bowl tightly and let the dough rise at room temperature for 1 hour to begin fermentation. Transfer the dough to the refrigerator and let it cold-ferment for 12–18 hours. If you prefer, you can also do the full rise at cool room temperature for about 8–10 hours, but the cold rise gives better flavor and a stronger, airier structure. After the long rise, the dough should look alive and aerated, with visible bubbles and a gently domed surface. It should feel light and well-risen rather than dense. Fermenting slowly in the cold, rather than quickly at room temperature, gives the yeast considerably more time to develop complex flavour compounds while the dough’s gluten structure continues strengthening gradually — that extended time is what produces both the depth of flavour and the genuinely open, airy structure a quicker rise wouldn’t achieve. - Pan the Dough
Generously oil a rectangular baking tray, roughly 30 x 20cm to 33 x 23cm, using part of the olive oil. Turn the dough into the tray and coat it lightly in the oil so it does not dry out. Gently stretch it toward the corners without forcing it. If it resists, let it rest 10–15 minutes, then continue gently stretching until it fits the tray. Cover loosely and let it proof for 1½ to 2 hours at room temperature. By the end of this proof the dough should be visibly puffy, soft, and airy. It should spread naturally in the tray and show bubbles beneath the surface. Letting the dough rest when it resists stretching, rather than forcing it into the corners immediately, respects the gluten’s own natural relaxation timing — dough stretched too forcefully while still tight will simply spring back, while a brief rest lets that tension ease enough for gentle stretching to actually hold. - Top the Ladenia
Preheat the oven to 240°C for at least 20 minutes before baking. Using oiled fingertips, lightly dimple the dough. Do not press too aggressively — the goal is to create shallow dimples while keeping as much gas in the dough as possible. Arrange the tomato slices generously over the surface, slightly overlapping. Scatter the feathered red onion evenly over the tomatoes and into the gaps. Press the topping only lightly into the surface so it adheres without crushing the dough. Drizzle generously with more olive oil. Sprinkle heavily with dried oregano, then season with flaky sea salt and black pepper. The topping should be abundant and rustic, not sparse. The tomatoes should sit proudly on the dough, while the onions should settle into the surface lightly without disappearing into it. Dimpling only shallowly, rather than pressing hard, is what preserves the gas bubbles this dough spent 12–18 hours building — an aggressive press would deflate much of that structure right before the bread ever reaches the oven. - Bake
Bake at 240°C for 15 minutes, then reduce the temperature to 220°C and continue baking for another 15–20 minutes, until the ladenia is deeply golden with crisp edges, a caramelized top, and a well-browned underside. If needed, rotate the tray once during baking so it colors evenly. The tomatoes should look slightly concentrated and lightly roasted, the red onion should have browned edges, and the base should be crisp enough to hold a slice cleanly while the interior stays soft and fluffy. Starting at a genuinely high temperature before stepping it down partway through gives the base and edges an initial, aggressive burst of heat to set and crisp, while the reduced temperature that follows lets the toppings roast and the interior finish cooking through without the exterior burning first. - Finish and Serve
Remove from the oven and drizzle lightly with a final touch of olive oil while still hot if desired. Let it rest in the tray for 5 minutes, then transfer to a rack or board so the underside stays crisp. Cut into 6 rectangular slices and serve warm or at room temperature. Moving the bread from the tray to a rack, rather than leaving it to cool in the pan, lets air circulate beneath it — resting it directly in the tray would trap steam against the just-baked crisp bottom and soften exactly the texture the whole bake was built to achieve.
*Notes :
- The extended cold ferment is worth understanding as the technique most responsible for this bread’s specific character, distinguishing it from a quicker, same-day flatbread. Cold, slow fermentation gives yeast considerably more time to develop the complex, slightly tangy depth of flavour associated with a properly long-risen dough, while also allowing the gluten structure to strengthen gradually without the harsher, faster gas production a warm, fast rise would produce. That combination is what gives ladenia its genuinely open, airy crumb alongside real depth of flavour.
- Performing the stretch-and-fold sequence directly in the bowl, rather than turning the sticky dough out onto a floured counter, is a deliberate choice that protects this dough’s high hydration. Working in extra flour at any point during shaping would tighten the dough’s texture and work against the light, airy structure this recipe depends on — the in-bowl technique lets gluten develop through folding alone, without needing to compensate for stickiness with additional flour.
- Dimpling the proofed dough only shallowly, explicitly avoiding an aggressive press, protects the gas structure the 12–18 hour rise spent building. This is the same underlying principle that governs dimpling in any long-fermented focaccia-style bread — the dough is at its most fragile and gas-rich right before baking, and heavy-handed dimpling at this stage can deflate a meaningful portion of that hard-won structure in seconds.
- The two-stage baking temperature — starting genuinely hot, then stepping down partway through — addresses a real timing tension between the base and the toppings. The initial high heat is what sets and crisps the base and edges quickly; the reduced temperature that follows gives the tomatoes and onion time to roast and caramelise properly, and the interior time to finish cooking through, without the risk of the crust burning before everything else catches up.
Why This Recipe Works
This recipe works because the dough is given a genuinely long, slow cold ferment that builds both real depth of flavour and an open, airy structure a faster rise couldn’t achieve.
Stretch-and-folds performed directly in the bowl protect the dough’s high hydration without diluting it with extra flour, and shallow dimpling before topping preserves the gas structure that long rise built.
The two-stage baking temperature lets the base crisp aggressively at first before easing off to let the toppings roast and the interior finish cooking through. Cooling on a rack rather than in the tray protects the crisp base from trapped steam.
Ingredient Breakdown
High-Hydration Bread Flour Dough
The base — its wet, sticky consistency is central to the airy, open crumb this bread depends on.
Extended 12–18 Hour Cold Ferment
The critical technique — develops both deep flavour and genuine structural airiness in a way a quicker rise can’t replicate.
In-Bowl Stretch-and-Folds
The dough-strengthening technique — builds gluten structure without diluting the dough’s hydration with extra flour.
Thinly Feathered Red Onion
The topping style — produces the classic tangled look and allows proper caramelisation at the edges.
Two-Stage Baking Temperature
The cooking technique — a high initial heat crisps the base quickly, a reduced temperature lets toppings roast without burning.
Flavor Structure Explained
This ladenia follows a layered balance model:
- Crisp savoury foundation (long-fermented, oil-rich dough)
- Sweet roasted centre (ripe tomato, caramelised red onion)
- Warm herbal aroma (dried oregano)
- Rich olive oil finish (generous drizzling throughout)
The long-fermented, olive-oil-rich dough provides a crisp, savoury foundation with genuine depth of flavour built up over its extended rise. Ripe tomato slices and thinly feathered red onion roast into a sweet, slightly caramelised centre that sits generously across the surface. Dried oregano, sprinkled heavily, adds warm, herbal aroma throughout. Generous olive oil, both worked into the dough and drizzled over the finished bread, ties every element together with rich, distinctly Greek character.
Common Mistakes to Avoid
- Working Extra Flour Into the Dough While Folding – This tightens the texture and works against the airy crumb this recipe depends on. Always perform stretch-and-folds directly in the bowl.
- Rushing the Rise at Room Temperature Only – This misses the deeper flavour and stronger structure the cold ferment specifically develops. Always allow for the full extended rise, ideally cold.
- Dimpling the Dough Too Aggressively – This deflates the gas structure the long rise spent building. Always dimple only shallowly.
- Using Overly Watery Tomatoes Without Draining Them – This can flood the dough during baking. Always pat very juicy tomato slices dry on paper towel first.
- Cooling the Bread in the Tray Instead of on a Rack – This traps steam and softens the crisp base. Always transfer it to a rack shortly after baking.
Variations
Extra Herb Version
Add a light scattering of fresh thyme alongside the dried oregano for additional aromatic complexity.
With Kalamata Olives
Scatter a handful of pitted, halved Kalamata olives over the topping before baking for a briny addition.
Feta-Topped Version
Crumble a small amount of feta over the top during the final few minutes of baking for a salty, tangy finish.
Smaller Individual Version
Divide the dough into smaller portions and bake as individual ladenia rounds, adjusting the baking time down accordingly.
Storage & Make-Ahead
The dough can be mixed and cold-fermented up to 18 hours ahead as directed; do not extend significantly beyond this window without risking over-fermentation.
Baked ladenia is best eaten the same day, when the edges are crisp and the crumb is still soft and open.
Leftover ladenia can be stored at room temperature, loosely covered, for up to 1 day; refresh briefly in a hot oven to restore some crispness before serving again.
Frequently Asked Questions
Why does the dough need such a long, cold ferment rather than a quicker rise?
Cold, slow fermentation gives the yeast considerably more time to develop complex, deep flavour while the gluten structure strengthens gradually. That combination is what produces both the bread’s genuinely open, airy crumb and its real depth of flavour, neither of which a faster rise can fully replicate.
Why are the stretch-and-folds done directly in the bowl instead of on a floured surface?
This dough is deliberately high in hydration, and working extra flour into it at any stage would tighten the texture and work against the light, airy structure the recipe depends on. Folding directly in the bowl builds gluten strength without needing to compensate for stickiness with more flour.
Why is the dough only lightly dimpled rather than pressed firmly?
The proofed dough is at its most fragile and gas-rich right before baking. Pressing too aggressively at this stage can deflate a meaningful portion of the structure the long rise spent 12 to 18 hours building.
Why does the oven temperature drop partway through baking instead of staying constant?
The initial high heat is what sets and crisps the base and edges quickly. The reduced temperature that follows gives the tomato and onion time to roast and caramelise properly, and the interior time to finish cooking through, without risking the crust burning first.
What pairs well with ladenia, and are there other Greek breads or sides worth trying?
Focaccia shares a closely related dough technique worth comparing directly. Authentic Tzatziki makes a great dip alongside a slice of ladenia, and a side of Greek Tomato Cucumber Salad or Greek Village Side Salad rounds out the meal in classic Greek style.
Nutrition Facts
( per serving )
Calories
~320 kcal
Protein
7 g
Fat
11 g
Carbs
48 g
Calories
~320 kcal
Protein
7 g
Fat
11 g
Carbs
48 g
Related Recipes
Related Recipes

Crispy Sweet Potato Fries
Sweet potatoes soaked, dried, lightly coated in cornstarch, seasoned, and baked until golden and crisp. Sweet, savory, and satisfying.
Greek-Style Potato Salad
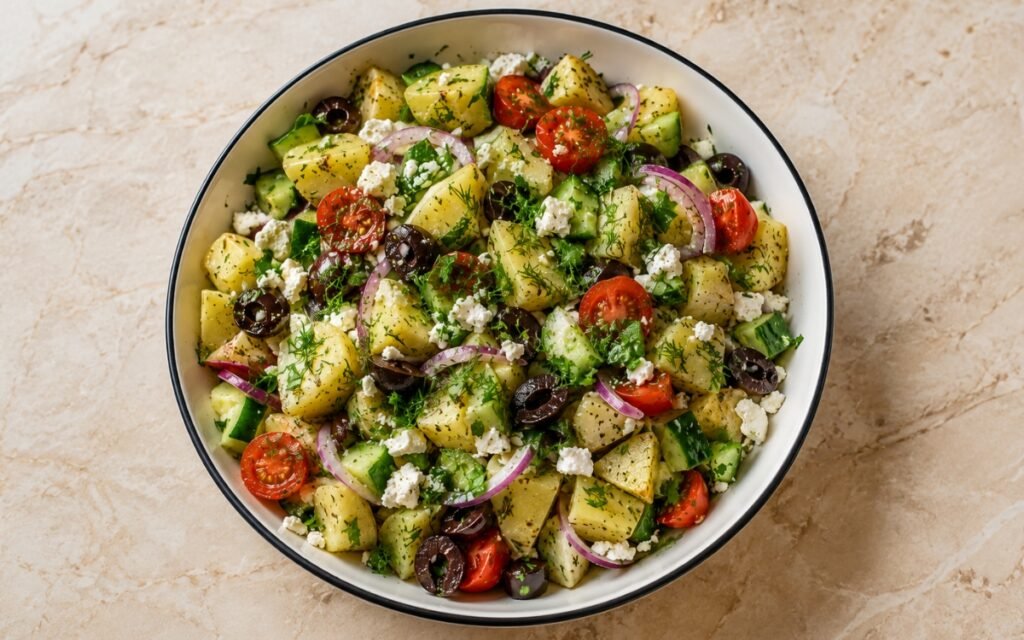
Potatoes dressed warm for absorption, vegetables added once cooled, feta folded in gently, chilled to integrate. Bright and briny.
Garlic Parmesan Carrot Fries
Carrots cut into consistent sticks, seasoned with garlic and smoked paprika, roasted uncrowded until golden, finished with melted Parmesan. Sweet and crisp.


You might also like
You might also like
Honey Lemon Pepper Wings
Crispy wings coated in glossy honey-lemon pepper glaze deliver citrus bite, heat, and buttery richness.
Grilled Corn Ribs with Chipotle Butter & Lime
Corn quartered into ribs and grilled until deeply caramelised and curled — chipotle-adobo-lime butter infused at low heat, brushed at finish. Cotija, cilantro, and lime. Three cooking methods.
Greek Frappé
Instant coffee, sugar, and a small amount of water shaken hard into thick pale caramel foam, then topped with ice and cold water.



Greek Ladenia with Tomato and Red Onion
Ingredients
Method
- In a large bowl, combine the water and active dry yeast. Stir and leave for 5 minutes so the yeast hydrates. Add the bread flour and mix until no dry flour remains. Add the fine sea salt and olive oil, then mix again until a shaggy, sticky dough forms. Cover and leave to rest for 15 minutes. After the rest, perform the first stretch and fold directly in the bowl: wet your hand, lift one side of the dough, stretch it upward, and fold it back over itself. Rotate the bowl and repeat until you have completed 4 folds. Cover and rest 15 minutes, then repeat 2 more rounds of stretch-and-folds. The dough starts rough and sticky, but after the folds it should feel smoother, more elastic, and noticeably stronger while still remaining soft and fairly loose. Performing these folds directly in the bowl, rather than on a floured surface, is what lets this genuinely high-hydration dough build gluten strength gradually without needing extra flour worked in — additional flour at this stage would compromise the airy, open crumb this recipe depends on.
- Cover the bowl tightly and let the dough rise at room temperature for 1 hour to begin fermentation. Transfer the dough to the refrigerator and let it cold-ferment for 12–18 hours. If you prefer, you can also do the full rise at cool room temperature for about 8–10 hours, but the cold rise gives better flavor and a stronger, airier structure. After the long rise, the dough should look alive and aerated, with visible bubbles and a gently domed surface. It should feel light and well-risen rather than dense. Fermenting slowly in the cold, rather than quickly at room temperature, gives the yeast considerably more time to develop complex flavour compounds while the dough’s gluten structure continues strengthening gradually — that extended time is what produces both the depth of flavour and the genuinely open, airy structure a quicker rise wouldn’t achieve.
- Generously oil a rectangular baking tray, roughly 30 x 20cm to 33 x 23cm, using part of the olive oil. Turn the dough into the tray and coat it lightly in the oil so it does not dry out. Gently stretch it toward the corners without forcing it. If it resists, let it rest 10–15 minutes, then continue gently stretching until it fits the tray. Cover loosely and let it proof for 1½ to 2 hours at room temperature. By the end of this proof the dough should be visibly puffy, soft, and airy. It should spread naturally in the tray and show bubbles beneath the surface. Letting the dough rest when it resists stretching, rather than forcing it into the corners immediately, respects the gluten’s own natural relaxation timing — dough stretched too forcefully while still tight will simply spring back, while a brief rest lets that tension ease enough for gentle stretching to actually hold.
- Preheat the oven to 240°C for at least 20 minutes before baking. Using oiled fingertips, lightly dimple the dough. Do not press too aggressively — the goal is to create shallow dimples while keeping as much gas in the dough as possible. Arrange the tomato slices generously over the surface, slightly overlapping. Scatter the feathered red onion evenly over the tomatoes and into the gaps. Press the topping only lightly into the surface so it adheres without crushing the dough. Drizzle generously with more olive oil. Sprinkle heavily with dried oregano, then season with flaky sea salt and black pepper. The topping should be abundant and rustic, not sparse. The tomatoes should sit proudly on the dough, while the onions should settle into the surface lightly without disappearing into it. Dimpling only shallowly, rather than pressing hard, is what preserves the gas bubbles this dough spent 12–18 hours building — an aggressive press would deflate much of that structure right before the bread ever reaches the oven.
- Bake at 240°C for 15 minutes, then reduce the temperature to 220°C and continue baking for another 15–20 minutes, until the ladenia is deeply golden with crisp edges, a caramelized top, and a well-browned underside. If needed, rotate the tray once during baking so it colors evenly. The tomatoes should look slightly concentrated and lightly roasted, the red onion should have browned edges, and the base should be crisp enough to hold a slice cleanly while the interior stays soft and fluffy. Starting at a genuinely high temperature before stepping it down partway through gives the base and edges an initial, aggressive burst of heat to set and crisp, while the reduced temperature that follows lets the toppings roast and the interior finish cooking through without the exterior burning first.
- Remove from the oven and drizzle lightly with a final touch of olive oil while still hot if desired. Let it rest in the tray for 5 minutes, then transfer to a rack or board so the underside stays crisp. Cut into 6 rectangular slices and serve warm or at room temperature. Moving the bread from the tray to a rack, rather than leaving it to cool in the pan, lets air circulate beneath it — resting it directly in the tray would trap steam against the just-baked crisp bottom and soften exactly the texture the whole bake was built to achieve.