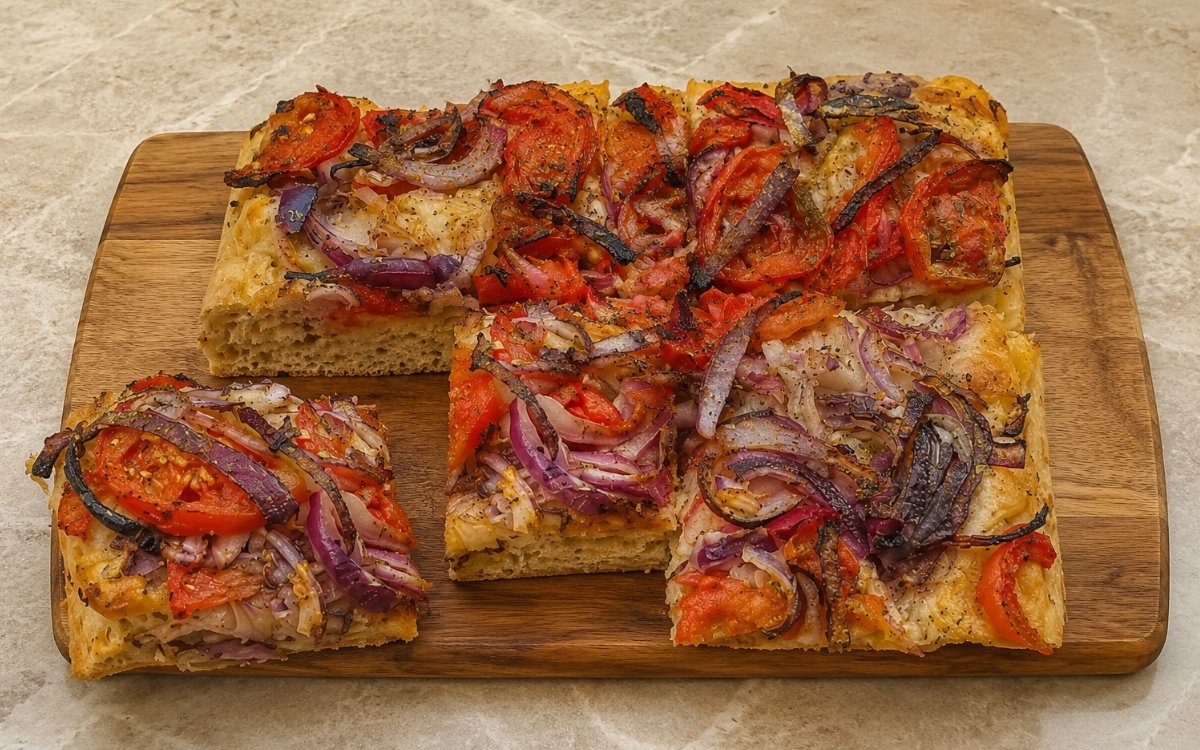
Ingredients
Method
Mix the Dough
- In a large bowl, combine the water and active dry yeast. Stir and leave for 5 minutes so the yeast hydrates. Add the bread flour and mix until no dry flour remains. Add the fine sea salt and olive oil, then mix again until a shaggy, sticky dough forms. Cover and leave to rest for 15 minutes. After the rest, perform the first stretch and fold directly in the bowl: wet your hand, lift one side of the dough, stretch it upward, and fold it back over itself. Rotate the bowl and repeat until you have completed 4 folds. Cover and rest 15 minutes, then repeat 2 more rounds of stretch-and-folds. The dough starts rough and sticky, but after the folds it should feel smoother, more elastic, and noticeably stronger while still remaining soft and fairly loose. Performing these folds directly in the bowl, rather than on a floured surface, is what lets this genuinely high-hydration dough build gluten strength gradually without needing extra flour worked in — additional flour at this stage would compromise the airy, open crumb this recipe depends on.
Long Rise
- Cover the bowl tightly and let the dough rise at room temperature for 1 hour to begin fermentation. Transfer the dough to the refrigerator and let it cold-ferment for 12–18 hours. If you prefer, you can also do the full rise at cool room temperature for about 8–10 hours, but the cold rise gives better flavor and a stronger, airier structure. After the long rise, the dough should look alive and aerated, with visible bubbles and a gently domed surface. It should feel light and well-risen rather than dense. Fermenting slowly in the cold, rather than quickly at room temperature, gives the yeast considerably more time to develop complex flavour compounds while the dough's gluten structure continues strengthening gradually — that extended time is what produces both the depth of flavour and the genuinely open, airy structure a quicker rise wouldn't achieve.
Pan the Dough
- Generously oil a rectangular baking tray, roughly 30 x 20cm to 33 x 23cm, using part of the olive oil. Turn the dough into the tray and coat it lightly in the oil so it does not dry out. Gently stretch it toward the corners without forcing it. If it resists, let it rest 10–15 minutes, then continue gently stretching until it fits the tray. Cover loosely and let it proof for 1½ to 2 hours at room temperature. By the end of this proof the dough should be visibly puffy, soft, and airy. It should spread naturally in the tray and show bubbles beneath the surface. Letting the dough rest when it resists stretching, rather than forcing it into the corners immediately, respects the gluten's own natural relaxation timing — dough stretched too forcefully while still tight will simply spring back, while a brief rest lets that tension ease enough for gentle stretching to actually hold.
Top the Ladenia
- Preheat the oven to 240°C for at least 20 minutes before baking. Using oiled fingertips, lightly dimple the dough. Do not press too aggressively — the goal is to create shallow dimples while keeping as much gas in the dough as possible. Arrange the tomato slices generously over the surface, slightly overlapping. Scatter the feathered red onion evenly over the tomatoes and into the gaps. Press the topping only lightly into the surface so it adheres without crushing the dough. Drizzle generously with more olive oil. Sprinkle heavily with dried oregano, then season with flaky sea salt and black pepper. The topping should be abundant and rustic, not sparse. The tomatoes should sit proudly on the dough, while the onions should settle into the surface lightly without disappearing into it. Dimpling only shallowly, rather than pressing hard, is what preserves the gas bubbles this dough spent 12–18 hours building — an aggressive press would deflate much of that structure right before the bread ever reaches the oven.
Bake
- Bake at 240°C for 15 minutes, then reduce the temperature to 220°C and continue baking for another 15–20 minutes, until the ladenia is deeply golden with crisp edges, a caramelized top, and a well-browned underside. If needed, rotate the tray once during baking so it colors evenly. The tomatoes should look slightly concentrated and lightly roasted, the red onion should have browned edges, and the base should be crisp enough to hold a slice cleanly while the interior stays soft and fluffy. Starting at a genuinely high temperature before stepping it down partway through gives the base and edges an initial, aggressive burst of heat to set and crisp, while the reduced temperature that follows lets the toppings roast and the interior finish cooking through without the exterior burning first.
Finish and Serve
- Remove from the oven and drizzle lightly with a final touch of olive oil while still hot if desired. Let it rest in the tray for 5 minutes, then transfer to a rack or board so the underside stays crisp. Cut into 6 rectangular slices and serve warm or at room temperature. Moving the bread from the tray to a rack, rather than leaving it to cool in the pan, lets air circulate beneath it — resting it directly in the tray would trap steam against the just-baked crisp bottom and soften exactly the texture the whole bake was built to achieve.
Notes
The extended cold ferment is worth understanding as the technique most responsible for this bread's specific character, distinguishing it from a quicker, same-day flatbread. Cold, slow fermentation gives yeast considerably more time to develop the complex, slightly tangy depth of flavour associated with a properly long-risen dough, while also allowing the gluten structure to strengthen gradually without the harsher, faster gas production a warm, fast rise would produce. That combination is what gives ladenia its genuinely open, airy crumb alongside real depth of flavour.
Performing the stretch-and-fold sequence directly in the bowl, rather than turning the sticky dough out onto a floured counter, is a deliberate choice that protects this dough's high hydration. Working in extra flour at any point during shaping would tighten the dough's texture and work against the light, airy structure this recipe depends on — the in-bowl technique lets gluten develop through folding alone, without needing to compensate for stickiness with additional flour.
Dimpling the proofed dough only shallowly, explicitly avoiding an aggressive press, protects the gas structure the 12–18 hour rise spent building. This is the same underlying principle that governs dimpling in any long-fermented focaccia-style bread — the dough is at its most fragile and gas-rich right before baking, and heavy-handed dimpling at this stage can deflate a meaningful portion of that hard-won structure in seconds.
The two-stage baking temperature — starting genuinely hot, then stepping down partway through — addresses a real timing tension between the base and the toppings. The initial high heat is what sets and crisps the base and edges quickly; the reduced temperature that follows gives the tomatoes and onion time to roast and caramelise properly, and the interior time to finish cooking through, without the risk of the crust burning before everything else catches up.