
Biscoff Chocolate Chip Cookies
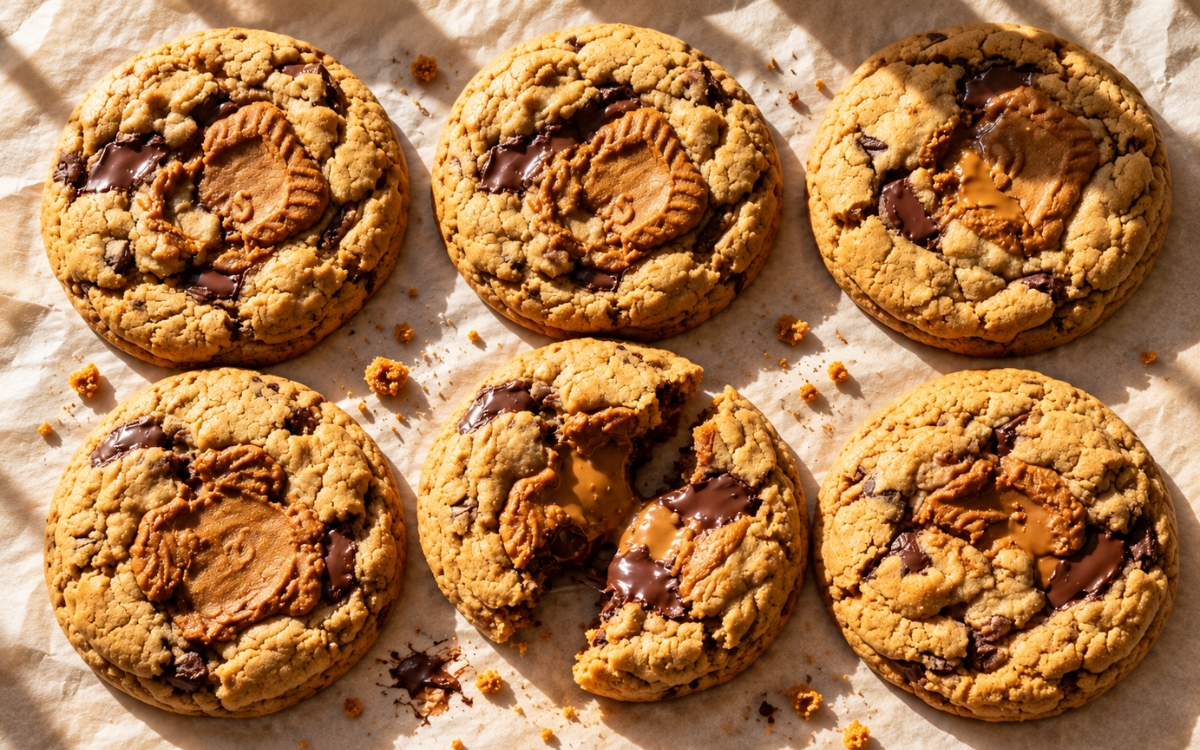
Thick, bakery-style chocolate chip cookies with golden, crackled tops, soft underbaked centers, and a hidden core of creamy Biscoff cookie butter that stays warm long after the cookies come out of the oven. The filling is frozen into small discs, then wrapped completely in dough, similar to the method behind the Salted Caramel Espresso Cookies, so the center survives baking as a defined pocket instead of melting straight through. A double chill, first for the dough and then for the shaped, filled cookies, keeps the dough firm enough to hold its shape around the stuffed center instead of spreading flat, and pulling the cookies from the oven while the middles still look soft leaves that Biscoff core molten once they’ve rested.

Prep Time : 40 min
Total Time : 2 hr 25 min
Servings : 12
40 min
2 hr 25 min
12
Ingredients
For the Biscoff Filling
• 240 g Biscoff spread (cookie butter), divided into 24 portions of about 10 g each
For the Cookie Dough
• 225 g unsalted butter, softened but cool
• 180 g light brown sugar
• 100 g granulated sugar
• 2 large eggs, room temperature
• 2 tsp vanilla extract
• 330 g all-purpose flour
• 20 g cornstarch
• 1 tsp baking soda
• ½ tsp baking powder
• 1 tsp fine salt
• 220 g dark or semisweet chocolate chips or chopped chocolate
For Topping / Finishing
• 60–80 g Biscoff spread, for visible top swirls
• 6–8 Biscoff biscuits, broken into halves or large rough pieces (optional)
• extra chocolate chips or chunks, as needed for topping
• flaky salt, a very light sprinkle (optional)
Directions
- Freeze the Biscoff Centers
Line a small tray or plate with parchment and scoop 24 small mounds of Biscoff spread, about 2 teaspoons or 10 g each, spacing them so they don’t touch. Freeze until firm, 30 to 45 minutes. The centers don’t need to be rock hard, but they must be firm enough to handle cleanly; too soft and they smear into the dough instead of holding together as a distinct core. - Make the Cookie Dough
Beat the softened butter with the brown sugar and granulated sugar until creamy and smooth, 2 to 3 minutes, stopping short of fluffy and aerated. Add the eggs one at a time, mixing well after each, then mix in the vanilla. In a separate bowl, whisk together the flour, cornstarch, baking soda, baking powder, and salt, then add this to the butter mixture and mix just until combined before folding in the chocolate. The dough should be thick, soft, and scoopable, not loose; if it feels warm or slightly sticky, that’s normal and will correct itself in the chill. - Chill the Dough
Cover the dough and refrigerate for 30 to 45 minutes, until noticeably firmer and easier to portion. This chill keeps the cookies thick, reduces spread later in the oven, and makes it easier to wrap dough cleanly around the frozen filling in the next stage. - Portion and Fill the Cookies
Line baking sheets with parchment. Divide the dough into 24 equal portions, about 40 to 45 g each, and flatten each into a disc in your palm. Set one frozen Biscoff center in the middle, then wrap the dough around it and seal completely, rolling gently into a tall mound rather than a flat ball, since a taller shape bakes up thicker. Space the filled balls on the tray with room to spread, then press a few extra chocolate chunks, a small dab of Biscoff, or a piece of Biscoff biscuit lightly into the tops without pressing deep enough to expose the filling underneath. - Chill Again Before Baking
Refrigerate the shaped cookies for 20 to 30 minutes, or freeze for 10 to 15 minutes, until firm again. Stuffed dough spreads more easily than solid dough once it hits a hot oven, so this second chill matters more here than in a plain cookie. - Bake
Heat the oven to 180°C conventional or 170°C fan. Bake 6 to 8 cookies per tray for 12 to 14 minutes, until the edges are set and lightly golden-brown, the tops are crackled and slightly puffed, and the centers still look a little soft and underdone. Pull the tray while the middles still look tender; waiting for them to firm fully in the oven trades away the molten center. If needed, immediately after baking, gently swirl a round cutter or bowl slightly larger than the cookie around each one to tighten the shape. - Finish and Cool
For more visible swirls, add a tiny extra dab of Biscoff to the hot cookies and lightly drag it with a spoon or small offset spatula, scattering on a few extra chocolate pieces or biscuit crumbs if desired. Let the cookies cool on the tray for 15 minutes before moving them; this rest lets the centers finish setting, the melted chocolate thicken slightly, and the Biscoff core turn creamy rather than runny. Serve warm for the softest center, or let them cool fully for a thicker, fudgier middle.
*Notes :
- Cornstarch works alongside the flour rather than replacing any of it, softening the crumb and giving both the cookie and the area around the filling a more tender, bakery-style bite instead of a dense one.
- Chopped chocolate melts into larger, glossier pools than chocolate chips, which hold their shape and distribute more evenly through the dough; a mix of both gives visible melted streaks without losing even coverage in every bite.
- The two chills do different jobs. The first firms the raw dough so it’s easier to work with and keeps the base spread under control; the second re-firms the shaped, filled cookies right before they go into the oven, since a stuffed cookie spreads faster than a plain one as soon as the dough meets heat.
- Sealing the dough fully around the frozen Biscoff disc separates a clean filled center from one that leaks heavily. A little seepage at the edges is normal and even looks good; a full blowout usually means the filling wasn’t cold enough or a seam didn’t close properly.
Why This Recipe Works
Freezing the Biscoff solid and fully wrapping it in chilled dough buys enough time in the oven for the cookie to bake through and crackle on top before the filling has any chance to leak out. That’s what turns the center into a defined, creamy core instead of a thin smear lost in the dough.
Ingredient Breakdown
Biscoff spread
cookie butter core — frozen into firm discs before baking, it holds its shape through assembly, then softens into a warm, creamy center as the baked cookie rests.
Cornstarch
tenderizing agent — cuts a small amount of flour’s structure to keep both the dough and the area around the filling soft rather than dense or dry.
Brown sugar
moisture and chew — its molasses content keeps the base dough soft and slightly chewy, which matters more here since the dough also has to flex around a filled center without cracking.
Dark or semisweet chocolate
bittersweet counterpoint — balances the sweetness of the Biscoff core so the finished cookie doesn’t read as one-note sugary.
Cold, not room-temperature, butter
spread control — starting the butter softened but still cool keeps the dough from turning greasy during creaming, which would otherwise undercut the chilling stages meant to manage spread.
Baking soda and baking powder together
lift and spread balance — the soda drives the browning and crackled top, while the smaller amount of baking powder gives just enough lift to keep the stuffed cookie from baking flat under its own filling.
Flaky salt
finishing contrast — a light sprinkle on the warm, sweet surface sharpens the chocolate and the Biscoff without reading as salty on its own.
Flavor Structure Explained
This cookie layers a few contrasting elements, and texture does as much work as flavor:
- a crisp, lightly crackled edge against a soft, underbaked center
- deep, toasty brown sugar and butter as the base dough flavor
- bittersweet chocolate running throughout to offset the sweetness
- a warm, spiced-caramel Biscoff core that turns molten as the cookie rests
- a light salt finish that sharpens the sweeter elements
These layers peak once the cookie has rested its full 15 minutes, the point where the center finishes turning creamy instead of staying too firm or too runny.
Common Mistakes to Avoid
- Skipping the freeze on the Biscoff centers – This causes the filling to smear into the dough instead of staying a defined core. Always freeze the portioned Biscoff until firm before assembling.
- Leaving a gap in the seal around the filling – This causes heavier leaking and uneven baking around the exposed seam. Always pinch the dough fully closed around the frozen center with no visible gaps.
- Skipping the second chill before baking – This causes stuffed cookies to spread thin and flat since they carry more weight and moisture than a plain dough ball. Always rechill the shaped cookies for the full 20 to 30 minutes, or freeze briefly, before they go into the oven.
- Baking until the centers look fully set – This causes a dry cookie with a hardened, no-longer-molten Biscoff core. Always pull the tray while the middles still look slightly soft and underdone.
Variations
Oversized Bakery Style
Make 12 large cookies instead of 24 by doubling each dough portion and using two Biscoff centers per cookie, extending the bake to 14–17 minutes.
Double Biscoff Crunch
Fold a handful of crushed Biscoff biscuits directly into the dough along with the chocolate for extra texture and caramelized flavor throughout.
White Chocolate Swap
Replace the dark or semisweet chocolate with white chocolate chips for a sweeter, creamier contrast against the spiced Biscoff core.
Espresso-Biscoff
Dissolve 1 teaspoon of instant espresso powder into the vanilla before mixing it into the dough, adding a subtle coffee depth behind the chocolate and Biscoff.
Storage & Make-Ahead
Store baked cookies in an airtight container at room temperature for up to 3 days. The molten quality of the center fades as they sit, so rewarm briefly in the microwave or a low oven before serving if you want the core soft again.
Unbaked, filled dough balls freeze well and can be baked directly from cold. Add 1 to 2 extra minutes to the bake time and watch the edges rather than the clock, since frozen dough behaves slightly differently tray to tray.
The dough can also be made up to a day ahead and left covered in the refrigerator before portioning and filling, which can split the two-chill process across an evening instead of doing everything at once.
Avoid freezing already-baked cookies if possible; the texture holds up far better when the filled dough is frozen raw and baked fresh, since the center only sets properly once, during its one bake-and-rest cycle.
Frequently Asked Questions
Why do I need to freeze the Biscoff before putting it in the dough?
Frozen Biscoff holds its shape through portioning, wrapping, and the first few minutes of baking, so it stays a defined core instead of smearing into the dough as soon as it warms up.
My cookies leaked a lot of filling during baking — what went wrong?
A small amount of leaking at the seams is normal and even looks appealing, but heavy leaking usually means the Biscoff wasn’t fully frozen or the dough wasn’t completely sealed around it, so check both before the next batch.
Can I use a different filling instead of Biscoff?
Yes, this same frozen-center method works well with other thick spreads like Nutella or a firm caramel, as long as the filling can be frozen solid enough to handle and fully wrapped before its second chill.
Why are the centers still soft when I pull the cookies from the oven?
That’s intentional — the cookies finish setting during the 15-minute rest on the tray. Pulling them while the middles still look underdone keeps the Biscoff core soft and molten instead of letting it firm up in the oven.
What else pairs well with these cookies?
They sit nicely alongside a No-Bake Biscoff Cheesecake for a full Biscoff spread, or next to Brown Butter Pistachio Chocolate Chunk Cookies, Tahini Chocolate Chunk Cookies, or Cinnamon Roll Cookies on a mixed cookie tray, and they go particularly well with an Iced Spanish Latte (Condensed Milk) on the side.
Nutrition Facts
( per serving, 2 cookies )
Calories
~580 kcal
Protein
7 g
Fat
31 g
Carbs
72 g
Calories
~580 kcal
Protein
7 g
Fat
31 g
Carbs
72 g
Related Recipes
Related Recipes
-

Classic Madeleines
Classic French shell-shaped madeleines with crisp golden-brown ridges, tender buttery crumb, and the signature raised hump.
-
Lemon Poppy Seed Crinkle Cookies
Soft lemon crinkle cookies with poppy seeds and a crackled powdered sugar finish.
-
Raspberry White Chocolate Muffins
Bakery-style raspberry muffins with creamy melted white chocolate pockets.

You might also like
You might also like
-
Blueberry Crumble Cookies
Thick, soft cookies with jammy blueberry streaks and a buttery crumble topping.
-
Raspberry White Chocolate Cheesecake Cookies
Soft bakery-style cookies stuffed with a creamy cheesecake center and jammy raspberry pockets.
-
Banana Espresso Chocolate Chip Muffins
Bakery-style banana muffins with concentrated espresso flavor and melted chocolate chips.


Biscoff Chocolate Chip Cookies
Ingredients
Method
- Line a small tray or plate with parchment and scoop 24 small mounds of Biscoff spread, about 2 teaspoons or 10 g each, spacing them so they don’t touch. Freeze until firm, 30 to 45 minutes. The centers don’t need to be rock hard, but they must be firm enough to handle cleanly; too soft and they smear into the dough instead of holding together as a distinct core.
- Beat the softened butter with the brown sugar and granulated sugar until creamy and smooth, 2 to 3 minutes, stopping short of fluffy and aerated. Add the eggs one at a time, mixing well after each, then mix in the vanilla. In a separate bowl, whisk together the flour, cornstarch, baking soda, baking powder, and salt, then add this to the butter mixture and mix just until combined before folding in the chocolate. The dough should be thick, soft, and scoopable, not loose; if it feels warm or slightly sticky, that’s normal and will correct itself in the chill.
- Cover the dough and refrigerate for 30 to 45 minutes, until noticeably firmer and easier to portion. This chill keeps the cookies thick, reduces spread later in the oven, and makes it easier to wrap dough cleanly around the frozen filling in the next stage.
- Line baking sheets with parchment. Divide the dough into 24 equal portions, about 40 to 45 g each, and flatten each into a disc in your palm. Set one frozen Biscoff center in the middle, then wrap the dough around it and seal completely, rolling gently into a tall mound rather than a flat ball, since a taller shape bakes up thicker. Space the filled balls on the tray with room to spread, then press a few extra chocolate chunks, a small dab of Biscoff, or a piece of Biscoff biscuit lightly into the tops without pressing deep enough to expose the filling underneath.
- Refrigerate the shaped cookies for 20 to 30 minutes, or freeze for 10 to 15 minutes, until firm again. Stuffed dough spreads more easily than solid dough once it hits a hot oven, so this second chill matters more here than in a plain cookie.
- Heat the oven to 180°C conventional or 170°C fan. Bake 6 to 8 cookies per tray for 12 to 14 minutes, until the edges are set and lightly golden-brown, the tops are crackled and slightly puffed, and the centers still look a little soft and underdone. Pull the tray while the middles still look tender; waiting for them to firm fully in the oven trades away the molten center. If needed, immediately after baking, gently swirl a round cutter or bowl slightly larger than the cookie around each one to tighten the shape.
- For more visible swirls, add a tiny extra dab of Biscoff to the hot cookies and lightly drag it with a spoon or small offset spatula, scattering on a few extra chocolate pieces or biscuit crumbs if desired. Let the cookies cool on the tray for 15 minutes before moving them; this rest lets the centers finish setting, the melted chocolate thicken slightly, and the Biscoff core turn creamy rather than runny. Serve warm for the softest center, or let them cool fully for a thicker, fudgier middle.