
Salted Caramel Iced Latte
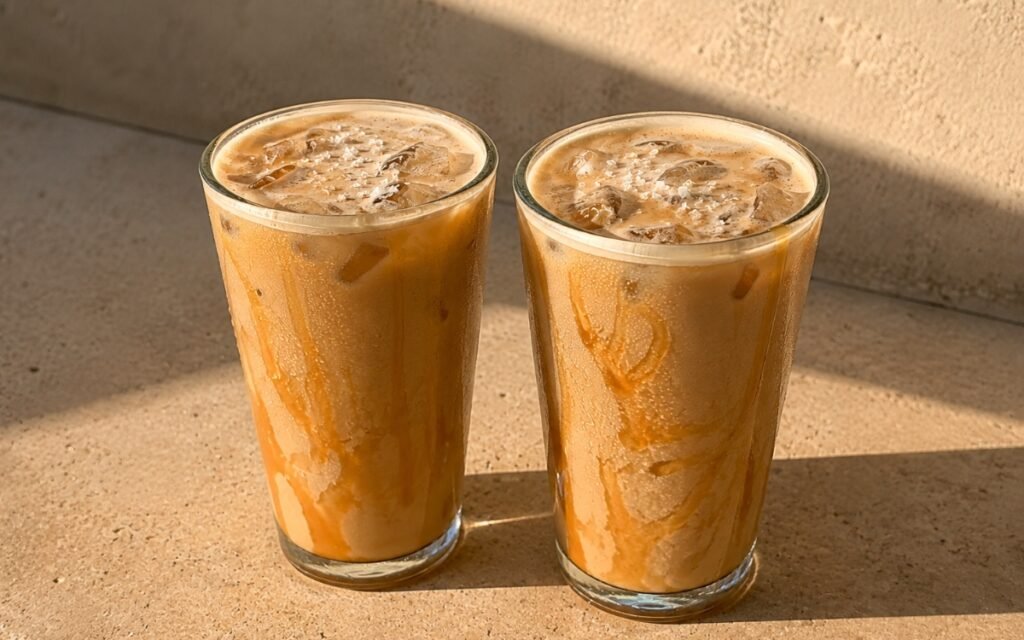
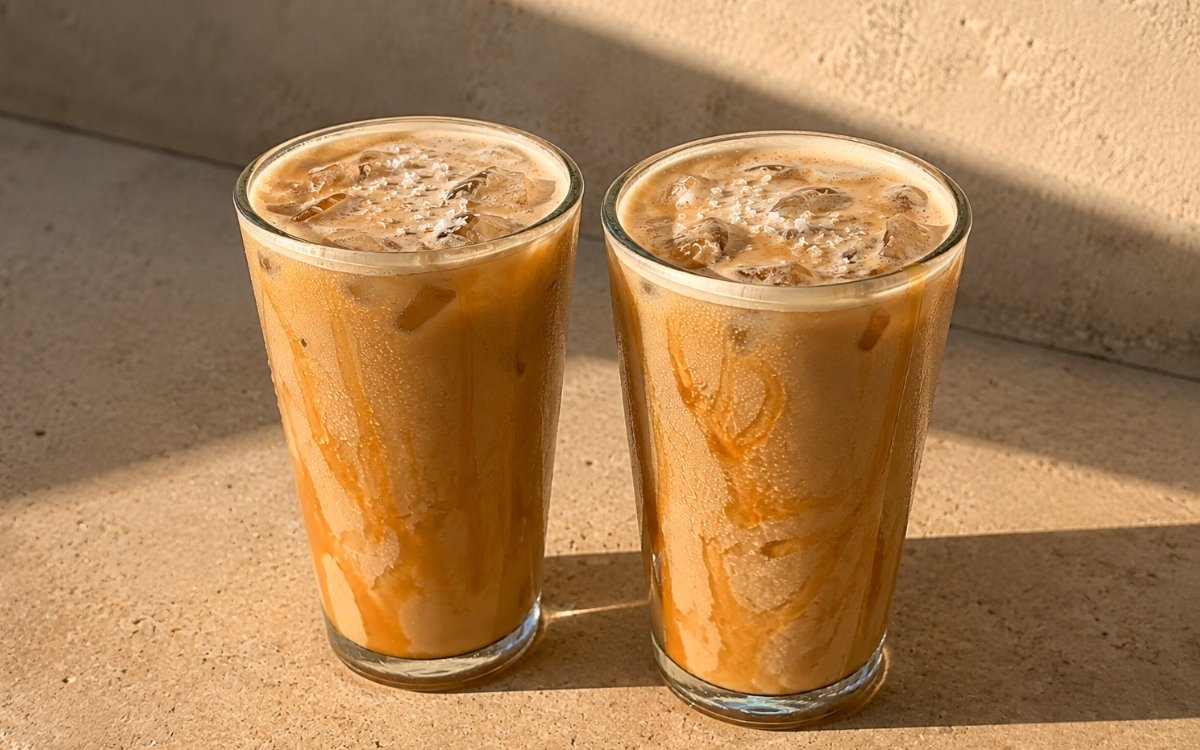
A classic salted caramel iced latte made with espresso, cold milk, ice, and a smooth salted caramel sauce. Richer and deeper in colour than a regular iced latte, with caramel drizzled inside the glass, a pale caramel milk-coffee body, and a light finish of flaky sea salt over a thin foam layer. Cooking the sugar to a genuine deep amber before the cream ever meets it is the technique this whole sauce depends on — too pale and the caramel tastes flat and overly sweet, too dark and it turns bitter, the same dry-caramel-to-amber principle used elsewhere in this collection whenever a caramel sauce needs real depth rather than simple sweetness. Stirring part of that caramel directly into the hot espresso, rather than letting all the sweetness settle at the bottom of the glass, is what gives the drink a properly integrated caramel-coffee base instead of an unevenly sweet one. Keeping the final sea salt finish genuinely restrained is what lets it sharpen the caramel rather than making the drink taste overtly salty. The payoff is a drink with three distinct visual layers before stirring — caramel at the base, caramel swirls on the glass walls, and pale milk over ice — that combines into a rich, golden-caramel, still clearly espresso-based latte.
Prep Time : 10 min
Cook Time : 5 min
Servings : 2
10 min
5 min
2
Ingredients
For the Salted Caramel Sauce
• 100g granulated sugar
• 30ml water
• 60ml heavy cream, warmed
• 20g unsalted butter — this one on Amazon
• 2g fine sea salt
• ½ tsp vanilla extract, optional — this one on Amazon
For the Salted Caramel Iced Latte
• 120ml espresso, freshly brewed (4 standard shots total, counting 1 shot = 30ml)
• 300ml cold whole milk — this one on Amazon
• 40ml salted caramel sauce, plus extra for drizzling the glasses
• 8–10 ice cubes
For Finishing
• 30–40ml cold milk, optional, for a very light top foam
• Flaky sea salt, a small pinch for each drink
This post may contain affiliate links. As an Amazon Associate I earn from qualifying purchases, at no additional cost to you.
Directions
- Make the Salted Caramel Sauce
Add the sugar and water to a small saucepan. Cook over medium heat without stirring, swirling the pan occasionally, until the sugar dissolves and turns a deep amber caramel. Remove the pan from the heat and carefully pour in the warm cream. It will bubble aggressively. Stir until smooth, then add the butter, fine sea salt, and vanilla if using. Stir again until fully combined. Let the sauce cool slightly until it is fluid but no longer extremely hot. The sauce should be smooth, glossy, and pourable. If it is too pale, it will taste flat and overly sweet. If it goes too dark, it will taste bitter. You want a rich amber caramel, not burnt sugar. Cooking the sugar dry, swirling rather than stirring, lets it colour evenly and predictably — stirring with a spoon at this stage risks crystallising the sugar back into a grainy mass rather than letting it melt cleanly into caramel. - Brew the Espresso
Brew 120ml espresso total, equal to 4 standard 30ml shots. While still hot, stir 20ml of the salted caramel sauce into the espresso until fully dissolved. Mixing part of the caramel into the hot espresso matters. It gives you a properly integrated caramel-coffee base instead of a drink where all the sweetness sinks to the bottom. Hot espresso has real capacity to loosen and fully dissolve the caramel on contact — that integration is what keeps the drink tasting balanced from the first sip to the last, rather than starting weak and turning cloying only once the concentrated bottom layer is finally reached. - Prepare the Glasses
Drizzle extra salted caramel sauce around the inside walls of 2 glasses in visible loose swirls. Add 10ml salted caramel sauce to the bottom of each glass. The caramel should cling to the inside walls and remain clearly visible. Do not flood the glasses. Too much sauce makes the drink cloying and turns the base muddy instead of layered and elegant. Applying the caramel to the dry, empty glass first is what allows it to cling to the walls rather than sliding down and disappearing — this same drizzle-first principle governs every layered iced coffee drink in this collection where a sauce is meant to remain a visible accent. - Add the Ice and Milk
Fill each glass generously with ice. Pour 150ml cold whole milk into each glass over the ice. The glasses should now show three clear visual layers: caramel at the bottom, caramel swirls on the walls, and pale milk over the ice. Leave enough room for the espresso. Building this ice-and-milk layer on top of the caramel base and drizzled walls is what sets up the full three-layer visual before a single drop of espresso has even been added. - Pour in the Salted Caramel Espresso
Divide the salted caramel espresso mixture evenly between the 2 glasses, pouring it slowly over the milk and ice. Let it swirl naturally through the milk before stirring. The drink should take on a rich golden-caramel tone, deeper and warmer than a regular iced latte. You should still see some darker coffee movement before it fully blends. Pouring slowly rather than quickly is what gives the espresso time to fall through the cold milk in visible movement before the two liquids fully combine — a fast pour would collapse that visual moment almost immediately. - Optional Thin Foam Finish If
you want the more polished café-style finish, froth the extra cold milk very lightly until it forms only a thin soft foam. Spoon a small amount over the top of each drink. This should be only a thin surface layer, not a thick cappuccino cap. The foam is there to carry the flaky salt and give the drink a clean finished top. Keeping this foam genuinely light rather than substantial serves a specific functional purpose beyond presentation — a thin layer gives the flaky salt somewhere visible and stable to sit, without adding the heavier, more filling texture a thick cappuccino-style cap would bring to what’s meant to stay a latte. - Finish and Serve
Sprinkle a small pinch of flaky sea salt over the top of each drink. If you want the full visual, let one small line of caramel drip slightly over the outside of the glass. Serve immediately. The finished drink should taste creamy, caramel-forward, lightly salty, and still clearly espresso-based. The salt should sharpen the caramel, not make the drink taste overtly salty. A restrained pinch of flaky salt works specifically by contrast — a small amount heightens the caramel’s sweetness and depth through that classic sweet-salty interplay, while too much simply reads as a salty drink rather than a sharpened caramel one.
*Notes :
- Cooking the caramel to a genuine deep amber, rather than pulling it early out of caution, is worth understanding as the step most responsible for this sauce’s actual flavour character. A caramel stopped too pale hasn’t developed the deeper, more complex notes that separate real caramel from simple burnt sugar syrup — it tastes flat and one-dimensionally sweet instead. Pushed too far in the other direction, past deep amber into genuinely dark territory, the sugar’s own compounds turn bitter in a way cream and butter added afterward can’t fully correct. The window for proper amber caramel is real but manageable with attention.
- Integrating part of the caramel directly into the hot espresso, rather than relying entirely on the glass-base layer for sweetness, follows the same logic used throughout this collection’s layered iced drinks. A drink sweetened only at its visual base layer tends to taste unevenly sweet through the drinking experience — weaker at the top, overly concentrated at the bottom. Mixing a portion into the espresso itself distributes that sweetness more evenly while still preserving the separate caramel layers for visual effect.
- The three-layer build — caramel at the base, caramel drizzled on the walls, pale milk over ice — deserves recognition as a deliberate visual sequence rather than simply “adding caramel in a few places.” Each layer is placed at a specific stage for a specific reason: the base layer for a concentrated visual anchor, the wall drizzle for a decorative accent visible from outside the glass, and the milk-over-ice layer as the neutral canvas the espresso will swirl through last.
- The instruction to keep the final salt finish restrained, rather than generous, reflects a real principle about how salt interacts with sweetness. A small, carefully placed pinch of flaky salt heightens and sharpens the caramel’s own sweetness through contrast — this is the entire point of a “salted caramel” flavour profile. Oversalting instead simply introduces a competing, salty flavour that fights the caramel rather than complementing it, undermining the balance the whole drink is built around.
Why This Recipe Works
This recipe works because the caramel sauce is cooked to a genuine deep amber for real depth of flavour, rather than pulled early or pushed into bitterness.
Integrating part of that caramel directly into the hot espresso distributes sweetness evenly through the drink, while the remaining sauce is used deliberately across three separate visual layers — base, walls, and swirl — that build a genuinely layered presentation.
A slow espresso pour preserves the visible swirling moment before the drink is stirred, and a restrained final pinch of flaky salt sharpens the caramel through contrast rather than competing with it.
Ingredient Breakdown
Genuinely Amber-Cooked Caramel
The sauce’s foundation — cooked to real deep amber rather than pale or burnt, developing the depth that separates it from plain sweet syrup.
Caramel Integrated Into Hot Espresso
The critical technique — dissolves cleanly into the coffee itself, keeping the drink’s sweetness evenly distributed rather than concentrated only at the base.
Three-Layer Caramel Placement (Base, Walls, Pour)
The visual build — each stage placed deliberately for a specific presentation purpose across the drink’s construction.
Slow Espresso Pour
The finishing technique — gives the coffee time to swirl visibly through the milk before the drink is stirred together.
Restrained Flaky Salt Finish
The final touch — a small, carefully placed pinch sharpens the caramel through contrast rather than introducing a competing salty flavour.
Flavor Structure Explained
This salted caramel iced latte follows a layered balance model:
- Smooth milky foundation (cold whole milk)
- Bold aromatic centre (espresso, integrated with caramel)
- Rich deep sweetness (genuine amber caramel sauce)
- Sharp contrasting finish (flaky sea salt)
Cold whole milk provides the drink’s smooth, mellow foundation, holding its milk-forward character even against the rich caramel. Espresso, partly integrated with caramel while still hot, layers in bold coffee flavour alongside genuine sweetness rather than the two sitting separately. The deep amber caramel sauce contributes rich, complex sweetness well beyond simple sugar, distributed across the base, walls, and pour. A final restrained pinch of flaky sea salt sharpens that caramel through classic sweet-salty contrast, finishing the drink without ever tipping it toward tasting overtly salty.
Common Mistakes to Avoid
- Pulling the Caramel Too Pale – This produces a flat, overly simple sweetness rather than real caramel depth. Always cook it to a genuine deep amber.
- Letting the Caramel Go Too Dark – This introduces bitterness that cream and butter can’t fully correct. Always watch closely and stop at deep amber, not beyond.
- Putting All the Sweetness Only at the Glass Base – This produces an unevenly sweet drink, weak at the top and cloying at the bottom. Always integrate part of the caramel into the hot espresso as well.
- Flooding the Glass With Caramel – Too much sauce turns the base muddy rather than layered and elegant. Always drizzle and pour with restraint.
- Oversalting the Finish – Too much flaky salt makes the drink taste salty rather than sharpening the caramel. Always use just a small, restrained pinch.
Variations
Extra-Strong Version
Increase to 3 shots of espresso per serving, keeping the caramel amount the same, for a bolder coffee base against the sweetness.
Oat Milk Version
Substitute a barista-style oat milk for the dairy milk, following the identical caramel-and-espresso build.
Extra-Salty Version
Increase the sea salt in the sauce itself slightly for a more pronounced salted caramel character throughout, rather than only at the finish.
Iced Blended Version
Blend the fully built drink with extra ice for a frozen, slushier salted caramel variation.
Storage & Make-Ahead
The salted caramel sauce can be made ahead and refrigerated in a sealed jar for up to 2 weeks; warm gently before using, as it will firm up considerably when cold.
This drink is meant to be built and served fresh; it does not hold or store well once assembled, since the ice will melt and the caramel swirls will soften and blend into the milk over time.
Espresso should be brewed just before combining with the caramel, since its flavour and ability to properly dissolve the sauce both fade as it cools.
Frequently Asked Questions
Why does the caramel need to be cooked to a genuine deep amber rather than pulled early?
A caramel stopped too pale hasn’t developed the deeper, more complex flavour that separates real caramel from simple sugar syrup, tasting flat and one-dimensionally sweet instead. Cooking it to proper deep amber, without pushing into bitterness, is what gives the sauce its real character.
Why is part of the caramel mixed into the hot espresso instead of all of it staying in the glass base?
A drink sweetened only at its visual base layer tends to taste unevenly sweet — weaker at the top, overly concentrated at the bottom. Mixing a portion directly into the hot espresso distributes that sweetness evenly through the whole drink while still preserving separate caramel layers for visual effect.
Why does the caramel go into the glass in three separate places — base, walls, and pour?
Each placement serves a specific visual purpose: the base layer as a concentrated anchor, the wall drizzle as a decorative accent visible from outside the glass, and the espresso pour swirling through the milk last. Together they build the drink’s full layered presentation.
Why does the flaky sea salt finish need to stay so restrained?
A small, carefully placed pinch of salt heightens and sharpens the caramel’s sweetness through contrast, which is the entire point of a salted caramel flavour profile. Too much salt instead introduces a competing salty flavour that fights the caramel rather than complementing it.
Are there other caramel or salted iced coffee drinks worth trying?
Iced Caramel Macchiato, Salted Caramel Cold Foam Cold Brew, Brown Sugar Shaken Espresso, and Maple Cinnamon Iced Latte all build on a related sweet, layered iced espresso foundation, each bringing its own distinct syrup, technique, or finish worth exploring.
Nutrition Facts
( per serving )
Calories
~340 kcal
Protein
8 g
Fat
18 g
Carbs
36 g
Calories
~340 kcal
Protein
8 g
Fat
18 g
Carbs
36 g
Related Recipes
Related Recipes

White Chocolate Iced Mocha
Gently melted white chocolate sauce combined with hot espresso, poured over ice and cold milk for a creamy, pale caramel-cream mocha.
Iced Dirty Chai Latte
A strong homemade chai concentrate, cold milk, and espresso poured over ice, topped with a thin spiced foam layer and star anise.
Iced Spanish Latte with Condensed Milk
Sweetened condensed milk at the base, cold milk and ice in the middle, and freshly brewed espresso poured over the top for a rich, layered latte.



You might also like
You might also like
Strawberry Basil Pitcher Drink
Cold-macerated strawberries with a gentle basil extraction, fresh lemon juice, and a second infusion of sliced strawberries and basil.
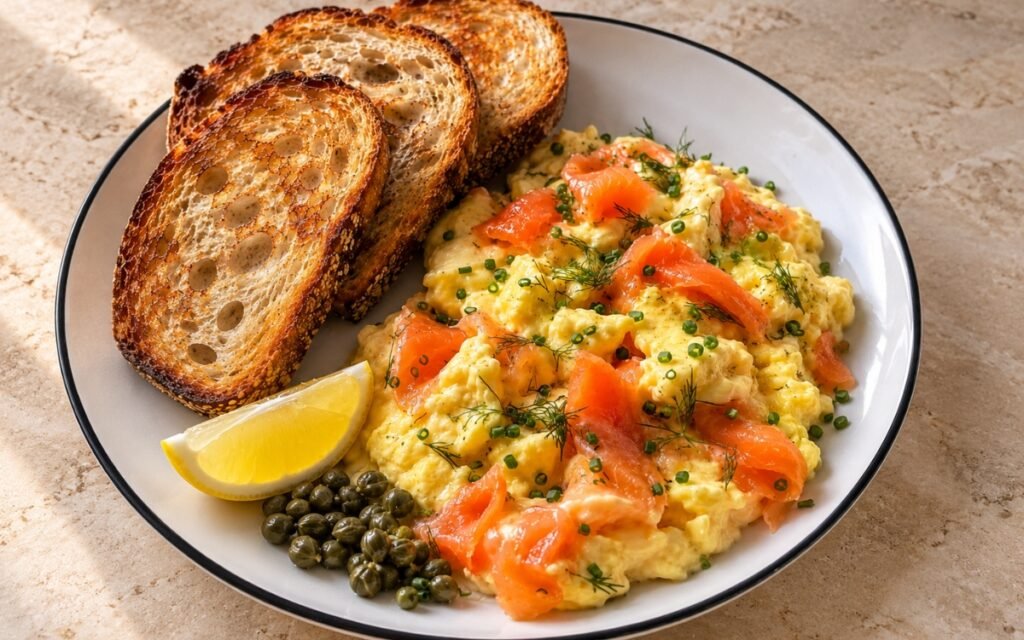
Smoked Salmon Scrambled Eggs Plate
Soft, creamy scrambled eggs finished with ribbons of smoked salmon, fresh dill, and chives, served with toasted sourdough, capers, and lemon.
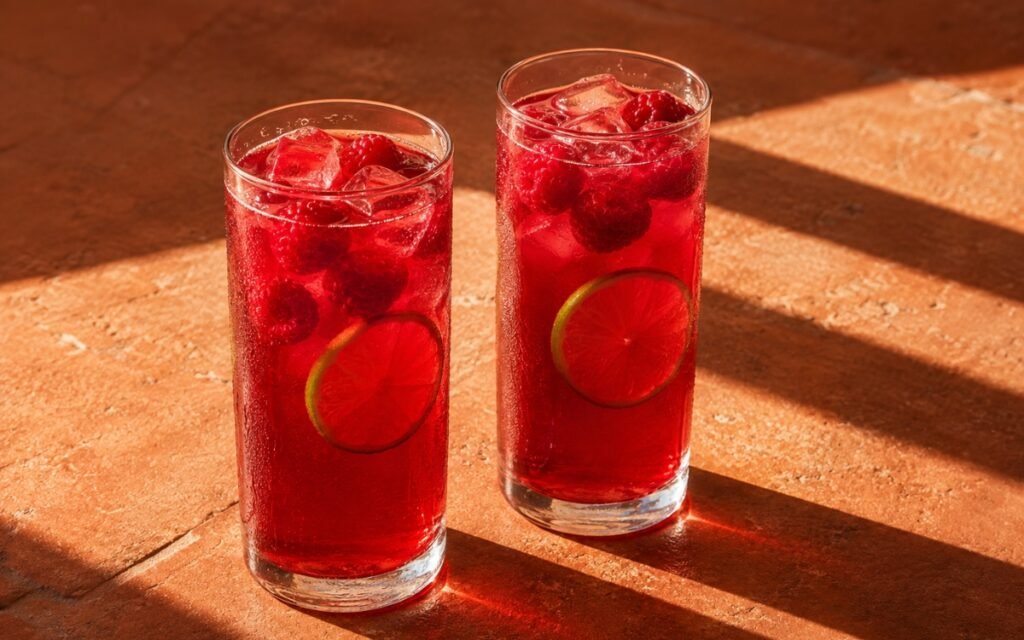
Hibiscus Raspberry Ginger Cooler
Off-heat steeped hibiscus and ginger combined with cold-macerated raspberries and fresh lime juice for a vivid ruby-red, tart cooler.

Salted Caramel Iced Latte
Ingredients
Method
- Add the sugar and water to a small saucepan. Cook over medium heat without stirring, swirling the pan occasionally, until the sugar dissolves and turns a deep amber caramel. Remove the pan from the heat and carefully pour in the warm cream. It will bubble aggressively. Stir until smooth, then add the butter, fine sea salt, and vanilla if using. Stir again until fully combined. Let the sauce cool slightly until it is fluid but no longer extremely hot. The sauce should be smooth, glossy, and pourable. If it is too pale, it will taste flat and overly sweet. If it goes too dark, it will taste bitter. You want a rich amber caramel, not burnt sugar. Cooking the sugar dry, swirling rather than stirring, lets it colour evenly and predictably — stirring with a spoon at this stage risks crystallising the sugar back into a grainy mass rather than letting it melt cleanly into caramel.
- Brew 120ml espresso total, equal to 4 standard 30ml shots. While still hot, stir 20ml of the salted caramel sauce into the espresso until fully dissolved. Mixing part of the caramel into the hot espresso matters. It gives you a properly integrated caramel-coffee base instead of a drink where all the sweetness sinks to the bottom. Hot espresso has real capacity to loosen and fully dissolve the caramel on contact — that integration is what keeps the drink tasting balanced from the first sip to the last, rather than starting weak and turning cloying only once the concentrated bottom layer is finally reached.
- Drizzle extra salted caramel sauce around the inside walls of 2 glasses in visible loose swirls. Add 10ml salted caramel sauce to the bottom of each glass. The caramel should cling to the inside walls and remain clearly visible. Do not flood the glasses. Too much sauce makes the drink cloying and turns the base muddy instead of layered and elegant. Applying the caramel to the dry, empty glass first is what allows it to cling to the walls rather than sliding down and disappearing — this same drizzle-first principle governs every layered iced coffee drink in this collection where a sauce is meant to remain a visible accent.
- Fill each glass generously with ice. Pour 150ml cold whole milk into each glass over the ice. The glasses should now show three clear visual layers: caramel at the bottom, caramel swirls on the walls, and pale milk over the ice. Leave enough room for the espresso. Building this ice-and-milk layer on top of the caramel base and drizzled walls is what sets up the full three-layer visual before a single drop of espresso has even been added.
- Divide the salted caramel espresso mixture evenly between the 2 glasses, pouring it slowly over the milk and ice. Let it swirl naturally through the milk before stirring. The drink should take on a rich golden-caramel tone, deeper and warmer than a regular iced latte. You should still see some darker coffee movement before it fully blends. Pouring slowly rather than quickly is what gives the espresso time to fall through the cold milk in visible movement before the two liquids fully combine — a fast pour would collapse that visual moment almost immediately.
- you want the more polished café-style finish, froth the extra cold milk very lightly until it forms only a thin soft foam. Spoon a small amount over the top of each drink. This should be only a thin surface layer, not a thick cappuccino cap. The foam is there to carry the flaky salt and give the drink a clean finished top. Keeping this foam genuinely light rather than substantial serves a specific functional purpose beyond presentation — a thin layer gives the flaky salt somewhere visible and stable to sit, without adding the heavier, more filling texture a thick cappuccino-style cap would bring to what’s meant to stay a latte.
- Sprinkle a small pinch of flaky sea salt over the top of each drink. If you want the full visual, let one small line of caramel drip slightly over the outside of the glass. Serve immediately. The finished drink should taste creamy, caramel-forward, lightly salty, and still clearly espresso-based. The salt should sharpen the caramel, not make the drink taste overtly salty. A restrained pinch of flaky salt works specifically by contrast — a small amount heightens the caramel’s sweetness and depth through that classic sweet-salty interplay, while too much simply reads as a salty drink rather than a sharpened caramel one.