
Mole Poblano Sauce
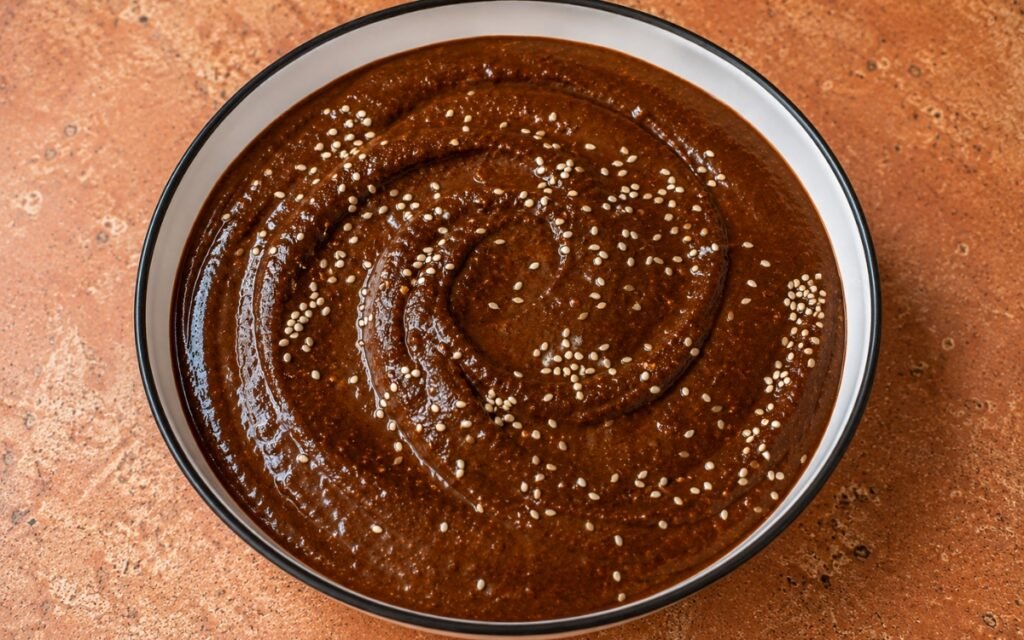
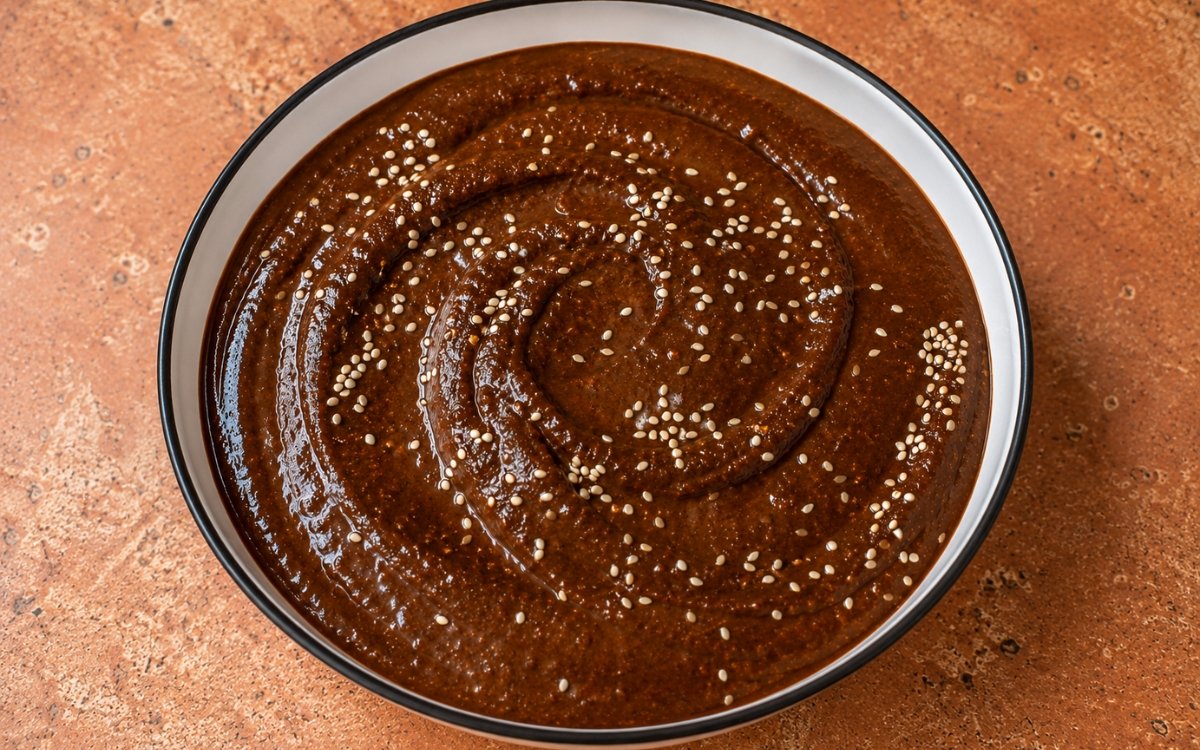
A classic mole poblano sauce made with dried chiles, roasted aromatics, nuts, seeds, spices, tortilla, bread, raisins, and Mexican chocolate, blended into a deep red-brown sauce that is thick, glossy, smooth, and richly complex. This version is built in the traditional layered way so the final mole tastes rounded, dark, savory, lightly sweet, gently smoky, and balanced rather than harsh or bitter. Toasting the dried chiles only briefly, watching closely to avoid any blackening, is the technique this whole sauce depends on for its foundation — scorched chile skins introduce a bitterness that no amount of chocolate, sugar, or careful simmering afterward can fully correct, the same brief-toast-never-burn principle used elsewhere in this collection whenever a dried chile needs to be woken up without being pushed into bitterness. Frying each nut, seed, and dried component separately, removing each the moment it’s fragrant and lightly coloured, is what builds real, layered depth without any single ingredient tipping into burnt territory. Frying the strained mole paste itself in fat before it’s diluted with stock is what deepens the flavour, cooks out raw notes, and gives the finished sauce its signature sheen. The payoff is a sauce that’s genuinely velvety, glossy, and integrated — chile depth first, then warm spice, nutty richness, gentle chocolate bitterness, and a mild sweet finish.
Prep Time : 35 min
Cook Time : 1 hr, 20 min
Servings : 8
35 min
1 hr, 20 min
8
Ingredients
For the Chiles
• 6 dried ancho chiles, stems and seeds removed — this one on Amazon
• 4 dried mulato chiles, stems and seeds removed — this one on Amazon
• 3 dried pasilla chiles, stems and seeds removed — this one on Amazon
• Hot water, as needed for soaking
For the Roasted Aromatics
• 500g ripe Roma tomatoes, halved
• 250g tomatillos, husked and rinsed
• 1 medium white onion, roughly sliced
• 6 garlic cloves, unpeeled
For the Nuts, Seeds, and Frying Components
• 60ml lard or neutral oil, plus more as needed — this one on Amazon
• 70g almonds
• 50g peanuts
• 35g pumpkin seeds
• 70g white sesame seeds, plus 1 extra tablespoon for garnish
• 60g raisins
• 2 corn tortillas, torn into pieces
• 2 slices rustic white bread or bolillo, torn into pieces
For the Spice Base
• 1 small cinnamon stick, preferably Ceylon if available
• 4 whole cloves — this one on Amazon
• 6 black peppercorns
• 4 allspice berries — this one on Amazon
• 1 tsp coriander seeds — this one on Amazon
• ½ tsp cumin seeds — this one on Amazon
• ½ tsp anise seeds — this one on Amazon
For Simmering and Finishing
• 1.2 to 1.5 litres chicken stock or light poultry stock, warm
• 90–100g Mexican chocolate, chopped — this one on Amazon
• 15–25g dark brown sugar or grated piloncillo, to taste
• 2 tsp fine sea salt, plus more to taste
This post may contain affiliate links. As an Amazon Associate I earn from qualifying purchases, at no additional cost to you.
Directions
- Prepare and Soften the Chiles
Wipe the dried chiles clean if dusty. Remove the stems and shake out the seeds. Tear the chiles open into large flat pieces. Heat a dry skillet over medium-low heat. Toast the chile pieces in batches for just a few seconds per side until fragrant and pliable. Press them lightly with a spatula as they toast. Do not let them blacken or scorch. Burnt chiles will make the entire mole bitter and muddy. Transfer the toasted chiles to a bowl and cover with hot water. Weigh them down with a small plate if needed and soak for 20 minutes until fully softened. The chiles should smell sweet, rich, and fruity, not acrid. After soaking, they should be soft and flexible all the way through. This brief, watched toast is calibrated specifically to wake up the chiles’ own aromatic oils without crossing into scorched territory — that distinction matters more here than in almost any other stage of the recipe, since bitterness introduced at this point carries all the way through to the finished mole with no real way to correct it later. - Roast the Aromatics
While the chiles soak, place the tomatoes, tomatillos, onion, and unpeeled garlic on a hot dry skillet, comal, or under a broiler. Roast until the tomatoes and tomatillos soften and blister, the onion has dark caramelized edges, and the garlic is softened inside its skins. Peel the roasted garlic once cool enough to handle. The vegetables should have visible char in spots for depth, but still taste sweet and juicy rather than burnt. Roasting the garlic in its skin protects the clove itself from direct scorching while still letting real heat build flavour — the skin acts as a buffer, allowing the garlic inside to soften and sweeten rather than burning the way a peeled clove exposed directly to the same heat would. - Fry the Nuts, Seeds, Raisins, Tortilla, and Bread
Heat the lard or oil in a medium pan over medium heat. Fry the almonds first until lightly golden, then remove. Fry the peanuts, then the pumpkin seeds, then the sesame seeds, removing each as soon as fragrant and lightly colored. Add the raisins and fry briefly until they puff slightly. Remove immediately. Fry the torn tortilla pieces until crisp and golden. Then fry the bread until golden and lightly toasted in the fat. Work in order and do not overcrowd the pan. Each ingredient should take on color and aroma, but none should become deeply brown or bitter. Sesame in particular can go from perfect to burnt very quickly. Frying each component separately and removing it individually, rather than combining everything in the pan at once, is what allows each ingredient to be pulled at its own specific ideal point — items with very different sizes and oil content, like delicate sesame seeds against denser almonds, simply don’t reach their peak colour at the same rate. - Toast the Whole Spices
In the now mostly dry pan, toast the cinnamon, cloves, peppercorns, allspice, coriander, cumin, and anise over low heat for 30–60 seconds, just until fragrant. Transfer immediately so they do not continue to cook in the hot pan. You should smell warm spice perfume clearly. If the spices smoke aggressively, they have gone too far. Transferring the spices out of the pan the moment they’re toasted, rather than leaving them to cool in place, matters because a hot pan retains enough residual heat to keep cooking the spices even after the burner is off — that continued cooking in the pan can push already-toasted spices past their ideal point without any further active heat being applied. - Blend the Mole Base
Drain the softened chiles, reserving a little soaking liquid only if needed for blending. In batches if necessary, blend together the softened chiles, roasted tomatoes, tomatillos, onion, and garlic, fried almonds, peanuts, pumpkin seeds, sesame seeds, raisins, tortillas, and bread, toasted spices, and 500–700ml of the warm stock. Blend until very smooth. The mixture should be thick but pourable. Add more stock as needed to keep the blender moving. For the smoothest classic texture, pass the blended mixture through a fine sieve into a bowl, pressing firmly with a ladle or spatula. The puree should be very smooth, with no obvious grit from skins or seeds. It should already taste complex, but still somewhat raw and unfinished. Straining through a fine sieve after blending catches whatever fibrous bits — chile skin, seed hulls, sesame husks — the blender itself couldn’t fully break down, which is what produces the genuinely smooth, restaurant-style texture classic mole is known for rather than a coarser, more rustic result. - Fry the Mole Paste
Heat 1–2 tablespoons more lard or oil in a heavy pot or Dutch oven over medium heat. Pour in the strained mole base carefully — it may splutter. Stir constantly for the first few minutes as it thickens and darkens. Cook the paste for 10–15 minutes, stirring often and scraping the bottom so nothing catches. This frying stage is essential. It deepens the flavor, cooks out raw notes, and gives the finished sauce its signature sheen and richness. The paste should darken to a deeper mahogany-brown, smell rounder and toastier, and leave slow thick trails when stirred. This step is genuinely non-negotiable within the classic mole method — the blended paste, however carefully every individual component was prepared, still tastes distinctly raw and disjointed until it’s actively fried in fat, a process that both concentrates and rounds out every flavour built up through the earlier stages into something cohesive. - Simmer and Finish the Mole
Gradually whisk in the remaining warm stock until the sauce reaches a thick but spoonable consistency. It should coat the back of a spoon heavily but still flow. Add the Mexican chocolate, 15g brown sugar or piloncillo to start, and the salt. Simmer very gently over low heat for 25–35 minutes, stirring often, especially along the base and corners of the pot. If it becomes too thick, loosen with a little more stock or hot water. Taste and adjust: more salt if it tastes flat, a little more sugar if the bitter cocoa/chile edge feels too sharp, a little more stock if it feels heavy or pasty. The finished mole should taste balanced: chile depth first, then warm spice, sesame-nut richness, a gentle chocolate bitterness, and a mild sweet finish. The sauce is ready when it looks glossy, feels velvety on the palate, and the flavors taste integrated rather than separated. Stirring often along the base and corners specifically, rather than just the centre, protects against the sauce’s own density — this thick a mixture is genuinely prone to catching and scorching in exactly those less-disturbed spots, which would introduce bitterness right at the final stage after everything else has been carefully protected from it. - Serve
Serve hot over chicken, turkey, pork, enchiladas, or roasted vegetables. If serving in the classic style, spoon the mole onto the plate or over the protein and finish with a light scattering of toasted white sesame seeds.
*Notes :
- The chile-toasting stage deserves to be understood as the single point in this entire recipe where a mistake is least correctable. Every other component — the vegetables, the nuts and seeds, the spices — gets blended, fried, and simmered together over multiple subsequent stages, giving some room for balance to shift and adjust. A scorched chile’s bitterness, by contrast, is baked into the sauce’s very foundation from that first stage onward, and no amount of sugar, chocolate, or careful simmering later fully removes it.
- Frying each nut, seed, and dried component individually rather than together is worth appreciating as real technique discipline rather than unnecessary fussiness. These ingredients vary considerably in size, density, and fat content, and they simply don’t reach their own ideal, lightly coloured point at the same rate in a shared pan — sesame seeds in particular can go from perfectly toasted to burnt within seconds, a margin that would be impossible to manage if it were competing for attention against denser almonds or peanuts in the same batch.
- The mole paste’s frying stage — after blending and straining, before the stock is fully incorporated — is worth recognising as the technique that actually transforms this recipe from a collection of well-prepared individual components into a genuine, unified mole. Every ingredient up to this point has been carefully toasted or roasted on its own, but the blended mixture still tastes distinctly raw and disjointed until this active frying stage concentrates and rounds those flavours into something cohesive.
- Resting the finished mole, as this recipe’s own notes point out, genuinely improves it — a detail worth taking seriously rather than dismissing as a minor suggestion. Complex sauces built from this many distinct, separately prepared components benefit from real time for those flavours to continue melding and settling together, which is part of why mole is traditionally understood as a dish that tastes even better the next day.
Why This Recipe Works
This recipe works because every component is built with real, individual attention before it’s ever combined: chiles toasted only briefly to avoid bitterness, vegetables roasted with visible char but genuine sweetness intact, and nuts, seeds, and dried components fried separately so each is pulled at its own ideal point.
Blending followed by straining produces a genuinely smooth base, and frying that strained paste in fat before diluting it with stock is what transforms all those individually prepared elements into a cohesive, integrated sauce rather than a collection of separate flavours.
Careful stirring during the final simmer protects the thick sauce from scorching, and the finished mole’s balance — chile, spice, nut richness, chocolate, and sweetness — is what defines it as properly made.
Ingredient Breakdown
Three Dried Chile Varieties (Ancho, Mulato, Pasilla)
The sauce’s flavour foundation — each contributing distinct depth, with mulato specifically responsible for the classic chocolate-like complexity.
Briefly, Carefully Toasted Chiles
The critical technique — woken up aromatically without ever crossing into the bitterness scorched chile skins would introduce.
Individually Fried Nuts, Seeds, and Dried Components
The layering technique — each pulled at its own ideal point, since they vary too much in size and fat content to fry together evenly.
Strained Mole Base
The texture-refining step — removes fibrous bits the blender alone couldn’t fully break down, for a genuinely smooth result.
Fried Mole Paste (Before Full Dilution)
The transformative stage — cooks out raw notes and concentrates flavour, turning individually prepared components into one unified sauce.
Flavor Structure Explained
This mole poblano follows a layered balance model:
- Deep chile foundation (three dried chile varieties)
- Warm complex spice (cinnamon, clove, allspice, coriander, cumin, anise)
- Rich nutty body (almonds, peanuts, pumpkin seeds, sesame)
- Gentle chocolate bitterness (Mexican chocolate)
- Mild sweet finish (brown sugar or piloncillo)
Three dried chile varieties provide the sauce’s deep, foundational flavour, each contributing its own character to the finished blend. Warm, complex whole spices — cinnamon, clove, allspice, coriander, cumin, and anise — layer in aromatic depth throughout. Fried nuts and seeds contribute rich, substantial body that thickens and rounds out the sauce. Mexican chocolate adds a gentle, distinctly bitter note that’s central to mole poblano’s identity, balanced by a mild sweetness from brown sugar or piloncillo that keeps the whole sauce from tasting harsh.
Common Mistakes to Avoid
- Scorching the Dried Chiles While Toasting – This introduces bitterness that carries through the entire finished sauce with no way to correct it later. Always toast only briefly, watching closely.
- Frying the Nuts and Seeds All Together – They reach their ideal colour at different rates, and sesame in particular burns very quickly. Always fry each component separately, removing it the moment it’s ready.
- Skipping the Straining Step – This leaves gritty texture from chile skins and seed hulls in the finished sauce. Always pass the blended base through a fine sieve for a genuinely smooth result.
- Skipping or Rushing the Paste-Frying Stage – The blended base tastes raw and disjointed without this step. Always fry the strained paste properly before diluting it with stock.
- Not Stirring the Base and Corners During the Final Simmer – This thick sauce is prone to scorching in those less-disturbed spots. Always stir attentively throughout the final simmer.
Variations
Extra-Smoky Version
Add a single dried chipotle to the chile mix for a more pronounced smoky depth.
Turkey Mole Version
Serve the finished sauce over roasted turkey instead of chicken for a traditional holiday preparation.
Milder Version
Reduce the mulato chiles slightly and increase ancho proportionally for a gentler, less intensely dark result.
Extra-Glossy Version
Whisk in a small spoonful of lard right at the end of cooking for additional shine and richness.
Storage & Make-Ahead
Mole almost always tastes even better after resting. If making ahead, cool and refrigerate, then reheat gently with a splash of stock or water to loosen.
Leftover mole freezes very well, kept in a sealed container for several months.
Garnish sesame seeds should be toasted separately and added only at serving so they stay fragrant and visible.
Frequently Asked Questions
Why is it so important that the dried chiles never blacken while toasting?
Scorched chile skins introduce a genuine bitterness that carries through the entire sauce, and unlike other components that get further cooked and blended together over multiple stages, that bitterness has no real opportunity to be corrected later. A brief, watched toast wakes up the chiles’ aromatic oils without crossing into that scorched territory.
Why does each nut, seed, and dried component need to be fried separately instead of all together?
These ingredients vary considerably in size, density, and fat content, meaning they don’t reach their own ideal, lightly coloured point at the same rate. Sesame seeds especially can go from perfectly toasted to burnt within seconds — a margin too narrow to manage if competing with denser ingredients in the same pan.
Why strain the blended mole base if it’s already been blended smooth?
A standard blender doesn’t always fully break down every fibrous bit — chile skin, seed hulls, sesame husks. Straining through a fine sieve catches what the blender missed, producing the genuinely smooth, restaurant-style texture classic mole is known for.
Why does the strained paste need to be fried before the stock is fully added?
This is the step that actually transforms individually prepared components into one unified sauce. The blended mixture still tastes distinctly raw and disjointed until this active frying stage concentrates and rounds those separate flavours into something cohesive.
Are there other classic mole sauces or mole-based dishes worth trying?
Mole Negro Sauce, Mole Coloradito Sauce, and Mole Verde Sauce are all worth exploring for different classic regional mole directions, each with its own distinct chile and ingredient profile. Chicken Mole Poblano and Chicken Enmoladas with Mole Poblano both put this exact sauce to use in complete, classic dishes worth trying as well.
Nutrition Facts
( per serving )
Calories
~320 kcal
Protein
8 g
Fat
22 g
Carbs
26 g
Calories
~320 kcal
Protein
8 g
Fat
22 g
Carbs
26 g
Related Recipes
Related Recipes
You might also like
You might also like

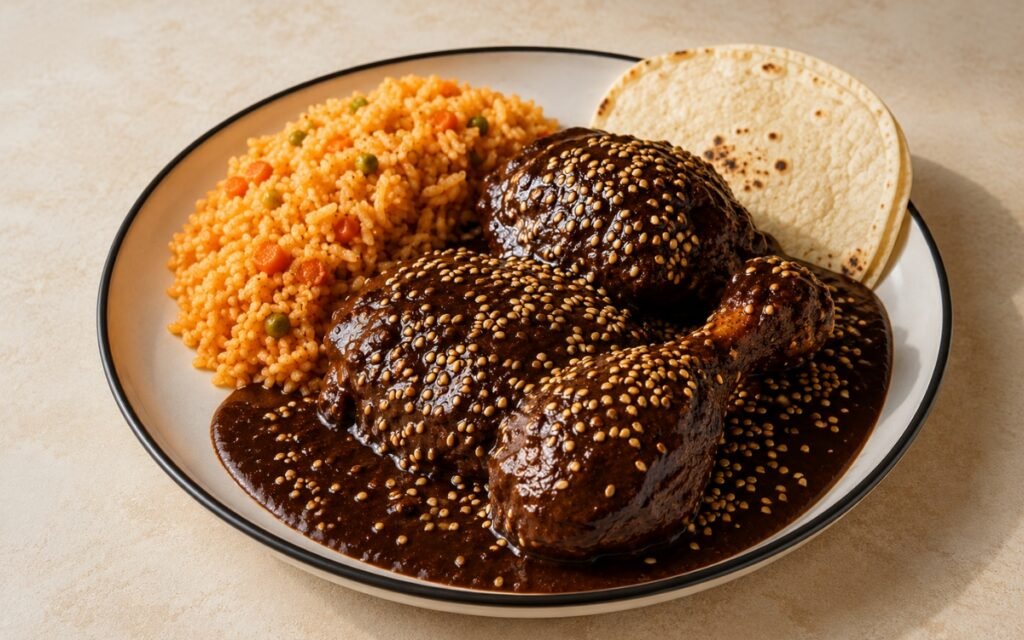
Chicken Mole Poblano
Gently poached chicken finished in deep, glossy mole poblano sauce, topped with toasted sesame seeds, served with Mexican rice and warm tortillas.
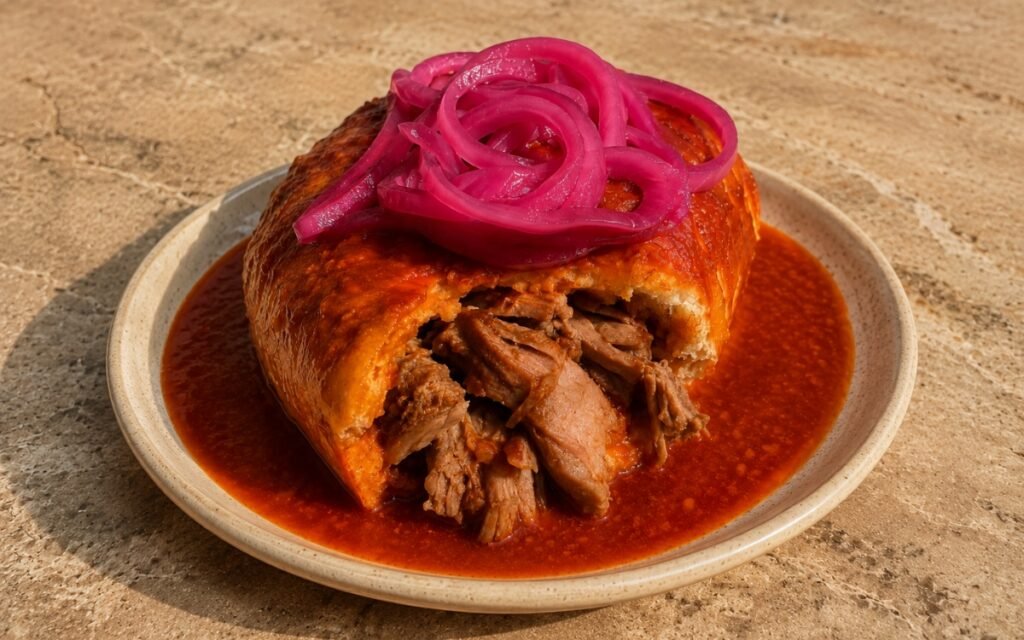
Sándwich Ahogado (Torta Ahogada)
Crusty birote rolls filled with juicy carnitas, drowned in a vivid, pourable chile de árbol sauce and topped with bright pickled onion.
Molletes Mexicanos
Toasted bolillo rolls spread with thick refried beans, topped with melted cheese and finished with fresh pico de gallo.
Mole Poblano Sauce
Ingredients
Method
- Wipe the dried chiles clean if dusty. Remove the stems and shake out the seeds. Tear the chiles open into large flat pieces. Heat a dry skillet over medium-low heat. Toast the chile pieces in batches for just a few seconds per side until fragrant and pliable. Press them lightly with a spatula as they toast. Do not let them blacken or scorch. Burnt chiles will make the entire mole bitter and muddy. Transfer the toasted chiles to a bowl and cover with hot water. Weigh them down with a small plate if needed and soak for 20 minutes until fully softened. The chiles should smell sweet, rich, and fruity, not acrid. After soaking, they should be soft and flexible all the way through. This brief, watched toast is calibrated specifically to wake up the chiles’ own aromatic oils without crossing into scorched territory — that distinction matters more here than in almost any other stage of the recipe, since bitterness introduced at this point carries all the way through to the finished mole with no real way to correct it later.
- While the chiles soak, place the tomatoes, tomatillos, onion, and unpeeled garlic on a hot dry skillet, comal, or under a broiler. Roast until the tomatoes and tomatillos soften and blister, the onion has dark caramelized edges, and the garlic is softened inside its skins. Peel the roasted garlic once cool enough to handle. The vegetables should have visible char in spots for depth, but still taste sweet and juicy rather than burnt. Roasting the garlic in its skin protects the clove itself from direct scorching while still letting real heat build flavour — the skin acts as a buffer, allowing the garlic inside to soften and sweeten rather than burning the way a peeled clove exposed directly to the same heat would.
- Heat the lard or oil in a medium pan over medium heat. Fry the almonds first until lightly golden, then remove. Fry the peanuts, then the pumpkin seeds, then the sesame seeds, removing each as soon as fragrant and lightly colored. Add the raisins and fry briefly until they puff slightly. Remove immediately. Fry the torn tortilla pieces until crisp and golden. Then fry the bread until golden and lightly toasted in the fat. Work in order and do not overcrowd the pan. Each ingredient should take on color and aroma, but none should become deeply brown or bitter. Sesame in particular can go from perfect to burnt very quickly. Frying each component separately and removing it individually, rather than combining everything in the pan at once, is what allows each ingredient to be pulled at its own specific ideal point — items with very different sizes and oil content, like delicate sesame seeds against denser almonds, simply don’t reach their peak colour at the same rate.
- In the now mostly dry pan, toast the cinnamon, cloves, peppercorns, allspice, coriander, cumin, and anise over low heat for 30–60 seconds, just until fragrant. Transfer immediately so they do not continue to cook in the hot pan. You should smell warm spice perfume clearly. If the spices smoke aggressively, they have gone too far. Transferring the spices out of the pan the moment they’re toasted, rather than leaving them to cool in place, matters because a hot pan retains enough residual heat to keep cooking the spices even after the burner is off — that continued cooking in the pan can push already-toasted spices past their ideal point without any further active heat being applied.
- Drain the softened chiles, reserving a little soaking liquid only if needed for blending. In batches if necessary, blend together the softened chiles, roasted tomatoes, tomatillos, onion, and garlic, fried almonds, peanuts, pumpkin seeds, sesame seeds, raisins, tortillas, and bread, toasted spices, and 500–700ml of the warm stock. Blend until very smooth. The mixture should be thick but pourable. Add more stock as needed to keep the blender moving. For the smoothest classic texture, pass the blended mixture through a fine sieve into a bowl, pressing firmly with a ladle or spatula. The puree should be very smooth, with no obvious grit from skins or seeds. It should already taste complex, but still somewhat raw and unfinished. Straining through a fine sieve after blending catches whatever fibrous bits — chile skin, seed hulls, sesame husks — the blender itself couldn’t fully break down, which is what produces the genuinely smooth, restaurant-style texture classic mole is known for rather than a coarser, more rustic result.
- Heat 1–2 tablespoons more lard or oil in a heavy pot or Dutch oven over medium heat. Pour in the strained mole base carefully — it may splutter. Stir constantly for the first few minutes as it thickens and darkens. Cook the paste for 10–15 minutes, stirring often and scraping the bottom so nothing catches. This frying stage is essential. It deepens the flavor, cooks out raw notes, and gives the finished sauce its signature sheen and richness. The paste should darken to a deeper mahogany-brown, smell rounder and toastier, and leave slow thick trails when stirred. This step is genuinely non-negotiable within the classic mole method — the blended paste, however carefully every individual component was prepared, still tastes distinctly raw and disjointed until it’s actively fried in fat, a process that both concentrates and rounds out every flavour built up through the earlier stages into something cohesive.
- Gradually whisk in the remaining warm stock until the sauce reaches a thick but spoonable consistency. It should coat the back of a spoon heavily but still flow. Add the Mexican chocolate, 15g brown sugar or piloncillo to start, and the salt. Simmer very gently over low heat for 25–35 minutes, stirring often, especially along the base and corners of the pot. If it becomes too thick, loosen with a little more stock or hot water. Taste and adjust: more salt if it tastes flat, a little more sugar if the bitter cocoa/chile edge feels too sharp, a little more stock if it feels heavy or pasty. The finished mole should taste balanced: chile depth first, then warm spice, sesame-nut richness, a gentle chocolate bitterness, and a mild sweet finish. The sauce is ready when it looks glossy, feels velvety on the palate, and the flavors taste integrated rather than separated. Stirring often along the base and corners specifically, rather than just the centre, protects against the sauce’s own density — this thick a mixture is genuinely prone to catching and scorching in exactly those less-disturbed spots, which would introduce bitterness right at the final stage after everything else has been carefully protected from it.
- Serve hot over chicken, turkey, pork, enchiladas, or roasted vegetables. If serving in the classic style, spoon the mole onto the plate or over the protein and finish with a light scattering of toasted white sesame seeds.