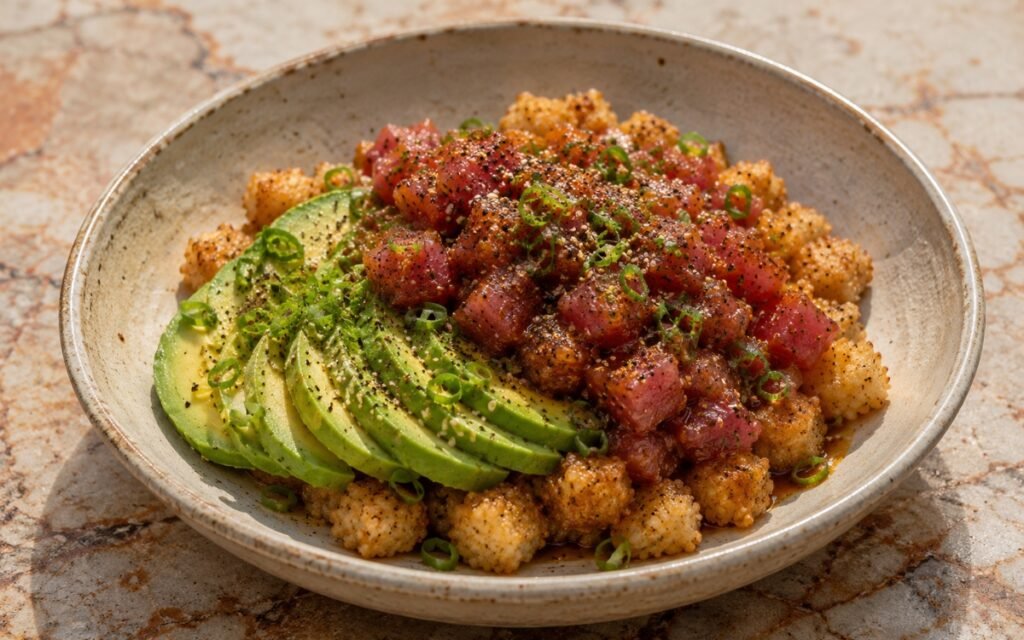
Crispy Rice Salad with Spicy Tuna & Avocado
Sushi rice seasoned with the vinegar-sugar-salt mixture while still warm — fanned and folded to the glossy, slightly tacky surface that correctly prepared sushi rice has — then spread on a baking sheet to cool completely before being compressed into compact balls or rough cubes. Baked at 220°C until the exterior is crunchy and lightly golden while the compressed centre retains its specific chewy, yielding quality — the textural contrast that makes crispy rice the specifically satisfying base it is. Sushi-grade tuna marinated for 10–15 minutes maximum in soy, sesame oil, rice vinegar, ginger, and garlic — the marinating window controlled specifically because the soy’s salt begins curing the tuna beyond this point, altering the clean, fresh texture that makes the preparation work. Assembled immediately before serving so the crispy rice encounters the tuna and its marinade while still warm and crunchy — the contrast between the crunchy, warm rice and the cold, fresh tuna and creamy avocado existing only in the window after plating.
Prep Time : 25 min
Cook Time : 30 min
Servings : 4
25 min
30 min
4
Ingredients
For the Crispy Rice
• 300g sushi rice, uncooked
• 480ml water
• 45ml rice vinegar — this one on Amazon
• 15g granulated sugar
• 7g kosher salt
• Cooking spray or neutral oil spray
For the Marinated Tuna
• 600g sushi-grade ahi tuna, cut into 1cm cubes
• 60ml soy sauce — this one on Amazon
• 15ml toasted sesame oil — this one on Amazon
• 10ml rice vinegar
• 5g fresh ginger, grated
• 2 garlic cloves, minced
For Assembly
• 2 ripe avocados, sliced
• 4 scallions, thinly sliced
• Freshly cracked black pepper
• Fine sea salt
This post may contain affiliate links. As an Amazon Associate I earn from qualifying purchases, at no additional cost to you.
Directions
- Cook and Season the Sushi Rice
Rinse the 300g of sushi rice under cold running water 4–6 times until the water running through the grains is nearly clear — sushi rice has a higher surface starch content than standard rice and requires thorough rinsing to prevent the seasoned rice from becoming gluey and dense rather than slightly sticky with individual grain identity. Combine the rinsed rice with 480ml of cold water in a medium saucepan. Bring to a full rolling boil, reduce immediately to the lowest possible setting, cover tightly, and simmer for 15 minutes without lifting the lid. Remove from heat and rest covered for 5 minutes. In a small bowl, stir together the 45ml of rice vinegar, 15g of sugar, and 7g of salt until fully dissolved. Transfer the cooked rice to a large, wide, non-metallic bowl. Pour the vinegar mixture evenly over the warm rice and fold it through using a cutting-and-folding motion with a rice paddle or flat wooden spoon — the cutting-and-folding rather than stirring preserves each grain’s individual integrity while distributing the seasoning evenly. While folding, fan the rice simultaneously with a hand fan, a magazine, or the pot’s lid — the moving air evaporates the surface moisture that the vinegar mixture brings to each grain, creating the characteristic slightly tacky, slightly dry, glossy surface of properly seasoned sushi rice. Spread the seasoned rice in an even layer on a large baking sheet. Allow to cool completely to room temperature — a minimum of 30 minutes. Do not refrigerate; cold temperature makes the starch retrogradation too rigid for the crispy rice balls to compress properly. - Form and Bake the Crispy Rice
Preheat the oven to 220°C. Line a clean baking sheet with parchment paper. With lightly wet hands — keeping a small bowl of cold water nearby — take approximately 2–3 tablespoons of the cooled sushi rice and compress it firmly into a compact ball or rough cube approximately 2.5cm in diameter. The key technique in this step is the firmness of compression: the rice must be pressed tightly enough that the formed shape holds together completely without any pieces separating when lifted, but not so aggressively that it becomes a dense, uniform block without any internal texture variation. Each piece should feel solid and dense when squeezed. Place each formed piece on the parchment-lined baking sheet with clear space between each — the pieces need surrounding hot air circulation to crisp on all surfaces rather than only on the tray-facing base. Spray each piece lightly and evenly with cooking spray or neutral oil — the oil coating is what produces the golden, crunchy surface during baking by facilitating the browning of the rice starch. Without oil the surface dries rather than crisps. Place in the preheated 220°C oven and bake for 25–35 minutes, turning each piece once carefully at the halfway point to expose the other faces to the oven’s direct heat. The correctly baked crispy rice should feel firm and crisp across all surfaces when pressed and show a light golden colour on the exposed faces. The interior — accessed by pressing firmly with a finger — should yield slightly, indicating the remaining soft-chewy core that is the specific textural pleasure of crispy rice. Fully dried-through rice pieces without a chewy core lose the contrast that makes the preparation compelling. - Marinate the Tuna
While the rice bakes in its final 15 minutes, prepare the tuna. In a medium bowl, whisk together the 60ml of soy sauce, 15ml of sesame oil, 10ml of rice vinegar, 5g of grated ginger, and 2 minced garlic cloves until combined. Add the 600g of cubed sushi-grade ahi tuna and gently fold to coat every piece evenly — fold rather than stir, which would bruise the delicate tuna cubes and begin to break down their clean, firm texture. Refrigerate for exactly 10–15 minutes. This marinating window is specifically controlled: the soy sauce’s sodium chloride begins drawing moisture from the tuna’s surface through osmosis from the moment of contact, beginning a mild curing process that firms the surface and slightly changes the texture. Within 10–15 minutes the tuna’s surface has absorbed the marinade’s flavour without any curing damage to the texture — it remains clean, fresh, and yielding. Significantly beyond 15 minutes the curing effect becomes noticeable — the tuna becomes firmer and the fresh, clean eating quality that makes sushi-grade tuna specifically worth using begins to be lost. Always use sushi-grade ahi tuna sourced from a reputable fishmonger for this preparation. - Prepare the Avocado
Halve, pit, and slice each avocado thinly immediately before assembly — avocado oxidises rapidly once cut, and the clean, pale green-yellow colour is part of the dish’s visual appeal. Season the sliced avocado lightly with fine sea salt and freshly cracked black pepper directly on the cutting board before arranging on the plate — seasoning the avocado separately ensures it is specifically seasoned rather than relying on the marinade’s drizzle to season it from contact. - Assemble and Serve Immediately
Divide the warm crispy rice pieces among four shallow bowls or plates — 5–6 pieces per person. Spoon the marinated tuna generously over the crispy rice immediately — the warm rice beneath the cold, marinated tuna produces the thermal contrast that is one of the preparation’s most pleasurable qualities. Arrange the thinly sliced avocado alongside the tuna rather than over it — the distinct placement allows each component’s individual identity to be visible and for the person eating to combine them in each bite as preferred. Spoon a few tablespoons of the accumulated tuna marinade from the bottom of the marinating bowl over each portion — the marinade has absorbed some of the tuna’s natural juices during the 10–15 minute rest and is more complex and specifically flavourful than it was when first mixed. Scatter the thinly sliced scallions over each bowl. Serve immediately — the window between the warm, crunchy rice and the softening that occurs as the marinade contacts the rice surface is approximately 5–10 minutes.
*Notes :
- The crispy rice technique — sushi rice formed into compressed balls and baked or fried until crunchy — became widely associated with the omakase and Japanese-inspired small plates restaurant tradition of the 2010s and 2020s, appearing as a bite-sized appetiser at many high-end sushi and fusion restaurants. The specific pleasure it provides is textural: the crunch of the baked rice exterior against the slightly chewy compressed interior, against the silky, cold marinated tuna, against the creamy avocado. All four textures are present simultaneously in a single bite, which is why the dish requires immediate serving — any delay allows the marinade to soften the rice, the tuna to warm, and the avocado to oxidise, progressively eliminating the contrasts that make it specifically compelling.
- For the crispiest baked result, the rice pieces benefit from being formed and refrigerated uncovered on the baking sheet for 30–60 minutes before baking — the refrigerated air drying the surface slightly and producing a faster, crisper crust in the oven. This also makes the pieces easier to handle during turning at the halfway point.
Why This Recipe Works
This recipe works because it controls every variable that affects the specific quality each component provides: the sushi rice fanned-and-folded to the correct surface for compression and baking; the rice pieces compressed firmly enough for cohesion; the tuna marinated for the maximum flavour window before curing damage begins; the avocado seasoned separately before assembly; and the dish served immediately while all four textural contrasts are simultaneously at their best.
Ingredient Breakdown
Sushi Rice (Fanned-and-Folded, Room Temperature Before Forming)
The crispy rice base — correct sushi rice preparation produces the specific slightly tacky, grain-distinct surface that compresses into cohesive pieces; room temperature rather than cold for proper compression.
Firm Compression into Balls or Cubes
The structural requirement — pieces must be dense enough to hold their shape during baking and handling but retain a slightly yielding interior after the crust sets.
Sushi-Grade Ahi Tuna (10–15 Minute Maximum Marination)
The fresh, clean-textured protein — sushi-grade for safe cold serving; maximum 15 minutes marination before curing begins to change the texture.
Sesame Oil and Soy Marinade
The Japanese-influenced dressing — the tuna marinade doubles as the bowl’s finishing sauce when drizzled over the assembled dish from the bottom of the bowl.
Immediate Assembly and Service
The window management — warm crispy rice against cold marinated tuna against room-temperature avocado existing at maximum contrast only in the first 5–10 minutes after assembly.
Flavor Structure Explained
This Crispy rice salad follows a layered balance model:
- Crunchy-chewy foundation (crispy rice)
- Savory umami depth (soy sauce, sesame oil)
- Clean fresh protein core (ahi tuna)
- Cool creamy contrast (avocado)
- Aromatic finish (sesame, ginger, garlic)
Crispy rice defines the eating experience with its contrast between deeply toasted crunch and softer interior chew, creating the dish’s essential texture. Marinated tuna provides clean oceanic sweetness supported by soy-driven umami and sesame richness. Avocado introduces cool, buttery creaminess that balances both the tuna and the crisp rice. Sesame oil, ginger, and garlic add aromatic warmth and nuttiness that give the bowl its Japanese-inspired character. The dish succeeds because texture and flavor work together — crisp against creamy, warm against cool, savory against fresh — in every bite.
Common Mistakes to Avoid
- Not Compressing the Rice Firmly Enough – Loosely formed pieces fall apart during baking and when the tuna is spooned over them. Always compress firmly until the piece feels dense and holds its shape completely.
- Marinating the Tuna Longer Than 15 Minutes – Beyond 15 minutes the soy’s salt cures the tuna’s surface, altering the clean fresh texture. Always marinate for exactly 10–15 minutes.
- Serving After the Rice Has Softened – The marinade begins softening the rice crust within 5–10 minutes of contact. Always serve immediately after assembly.
- Not Fanning the Sushi Rice During Seasoning – Unfanned seasoned rice retains surface moisture and produces wet, gummy pieces that bake less crisply. Always fan while folding.
- Using Cold Rice for Forming – Refrigerated sushi rice is too rigid for proper compression — the starch retrogrades too completely and the pieces crack rather than compressing cleanly. Always form at room temperature.
Variations
With Spicy Mayo
Drizzle each assembled bowl with a spicy mayo — 60g Kewpie mayonnaise whisked with 20g sriracha and 5ml lime juice — over the tuna and avocado alongside the marinade drizzle. The creamy, spiced mayo is the classic pairing for tuna and crispy rice in the restaurant version of this dish and adds the spicy element the title implies.
Fried Crispy Rice
Instead of baking, shallow-fry the formed rice pieces in 2cm of neutral oil at 175°C for 2–3 minutes per side until deeply golden — the fried version produces a more dramatically crisp, less chewy exterior than baking and is the method used in most restaurant versions.
With Salmon
Replace the ahi tuna with 600g of sushi-grade salmon cut into 1cm cubes — the same marinating technique applies. Salmon’s higher fat content produces a richer, slightly more buttery-tasting result against the crispy rice.
With Cucumber
Add 150g of thinly sliced cucumber alongside the avocado — its cool crunch provides a different texture variation and specifically complements the Japanese flavour profile.
Storage & Make-Ahead
Sushi rice for baking can be shaped up to 2 hours in advance and refrigerated uncovered on a lined baking sheet. The dry air in the refrigerator helps remove surface moisture, resulting in an even crispier baked texture.
Baked crispy rice pieces are best eaten within 30 minutes of baking. If they are made slightly ahead of time, they can be re-crisped in a 200°C oven or in an air fryer at 190°C for about 5 minutes.
Marinated tuna should be used immediately after its 10 to 15 minute marinating period. It is not intended for storage once marinated.
The assembled dish is not suitable for storage. For the best texture, freshness, and food safety, it should always be assembled and served immediately.
Frequently Asked Questions
What is sushi-grade ahi tuna?
Sushi-grade tuna has been handled, processed, and typically frozen according to standards that make it safe to consume raw or minimally marinated. Ahi tuna — specifically yellowfin or bigeye — is the variety most commonly used for this preparation, with a clean, mild, slightly oceanic flavour and firm texture that holds its cube shape well. Source from reputable fishmongers or Japanese grocery stores.
Why compress the rice so firmly?
The compression creates the structural cohesion that allows the rice piece to hold together during baking, turning, and serving under the weight of the tuna and marinade. Loosely formed pieces disintegrate at the first contact with liquid.
Why only 10–15 minutes marinating for the tuna?
Soy sauce’s sodium chloride draws moisture from the tuna’s surface through osmosis from the moment of contact — a mild curing process that begins firming and texturally altering the tuna beyond 15 minutes. Within 10–15 minutes the flavour has penetrated the surface without any texture damage.
Why does the dish need to be served immediately?
The marinade liquid that coats the tuna begins contacting and softening the crispy rice crust within minutes of assembly — eliminating the specific crunchy-warm-against-cold-tuna contrast that makes the preparation specifically compelling. The entire eating pleasure is concentrated in the first 5–10 minutes after plating.
What makes this a crispy rice salad rather than a crispy rice bowl?
The construction — the rice pieces as the base with components arranged over rather than mixed through — and the immediate serving requirement produce a salad-like presentation where each component retains its individual identity rather than combining into a unified bowl.
Nutrition Facts
( per serving )
Calories
~620 kcal
Protein
42 g
Fat
22 g
Carbs
64 g
Calories
~620 kcal
Protein
42 g
Fat
22 g
Carbs
64 g
Related Recipes
Related Recipes

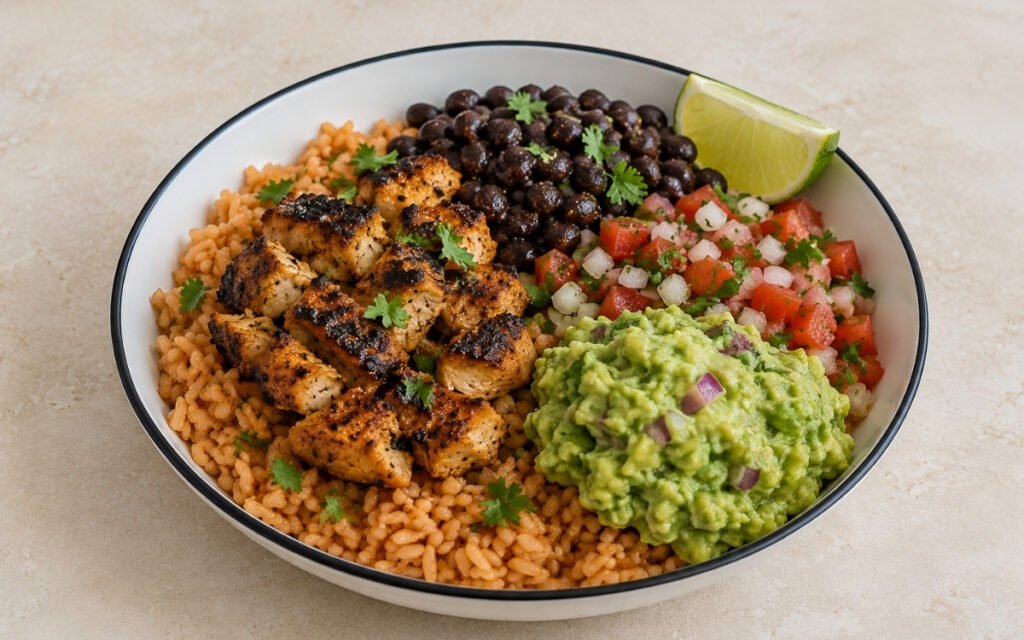
Beef Burrito Rice Bowl
Ground beef pressed flat in smoking cast iron, seared until deeply caramelised, then broken down and seasoned — over Mexican rice with spiced beans, pico, corn salad, guacamole, and cheese blend.
Classic Chicken Burrito Bowl
Smoked paprika marinated chicken seared golden over Mexican rice — with spiced black beans, pico de gallo, charred corn salad, guacamole, and Mexican cheese blend. The full burrito in a bowl.
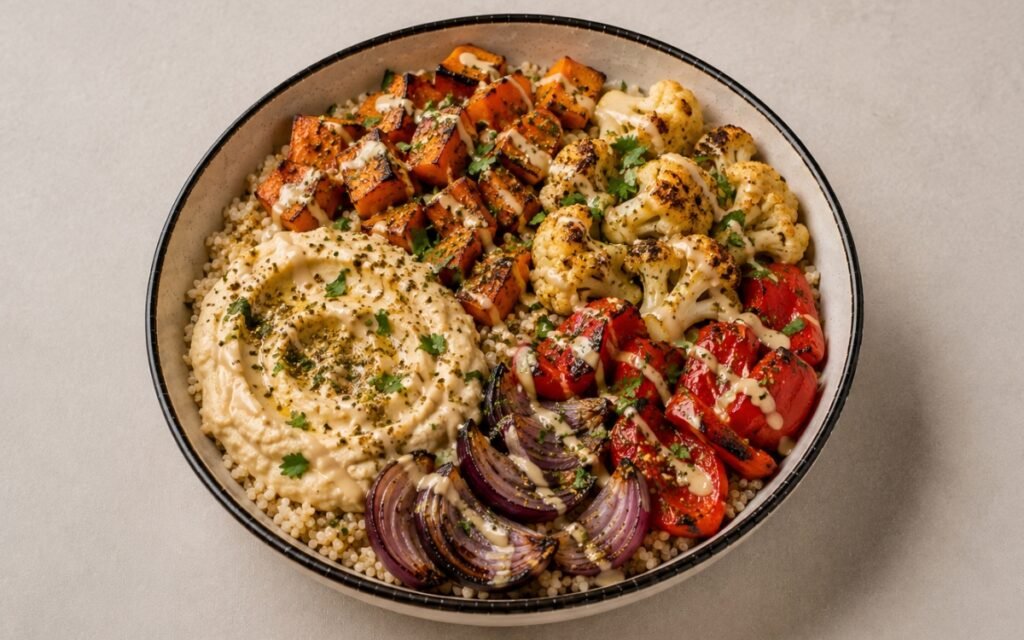
Roasted Veggie Quinoa Bowl
Za’atar-spiced sweet potatoes, cauliflower, and peppers roasted on two sheets for genuine caramelisation — over quinoa with Classic Hummus and lemon-tahini drizzle. 55 minutes.

You might also like
You might also like
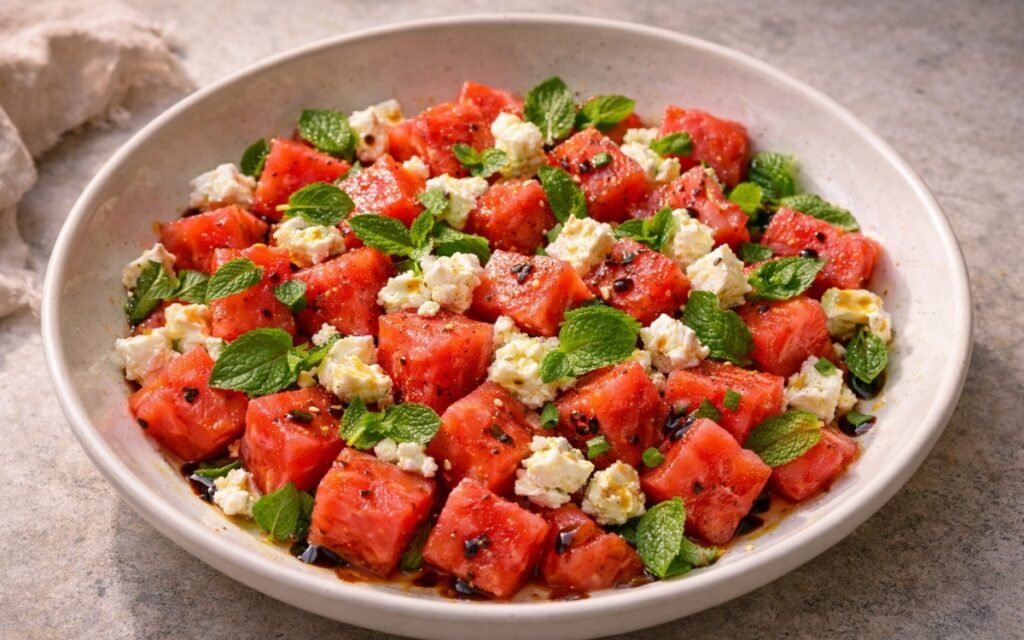
Watermelon Feta Salad
Sweet watermelon, salty feta, fresh mint, and honey-lime-balsamic dressing — the freshest summer salad built entirely on contrast, ready in 10 minutes.
Lemon Parmesan Kale Salad
Massaged kale with bright lemon dressing, shaved Parmesan, toasted almonds, and cranberries.
Strawberry Basil Smash Mocktail
Fresh mashed strawberries with honey, lime, and folded basil over club soda — bright and sweet.


Crispy Rice Salad with Spicy Tuna & Avocado
Ingredients
Method
- Rinse the 300g of sushi rice under cold running water 4–6 times until the water running through the grains is nearly clear — sushi rice has a higher surface starch content than standard rice and requires thorough rinsing to prevent the seasoned rice from becoming gluey and dense rather than slightly sticky with individual grain identity. Combine the rinsed rice with 480ml of cold water in a medium saucepan. Bring to a full rolling boil, reduce immediately to the lowest possible setting, cover tightly, and simmer for 15 minutes without lifting the lid. Remove from heat and rest covered for 5 minutes. In a small bowl, stir together the 45ml of rice vinegar, 15g of sugar, and 7g of salt until fully dissolved. Transfer the cooked rice to a large, wide, non-metallic bowl. Pour the vinegar mixture evenly over the warm rice and fold it through using a cutting-and-folding motion with a rice paddle or flat wooden spoon — the cutting-and-folding rather than stirring preserves each grain’s individual integrity while distributing the seasoning evenly. While folding, fan the rice simultaneously with a hand fan, a magazine, or the pot’s lid — the moving air evaporates the surface moisture that the vinegar mixture brings to each grain, creating the characteristic slightly tacky, slightly dry, glossy surface of properly seasoned sushi rice. Spread the seasoned rice in an even layer on a large baking sheet. Allow to cool completely to room temperature — a minimum of 30 minutes. Do not refrigerate; cold temperature makes the starch retrogradation too rigid for the crispy rice balls to compress properly.
- Preheat the oven to 220°C. Line a clean baking sheet with parchment paper. With lightly wet hands — keeping a small bowl of cold water nearby — take approximately 2–3 tablespoons of the cooled sushi rice and compress it firmly into a compact ball or rough cube approximately 2.5cm in diameter. The key technique in this step is the firmness of compression: the rice must be pressed tightly enough that the formed shape holds together completely without any pieces separating when lifted, but not so aggressively that it becomes a dense, uniform block without any internal texture variation. Each piece should feel solid and dense when squeezed. Place each formed piece on the parchment-lined baking sheet with clear space between each — the pieces need surrounding hot air circulation to crisp on all surfaces rather than only on the tray-facing base. Spray each piece lightly and evenly with cooking spray or neutral oil — the oil coating is what produces the golden, crunchy surface during baking by facilitating the browning of the rice starch. Without oil the surface dries rather than crisps. Place in the preheated 220°C oven and bake for 25–35 minutes, turning each piece once carefully at the halfway point to expose the other faces to the oven’s direct heat. The correctly baked crispy rice should feel firm and crisp across all surfaces when pressed and show a light golden colour on the exposed faces. The interior — accessed by pressing firmly with a finger — should yield slightly, indicating the remaining soft-chewy core that is the specific textural pleasure of crispy rice. Fully dried-through rice pieces without a chewy core lose the contrast that makes the preparation compelling.
- While the rice bakes in its final 15 minutes, prepare the tuna. In a medium bowl, whisk together the 60ml of soy sauce, 15ml of sesame oil, 10ml of rice vinegar, 5g of grated ginger, and 2 minced garlic cloves until combined. Add the 600g of cubed sushi-grade ahi tuna and gently fold to coat every piece evenly — fold rather than stir, which would bruise the delicate tuna cubes and begin to break down their clean, firm texture. Refrigerate for exactly 10–15 minutes. This marinating window is specifically controlled: the soy sauce’s sodium chloride begins drawing moisture from the tuna’s surface through osmosis from the moment of contact, beginning a mild curing process that firms the surface and slightly changes the texture. Within 10–15 minutes the tuna’s surface has absorbed the marinade’s flavour without any curing damage to the texture — it remains clean, fresh, and yielding. Significantly beyond 15 minutes the curing effect becomes noticeable — the tuna becomes firmer and the fresh, clean eating quality that makes sushi-grade tuna specifically worth using begins to be lost. Always use sushi-grade ahi tuna sourced from a reputable fishmonger for this preparation.
- Halve, pit, and slice each avocado thinly immediately before assembly — avocado oxidises rapidly once cut, and the clean, pale green-yellow colour is part of the dish’s visual appeal. Season the sliced avocado lightly with fine sea salt and freshly cracked black pepper directly on the cutting board before arranging on the plate — seasoning the avocado separately ensures it is specifically seasoned rather than relying on the marinade’s drizzle to season it from contact.
- Divide the warm crispy rice pieces among four shallow bowls or plates — 5–6 pieces per person. Spoon the marinated tuna generously over the crispy rice immediately — the warm rice beneath the cold, marinated tuna produces the thermal contrast that is one of the preparation’s most pleasurable qualities. Arrange the thinly sliced avocado alongside the tuna rather than over it — the distinct placement allows each component’s individual identity to be visible and for the person eating to combine them in each bite as preferred. Spoon a few tablespoons of the accumulated tuna marinade from the bottom of the marinating bowl over each portion — the marinade has absorbed some of the tuna’s natural juices during the 10–15 minute rest and is more complex and specifically flavourful than it was when first mixed. Scatter the thinly sliced scallions over each bowl. Serve immediately — the window between the warm, crunchy rice and the softening that occurs as the marinade contacts the rice surface is approximately 5–10 minutes.