
Calzone with Ricotta and Mozzarella
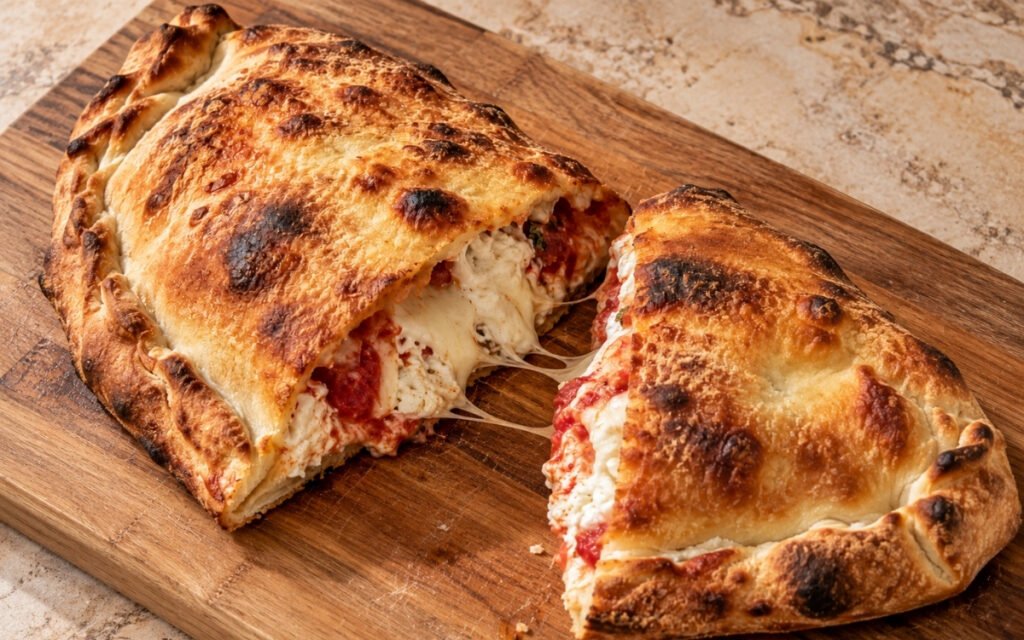
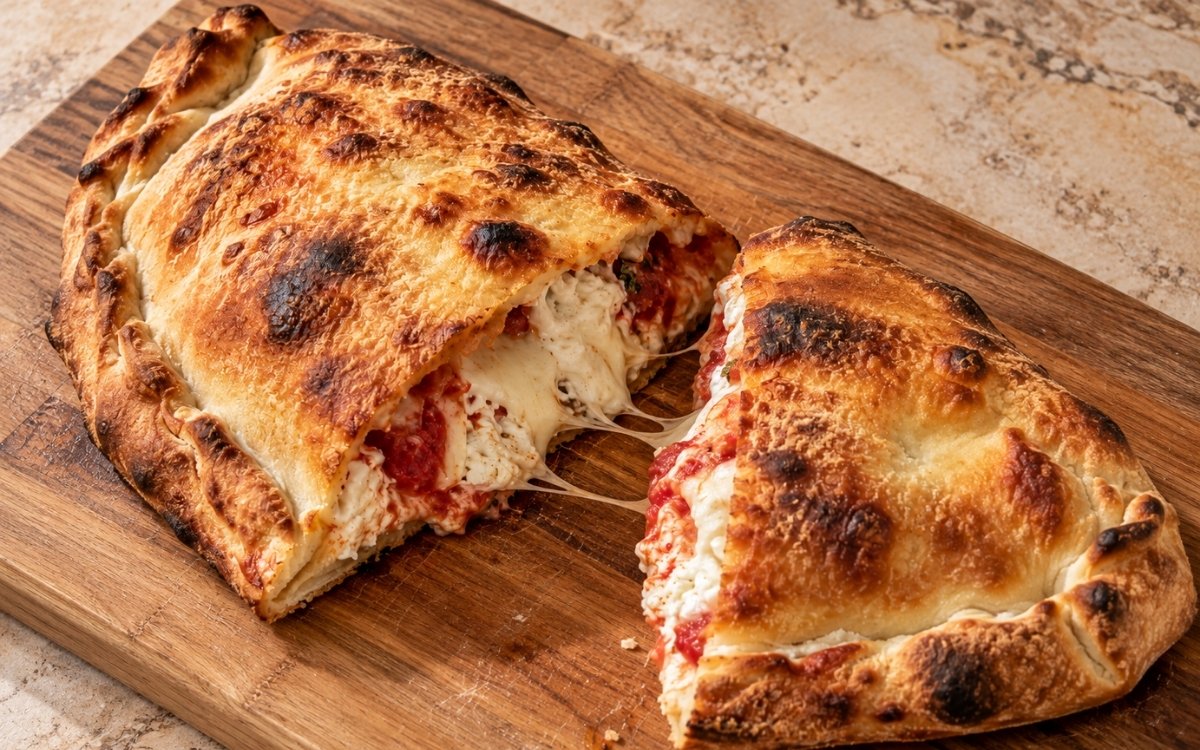
Golden baked calzones made with long-fermented pizza dough, filled with creamy ricotta, melted mozzarella, Parmesan, a little thick tomato sauce, black pepper, and basil, using half a batch of Homemade Pizza Dough for 4 individual calzones. Draining the ricotta thoroughly before it ever meets the other filling ingredients is the technique this whole calzone depends on for a genuinely sealed, non-leaking result — wet ricotta is one of the main reasons calzones turn soggy or split open, the same drain-the-cheese-first principle used elsewhere in this collection whenever a wet dairy filling’s own excess moisture would otherwise compromise the dough wrapped around it. Sealing the edge with real, deliberate pressure and crimping, rather than a quick pinch, is what keeps every calzone properly puffed instead of leaking its filling into the oven. Keeping the tomato sauce inside genuinely modest, rather than generous, is what protects the center from turning wet while extra sauce waits on the side for dipping. The payoff is a calzone with real, satisfying contrast — a deeply golden, blistered, crisp-edged crust giving way to hot, stretchy, creamy cheese filling.
Prep Time : 35 min
Cook Time : 10–14 min
Servings : 4 calzones
35 min
10–14 min
4 calzones
Ingredients
For the Dough
• ½ batch Homemade Pizza Dough, divided into 4 balls, about 250g each
• 00 flour or fine semolina, for dusting
For the Ricotta Filling
• 500g whole-milk ricotta, drained if wet — this one on Amazon
• 300g low-moisture mozzarella, grated — this one on Amazon
• 60g Parmesan or Pecorino Romano, finely grated — this one on Amazon
• 1 egg yolk
• 10g fresh basil, torn or chopped
• 3g fine sea salt, or to taste
• 2g black pepper
• 1g dried oregano, optional
For the Tomato Sauce
• 250g thick tomato sauce or pizza sauce
• 5ml olive oil
• 1 small garlic clove, finely grated, optional
• Pinch of salt, if needed
For Finishing
• 15ml olive oil, for brushing — this one on Amazon
• Extra Parmesan or Pecorino, for finishing, optional
• Extra tomato sauce, warmed, for dipping or serving on the side
This post may contain affiliate links. As an Amazon Associate I earn from qualifying purchases, at no additional cost to you.
Directions
- Bring the Dough to Room Temperature
Remove the 4 pizza dough balls from the refrigerator 2–3 hours before shaping. Keep them covered so the surface does not dry out. The dough should feel soft, relaxed, and airy before shaping. Cold dough fights back, tears more easily, and will not stretch cleanly into a calzone. Warm, relaxed dough folds and seals much better. That tempering window lets the cold, tightened gluten network genuinely relax before it’s ever asked to fold, seal, and hold a generous filling. - Drain the Ricotta
If the ricotta looks loose or wet, place it in a fine sieve over a bowl for 30–60 minutes. It should be creamy but thick, not watery. Wet ricotta is one of the main reasons calzones leak or turn soggy inside. The filling should hold together on a spoon. That draining step protects the whole calzone downstream — any excess moisture left in the ricotta has nowhere to go once sealed inside the dough except directly into the crust itself. - Make the Cheese Filling
In a bowl, mix the ricotta, grated mozzarella, Parmesan or Pecorino, egg yolk, basil, salt, black pepper, and oregano if using. Mix just until combined. The filling should be thick, creamy, and spoonable. The egg yolk helps bind the ricotta filling without making it heavy. Do not add a whole egg unless your ricotta is very dry. Using only the yolk, rather than the whole egg, adds real binding structure to the filling without introducing the extra water content the white would carry. - Prepare the Tomato Sauce
Stir the tomato sauce with the olive oil and garlic if using. Taste and adjust with a small pinch of salt only if needed. Use a thick sauce. If the sauce is loose or watery, simmer it for a few minutes until tighter, then cool before using. Only a little tomato sauce goes inside the calzone. Too much sauce makes the center wet and increases the chance of leaking. That deliberately thick, modest sauce amount protects the sealed dough from the same kind of moisture overload a wet ricotta would cause, keeping the filling’s overall liquid content genuinely manageable. - Preheat the Oven
Place a pizza steel or pizza stone in the oven and preheat to the highest temperature your oven can safely reach, ideally 260–290°C, for at least 45–60 minutes. If baking on a tray instead, preheat the tray as well. Strong bottom heat sets the crust quickly and helps the calzone puff instead of spreading flat. That extended preheat ensures the baking surface itself, not just the surrounding air, has genuinely reached its target temperature throughout. - Shape the First Dough Round
Dust the work surface lightly with 00 flour or semolina. Place one dough ball on the surface and press from the center outward, leaving the outer edge slightly thicker. Stretch gently into a round about 25–28cm wide. Do not roll it paper-thin. The dough needs enough strength to hold the filling and seal without tearing. Keeping the dough at this specific thickness, rather than rolling it thinner, is what gives it the structural strength this calzone’s genuinely substantial filling actually requires to stay contained. - Fill the Calzone
Spread 1–2 tbsp tomato sauce over one half of the dough, leaving a clean border of about 2cm around the edge. Add about ¼ of the ricotta filling over the sauce. Keep the filling slightly away from the edge. Fold the empty half of the dough over the filling to make a half-moon. Do not overfill. A calzone should look full but still seal easily. If filling squeezes out while closing, there is too much inside. Leaving that clean, filling-free border around the edge is what gives the dough real, uncontaminated surface to actually press together and seal cleanly in the next stage. - Seal the Edge
Press the edges firmly together with your fingers, then fold or crimp the seam over itself to make a tight seal. Make 1–2 small slits on top with a sharp knife to let steam escape. Brush the top lightly with olive oil. Sealing is not cosmetic. A weak seam opens in the oven, cheese leaks out, and the calzone loses its puff. That deliberate crimping, folding the seam over itself rather than simply pinching it once, is what actually protects the calzone from splitting under the internal steam pressure that builds as it bakes. - Bake
Transfer the calzone to the hot stone, steel, or tray. Bake for 10–14 minutes, until deeply golden, puffed, blistered in spots, and crisp around the edges. The calzone is ready when the crust is fully browned and the filling inside is hot and melted. If the outside is browning too fast before the dough feels set, lower the oven slightly after the first few minutes. The crust needs colour, but the folded dough must cook through. That willingness to lower the oven partway through protects the dough’s own doneness from being sacrificed for the sake of surface colour alone — a browned exterior over a still-raw fold would miss the point entirely. - Repeat with the Remaining Dough
Shape, fill, seal, and bake the remaining 3 calzones the same way. Keep unused dough balls covered while working so they do not dry out. Keeping every unshaped dough ball genuinely covered protects its surface from drying and cracking, which would otherwise compromise its ability to fold and seal cleanly once its turn comes. - Rest and Serve
Let each calzone rest for 3–5 minutes before cutting. Serve with warm tomato sauce on the side and a little extra Parmesan or Pecorino if desired. Cutting immediately can make the cheese spill out aggressively. A short rest lets the filling settle while staying hot and stretchy. That brief rest lets the molten filling firm up just enough to hold together cleanly when cut, rather than flooding out the moment a knife or fork breaks the crust.
*Notes :
- Draining the ricotta thoroughly before it ever joins the rest of the filling deserves genuine recognition as the technique most directly responsible for whether these calzones stay properly sealed or leak and turn soggy. Wet ricotta has nowhere else to release its excess moisture once fully enclosed in dough, and that trapped liquid works directly against both the filling’s own texture and the surrounding crust’s ability to bake through cleanly.
- Sealing the edge with real, deliberate crimping, rather than a single quick pinch, deserves the same attention this collection gives to every dumpling or stuffed dough that faces real internal pressure during baking. The recipe’s own explicit statement that sealing “is not cosmetic” reflects a genuine, functional requirement — a weak seam is specifically where the internal steam pressure a baking calzone builds finds its way out, taking the cheese filling along with it.
- Keeping the tomato sauce inside the calzone genuinely modest, with the bulk of it reserved for dipping on the side, deserves attention as a deliberate structural choice rather than a matter of taste. That restraint protects the filling’s overall moisture balance in exactly the same way draining the ricotta does, giving the sealed dough a real chance to bake through without becoming waterlogged from the inside.
- Using only the egg yolk in the filling, rather than the whole egg, deserves genuine respect as a small but functionally precise ingredient choice. The yolk contributes real binding structure to the ricotta mixture without introducing the extra water content the white would carry — a distinction that matters directly given how much this recipe already depends on managing the filling’s total moisture.
Why This Recipe Works
This recipe works because the ricotta is drained thoroughly, protecting both the filling’s own texture and the surrounding dough from excess moisture. The filling is bound with just the egg yolk, adding structure without extra liquid, and the tomato sauce is kept deliberately modest inside while extra sauce waits on the side.
Real, deliberate crimping seals each calzone against the internal steam pressure that builds during baking, and a fully preheated stone or steel sets the crust quickly enough to puff rather than spread. A brief rest after baking lets the hot, stretchy filling settle before cutting.
Ingredient Breakdown
Thoroughly Drained Ricotta
The critical technique — removes excess moisture that would otherwise leak or soften the crust from the inside out.
Low-Moisture Mozzarella
The critical ingredient choice — melts cleanly into the filling without the excess water fresh mozzarella would introduce.
Egg Yolk (Not Whole Egg)
The critical binding technique — adds real structure to the ricotta filling without extra water content.
Deliberately Modest Tomato Sauce
The critical technique — kept minimal inside to protect the filling’s overall moisture balance, with extra reserved for dipping.
Firmly Crimped, Sealed Edge
The critical technique — protects the calzone from splitting under the internal steam pressure built during baking.
Fully Preheated Baking Surface
The critical baking technique — sets the crust quickly, helping the calzone puff rather than spread flat.
Flavor Structure Explained
This calzone with ricotta and mozzarella follows a layered balance model:
- Blistered, crisp foundation (fully preheated, well-sealed dough)
- Creamy rich centre (drained ricotta, mozzarella, Parmesan filling)
- Fresh herbal lift (fresh basil)
- Modest tomato depth (thick sauce, kept restrained inside)
- Sharp finishing note (extra Parmesan or Pecorino)
Fully preheated, well-sealed dough provides this calzone’s blistered, genuinely crisp foundation. Drained ricotta, mozzarella, and Parmesan together define its rich, creamy centre, free of excess moisture. Fresh basil layers in real herbal lift throughout the filling. A modest amount of thick tomato sauce, kept deliberately restrained inside, adds depth without overwhelming the cheese, and a final scatter of extra Parmesan or Pecorino finishes each calzone with a sharp, classic note that ties the whole dish together.
Common Mistakes to Avoid
- Skipping the Ricotta’s Draining Step – This is one of the main causes of leaking or soggy calzones. Always drain it thoroughly if it looks loose or wet.
- Using a Whole Egg Instead of Just the Yolk – This adds unnecessary extra moisture to the filling. Always use only the egg yolk unless the ricotta is very dry.
- Adding Too Much Tomato Sauce Inside – This makes the center wet and increases the chance of leaking. Always keep it modest, serving extra on the side.
- Sealing the Edge With Only a Quick Pinch – This leaves a weak seam that can open in the oven. Always crimp firmly and fold the seam over itself.
- Cutting Into the Calzone Immediately After Baking – This makes the hot filling spill out aggressively. Always let it rest for 3 to 5 minutes first.
Variations
Meat-Added Version
Fold a small amount of cooked, cooled Italian sausage or crumbled pepperoni into the ricotta filling before sealing, for a heartier calzone that still relies on the same careful moisture-control principles throughout.
Extra-Herbal Version
Increase the fresh basil in the filling, or add a small amount of fresh oregano alongside the dried, for a more pronounced herbal presence running through every bite of the creamy cheese centre.
Spinach-Added Version
Stir a handful of well-squeezed, cooked spinach into the ricotta mixture, making sure it is genuinely dry, since any residual moisture would work against the same careful balance this recipe depends on.
Extra-Crisp Version
Brush the sealed calzones with a slightly heavier hand of olive oil before baking, per the recipe’s own guidance, for a noticeably more golden, crisper finished crust across the whole surface.
Storage & Make-Ahead
This recipe is specifically built around half a batch of Homemade Pizza Dough, yielding exactly 4 individual calzones, so use low-moisture mozzarella inside the filling rather than fresh mozzarella, since fresh mozzarella releases too much liquid unless it is drained very aggressively beforehand.
The ricotta must genuinely be thick, never watery, before it goes into the filling, since that consistency is directly what protects the finished calzone from the sogginess and leaking that a wetter cheese would cause once fully sealed inside the dough.
Keep the tomato sauce modest inside each calzone and serve any extra warmed on the side instead, since that restraint protects the filling’s overall moisture balance in exactly the way draining the ricotta does, and it also gives everyone a proper dipping sauce at the table.
Take care not to roll the dough too thin when shaping each round, since an overly thin base can tear during folding and baking, and always seal the edges firmly with real crimping while making small steam vents on top so pressure has somewhere controlled to escape.
Bake at a genuinely high, fully preheated temperature for the best puffed crust, browned surface, and crisp sealed edge, and know that calzones are best enjoyed hot, straight after their short post-bake rest, rather than held or reheated later.
Frequently Asked Questions
Why does the ricotta need to be drained so thoroughly before it’s used in the filling?
Wet ricotta is one of the main reasons calzones leak or turn soggy inside. Any excess moisture left in the cheese has nowhere else to go once fully sealed inside the dough except directly into the crust itself.
Why is only the egg yolk used to bind the filling rather than the whole egg?
The yolk adds real binding structure to the ricotta mixture without introducing the extra water content the egg white would carry. That distinction matters directly given how much this recipe already depends on managing the filling’s overall moisture.
Why does the tomato sauce inside the calzone need to stay so modest?
Too much sauce makes the center wet and increases the chance of the calzone leaking during baking. Keeping it minimal protects the filling’s overall moisture balance, while extra sauce is reserved for dipping on the side.
Why does the edge need such deliberate crimping rather than a simple pinch?
A weak seam is specifically where the internal steam pressure a baking calzone builds finds its way out, taking the cheese filling along with it. Firm crimping, folding the seam over itself, is what actually protects against that.
Are there other classic pizza, calzone, or baked cheese dishes worth trying with this same dough?
Homemade Pizza Dough is worth making from scratch as the foundation for this and many other recipes. Stromboli with Pepperoni and Cheese and Pepperoni Pizza are also worth trying for other classic dishes using this same dough, and White Pizza with Ricotta and Garlic and Baked Ziti offer other rich, cheese-forward directions worth exploring.
Nutrition Facts
( Per Serving — 1 calzone )
Calories
~780 kcal
Protein
42 g
Fat
42 g
Carbs
62 g
Calories
~780 kcal
Protein
42 g
Fat
42 g
Carbs
62 g
Related Recipes
Related Recipes

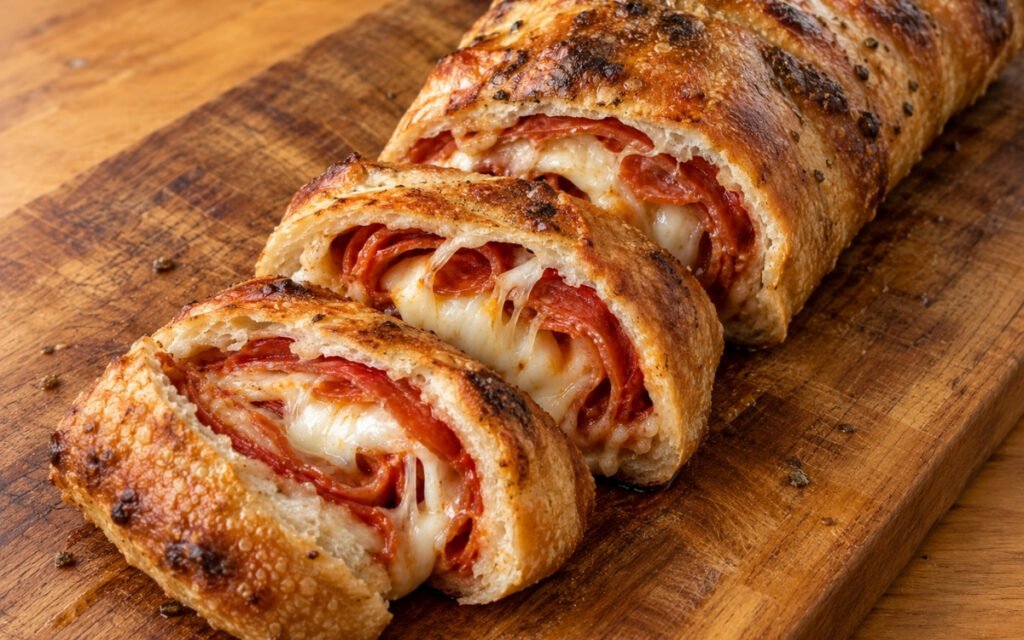
Stromboli with Pepperoni and Cheese
Pizza dough rolled tightly around pepperoni, low-moisture mozzarella, thick tomato sauce, and Parmesan, baked until deeply golden and crisp.
Crêpes Suzette
Delicate French crêpes folded into triangles and coated in a glossy orange-butter Suzette sauce with fresh orange juice and zest.
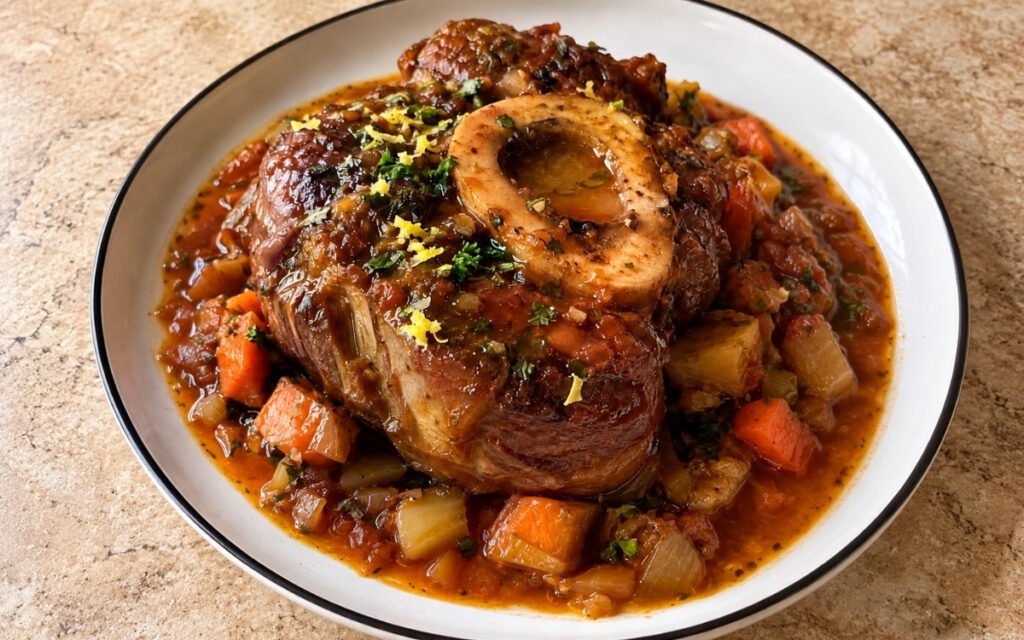
Osso Buco
Slow-braised veal shanks in a glossy white wine and tomato sauce, fork-tender with buttery marrow, finished with a bright lemon-parsley gremolata.

You might also like
You might also like
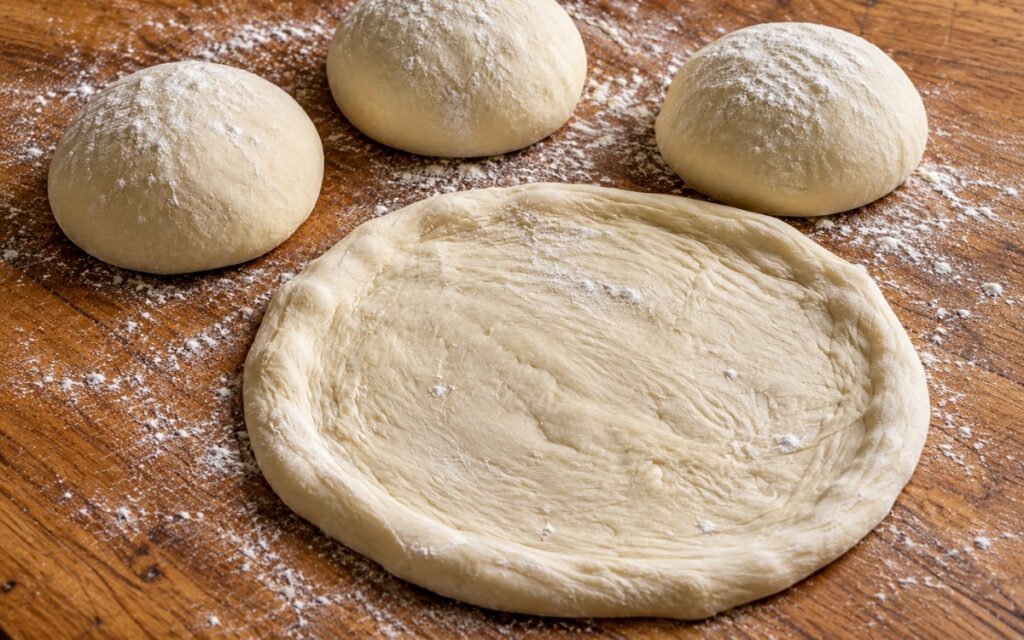
Homemade Pizza Dough
Long-fermented 00 flour pizza dough with a 24–48 hour cold ferment, producing smooth, elastic dough with a thin center and airy rim.
Deep Fried Calamari
Tender squid rings and tentacles lightly coated in flour and cornstarch, fried briefly until pale golden and crisp, served with marinara.
Creamy Pea & Asparagus Orzo
Seared asparagus and blended pea-ricotta sauce folded into stock-cooked orzo — bright, creamy, no cream needed, 40 minutes.

Calzone with Ricotta and Mozzarella
Ingredients
Method
- Remove the 4 pizza dough balls from the refrigerator 2–3 hours before shaping. Keep them covered so the surface does not dry out. The dough should feel soft, relaxed, and airy before shaping. Cold dough fights back, tears more easily, and will not stretch cleanly into a calzone. Warm, relaxed dough folds and seals much better. That tempering window lets the cold, tightened gluten network genuinely relax before it’s ever asked to fold, seal, and hold a generous filling.
- If the ricotta looks loose or wet, place it in a fine sieve over a bowl for 30–60 minutes. It should be creamy but thick, not watery. Wet ricotta is one of the main reasons calzones leak or turn soggy inside. The filling should hold together on a spoon. That draining step protects the whole calzone downstream — any excess moisture left in the ricotta has nowhere to go once sealed inside the dough except directly into the crust itself.
- In a bowl, mix the ricotta, grated mozzarella, Parmesan or Pecorino, egg yolk, basil, salt, black pepper, and oregano if using. Mix just until combined. The filling should be thick, creamy, and spoonable. The egg yolk helps bind the ricotta filling without making it heavy. Do not add a whole egg unless your ricotta is very dry. Using only the yolk, rather than the whole egg, adds real binding structure to the filling without introducing the extra water content the white would carry.
- Stir the tomato sauce with the olive oil and garlic if using. Taste and adjust with a small pinch of salt only if needed. Use a thick sauce. If the sauce is loose or watery, simmer it for a few minutes until tighter, then cool before using. Only a little tomato sauce goes inside the calzone. Too much sauce makes the center wet and increases the chance of leaking. That deliberately thick, modest sauce amount protects the sealed dough from the same kind of moisture overload a wet ricotta would cause, keeping the filling’s overall liquid content genuinely manageable.
- Place a pizza steel or pizza stone in the oven and preheat to the highest temperature your oven can safely reach, ideally 260–290°C, for at least 45–60 minutes. If baking on a tray instead, preheat the tray as well. Strong bottom heat sets the crust quickly and helps the calzone puff instead of spreading flat. That extended preheat ensures the baking surface itself, not just the surrounding air, has genuinely reached its target temperature throughout.
- Dust the work surface lightly with 00 flour or semolina. Place one dough ball on the surface and press from the center outward, leaving the outer edge slightly thicker. Stretch gently into a round about 25–28cm wide. Do not roll it paper-thin. The dough needs enough strength to hold the filling and seal without tearing. Keeping the dough at this specific thickness, rather than rolling it thinner, is what gives it the structural strength this calzone’s genuinely substantial filling actually requires to stay contained.
- Spread 1–2 tbsp tomato sauce over one half of the dough, leaving a clean border of about 2cm around the edge. Add about ¼ of the ricotta filling over the sauce. Keep the filling slightly away from the edge. Fold the empty half of the dough over the filling to make a half-moon. Do not overfill. A calzone should look full but still seal easily. If filling squeezes out while closing, there is too much inside. Leaving that clean, filling-free border around the edge is what gives the dough real, uncontaminated surface to actually press together and seal cleanly in the next stage.
- Press the edges firmly together with your fingers, then fold or crimp the seam over itself to make a tight seal. Make 1–2 small slits on top with a sharp knife to let steam escape. Brush the top lightly with olive oil. Sealing is not cosmetic. A weak seam opens in the oven, cheese leaks out, and the calzone loses its puff. That deliberate crimping, folding the seam over itself rather than simply pinching it once, is what actually protects the calzone from splitting under the internal steam pressure that builds as it bakes.
- Transfer the calzone to the hot stone, steel, or tray. Bake for 10–14 minutes, until deeply golden, puffed, blistered in spots, and crisp around the edges. The calzone is ready when the crust is fully browned and the filling inside is hot and melted. If the outside is browning too fast before the dough feels set, lower the oven slightly after the first few minutes. The crust needs colour, but the folded dough must cook through. That willingness to lower the oven partway through protects the dough’s own doneness from being sacrificed for the sake of surface colour alone — a browned exterior over a still-raw fold would miss the point entirely.
- Shape, fill, seal, and bake the remaining 3 calzones the same way. Keep unused dough balls covered while working so they do not dry out. Keeping every unshaped dough ball genuinely covered protects its surface from drying and cracking, which would otherwise compromise its ability to fold and seal cleanly once its turn comes.
- Let each calzone rest for 3–5 minutes before cutting. Serve with warm tomato sauce on the side and a little extra Parmesan or Pecorino if desired. Cutting immediately can make the cheese spill out aggressively. A short rest lets the filling settle while staying hot and stretchy. That brief rest lets the molten filling firm up just enough to hold together cleanly when cut, rather than flooding out the moment a knife or fork breaks the crust.