
White Pizza with Ricotta and Garlic
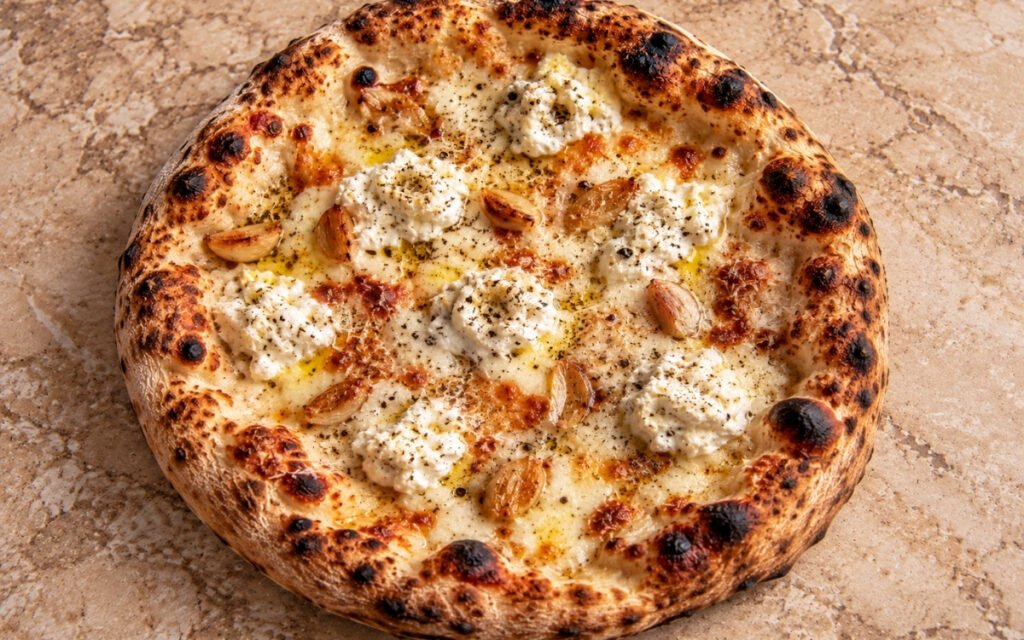
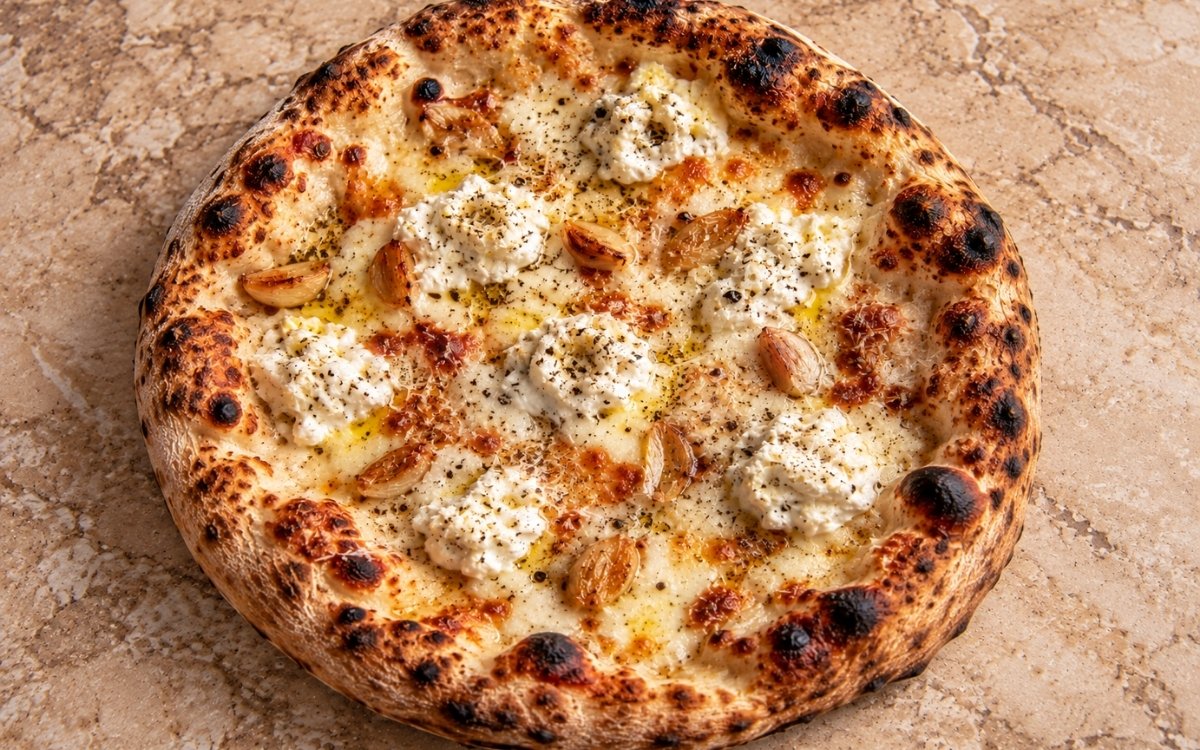
A classical white pizza built on long-fermented dough with no tomato sauce — melted mozzarella as the base, dollops of ricotta, sweet mellow garlic, grated Parmesan, cracked black pepper, and olive oil over a blistered, airy crust, made using half a batch of Homemade Pizza Dough for 4 individual pizzas. Cooking the garlic low and slow until soft and only lightly golden, never aggressively browned, is the technique this whole pizza depends on for real sweetness — garlic pushed past that point turns bitter and would dominate rather than blend into the cheese, the same gentle-garlic-for-mellow-sweetness principle used elsewhere in this collection whenever an aromatic’s own harshness needs coaxing out gently rather than through aggressive heat. Draining the ricotta before it ever meets the dough is what protects a white pizza’s center from turning watery, since there’s no tomato layer here to absorb any of that excess moisture. Topping the pizza with real restraint, rather than generously, is what lets this sauce-free style bake through cleanly. The payoff is a pizza with real, elegant contrast — a blistered, airy crust beneath bubbling mozzarella, soft ricotta dollops, and sweet, caramelised garlic.
Prep Time : 45 min
Cook Time : 7–10 min
Servings : 4 pizzas
45 min
7–10 min
4 pizzas
Ingredients
For the Dough
• ½ batch Homemade Pizza Dough, divided into 4 dough balls, about 250g each
• Extra 00 flour or fine semolina, for dusting
For the Garlic
• 24 garlic cloves, peeled
• 45ml extra-virgin olive oil — this one on Amazon
• 2g fine sea salt
For the Cheese Topping
• 500–550g low-moisture whole-milk mozzarella, coarsely grated — this one on Amazon
• 400g whole-milk ricotta — this one on Amazon
• 60g Parmesan, finely grated — this one on Amazon
• 20g Pecorino Romano, finely grated, optional
• 2–3g fine sea salt, only if needed
• 2–3g freshly cracked black pepper, plus more for finishing
For Finishing
• Extra-virgin olive oil, for drizzling
• Pinch of dried oregano, optional
This post may contain affiliate links. As an Amazon Associate I earn from qualifying purchases, at no additional cost to you.
Directions
- Prepare the Dough
Use half a batch of Homemade Pizza Dough and divide it into 4 dough balls of about 250g each after kneading. Place each dough ball into a lightly oiled covered container and cold-ferment for 24–48 hours. The long cold fermentation matters here. It improves flavour, relaxes the dough, and helps the crust bake up lighter, more blistered, and more open at the rim. Under-fermented dough tends to stay tight, resist stretching, and bake denser. That extended cold time gives the yeast genuine room to build real depth of flavour, well beyond what a same-day dough could achieve in only a few hours. - Bring the Dough to Room Temperature
Remove the dough balls from the refrigerator 2–3 hours before baking. Keep them covered so they do not dry out. They should be soft, airy, and relaxed before shaping. If the dough is still cold and tight, it will spring back and can tear while stretching. That tempering window lets the cold, tightened gluten network genuinely relax and warm through before it ever meets this pizza’s own hand-shaping. - Cook the Garlic
Place the peeled garlic cloves, olive oil, and salt in a small saucepan or small oven-safe dish. If using the stovetop, cook over very low heat for 10–15 minutes, turning occasionally, until the cloves are tender, lightly golden in spots, and sweet-smelling. They should not fry aggressively or brown dark. If using the oven, cover loosely and bake at 170–180°C for 20–30 minutes, until soft and lightly golden. Set aside to cool. Reserve the garlic oil. The goal is mellow garlic, not harsh garlic. If the cloves brown too deeply, they become bitter and dominate the pizza instead of blending into the cheese. That genuinely low, patient heat is what softens the cloves’ own harshness into real, mellow sweetness — the same aggressive heat that would brown them quickly would also push them straight past that point into bitterness. - Drain and Prepare the Ricotta
Place the ricotta in a sieve or fine strainer over a bowl for 20–30 minutes if it looks wet. Then stir it with a small pinch of salt if needed. Ricotta that is too wet will leak moisture into the center of the pizza and make the surface watery. It should be thick enough to hold in soft dollops. That draining step matters directly here since, unlike a red pizza, this style has no tomato sauce layer to absorb any of the ricotta’s own excess moisture. - Preheat the Oven and Baking Surface
Place a pizza steel or pizza stone in the oven and preheat at the highest temperature your oven can safely hold, ideally 260–290°C, for at least 45–60 minutes. If your oven has a broiler / grill element, turn it on for the last 10 minutes of preheating if appropriate for your setup. A fully heated steel or stone is critical. Without a properly saturated baking surface, the bottom crust stays pale and the pizza can dry out on top before the base finishes baking. That extended preheat ensures the surface itself, not just the surrounding air, has genuinely reached its target temperature all the way through. - Prepare the Toppings
Combine the Parmesan and Pecorino if using. Keep the mozzarella chilled until needed. Have the ricotta ready in spoonable dollops. Keep the cooked garlic cloves and reserved garlic oil nearby. Cold cheese is easier to distribute evenly and melts more cleanly during the short bake. Keeping everything genuinely cold and staged before shaping begins is what lets assembly happen quickly once the dough is stretched, protecting the shaped base from sitting too long before it reaches the hot oven. - Shape the First Pizza
Dust the work surface lightly with flour or semolina. Place one dough ball on the surface and turn to coat lightly. Press from the center outward with your fingertips, leaving a rim of about 1.5–2cm untouched. Stretch into a round of about 28–30cm / 11–12 inches. Do not use a rolling pin. You want to preserve the gas in the dough so the edge puffs properly in the oven. The center should be thin and even, with a defined rim. If the dough shrinks back, let it rest for 10–15 minutes and continue. Tight dough should be relaxed, not forced. Letting resistant dough rest rather than forcing it through the shaping is what protects it from tearing, giving the gluten genuine additional time to relax before the next attempt. - Top the Pizza
Transfer the shaped dough to a lightly floured peel. Scatter about 125–135g mozzarella evenly over the dough, leaving the rim bare. Add 5–6 garlic cloves per pizza, distributing them evenly. Spoon over 4–5 small dollops of ricotta. Sprinkle with about 15g Parmesan mixture. Drizzle lightly with a little of the reserved garlic oil and finish with cracked black pepper. Do not overload the pizza. White pizza has no sauce buffer, so excess cheese or ricotta will weigh down the center and slow the bake. The topping layer should be generous but restrained. That real restraint matters more here than on a red pizza specifically because there’s no tomato layer to help separate and manage the toppings’ own moisture. - Bake the Pizza
Launch the pizza onto the hot steel or stone. Bake for 5–7 minutes, then rotate if needed, and continue baking another 2–3 minutes, until the crust is puffed, blistered, and deeply golden in places, the underside is well-browned, the mozzarella is melted and bubbling, the ricotta is warmed through and just beginning to colour lightly at the edges, and the garlic is caramelized in spots but not burnt. If the bottom is finished but the top needs more colour, turn on the broiler / grill briefly for 30–60 seconds, watching closely. That brief broiler finish, used only if needed, builds extra colour on top quickly without extending the overall bake long enough to dry out the base beneath it. - Finish and Serve
Remove the pizza from the oven and immediately drizzle very lightly with olive oil. Add a little more cracked black pepper and a pinch of dried oregano if using. Let it sit for 1–2 minutes so the cheese settles slightly, then slice and serve. Drizzling that final oil while the pizza is still genuinely hot lets it settle into the melted cheese and warm crust rather than sitting on top as a separate, cool layer. - Repeat with the Remaining Dough
Shape, top, and bake the remaining three pizzas the same way, keeping the unused dough covered while you work. Let the steel or stone recover heat for a few minutes between pizzas if needed. Giving the baking surface real time to recover its heat between pizzas protects each subsequent pie from the slower, paler bake a cooled stone or steel would otherwise produce.
*Notes :
- Cooking the garlic low and slow, watching carefully for soft and only lightly golden rather than deeply browned, deserves genuine recognition as the technique responsible for this pizza’s whole defining sweetness. That patient, gentle heat is specifically what coaxes real mellowness out of the cloves — the same aggressive heat that would brown them quickly would also push them straight past that point into a bitterness that would dominate the pizza rather than blending softly into the cheese.
- Draining the ricotta before it ever meets the dough deserves the same attention this technique receives throughout this collection’s other cheese-topped dishes. That step matters considerably more here than it would on a red pizza, given that white pizza carries no tomato sauce layer to help absorb the ricotta’s own excess moisture — without proper draining, that liquid has nowhere else to go but directly into the center of the crust.
- Keeping every topping to a genuinely restrained amount, as the recipe’s own notes emphasise directly, deserves real attention given this style’s particular vulnerability. A red pizza’s sauce layer helps separate and manage moisture from the toppings above it; a white pizza has no such buffer, meaning excess cheese or ricotta here weighs down the center and slows the bake in a way red pizza would tolerate more forgivingly.
- Keeping the cheese genuinely cold and fully staged before shaping the first pizza deserves attention as a real, practical technique rather than a minor convenience. Cold cheese distributes more evenly across the dough and melts more cleanly during this pizza’s genuinely brief bake — cheese that’s already begun softening would clump unevenly and melt less predictably once it actually reaches the oven’s heat.
Why This Recipe Works
This recipe works because the garlic is cooked over genuinely low, patient heat, coaxing out real sweetness without ever tipping into bitterness. The ricotta is drained thoroughly, protecting the pizza’s center from the watery surface excess moisture would otherwise cause, especially given the absence of any tomato sauce layer.
Toppings are kept deliberately restrained, letting this sauce-free style bake through cleanly within its real cook time. A fully preheated steel or stone delivers the strong heat this style depends on, and keeping the cheese cold until assembly protects its own even melt. Serving each pizza immediately after a brief rest captures the whole dish at its bubbling, freshly baked best.
Ingredient Breakdown
Low, Slow-Cooked Garlic
The critical technique — gentle heat coaxes real sweetness from the cloves without tipping into the bitterness aggressive browning would cause.
Thoroughly Drained Ricotta
The critical technique — removes excess moisture that would otherwise soak directly into the crust with no sauce layer to absorb it.
Low-Moisture Mozzarella
The critical ingredient choice — provides a clean, stable melt distinct from what wetter fresh mozzarella would produce.
24–48 Hour Cold Fermentation
The flavour-building stage — develops real depth and helps the crust bake up lighter and more blistered at the rim.
Deliberately Restrained Toppings
The critical technique — protects this sauce-free style’s center from turning heavy and underbaked.
Reserved Garlic Oil
The finishing touch — carries real garlic flavour, drizzled over the pizza both before baking and, lightly, right at the end.
Flavor Structure Explained
This white pizza follows a layered balance model:
- Blistered, airy foundation (fully preheated, fermented dough crust)
- Rich melted body (low-moisture mozzarella)
- Soft creamy accent (drained ricotta dollops)
- Sweet caramelised depth (gently cooked garlic)
- Sharp finishing note (Parmesan, Pecorino, cracked black pepper)
A fully preheated steel or stone and a properly fermented dough together build this pizza’s blistered, airy crust foundation. Low-moisture mozzarella provides a rich, stable, melted body across the whole surface. Drained ricotta contributes soft, creamy dollops distinct from the mozzarella’s own texture. Gently cooked, sweet garlic layers in real caramelised depth without bitterness. Parmesan, Pecorino, and cracked black pepper finish the pizza with a final sharp note, tying every layer of this sauce-free style together.
Common Mistakes to Avoid
- Browning the Garlic Too Deeply – This introduces real bitterness that dominates the pizza. Always cook it over low, patient heat until only lightly golden.
- Skipping the Ricotta’s Draining Step – This leaves the pizza’s center watery, with no sauce layer to absorb the excess. Always drain it if it looks loose or wet.
- Overloading the Toppings – White pizza has no sauce buffer, so excess cheese or ricotta weighs the center down. Always keep the topping layer generous but restrained.
- Using Fresh Mozzarella Instead of Low-Moisture – This releases too much liquid and can make the pizza soggy. Always use low-moisture whole-milk mozzarella here.
- Not Fully Preheating the Baking Surface – This leaves the bottom crust pale while the top dries out before the base finishes. Always give the steel or stone the full 45 to 60 minutes.
Variations
Extra-Sharp Version
Lean a little harder on Pecorino Romano relative to Parmesan, per the recipe’s own suggestion, while still keeping mozzarella as the pizza’s main melt and ricotta as its soft, creamy accent throughout.
Herb-Finished Version
Add a scatter of fresh basil or a small handful of arugula right after baking for a brighter, more herbaceous finish against the rich, cheesy base.
Extra-Garlicky Version
Increase the garlic cloves slightly per pizza, distributing the extra pieces evenly, for a more pronounced, sweet garlic presence throughout every bite of the finished pizza.
Lighter Ricotta Version
Use part-skim ricotta instead of whole-milk, draining it just as thoroughly, for a slightly lighter finished pizza that still holds its characteristic soft dollops.
Storage & Make-Ahead
This recipe is specifically built around half a batch of Homemade Pizza Dough, yielding exactly 4 individual White Pizzas with Ricotta and Garlic, so plan your dough quantity accordingly if you are preparing both components together rather than starting from already-fermented dough balls.
Use low-moisture mozzarella rather than fresh mozzarella for this particular style, since fresh mozzarella releases considerably more liquid during baking and can leave the finished pizza noticeably soggy in a way that works against this recipe’s whole intended texture.
The dough needs to be genuinely, fully relaxed before it’s ever shaped, because cold or under-proofed dough resists stretching and tends to bake up denser than properly tempered dough would, so don’t rush the room-temperature resting period even when you’re eager to get baking.
Bake one pizza at a time rather than attempting to crowd the oven, since this gives you the best oven performance and the strongest possible bottom heat, and if flour burns excessively on the stone or steel between pizzas, dust more lightly on your next attempt, since too much bench flour turns bitter quickly.
If the center of a shaped pizza looks visibly wet once topped, you have most likely used too much ricotta or too much cheese overall, since white pizza genuinely needs a lighter hand than a red, sauced pizza would, given that there is no tomato layer here to separate and manage that moisture.
Frequently Asked Questions
Why does the garlic need to be cooked so low and slow rather than browned more quickly?
That patient, gentle heat is what coaxes real, mellow sweetness out of the cloves. The same aggressive heat that would brown them faster would also push them past that point into a genuine bitterness that would dominate the pizza rather than blending softly into the cheese.
Why does the ricotta need to be drained before it’s used?
Ricotta that’s too wet leaks moisture directly into the center of the pizza, making the surface watery. That step matters considerably more here than on a red pizza, since there’s no tomato sauce layer to help absorb any of that excess liquid.
Why do the toppings need to stay so restrained compared to a red pizza?
White pizza has no sauce buffer between the dough and the cheese, so excess mozzarella or ricotta adds real weight and moisture that slows the bake and can leave the center wet. Restraint protects this sauce-free style’s ability to bake through cleanly.
Why does the mozzarella need to stay cold until it’s actually used?
Cold cheese distributes more evenly across the dough and melts more cleanly during this pizza’s genuinely brief bake. Cheese that’s already begun softening clumps unevenly and melts less predictably once it reaches the oven’s heat.
Are there other classic pizza, garlic-forward, or creamy pasta dishes worth trying?
Homemade Pizza Dough is worth making from scratch as the foundation for this and many other recipes. Pizza Bianca Caprese and Garlic Knots are also worth trying for other garlic-forward, sauce-free directions, and Spaghetti alla Nerano and Creamy Mushroom Garlic Pasta offer other rich, cheese-forward pasta dishes worth exploring.
Nutrition Facts
( Per Serving — 1 pizza )
Calories
~820 kcal
Protein
42 g
Fat
48 g
Carbs
62 g
Calories
~820 kcal
Protein
42 g
Fat
48 g
Carbs
62 g
Related Recipes
Related Recipes

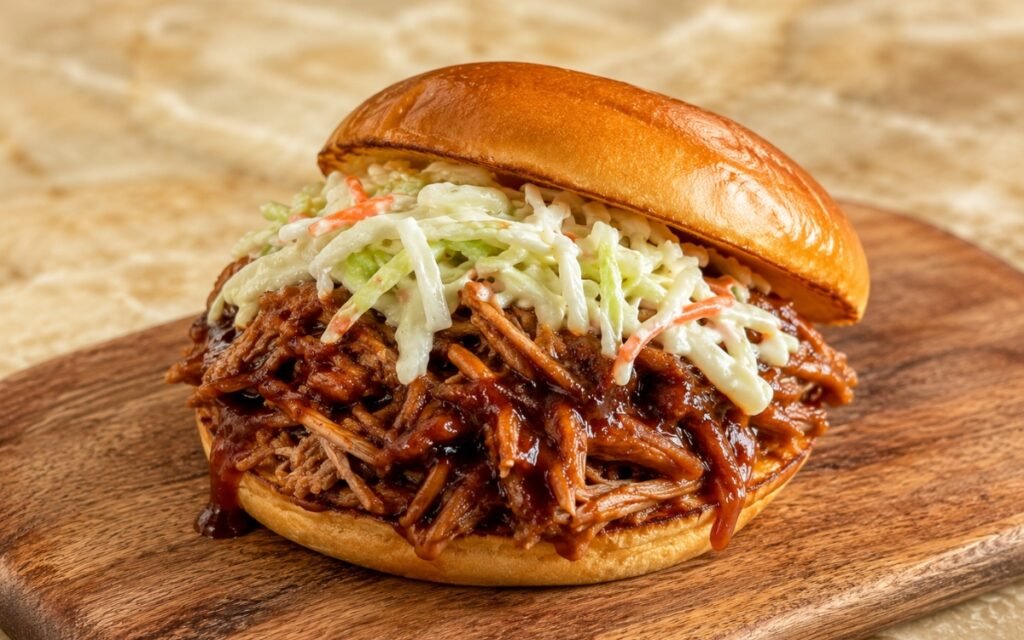
Pulled Pork Sandwich
Slow-braised pork shoulder shredded and tossed in a reduced, glossy barbecue glaze, piled onto toasted brioche buns with fresh coleslaw.
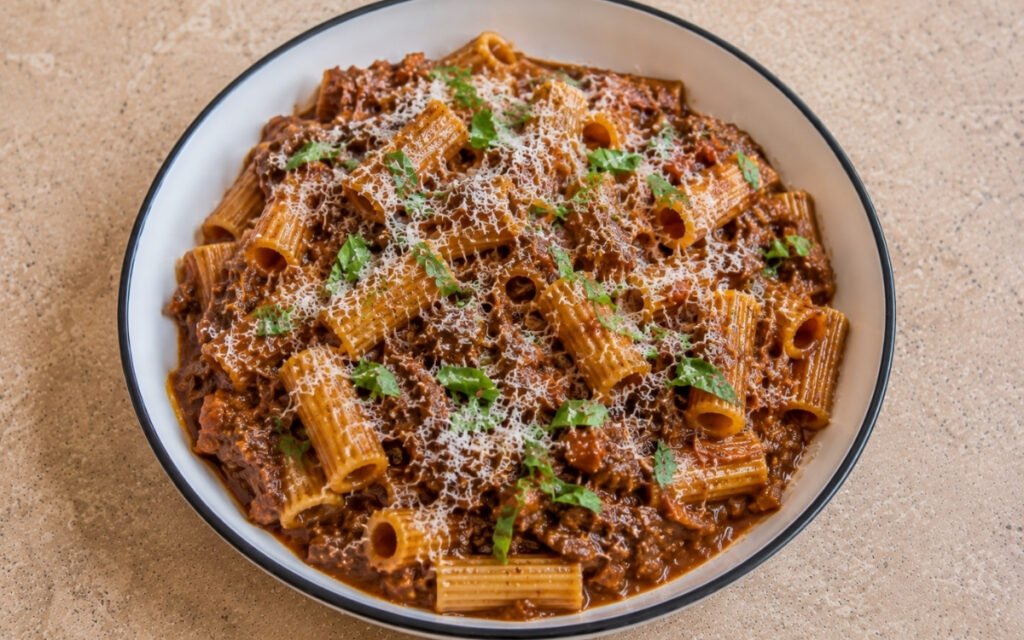
Slow-Simmered Beef Ragù Pasta
Beef chuck, soffritto, Chianti, and San Marzano tomatoes simmered 2.5 hours — finished with whole milk over rigatoni.
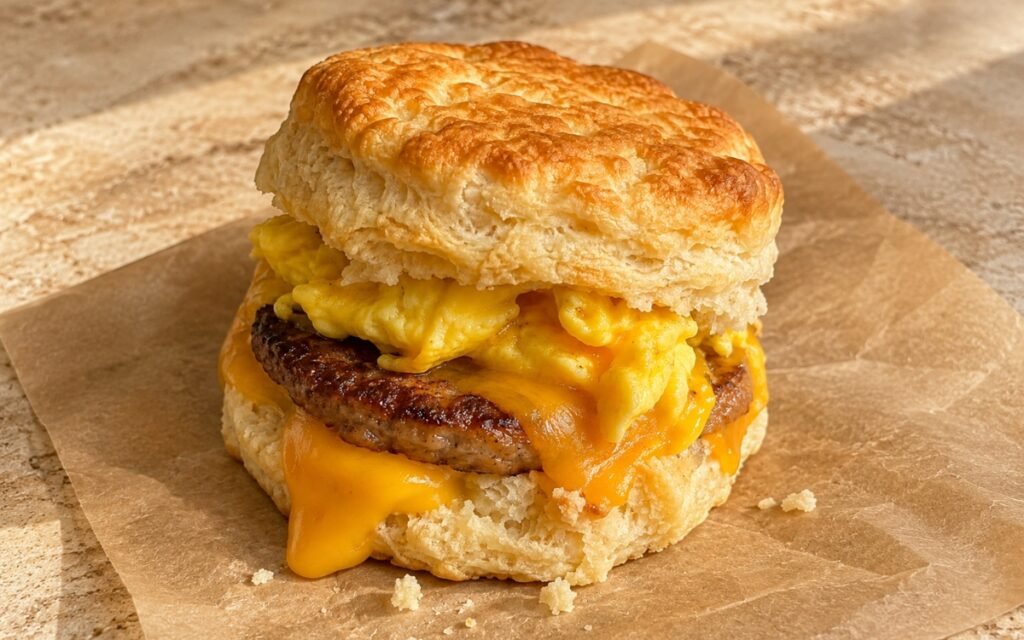
Classic Breakfast Biscuit Sandwich
A tender buttermilk biscuit filled with a browned breakfast sausage patty, soft folded scrambled egg, and melted American cheese.
You might also like
You might also like
Risotto alla Milanese
Deep golden Carnaroli rice with saffron, white wine, and a Parmigiano-Reggiano mantecatura, finished to a loose, glossy all’onda texture.
Pasta alla Zozzona (Roman Hidden Classic)
Guanciale, sausage, passata, and a carbonara egg emulsion in rigatoni — Rome’s dirty pasta in 40 minutes.
Spicy Italian ‘Nduja Pasta
Calabrian ‘nduja melted into olive oil until it becomes the sauce — mascarpone finish, 30 minutes.
White Pizza with Ricotta and Garlic
Ingredients
Method
- Use half a batch of Homemade Pizza Dough and divide it into 4 dough balls of about 250g each after kneading. Place each dough ball into a lightly oiled covered container and cold-ferment for 24–48 hours. The long cold fermentation matters here. It improves flavour, relaxes the dough, and helps the crust bake up lighter, more blistered, and more open at the rim. Under-fermented dough tends to stay tight, resist stretching, and bake denser. That extended cold time gives the yeast genuine room to build real depth of flavour, well beyond what a same-day dough could achieve in only a few hours.
- Remove the dough balls from the refrigerator 2–3 hours before baking. Keep them covered so they do not dry out. They should be soft, airy, and relaxed before shaping. If the dough is still cold and tight, it will spring back and can tear while stretching. That tempering window lets the cold, tightened gluten network genuinely relax and warm through before it ever meets this pizza’s own hand-shaping.
- Place the peeled garlic cloves, olive oil, and salt in a small saucepan or small oven-safe dish. If using the stovetop, cook over very low heat for 10–15 minutes, turning occasionally, until the cloves are tender, lightly golden in spots, and sweet-smelling. They should not fry aggressively or brown dark. If using the oven, cover loosely and bake at 170–180°C for 20–30 minutes, until soft and lightly golden. Set aside to cool. Reserve the garlic oil. The goal is mellow garlic, not harsh garlic. If the cloves brown too deeply, they become bitter and dominate the pizza instead of blending into the cheese. That genuinely low, patient heat is what softens the cloves’ own harshness into real, mellow sweetness — the same aggressive heat that would brown them quickly would also push them straight past that point into bitterness.
- Place the ricotta in a sieve or fine strainer over a bowl for 20–30 minutes if it looks wet. Then stir it with a small pinch of salt if needed. Ricotta that is too wet will leak moisture into the center of the pizza and make the surface watery. It should be thick enough to hold in soft dollops. That draining step matters directly here since, unlike a red pizza, this style has no tomato sauce layer to absorb any of the ricotta’s own excess moisture.
- Place a pizza steel or pizza stone in the oven and preheat at the highest temperature your oven can safely hold, ideally 260–290°C, for at least 45–60 minutes. If your oven has a broiler / grill element, turn it on for the last 10 minutes of preheating if appropriate for your setup. A fully heated steel or stone is critical. Without a properly saturated baking surface, the bottom crust stays pale and the pizza can dry out on top before the base finishes baking. That extended preheat ensures the surface itself, not just the surrounding air, has genuinely reached its target temperature all the way through.
- Combine the Parmesan and Pecorino if using. Keep the mozzarella chilled until needed. Have the ricotta ready in spoonable dollops. Keep the cooked garlic cloves and reserved garlic oil nearby. Cold cheese is easier to distribute evenly and melts more cleanly during the short bake. Keeping everything genuinely cold and staged before shaping begins is what lets assembly happen quickly once the dough is stretched, protecting the shaped base from sitting too long before it reaches the hot oven.
- Dust the work surface lightly with flour or semolina. Place one dough ball on the surface and turn to coat lightly. Press from the center outward with your fingertips, leaving a rim of about 1.5–2cm untouched. Stretch into a round of about 28–30cm / 11–12 inches. Do not use a rolling pin. You want to preserve the gas in the dough so the edge puffs properly in the oven. The center should be thin and even, with a defined rim. If the dough shrinks back, let it rest for 10–15 minutes and continue. Tight dough should be relaxed, not forced. Letting resistant dough rest rather than forcing it through the shaping is what protects it from tearing, giving the gluten genuine additional time to relax before the next attempt.
- Transfer the shaped dough to a lightly floured peel. Scatter about 125–135g mozzarella evenly over the dough, leaving the rim bare. Add 5–6 garlic cloves per pizza, distributing them evenly. Spoon over 4–5 small dollops of ricotta. Sprinkle with about 15g Parmesan mixture. Drizzle lightly with a little of the reserved garlic oil and finish with cracked black pepper. Do not overload the pizza. White pizza has no sauce buffer, so excess cheese or ricotta will weigh down the center and slow the bake. The topping layer should be generous but restrained. That real restraint matters more here than on a red pizza specifically because there’s no tomato layer to help separate and manage the toppings’ own moisture.
- Launch the pizza onto the hot steel or stone. Bake for 5–7 minutes, then rotate if needed, and continue baking another 2–3 minutes, until the crust is puffed, blistered, and deeply golden in places, the underside is well-browned, the mozzarella is melted and bubbling, the ricotta is warmed through and just beginning to colour lightly at the edges, and the garlic is caramelized in spots but not burnt. If the bottom is finished but the top needs more colour, turn on the broiler / grill briefly for 30–60 seconds, watching closely. That brief broiler finish, used only if needed, builds extra colour on top quickly without extending the overall bake long enough to dry out the base beneath it.
- Remove the pizza from the oven and immediately drizzle very lightly with olive oil. Add a little more cracked black pepper and a pinch of dried oregano if using. Let it sit for 1–2 minutes so the cheese settles slightly, then slice and serve. Drizzling that final oil while the pizza is still genuinely hot lets it settle into the melted cheese and warm crust rather than sitting on top as a separate, cool layer.
- Shape, top, and bake the remaining three pizzas the same way, keeping the unused dough covered while you work. Let the steel or stone recover heat for a few minutes between pizzas if needed. Giving the baking surface real time to recover its heat between pizzas protects each subsequent pie from the slower, paler bake a cooled stone or steel would otherwise produce.