
Arepas con Queso
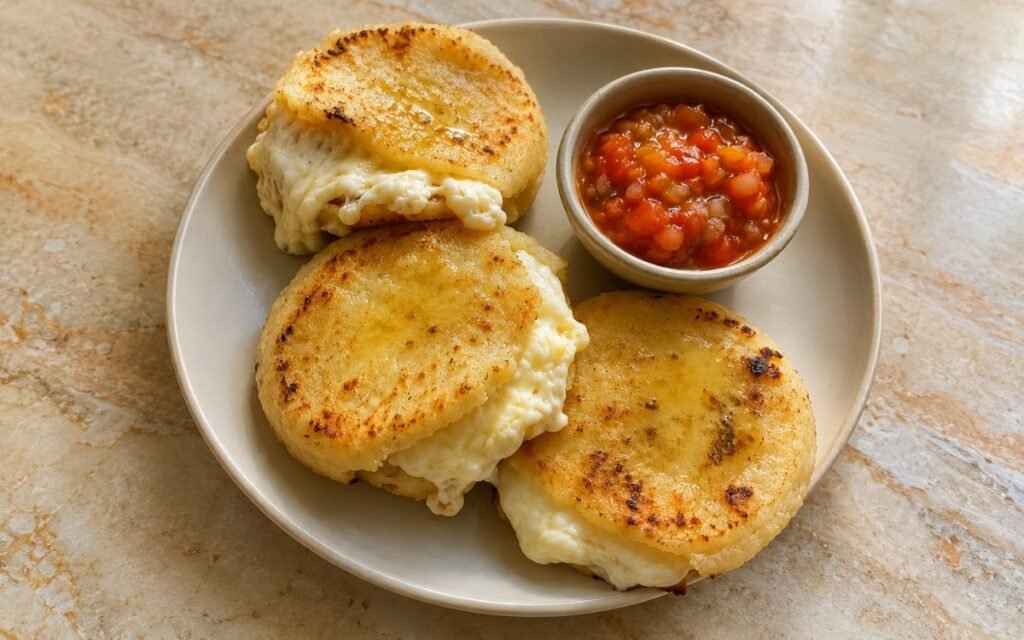
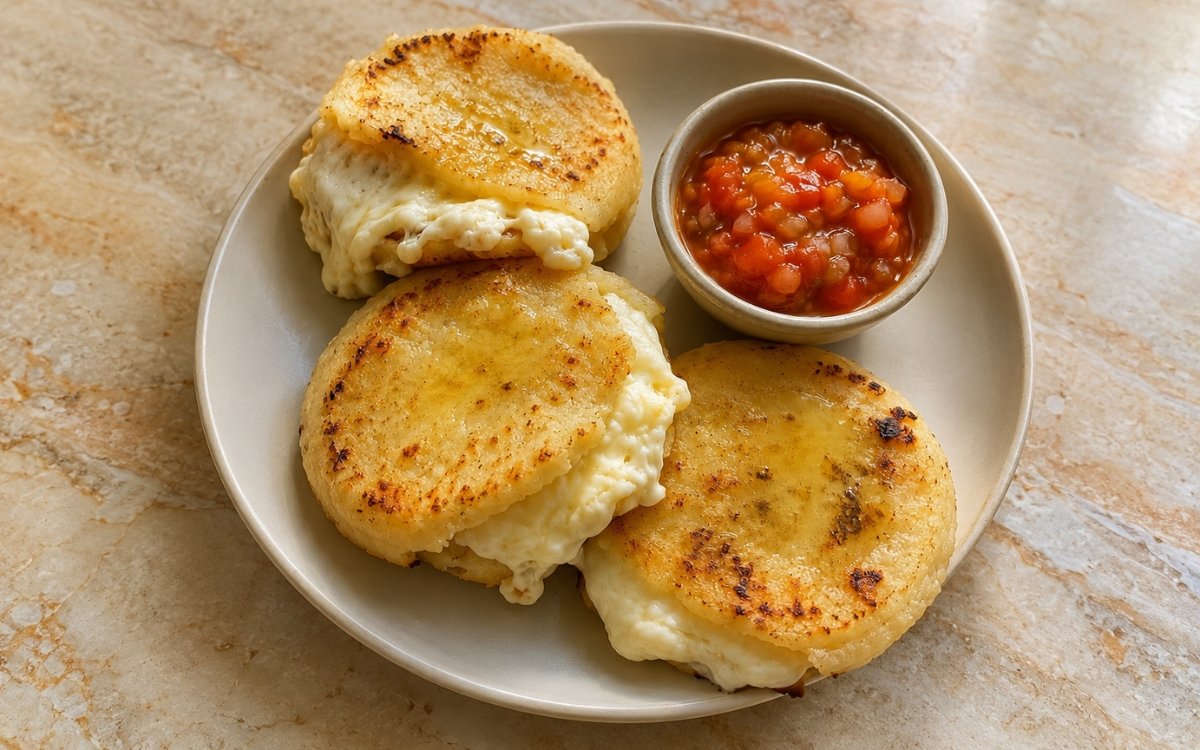
Classic Colombian-style arepas con queso made from white masarepa dough, pan-cooked until golden with lightly charred edges, then stuffed with melty white cheese and served warm with hogao on the side. The arepas stay tender inside, lightly crisp outside, and buttery on top. Sealing the cheese completely inside the dough before it ever touches the pan is the technique this whole recipe depends on — any gap in the seam lets the melting cheese leak straight into the pan instead of staying contained, the same fully-enclosed-filling principle used elsewhere in this collection whenever a stuffed dough needs its filling to stay put through direct heat. Mixing crumbled queso fresco directly into the dough, separate from the melting cheese used for the actual filling, is what gives the arepa its flavour and softness while a proper melting cheese still handles the classic gooey centre. Cooking over medium-low heat, rather than rushing at higher temperature, is what lets the crust set and the interior cook through together rather than the exterior overbrowning before the centre is even hot. The payoff is an arepa with a genuinely golden, lightly charred exterior giving way to a soft, tender corn crumb and a molten, gently stretchy cheese centre.
Prep Time : 25 min
Cook Time : 35 min
Servings : 4
25 min
35 min
4
Ingredients
For the Arepa Dough
• 480g white masarepa (pre-cooked white cornmeal for arepas) — this one on Amazon
• 600ml warm water
• 240ml warm whole milk — this one on Amazon
• 12g fine sea salt
• 30g unsalted butter, melted
• 150g queso fresco or queso blanco, finely crumbled, mixed into the dough for extra flavor and softness — this one on Amazon
For the Cheese Filling
• 360–420g melty white cheese, divided into 12 portions — quesillo, Oaxaca, mozzarella, queso quesadilla, or another good melting white cheese — this one on Amazon
For Cooking and Finishing
• 1–2 tbsp neutral oil or butter, for the pan
• 20–30g unsalted butter, for brushing or topping while warm — this one on Amazon
For the Hogao
• 2 tbsp neutral oil
• 1 medium white onion, very finely diced
• 3 scallions, finely sliced
• 2 garlic cloves, finely minced
• 4 medium ripe Roma tomatoes, finely diced
• 1 small pinch ground cumin
• Fine sea salt, to taste
• Freshly ground black pepper, to taste
• 2–3 tbsp water, if needed to loosen
This post may contain affiliate links. As an Amazon Associate I earn from qualifying purchases, at no additional cost to you.
Directions
- Make the Hogao
Heat the oil in a small pan over medium heat. Add the white onion and scallions and cook gently for 4–5 minutes until softened and slightly translucent. Add the garlic and cook for 30 seconds, just until fragrant. Add the diced tomatoes, cumin, salt, and black pepper. Cook for 10–15 minutes, stirring occasionally, until the tomatoes break down and the mixture becomes soft, spoonable, and lightly jammy. Add a small splash of water only if it tightens too much. Set aside. The hogao should not be watery. It should be soft, rich, and spoonable, with the onion fully softened and the tomato lightly concentrated. Cooking the onion and scallions gently before the tomato ever goes in builds a sweet, softened aromatic base first — adding the tomato too early, before the onion has properly broken down, would leave the finished sauce with a raw, sharper onion note running through it. - Mix the Dough
In a large bowl, combine the warm water, warm milk, salt, and melted butter. Stir to dissolve the salt evenly. Sprinkle in the masarepa gradually while mixing with your hand or a spoon so no dry lumps form. Add the crumbled queso fresco or queso blanco and mix again until evenly distributed. Let the dough rest for 5–7 minutes so the cornmeal fully hydrates. After resting, the dough should feel soft, moist, and pliable. It should hold together when pressed without cracking badly at the edges. If it feels too dry, add a tablespoon or two of warm water. If too wet, add a little more masarepa. Adding the masarepa gradually while mixing, rather than dumping it in all at once, is what prevents dry pockets from forming — pre-cooked cornmeal hydrates quickly, and lumps that form early tend not to fully smooth out even with continued mixing afterward. - Divide and Shape
Divide the dough into 12 equal portions. Roll each portion into a smooth ball. Flatten one ball in your palm into a small thick disc. Place one portion of the melting white cheese in the center. Fold the dough around the cheese and seal it completely. Gently flatten again into a round arepa about 1.5cm thick. Repeat with the remaining dough and cheese. Make sure the cheese is fully enclosed. If the seam stays open, the filling will leak into the pan instead of staying inside the arepa. Reshaping into the final flattened disc only after the seam is fully sealed protects that seal from being stretched back open — flattening too aggressively before the dough has properly closed around the cheese risks reopening exactly the gap this step is meant to prevent. - Pan-Cook the Arepas
Heat a large skillet, griddle, or cast-iron pan over medium to medium-low heat. Lightly grease with a little oil or butter. Cook the arepas in batches for about 5–7 minutes on the first side, then flip and cook another 5–7 minutes on the second side. Press very lightly only if needed to keep the shape even. Once both sides are golden and lightly charred in spots, continue turning every 1–2 minutes as needed until they feel firmer and sound slightly hollow when tapped. If your arepas are thick, you can finish them in a 180°C oven for 8–10 minutes after pan-cooking to ensure the center is hot and the cheese is fully melted. The exterior should be golden and set before the inside fully finishes. Cooking too fast will overbrown the crust before the center is heated through. Medium-low heat gives the dense masarepa dough genuine time to cook through to its centre at roughly the same pace the exterior develops its golden, charred colour — pushed at higher heat, that balance breaks down, and the crust darkens well before the interior and cheese have had a chance to properly heat through. - Finish and Serve
Transfer the hot arepas to a plate or rack and immediately top or brush them with a little butter so it melts over the surface. Let them rest for 2–3 minutes, then serve warm with the hogao on the side. When opened, the cheese should be melted, soft, and gently stretchy. Brushing the butter on while the arepas are still genuinely hot lets it melt in and glisten across the surface immediately, rather than sitting as a solid, unmelted pat the way it would on a cooler arepa.
*Notes :
- Sealing the cheese completely inside the dough before it ever meets the pan deserves to be treated as the single most consequential step in this whole recipe. Any gap left in that seam gives the melting cheese, once it liquefies under heat, a direct path to escape into the pan rather than staying contained inside the arepa — an open seam doesn’t just look messy, it actively empties the arepa of the very filling that defines this dish.
- Keeping crumbled queso fresco mixed into the dough itself, separate from the melting cheese used as the actual filling, is worth understanding as two distinct jobs assigned to two distinct cheeses. Queso fresco doesn’t melt appreciably under heat, so its role here is purely about flavour and tenderness within the dough itself. The molten, stretchy centre this dish is known for depends entirely on the second cheese — genuine melting cheese like quesillo, Oaxaca, or mozzarella — chosen and used specifically for that job.
- The medium-low cooking temperature specified throughout the pan-cooking stage addresses a genuine timing tension specific to this thick, dense masarepa dough. Unlike a thin pancake or tortilla, this dough has real depth for heat to travel through before the centre and cheese are properly hot — cooking at higher heat would darken and set the crust considerably faster than that heat can penetrate to the middle, forcing a trade-off between a burnt exterior and a cold, underdone interior.
- The hogao’s own cooking sequence — onion and scallions softened first, tomato added only afterward — mirrors a principle used throughout this collection whenever an aromatic base needs real time to develop before a more acidic or watery ingredient joins it. Rushing the tomato in too early leaves the finished sauce carrying a raw, sharper onion note that a fully softened base wouldn’t have.
Why This Recipe Works
This recipe works because the cheese filling is fully sealed inside the dough before cooking, preventing it from leaking out under heat.
Two different cheeses handle two distinct jobs — queso fresco for flavour and tenderness within the dough itself, genuine melting cheese for the actual molten centre.
Cooking over medium-low heat gives this dense masarepa dough genuine time to heat through to its centre at roughly the same pace the exterior develops its golden, charred colour, avoiding the trade-off a hotter, faster cook would force.
The hogao’s own base is properly softened before the tomato joins it, and brushing the arepas with butter while still hot finishes the dish with a glistening, properly melted surface.
Ingredient Breakdown
White Masarepa
The dough’s foundation — pre-cooked cornmeal specifically formulated for arepas, giving the classic soft, tender texture this recipe depends on.
Queso Fresco Mixed Into the Dough
The flavour and tenderness component — doesn’t melt appreciably, so its role is distinct from the actual melting cheese filling.
Genuine Melting White Cheese
The signature filling — a proper melting cheese like quesillo, Oaxaca, or mozzarella is what produces the classic gooey, stretchy centre.
Fully Sealed Dough Seam
The critical technique — prevents the melting cheese from leaking out into the pan during cooking.
Medium-Low Cooking Heat
The critical cooking technique — lets the thick dough’s exterior and interior finish at roughly the same pace.
Flavor Structure Explained
This arepas con queso follow a layered balance model:
- Tender corn foundation (masarepa dough)
- Rich melted centre (genuine melting cheese)
- Savoury dough flavour (queso fresco within the dough)
- Buttery glossy finish (butter brushed on hot)
- Bright savoury accompaniment (hogao)
The tender masarepa dough provides a soft, corn-forward foundation with a lightly crisp, golden, charred exterior. Genuine melting cheese sealed inside contributes a rich, stretchy, molten centre that’s the dish’s defining feature. Queso fresco mixed directly into the dough adds savoury flavour and softness throughout every bite. A brush of butter while the arepas are still hot finishes the surface with rich, glossy shine. Served alongside, the hogao adds a bright, softened onion-and-tomato accompaniment that complements the buttery corn and melted cheese without overpowering either.
Common Mistakes to Avoid
- Leaving the Dough Seam Open Around the Cheese – This lets the melting cheese leak directly into the pan during cooking. Always seal it completely before flattening into the final arepa shape.
- Using Only Queso Fresco as the Filling – This cheese doesn’t melt appreciably, missing the classic gooey centre entirely. Always use a proper melting cheese for the filling itself.
- Adding the Masarepa All at Once – This risks dry lumps that don’t fully smooth out even with continued mixing. Always sprinkle it in gradually while mixing.
- Cooking Over Too-High Heat – This overbrowns the exterior before the thick centre and cheese have properly heated through. Always use medium to medium-low heat.
- Rushing the Hogao’s Onion Stage – Adding the tomato too early leaves a raw, sharp onion note in the finished sauce. Always soften the onion and scallions fully first.
Variations
Extra-Cheesy Version
Increase the melting cheese portion slightly per arepa for a more generous, gooier centre.
Spicier Hogao Version
Add a finely diced jalapeño or a pinch of aji amarillo to the hogao for extra heat.
Herb-Flecked Dough Version
Mix a small amount of finely chopped fresh cilantro into the dough alongside the queso fresco for an herbal note.
Oven-Finished Version
Follow the optional oven finish for consistently, evenly melted cheese, especially useful for thicker arepas.
Storage & Make-Ahead
The hogao can be made 2–3 days ahead and refrigerated in a sealed container; reheat gently before serving.
Shaped, unfilled or filled uncooked arepas can be refrigerated for a few hours before cooking, covered to prevent drying.
Cooked arepas can be refrigerated for up to 2 days; reheat in a skillet or oven to help restore some crispness and re-melt the cheese, since a microwave will soften the crust.
Fully cooked arepas are best eaten the same day for the freshest texture and fully molten cheese centre.
Frequently Asked Questions
Why is sealing the cheese completely inside the dough so important?
Any gap left in the seam gives the melting cheese a direct path to escape into the pan once it liquefies under heat. A properly sealed arepa is what keeps that filling contained and molten inside, rather than emptying out during cooking.
Why does the recipe use two different cheeses — queso fresco in the dough and a separate melting cheese for the filling?
Queso fresco doesn’t melt appreciably under heat, so its role is purely about flavour and tenderness within the dough itself. The classic gooey, stretchy centre depends entirely on a genuine melting cheese used specifically as the filling.
Why does the pan need to stay at medium-low heat rather than cooking the arepas faster?
This thick, dense dough has real depth for heat to travel through before the centre and cheese are properly hot. Higher heat would darken the crust considerably faster than that heat could penetrate to the middle, forcing a trade-off between a burnt exterior and an underdone interior.
Why does the hogao’s onion need to soften fully before the tomato is added?
Yes. Prepare the citrus base ahead, keep it chilled, and add soda directly into glasses or just before serving to preserve carbonation.
Are there other Latin American corn-based or stuffed dishes worth trying?
Arepas Reina Pepiada takes the same masarepa base in a different direction, split and filled with a chicken-avocado salad instead of melted cheese. Brazilian Pão de Queijo offers another cheese-forward Latin American bread worth exploring. Sándwich Ahogado (Torta Ahogada) and Kimcheese (Kimchi Grilled Cheese) are both worth trying too if you enjoy this kind of hearty, cheese-centred comfort food from different culinary traditions.
Nutrition Facts
( per serving )
Calories
~720 kcal
Protein
32 g
Fat
34 g
Carbs
76 g
Calories
~720 kcal
Protein
32 g
Fat
34 g
Carbs
76 g
Related Recipes
Related Recipes

Tequeños
Firm white cheese wrapped in thin buttery dough, fried until deeply golden and crisp with melted, stretchy cheese inside.
Spanish Escalivada with Burrata & Capers
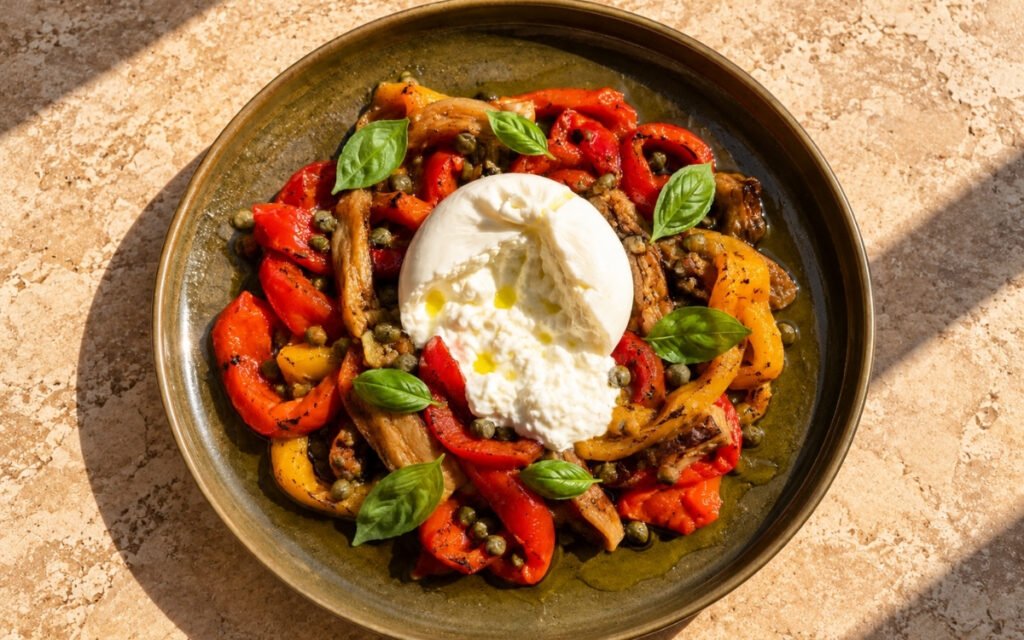
Fully roasted peppers, eggplant, and onion, peeled and torn into soft smoky strips, dressed with olive oil, finished with torn burrata, capers, and basil.
Cinnamon Dolce Iced Latte
Warm cinnamon-brown sugar syrup, cold milk, and ice topped with freshly brewed espresso, for a milk-forward, gently spiced latte.


You might also like
You might also like
Chicken Fries
Long thin chicken breast strips coated in a craggy panko-breadcrumb crust, deep-fried until golden and crisp, served with a savoury dipping sauce.
Cheddar Chive Scones
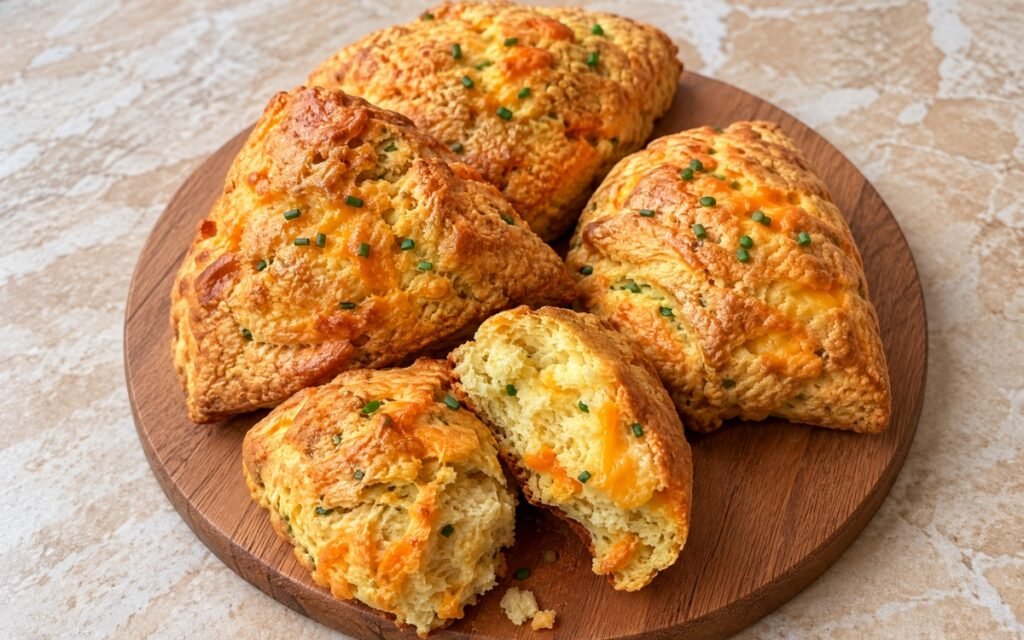
Savory cheddar chive scones with golden craggy tops, buttery flaky interiors, sharp cheddar pockets, and fresh chive flecks throughout.
Full English Breakfast
Fried eggs, browned pork sausages, crisp bacon rashers, grilled tomatoes, sautéed mushrooms, baked beans, buttered toast, and crisp hash browns.


Arepas con Queso
Ingredients
Method
- Heat the oil in a small pan over medium heat. Add the white onion and scallions and cook gently for 4–5 minutes until softened and slightly translucent. Add the garlic and cook for 30 seconds, just until fragrant. Add the diced tomatoes, cumin, salt, and black pepper. Cook for 10–15 minutes, stirring occasionally, until the tomatoes break down and the mixture becomes soft, spoonable, and lightly jammy. Add a small splash of water only if it tightens too much. Set aside. The hogao should not be watery. It should be soft, rich, and spoonable, with the onion fully softened and the tomato lightly concentrated. Cooking the onion and scallions gently before the tomato ever goes in builds a sweet, softened aromatic base first — adding the tomato too early, before the onion has properly broken down, would leave the finished sauce with a raw, sharper onion note running through it.
- In a large bowl, combine the warm water, warm milk, salt, and melted butter. Stir to dissolve the salt evenly. Sprinkle in the masarepa gradually while mixing with your hand or a spoon so no dry lumps form. Add the crumbled queso fresco or queso blanco and mix again until evenly distributed. Let the dough rest for 5–7 minutes so the cornmeal fully hydrates. After resting, the dough should feel soft, moist, and pliable. It should hold together when pressed without cracking badly at the edges. If it feels too dry, add a tablespoon or two of warm water. If too wet, add a little more masarepa. Adding the masarepa gradually while mixing, rather than dumping it in all at once, is what prevents dry pockets from forming — pre-cooked cornmeal hydrates quickly, and lumps that form early tend not to fully smooth out even with continued mixing afterward.
- Divide the dough into 12 equal portions. Roll each portion into a smooth ball. Flatten one ball in your palm into a small thick disc. Place one portion of the melting white cheese in the center. Fold the dough around the cheese and seal it completely. Gently flatten again into a round arepa about 1.5cm thick. Repeat with the remaining dough and cheese. Make sure the cheese is fully enclosed. If the seam stays open, the filling will leak into the pan instead of staying inside the arepa. Reshaping into the final flattened disc only after the seam is fully sealed protects that seal from being stretched back open — flattening too aggressively before the dough has properly closed around the cheese risks reopening exactly the gap this step is meant to prevent.
- Heat a large skillet, griddle, or cast-iron pan over medium to medium-low heat. Lightly grease with a little oil or butter. Cook the arepas in batches for about 5–7 minutes on the first side, then flip and cook another 5–7 minutes on the second side. Press very lightly only if needed to keep the shape even. Once both sides are golden and lightly charred in spots, continue turning every 1–2 minutes as needed until they feel firmer and sound slightly hollow when tapped. If your arepas are thick, you can finish them in a 180°C oven for 8–10 minutes after pan-cooking to ensure the center is hot and the cheese is fully melted. The exterior should be golden and set before the inside fully finishes. Cooking too fast will overbrown the crust before the center is heated through. Medium-low heat gives the dense masarepa dough genuine time to cook through to its centre at roughly the same pace the exterior develops its golden, charred colour — pushed at higher heat, that balance breaks down, and the crust darkens well before the interior and cheese have had a chance to properly heat through.
- Transfer the hot arepas to a plate or rack and immediately top or brush them with a little butter so it melts over the surface. Let them rest for 2–3 minutes, then serve warm with the hogao on the side. When opened, the cheese should be melted, soft, and gently stretchy. Brushing the butter on while the arepas are still genuinely hot lets it melt in and glisten across the surface immediately, rather than sitting as a solid, unmelted pat the way it would on a cooler arepa.