Ingredients
Method
Activate the Yeast and Combine the Wet Ingredients
- In a large mixing bowl, combine the 220g of warm milk — measured at 24–27°C specifically, as temperatures above 30°C begin inhibiting yeast activity and temperatures above 43°C kill it — with the 10g of honey and 7g of instant dry yeast. Stir briefly and allow to sit for 5 minutes. After 5 minutes the mixture should show visible foam and small bubbles across the surface — the sign that the yeast is active and viable. If no foam appears after 5 minutes, the yeast is likely dead or the milk temperature was incorrect; discard and begin again with fresh yeast and correctly tempered milk. Add the 2 whole eggs and 2 egg yolks to the foamy milk mixture. Whisk until completely combined and uniform — no visible yolk streaks remaining. The four-egg combination (two whole, two yolks) is the specific enrichment ratio that produces the characteristic golden crumb colour and the rich, slightly custard-adjacent flavour of brioche. The yolks' carotenoid pigments are what produce the golden colour; the whites provide structure and moisture. More yolks than whites produces a richer result; this ratio balances colour and richness against structural integrity.
Combine with the Dry Ingredients and Develop Initial Structure
- In a separate bowl, whisk together the 500g of flour, 30g of sugar, and 8g of salt. Add the dry mixture to the wet mixture. Begin kneading — either by hand on a lightly floured surface or with a stand mixer fitted with the dough hook on medium-low speed. Knead for 5–7 minutes until the initial rough, shaggy mass smooths into a cohesive dough that is noticeably more elastic and extensible than at the start. At this stage the dough should be somewhat sticky and smooth but not yet fully developed — it will tear rather than stretch when pulled. This initial kneading establishes the primary gluten network that will subsequently be enriched by the butter.
Add the Butter Gradually
- This is the most technique-critical and most patience-requiring step in the recipe, and it is non-negotiable in its execution. The butter must be added gradually, one small piece at a time, with thorough kneading after each addition until the piece is fully absorbed and no visible butter streaks remain before the next piece enters the dough. The reason for gradual addition is structural: fat inhibits gluten formation by coating the flour's protein strands and preventing them from bonding into the extended gluten network. If all the butter is added simultaneously at the beginning, the fat overwhelms the flour and prevents any meaningful gluten development — producing a greasy, structureless mass that cannot hold the carbon dioxide from fermentation and will not rise. Added gradually after initial gluten development, each piece of butter is absorbed into an existing gluten network and lubricates rather than prevents the structure, producing the specific smooth, glossy, slightly elastic final dough. Add the 110g of soft butter in approximately 10–12 pieces over the course of 10–12 minutes of continuous kneading. The butter must be genuinely soft — cold butter breaks the gluten strands during incorporation and creates grey, greasy streaks; melted butter produces a different emulsification and a different crumb texture. Soft, room-temperature butter that smears easily between fingers is the correct starting point. Continue kneading for the full 10–12 minutes until the dough is completely smooth, glossy, slightly tacky but not wet or sticky, and passes the windowpane test: stretch a small piece slowly between your fingers — a well-developed brioche dough stretches into a thin, translucent membrane before tearing.
First Rise and Overnight Refrigeration
- Transfer the dough to a lightly greased bowl and cover tightly with plastic wrap. Allow to rest at room temperature for 45–60 minutes — not until doubled, but until slightly puffed and relaxed from the kneading. This brief room-temperature rest begins the fermentation and allows the gluten to relax before the cold slow-down. Transfer the covered bowl to the refrigerator and allow to ferment overnight — a minimum of 8 hours and up to 16 hours. During the cold fermentation the yeast remains active but at a greatly reduced metabolic rate, producing carbon dioxide slowly while also producing the flavour compounds — organic acids, esters, and alcohols — that develop over time and make the overnight brioche taste noticeably more complex and more flavourful than a same-day rushed version. The cold temperature also firms the butter within the dough, making the dough significantly easier to shape in the morning — cold, firm brioche dough shapes cleanly and holds its form; room-temperature brioche dough is soft and difficult to manipulate.
- Same-Day Alternative: Skip the refrigeration and allow the dough to rise at room temperature for 1½–2 hours, or until doubled in volume. Watch the dough rather than the clock — ambient temperature, yeast vigour, and dough hydration all affect timing. An over-proofed dough that has risen beyond doubled will have weakened gluten structure and may collapse during baking; a correctly doubled dough will spring back slowly when poked with a floured finger.
Shape the Loaf
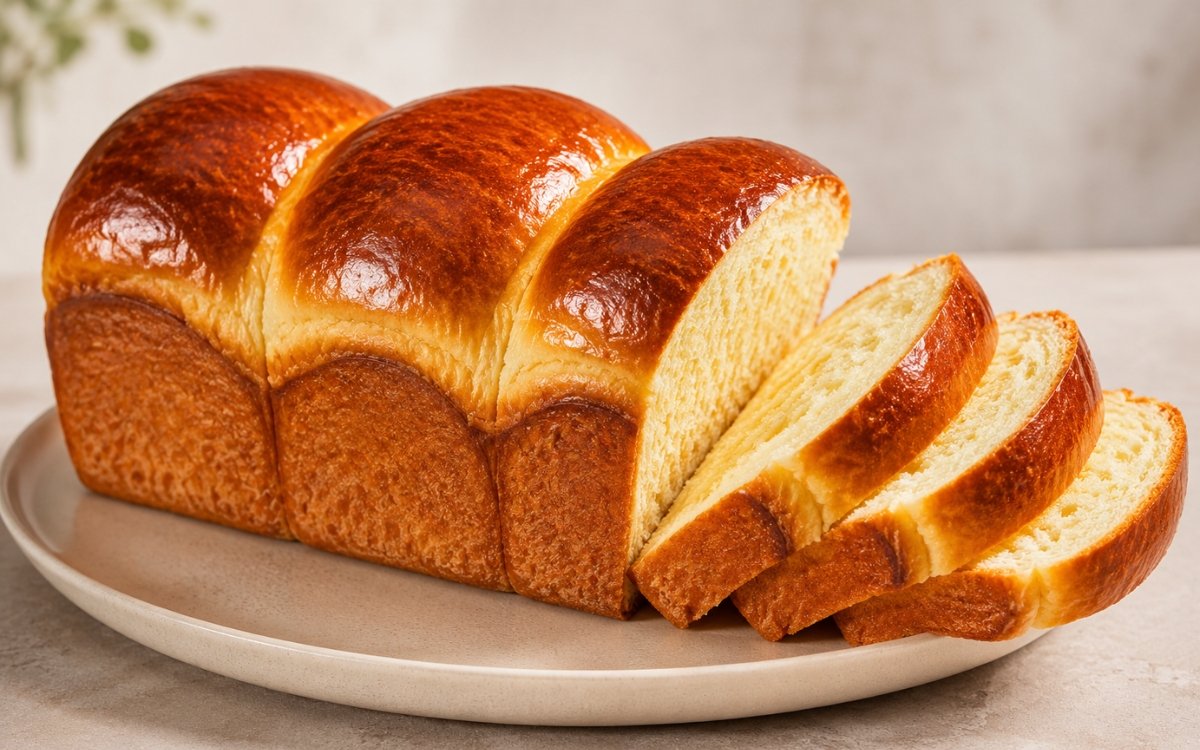
- Remove the refrigerated dough from the refrigerator. Allow to sit at room temperature for 15–20 minutes to relax slightly. The dough will be cold, firm, and significantly easier to handle than room-temperature brioche. Gently deflate the dough by pressing it down. Divide into 3 equal portions — a kitchen scale produces the most consistent equal portions; three equal portions in a standard 23×13cm loaf pan produce the characteristic three-crowned top that is the visual hallmark of a classic toast bread. Shape each portion into a tight log or ball — pulling the surface toward the base and pinching the seam closed — to build surface tension. Surface tension in shaped dough is what produces the smooth, evenly rounded rise during proofing; loosely shaped dough with no surface tension produces irregular, flat-topped results. Place the three shaped portions side by side, seam-side down, in a buttered 23×13cm (9×5 inch) loaf pan. The pieces should touch each other and fill the pan's length evenly. Cover loosely with lightly greased plastic wrap or a clean damp cloth.
Final Proof
- Allow to proof at room temperature for 45–75 minutes — until the dough is noticeably puffed, slightly domed above the pan's rim, and springs back slowly (but does return) when poked. The final proof window varies significantly with ambient temperature: a warm kitchen at 24°C may proof the shaped loaf in 45 minutes; a cool kitchen at 18°C may require 75–90 minutes. The dough is correctly proofed when it looks pillowy and soft and has visibly expanded from its shaped size. Under-proofed dough produces a dense, tight crumb and may burst at the sides during baking; over-proofed dough loses structural integrity and collapses or sinks after baking. Preheat the oven to 175°C during the final proof period.
Egg Wash and Bake
- Whisk together 1 egg and 1 tbsp of whole milk until uniform. Using a pastry brush, apply a thin, even coat of egg wash across the entire top surface of the proofed loaf — reaching all three domed crowns but not dripping into the sides of the pan where it would adhere and prevent the loaf from releasing cleanly. The egg wash's protein and fat produce the specific deep amber, glossy, lacquered surface during baking that distinguishes a brioche from an unfinished loaf. Place in the preheated 175°C oven. Bake for 32–38 minutes until the top is a deep, even golden-brown across all three crowns and the internal temperature reads 90–92°C at the centre of the loaf — insert the thermometer from the side through the centre mass, not from the top. At 90–92°C the crumb is fully set and cooked through; below this the centre remains gummy. If the top surface begins browning significantly before 32 minutes — check at 20–22 minutes — loosely tent with a sheet of aluminium foil for the remainder of the baking time.
Cool Before Slicing
- Remove from the oven and allow the loaf to cool in the pan on a wire rack for 10 minutes. After 10 minutes, use the pan's sides to gently loosen the loaf and transfer it to the wire rack. Allow to cool completely to room temperature before slicing — a minimum of 1 hour. Hot brioche cut immediately produces a gummy, compressed crumb that tears rather than slicing cleanly; fully cooled brioche produces clean, even 2cm slices with visible, open crumb structure.
Notes
The overnight cold fermentation is the specific quality decision that most distinguishes bakery-quality brioche from a same-day rushed version. Cold fermentation produces flavour through a slow accumulation of organic acids, esters, and alcohols as the yeast and beneficial bacteria process the dough's sugars over 8–16 hours. The same-day version is good; the overnight version has a specific depth and complexity — a barely perceptible background tang and a more aromatic, more developed butter-and-egg flavour — that makes it noticeably more satisfying as a toast bread.
The windowpane test is the most reliable indicator of sufficient gluten development in an enriched dough, and it is worth performing before accepting the dough as ready for its first rise. Take a small piece — roughly golf ball size — and stretch it slowly and steadily between your fingers. A fully developed dough stretches into a thin, translucent membrane, similar to a soap bubble, before tearing. An underdeveloped dough tears immediately without thinning. Underdeveloped brioche dough produces a dense, heavy loaf without the open, tender crumb that the recipe produces when properly kneaded.
This bread is specifically well-suited to French toast — its high egg and butter content produces a crumb that absorbs custard at the correct rate without over-saturating, and its inherent richness makes the finished French toast taste specifically indulgent. See the Classic French Toast recipe for the technique.