
Tamago Sando
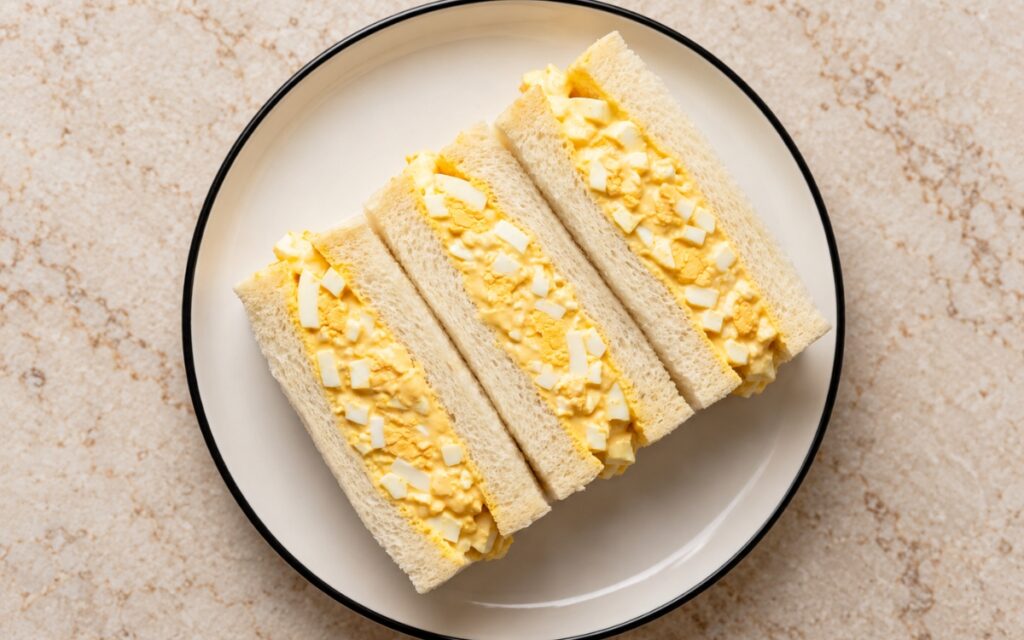
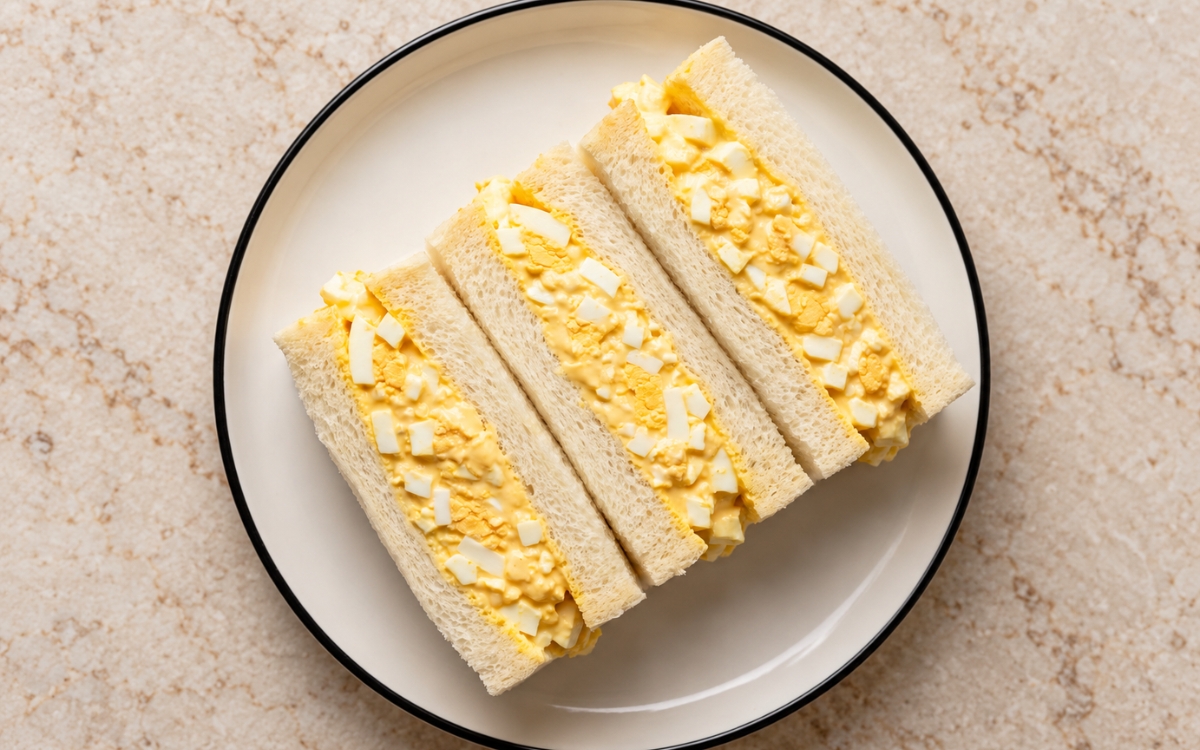
Classic Japanese tamago sando made with soft, crustless milk bread and a thick, creamy egg salad of finely mashed golden yolks and small, visible pieces of chopped white, the key being a rich, mayonnaise-bound filling that mounds generously between the slices without leaking out. Chilling the boiled eggs immediately in ice water, rather than letting them cool slowly in their own heat, is the technique this whole sandwich depends on for tender whites and bright yellow yolks — slow cooling lets the yolks turn chalky and grey at the edges while the whites toughen, the same stop-the-cooking-promptly principle used elsewhere in this collection whenever a delicate egg texture must be preserved. Mashing the yolks until powdery while keeping the whites in small chunks is what gives the filling both a genuinely smooth richness and its classic textured look. A thin layer of soft butter on every slice is what keeps the filling’s moisture from soaking into the fluffy crumb. The payoff is a sandwich with real, cloud-soft tenderness — pillowy white bread, a thick, creamy and gently seasoned egg filling, and clean rectangular halves that show every layer.
Prep Time : 20 min
Total Time : 30 min
Servings : 4
20 min
30 min
4
Ingredients
For the Egg Filling
• 8 large eggs
• 120–140g Japanese mayonnaise, preferably Kewpie
• 4–5g fine salt, or to taste
• A small pinch of white or black pepper
• 4–6g sugar, optional, for a classic conbini-style balance
• 1–2 tbsp milk or heavy cream, optional, only if needed to loosen slightly
• 10–15g unsalted butter, softened, optional, for extra richness
For the Bread
• 8 slices Japanese milk bread (shokupan), soft and evenly cut
• 20–25g soft unsalted butter, for lightly spreading on the bread
• Japanese karashi mustard, a very thin layer, optional
Directions
- Cook the Eggs
Place the 8 large eggs in a saucepan, cover generously with cold water and bring to a boil over medium-high heat. Once the water is boiling, lower the heat slightly and cook for 9–10 minutes, until the yolks are fully set. While they cook, fill a large bowl with ice and cold water. Transfer the eggs straight into the ice water and leave them until completely cold, then peel carefully. The yolks should be a genuinely clean, bright yellow right through, never chalky or ringed with grey. That immediate chilling is what stops the cooking at the right moment, so the whites stay tender and the yolks keep their colour. - Make the Egg Salad
Separate the peeled eggs into whites and yolks. Mash the yolks finely in a bowl with a fork until powdery and smooth, then chop the whites into small but visible pieces and fold them back in. Add 120–140g of Japanese mayonnaise, 4–5g of fine salt, a small pinch of pepper and, if using, 4–6g of sugar and 10–15g of softened butter, and mix until creamy and cohesive. Only if the mixture seems stiff, loosen it with 1 tbsp of milk or cream, adding a second only if needed. Taste before assembling, since Japanese egg sandwiches are gently seasoned rather than aggressively salty. That balance of fine yolk and chunky white is what gives the filling richness without turning it into paste. - Prepare the Bread
Lay out the 8 slices of milk bread and trim the crusts cleanly from all four sides, so every slice is an even, tidy rectangle. Spread each slice lightly with the 20–25g of softened butter, about 2½–3g per slice, right to the edges. If using karashi, spread an extremely thin layer on the bottom slice of each sandwich only. Use genuinely soft, fresh bread that feels fluffy and almost cloud-like. That thin butter coating is what acts as a moisture barrier, so the bread stays soft and light instead of going damp under the filling. - Fill and Shape
Divide the egg filling evenly into 4 portions of about 130–140g each, then spread or mound one portion generously over each of 4 buttered slices, taking it all the way to the edges. Top with the remaining 4 slices, buttered side down, and press very gently so the filling settles evenly right to the corners. Keep the layers level so the cut faces look neat and full. That light pressure is what lets the filling genuinely fill the sandwich without squashing the crumb flat. - Chill and Cut
For the cleanest slices, wrap the sandwiches lightly or set them seam-side down and chill for 5–10 minutes. Using a very sharp knife, cut each sandwich cleanly in half into 2 rectangular halves, wiping the blade between cuts if filling clings to it. Arrange the halves upright or slightly leaned so the creamy cross-sections show. The bread edges should stay clean and tidy. That brief chill is what firms the filling just enough to hold its shape under the blade, giving genuinely sharp, neat edges.
*Notes :
- Chilling the eggs in ice water deserves genuine recognition as the technique most directly responsible for tender whites and bright yellow yolks in the finished filling. Residual heat keeps cooking a boiled egg after it leaves the pot, so eggs left to cool slowly turn chalky and grey at the yolk edge while the whites become rubbery.
- Mashing the yolks finely while only chopping the whites deserves the same attention this technique receives throughout this collection’s other egg-based fillings and salads that depend on contrasting textures. Powdery yolk dissolves into the mayonnaise for a smooth, rich base, whereas whites worked into paste lose their pleasant chunks and the whole filling turns dense, flat and heavy.
- Spreading butter right to the edges of each slice deserves genuine respect as the detail most directly responsible for bread that stays soft and fluffy until the last bite. Butter sets as a thin fatty film that blocks the filling’s moisture from soaking into the crumb, which would otherwise turn the airy slices damp, dense and gummy.
- Chilling briefly before cutting deserves attention as a genuine, checkable cue rather than a loose approximation of readiness. The sandwich should feel slightly firm to a light touch and hold its shape under the knife, because an unchilled filling slumps and smears across the blade instead of giving a clean, full cross-section.
Why This Recipe Works
This recipe works because eggs chilled in ice water straight from the pot keep tender whites and bright yellow yolks that never turn chalky or grey. Finely mashed yolks blended with Japanese mayonnaise build a thick, creamy base, while small chopped whites keep a visible, pleasant texture in every bite. A thin layer of soft butter shields the fluffy bread from moisture, so the crumb stays pillowy and light. A gentle press and a short chill then hold the generous filling neatly in place, so the sandwich cuts into clean, full halves.
Ingredient Breakdown
Ice-Water Chilling (Straight From the Pot)
The critical technique — stopping the cooking at once keeps the whites tender and the yolks a clean, bright yellow.
Finely Mashed Yolks with Chopped Whites
The structural choice — powdery yolk makes a smooth, rich base while small white pieces keep the classic textured look.
Kewpie-Style Japanese Mayonnaise
The defining flavour ingredient — its rich, gently tangy character binds the eggs into a thick, creamy filling that mounds without running.
Soft Unsalted Butter on the Bread
The critical safeguard — a thin layer blocks moisture from the filling, keeping the crumb fluffy while adding quiet richness.
Fresh Shokupan (Crusts Trimmed)
The structural foundation — genuinely soft, evenly cut milk bread gives the cloud-like texture and neat rectangular halves that define the sandwich.
Optional Karashi and Sugar (Used Sparingly)
The finishing touch — a whisper of mustard and a little sweetness round the egg without overpowering the creamy flavour.
Flavor Structure Explained
This tamago sando follows a layered balance model:
- Soft, pillowy foundation (fresh shokupan, trimmed crusts)
- Rich, creamy body (mashed yolks, Japanese mayonnaise)
- Tender, textural contrast (small chopped egg whites)
- Gentle, rounded seasoning (fine salt, white pepper, optional sugar)
- Subtle, sharp accent (thin karashi mustard layer)
Fluffy shokupan provides the soft, mild base, while mashed yolk and mayonnaise supply the rich, creamy body that makes the sandwich so satisfying. Small pieces of chopped white add a tender contrast that keeps each bite from feeling heavy. Salt, pepper and a touch of sugar season the egg gently rather than aggressively. A thin streak of karashi adds a faint, sharp note that ties the tamago sando together.
Common Mistakes to Avoid
- Overcooking the Eggs – This turns the yolks grey and chalky and the whites rubbery, dulling both colour and flavour. Always cook for 9–10 minutes, then chill immediately in ice water.
- Mashing the Whites Into Paste – This loses the small, visible chunks that give the filling its classic look and texture. Always chop the whites small, then fold them gently into the mashed yolks.
- Leaving Out the Butter Layer – This lets the filling’s moisture soak into the crumb, leaving the bread damp and heavy. Always spread softened butter thinly over every slice, right to the edges.
- Pressing the Sandwich Too Hard – This squashes the airy crumb flat and pushes filling out of the sides. Always press just enough to settle the filling evenly to the edges.
- Cutting Without a Short Chill – This lets the soft filling slump and smear across the knife, ruining the clean cross-section. Always chill for 5–10 minutes and wipe the blade between cuts.
Variations
Extra-Rich Version
Include the optional 10–15g of softened butter and mash the yolks even more finely while leaving the whites slightly chunkier, giving a plusher, more indulgent filling with a genuinely velvety bite.
Karashi Version
Spread a very thin layer of Japanese karashi mustard on one slice of each sandwich for a faint, sharp heat that cuts through the creamy richness without dominating the egg.
Conbini-Style Version
Stir the full 6g of sugar into the filling with a little extra white pepper for the gently sweet, mellow balance typical of Japanese convenience-store egg sandwiches.
Cream-Loosened Version
Fold in 1–2 tbsp of heavy cream or milk for a softer, more spreadable filling that settles easily to the edges while still holding its shape between the slices.
Storage & Make-Ahead
Tamago sando is best eaten fresh and slightly chilled, never warm, while the bread is at its softest and the creamy egg filling is cool, lightly set and still holding its generous mounded shape.
If you need to hold the sandwiches for later, wrap them tightly in cling film straight after cutting so the delicate milk bread does not dry out, stiffen or form a leathery crust at the edges.
Because the filling is egg-based, keep the wrapped sandwiches refrigerated until you are ready to serve them and eat them within 24 hours for the best texture and a safe, fresh flavour.
For a make-ahead approach, boil, chill and peel the eggs a day in advance and refrigerate them covered, then mash and mix the filling just before assembling so the bread stays as fluffy as possible.
Do not freeze tamago sando, because the mayonnaise-based filling separates and weeps when thawed and the fine, airy crumb of the bread turns wet, dense and heavy.
Frequently Asked Questions
Why are the boiled eggs chilled in ice water immediately?
Rapid cooling stops the residual heat from carrying on cooking the eggs, so the whites stay tender and the yolks remain a bright yellow instead of turning chalky with a grey ring.
Why are the yolks mashed finely while the whites are only chopped?
Powdery yolk blends smoothly into the mayonnaise for a rich, creamy base, while small white pieces add a tender texture and the classic look, so neither is lost to paste.
Why is butter spread on the bread before the filling goes on?
The thin butter layer acts as a moisture barrier, so the creamy egg filling cannot soak into the fluffy milk bread and turn it damp, and it adds subtle richness.
Why does the sandwich chill for 5–10 minutes before it is cut?
A short chill firms the filling and settles the bread, so a sharp knife glides through cleanly and the halves keep neat, full cross-sections instead of squashing or smearing.
Are there other classic Japanese bread, handheld, or tea recipes worth trying?
Japanese Milk Bread / Three-Part Shokupan offers another classic Japanese bread direction worth exploring. Onigiri Rice Balls and Avocado Toast with Jammy Eggs are also worth trying for other handheld and egg-topped directions, and Tonkatsu with Cabbage Slaw and Cold Brew Green Tea offer a crisp cutlet dish and a cooling drink worth exploring.
Nutrition Facts
( Per Serving — 1 sandwich )
Calories
~650 kcal
Protein
21 g
Fat
42 g
Carbs
45 g
Calories
~650 kcal
Protein
21 g
Fat
42 g
Carbs
45 g
Related Recipes
Related Recipes
-

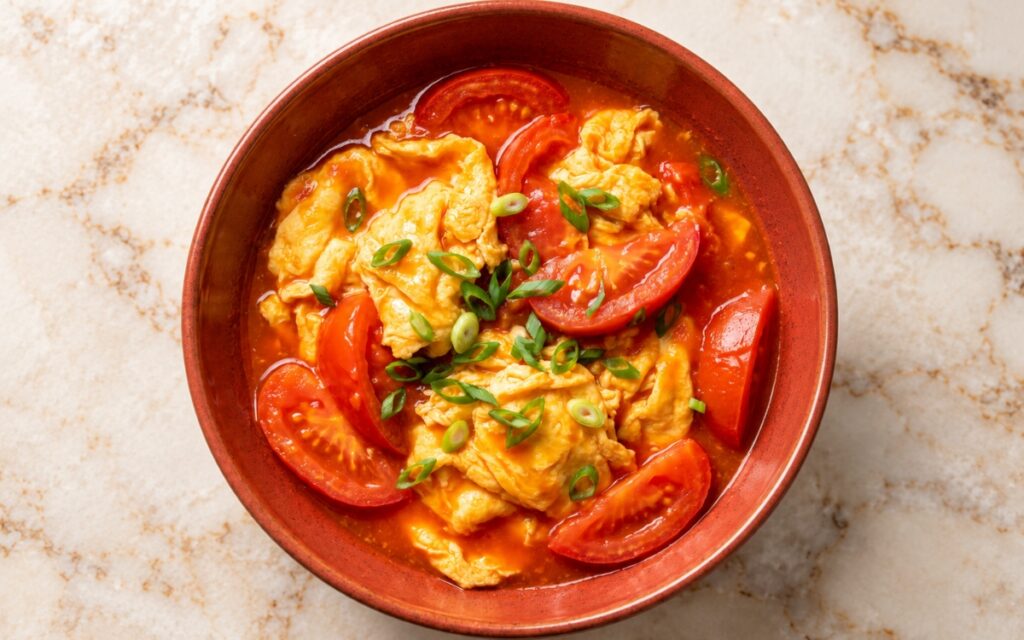
Chinese Tomato Egg Stir-Fry
Large soft scrambled egg curds and juicy tomato wedges in a glossy, lightly thickened red sauce, finished with fresh sliced scallion greens.
-
Chocolate Peanut Butter Banana Smoothie
A thick, creamy chocolate banana smoothie with peanut butter, cocoa and yogurt, swirled with peanut butter ribbons and topped with banana, peanuts, and cocoa.
-
Carrot Orange Ginger Smoothie
A bright golden-orange smoothie made with carrot, orange, fresh ginger, and yogurt, with natural sweetness and gentle ginger warmth.


You might also like
You might also like
-
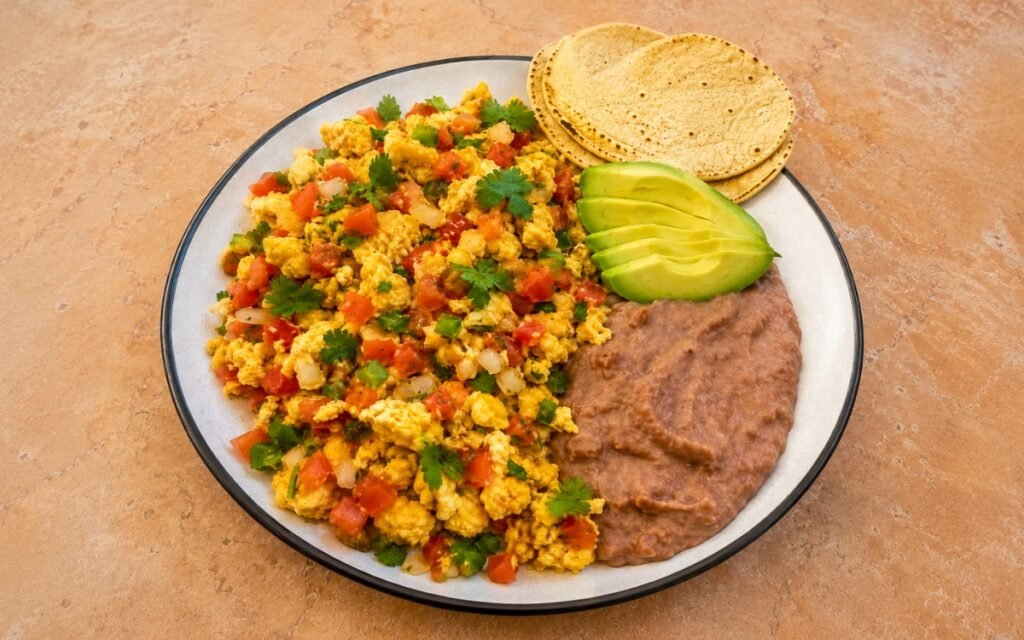
Huevos a la Mexicana
Softly scrambled eggs cooked with diced tomato, onion, and jalapeño, served with warm refried beans, sliced avocado, and tortillas.
-
Japanese Oyakodon
Tender simmered chicken thigh and soft onion topped with softly set egg in a light soy-dashi sauce, served over short-grain rice.
-
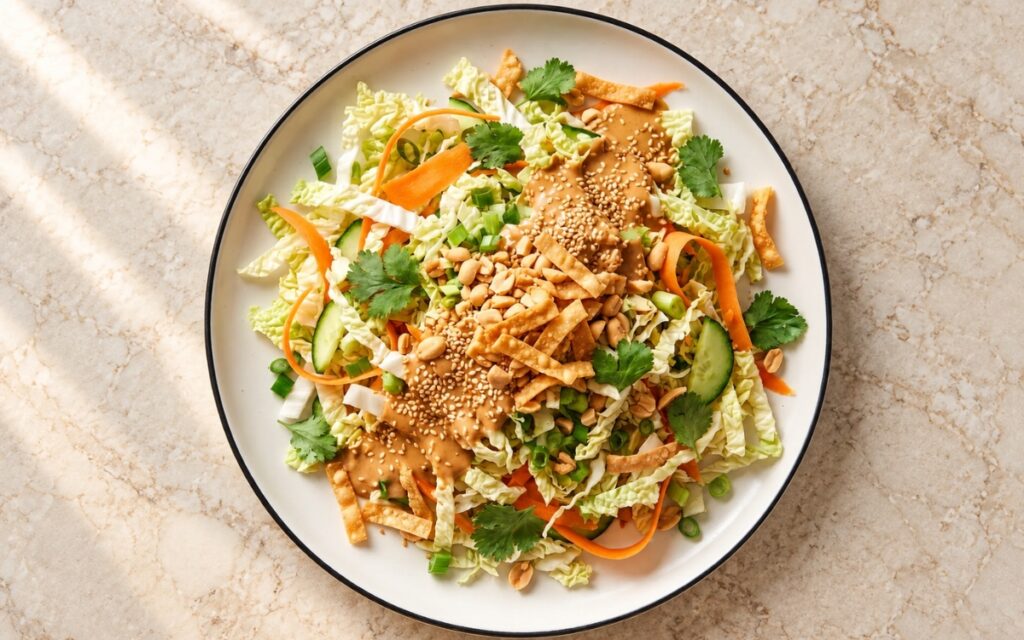
Chinese Cabbage Salad with Sesame Dressing
Shredded napa cabbage, carrots, cucumber and herbs tossed with a creamy toasted sesame dressing and topped with peanuts, sesame seeds and crisp wonton strips.

Tamago Sando
Ingredients
Method
- Place the 8 large eggs in a saucepan, cover generously with cold water and bring to a boil over medium-high heat. Once the water is boiling, lower the heat slightly and cook for 9–10 minutes, until the yolks are fully set. While they cook, fill a large bowl with ice and cold water. Transfer the eggs straight into the ice water and leave them until completely cold, then peel carefully. The yolks should be a genuinely clean, bright yellow right through, never chalky or ringed with grey. That immediate chilling is what stops the cooking at the right moment, so the whites stay tender and the yolks keep their colour.
- Separate the peeled eggs into whites and yolks. Mash the yolks finely in a bowl with a fork until powdery and smooth, then chop the whites into small but visible pieces and fold them back in. Add 120–140g of Japanese mayonnaise, 4–5g of fine salt, a small pinch of pepper and, if using, 4–6g of sugar and 10–15g of softened butter, and mix until creamy and cohesive. Only if the mixture seems stiff, loosen it with 1 tbsp of milk or cream, adding a second only if needed. Taste before assembling, since Japanese egg sandwiches are gently seasoned rather than aggressively salty. That balance of fine yolk and chunky white is what gives the filling richness without turning it into paste.
- Lay out the 8 slices of milk bread and trim the crusts cleanly from all four sides, so every slice is an even, tidy rectangle. Spread each slice lightly with the 20–25g of softened butter, about 2½–3g per slice, right to the edges. If using karashi, spread an extremely thin layer on the bottom slice of each sandwich only. Use genuinely soft, fresh bread that feels fluffy and almost cloud-like. That thin butter coating is what acts as a moisture barrier, so the bread stays soft and light instead of going damp under the filling.
- Divide the egg filling evenly into 4 portions of about 130–140g each, then spread or mound one portion generously over each of 4 buttered slices, taking it all the way to the edges. Top with the remaining 4 slices, buttered side down, and press very gently so the filling settles evenly right to the corners. Keep the layers level so the cut faces look neat and full. That light pressure is what lets the filling genuinely fill the sandwich without squashing the crumb flat.
- For the cleanest slices, wrap the sandwiches lightly or set them seam-side down and chill for 5–10 minutes. Using a very sharp knife, cut each sandwich cleanly in half into 2 rectangular halves, wiping the blade between cuts if filling clings to it. Arrange the halves upright or slightly leaned so the creamy cross-sections show. The bread edges should stay clean and tidy. That brief chill is what firms the filling just enough to hold its shape under the blade, giving genuinely sharp, neat edges.