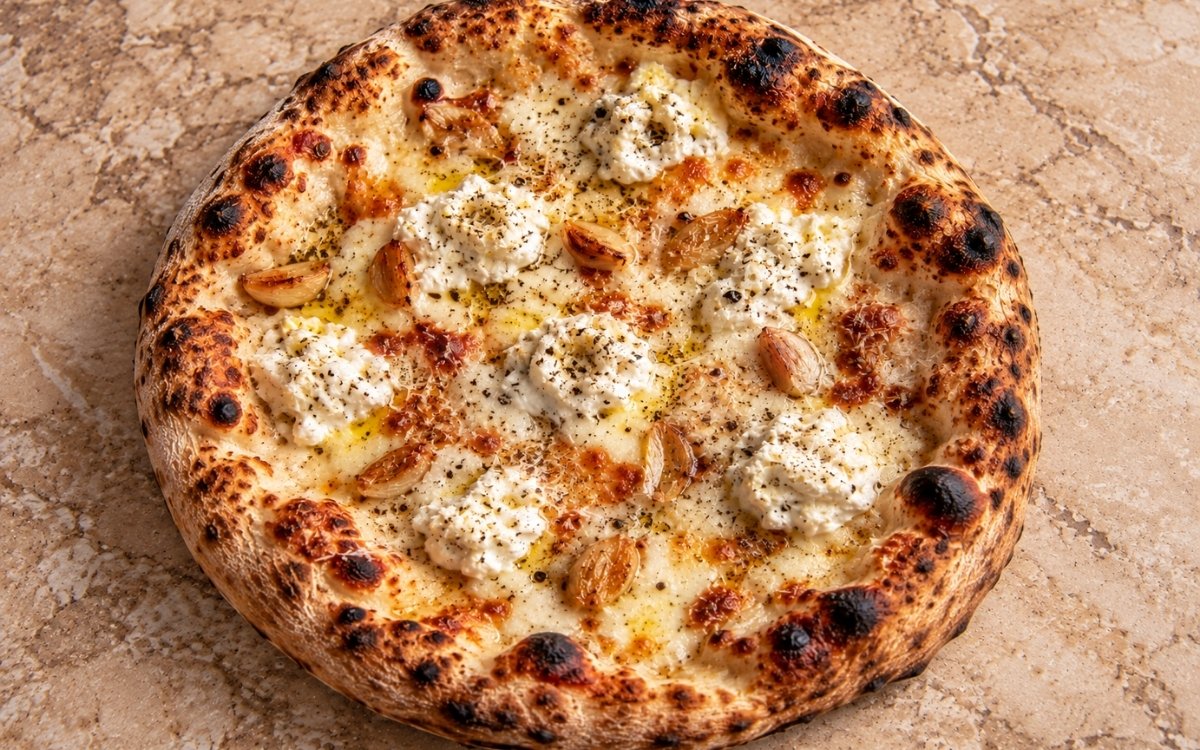
Ingredients
Method
Prepare the Dough
- Use half a batch of Homemade Pizza Dough and divide it into 4 dough balls of about 250g each after kneading. Place each dough ball into a lightly oiled covered container and cold-ferment for 24–48 hours. The long cold fermentation matters here. It improves flavour, relaxes the dough, and helps the crust bake up lighter, more blistered, and more open at the rim. Under-fermented dough tends to stay tight, resist stretching, and bake denser. That extended cold time gives the yeast genuine room to build real depth of flavour, well beyond what a same-day dough could achieve in only a few hours.
Bring the Dough to Room Temperature
- Remove the dough balls from the refrigerator 2–3 hours before baking. Keep them covered so they do not dry out. They should be soft, airy, and relaxed before shaping. If the dough is still cold and tight, it will spring back and can tear while stretching. That tempering window lets the cold, tightened gluten network genuinely relax and warm through before it ever meets this pizza's own hand-shaping.
Cook the Garlic
- Place the peeled garlic cloves, olive oil, and salt in a small saucepan or small oven-safe dish. If using the stovetop, cook over very low heat for 10–15 minutes, turning occasionally, until the cloves are tender, lightly golden in spots, and sweet-smelling. They should not fry aggressively or brown dark. If using the oven, cover loosely and bake at 170–180°C for 20–30 minutes, until soft and lightly golden. Set aside to cool. Reserve the garlic oil. The goal is mellow garlic, not harsh garlic. If the cloves brown too deeply, they become bitter and dominate the pizza instead of blending into the cheese. That genuinely low, patient heat is what softens the cloves' own harshness into real, mellow sweetness — the same aggressive heat that would brown them quickly would also push them straight past that point into bitterness.
Drain and Prepare the Ricotta
- Place the ricotta in a sieve or fine strainer over a bowl for 20–30 minutes if it looks wet. Then stir it with a small pinch of salt if needed. Ricotta that is too wet will leak moisture into the center of the pizza and make the surface watery. It should be thick enough to hold in soft dollops. That draining step matters directly here since, unlike a red pizza, this style has no tomato sauce layer to absorb any of the ricotta's own excess moisture.
Preheat the Oven and Baking Surface
- Place a pizza steel or pizza stone in the oven and preheat at the highest temperature your oven can safely hold, ideally 260–290°C, for at least 45–60 minutes. If your oven has a broiler / grill element, turn it on for the last 10 minutes of preheating if appropriate for your setup. A fully heated steel or stone is critical. Without a properly saturated baking surface, the bottom crust stays pale and the pizza can dry out on top before the base finishes baking. That extended preheat ensures the surface itself, not just the surrounding air, has genuinely reached its target temperature all the way through.
Prepare the Toppings
- Combine the Parmesan and Pecorino if using. Keep the mozzarella chilled until needed. Have the ricotta ready in spoonable dollops. Keep the cooked garlic cloves and reserved garlic oil nearby. Cold cheese is easier to distribute evenly and melts more cleanly during the short bake. Keeping everything genuinely cold and staged before shaping begins is what lets assembly happen quickly once the dough is stretched, protecting the shaped base from sitting too long before it reaches the hot oven.
Shape the First Pizza
- Dust the work surface lightly with flour or semolina. Place one dough ball on the surface and turn to coat lightly. Press from the center outward with your fingertips, leaving a rim of about 1.5–2cm untouched. Stretch into a round of about 28–30cm / 11–12 inches. Do not use a rolling pin. You want to preserve the gas in the dough so the edge puffs properly in the oven. The center should be thin and even, with a defined rim. If the dough shrinks back, let it rest for 10–15 minutes and continue. Tight dough should be relaxed, not forced. Letting resistant dough rest rather than forcing it through the shaping is what protects it from tearing, giving the gluten genuine additional time to relax before the next attempt.
Top the Pizza
- Transfer the shaped dough to a lightly floured peel. Scatter about 125–135g mozzarella evenly over the dough, leaving the rim bare. Add 5–6 garlic cloves per pizza, distributing them evenly. Spoon over 4–5 small dollops of ricotta. Sprinkle with about 15g Parmesan mixture. Drizzle lightly with a little of the reserved garlic oil and finish with cracked black pepper. Do not overload the pizza. White pizza has no sauce buffer, so excess cheese or ricotta will weigh down the center and slow the bake. The topping layer should be generous but restrained. That real restraint matters more here than on a red pizza specifically because there's no tomato layer to help separate and manage the toppings' own moisture.
Bake the Pizza
- Launch the pizza onto the hot steel or stone. Bake for 5–7 minutes, then rotate if needed, and continue baking another 2–3 minutes, until the crust is puffed, blistered, and deeply golden in places, the underside is well-browned, the mozzarella is melted and bubbling, the ricotta is warmed through and just beginning to colour lightly at the edges, and the garlic is caramelized in spots but not burnt. If the bottom is finished but the top needs more colour, turn on the broiler / grill briefly for 30–60 seconds, watching closely. That brief broiler finish, used only if needed, builds extra colour on top quickly without extending the overall bake long enough to dry out the base beneath it.
Finish and Serve
- Remove the pizza from the oven and immediately drizzle very lightly with olive oil. Add a little more cracked black pepper and a pinch of dried oregano if using. Let it sit for 1–2 minutes so the cheese settles slightly, then slice and serve. Drizzling that final oil while the pizza is still genuinely hot lets it settle into the melted cheese and warm crust rather than sitting on top as a separate, cool layer.
Repeat with the Remaining Dough
- Shape, top, and bake the remaining three pizzas the same way, keeping the unused dough covered while you work. Let the steel or stone recover heat for a few minutes between pizzas if needed. Giving the baking surface real time to recover its heat between pizzas protects each subsequent pie from the slower, paler bake a cooled stone or steel would otherwise produce.
Notes
Cooking the garlic low and slow, watching carefully for soft and only lightly golden rather than deeply browned, deserves genuine recognition as the technique responsible for this pizza's whole defining sweetness. That patient, gentle heat is specifically what coaxes real mellowness out of the cloves — the same aggressive heat that would brown them quickly would also push them straight past that point into a bitterness that would dominate the pizza rather than blending softly into the cheese.
Draining the ricotta before it ever meets the dough deserves the same attention this technique receives throughout this collection's other cheese-topped dishes. That step matters considerably more here than it would on a red pizza, given that white pizza carries no tomato sauce layer to help absorb the ricotta's own excess moisture — without proper draining, that liquid has nowhere else to go but directly into the center of the crust.
Keeping every topping to a genuinely restrained amount, as the recipe's own notes emphasise directly, deserves real attention given this style's particular vulnerability. A red pizza's sauce layer helps separate and manage moisture from the toppings above it; a white pizza has no such buffer, meaning excess cheese or ricotta here weighs down the center and slows the bake in a way red pizza would tolerate more forgivingly.
Keeping the cheese genuinely cold and fully staged before shaping the first pizza deserves attention as a real, practical technique rather than a minor convenience. Cold cheese distributes more evenly across the dough and melts more cleanly during this pizza's genuinely brief bake — cheese that's already begun softening would clump unevenly and melt less predictably once it actually reaches the oven's heat.