Ingredients
Method
Cook the Chicken Gently
- Season the chicken all over with the 14g salt and a few grinds of black pepper. You can either poach the chicken directly for the most classical soft result, or brown it lightly first for a deeper roasted flavor. If browning, heat 1 tablespoon oil or lard in a large heavy pot over medium heat and color the chicken lightly on both sides, about 3–4 minutes per side. It does not need to be fully cooked. Add the halved onion, peeled garlic cloves, bay leaves, and 1 litre water or stock. Bring just to a gentle simmer, not a hard boil. Skim any foam that rises. Cover partially and simmer very gently for 25–30 minutes, until the chicken is cooked through and tender but not falling apart. Transfer the chicken to a tray. Strain and reserve the cooking liquid. You will need this for the sauce. The chicken should be fully cooked but still juicy, and the broth should smell savory and clean. A hard boil will toughen the meat and cloud the broth. Keeping this simmer genuinely gentle serves two purposes at once — it protects the chicken's own texture from toughening, and it keeps the broth clean and clear, which matters directly since that same broth becomes the sauce's liquid base later on.
Roast the Green Vegetables
- While the chicken cooks, place the tomatillos, poblano peppers, serranos, sliced onion, and unpeeled garlic on a baking tray or directly on a hot dry comal or cast-iron pan. Roast or broil until the tomatillos are softened and blistered, the onion has taken on color, the garlic is softened, and the poblanos are charred in patches. Turn as needed for even roasting. This usually takes 12–18 minutes. Transfer the poblanos to a bowl and cover for 5 minutes so they steam. Peel away most of the loose skin. Remove some or all of the seeds only if you want a milder sauce. Peel the roasted garlic. The tomatillos should look collapsed and juicy, not raw and firm. The poblanos should smell sweet and smoky rather than grassy. Covering the freshly roasted poblanos to steam for those few minutes loosens their charred skin far more effectively than trying to peel it immediately — the trapped steam softens the skin's grip on the flesh underneath.
Toast the Seeds and Thickeners
- Set a dry skillet over medium heat. Toast the pumpkin seeds, stirring frequently, until fragrant and lightly golden, 3–5 minutes. They may pop a little. Remove immediately so they do not darken too far. Toast the sesame seeds for 30–60 seconds until lightly golden, then remove. Toast the torn tortillas until dry and lightly browned in spots. If using the bread, toast it as well until dry and pale golden. The pepitas should taste nutty, rich, and fully aromatic. If they get too dark, the sauce can become bitter. Pulling the pumpkin seeds the moment they begin popping, rather than continuing for more colour, protects them from the bitterness that develops quickly once they cross past golden into truly browned.
Wilt the Greens
- Bring about 250ml of the reserved chicken liquid to a simmer. Add the chopped romaine and cook for about 20–30 seconds until wilted. Add the cilantro, parsley, and epazote if using, and cook only 10–15 seconds more. Remove from the heat immediately. This step softens the greens and helps the final sauce stay vivid instead of tasting raw. The greens should stay bright green. Do not boil them hard or cook them for long. Chlorophyll, the pigment responsible for that bright green colour, degrades quickly under sustained heat — the staged, brief wilting used here, lettuce first and more delicate herbs only afterward for an even shorter window, is what softens everything just enough for blending while protecting as much of that colour as possible.
Blend the Pipián
- In a blender, combine the roasted tomatillos, roasted poblanos, serranos, roasted onion, roasted garlic, wilted lettuce and herbs with their liquid, toasted pepitas, toasted sesame seeds, toasted tortilla pieces, bread if using, 1 teaspoon salt, black pepper to taste, cumin, cloves if using, and oregano if using. Add 300–400ml warm reserved chicken liquid and blend until very smooth. Add more liquid as needed so the blender moves freely. The sauce should be thick but pourable. For a more refined finish, you can strain the sauce, but it is not essential. A classical pipián often keeps a slight natural texture from the seeds. The blended sauce should be a vivid green and creamy-looking, thick enough to coat a spoon heavily. Using the chicken's own reserved cooking liquid to loosen the blender, rather than plain water or a separate stock, means the sauce carries the chicken's own savoury flavour built directly into its base from this very early stage.
Fry the Sauce
- Heat the 2 tablespoons oil or lard in a wide heavy pot or deep sauté pan over medium heat. Carefully pour in the blended sauce. Stir immediately — it may sputter. Cook, stirring often, for 8–10 minutes. This frying step is very important for building flavor and removing the raw blended taste. Once the sauce thickens slightly and becomes glossy, gradually add enough of the reserved chicken liquid to reach a thick, spoonable consistency. Usually 250–350ml more is enough, but it depends on how thick your blend was. Taste and adjust seasoning with more salt and pepper if needed. If the tomatillos are especially sharp, add up to 1 teaspoon sugar. The sauce should lose its raw edge, turn glossy, and settle into a thick velvety texture that slowly folds back into itself when stirred. This frying stage is the point where the blended base's still-raw flavour transforms into something genuinely cooked and integrated — without it, even the most carefully roasted and toasted individual components would still taste disconnected rather than like one finished sauce.
Finish the Chicken in the Sauce
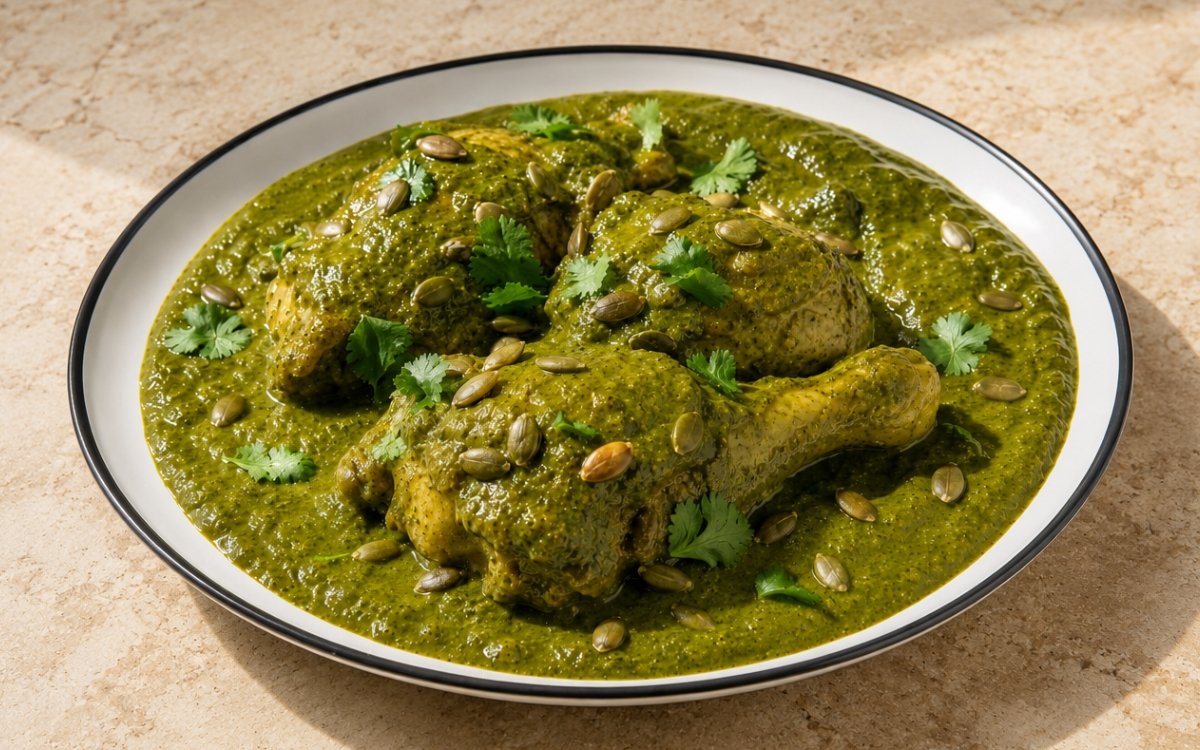
- Add the cooked chicken pieces back into the sauce. Spoon the sauce over them so they are well coated. Lower the heat and simmer very gently for 10–15 minutes, uncovered or partially covered, turning the chicken once or twice, until the chicken is hot all the way through and has absorbed some of the pipián flavor. If the sauce thickens too much, loosen it with a splash of hot stock or water. It should be thick enough to nap the chicken generously, but not so tight that it becomes pasty. The finished pipián should cling richly to the chicken, with a glossy thick consistency. The chicken should be tender and juicy, not stringy or overcooked. Returning the chicken only after it's already fully cooked, rather than finishing it raw directly in the sauce, is what lets this final stage focus purely on flavour absorption and gentle reheating — the chicken's texture was already protected during its earlier gentle poach, and this brief finish doesn't risk undoing that.
Garnish and Serve
- Transfer the chicken and sauce to a warm serving dish. Scatter toasted pumpkin seeds and torn fresh cilantro over the top. Spoon extra sauce around and over the chicken. Serve hot.
Notes
Keeping the chicken's initial poach genuinely gentle rather than a hard boil deserves attention as a decision that protects two separate things simultaneously. A vigorous boil agitates and toughens chicken meat directly, but it also clouds the cooking liquid with emulsified fat and proteins — and since that same liquid becomes a foundational component of the pipián sauce later, protecting its clarity and clean flavour at this early stage matters just as much as protecting the chicken's own texture.
The brief, staged wilting of the greens follows the identical colour-protection logic used throughout this collection's other green mole and pipián-style sauces. Chlorophyll degrades relatively quickly under sustained heat, and the specific sequence here — lettuce given slightly longer, more delicate herbs added only afterward for a much shorter window — is calibrated to soften everything just enough for blending while minimising how much of that vivid green colour is lost along the way.
Returning the already fully-cooked chicken to the finished sauce for only a brief final simmer, rather than cooking it raw directly in the pipián from the start, reflects a genuine understanding of what each stage of cooking is actually meant to accomplish. The initial gentle poach handles cooking the chicken through properly; this later, brief stage exists purely to let the meat absorb flavour from the sauce and come back up to serving temperature, without risking the overcooking a longer simmer in the sauce would introduce.
Using the chicken's own reserved cooking liquid throughout the sauce-building process — for wilting the greens, for loosening the blender, for adjusting the final sauce's consistency — ties the dish together in a genuinely practical way. That liquid already carries real savoury depth from the chicken and aromatics it simmered with, meaning the sauce builds its own foundation directly from that flavour rather than starting from a separate, unrelated stock.