Ingredients
Method
Prepare the Chicken
- If the chicken breasts are uneven in thickness, place them between two sheets of plastic wrap and gently pound the thicker end until uniform. This step is not optional — uneven thickness guarantees uneven cooking, meaning one part dries out while the other is still coming up to temperature. Once shaped, pat the chicken completely dry on all sides, especially the skin. Any moisture left on the surface will prevent proper browning and cause the skin to steam instead of crisp.
Season Generously
- Combine salt, black pepper, garlic powder, and smoked paprika, then season both sides of the chicken evenly. Press the seasoning into the surface so it adheres properly. The skin should look fully coated, not lightly dusted. Proper seasoning is what allows the chicken to stand on its own without needing a sauce to compensate for blandness.
Heat the Pan
- Heat olive oil in a heavy skillet over medium-high heat until it shimmers and moves fluidly across the surface. The pan should be hot enough to initiate browning immediately, but not smoking aggressively. Chicken requires slightly more controlled heat than steak — too hot and the skin burns before the interior cooks, too low and the skin never crisps.
Start Skin-Side Down
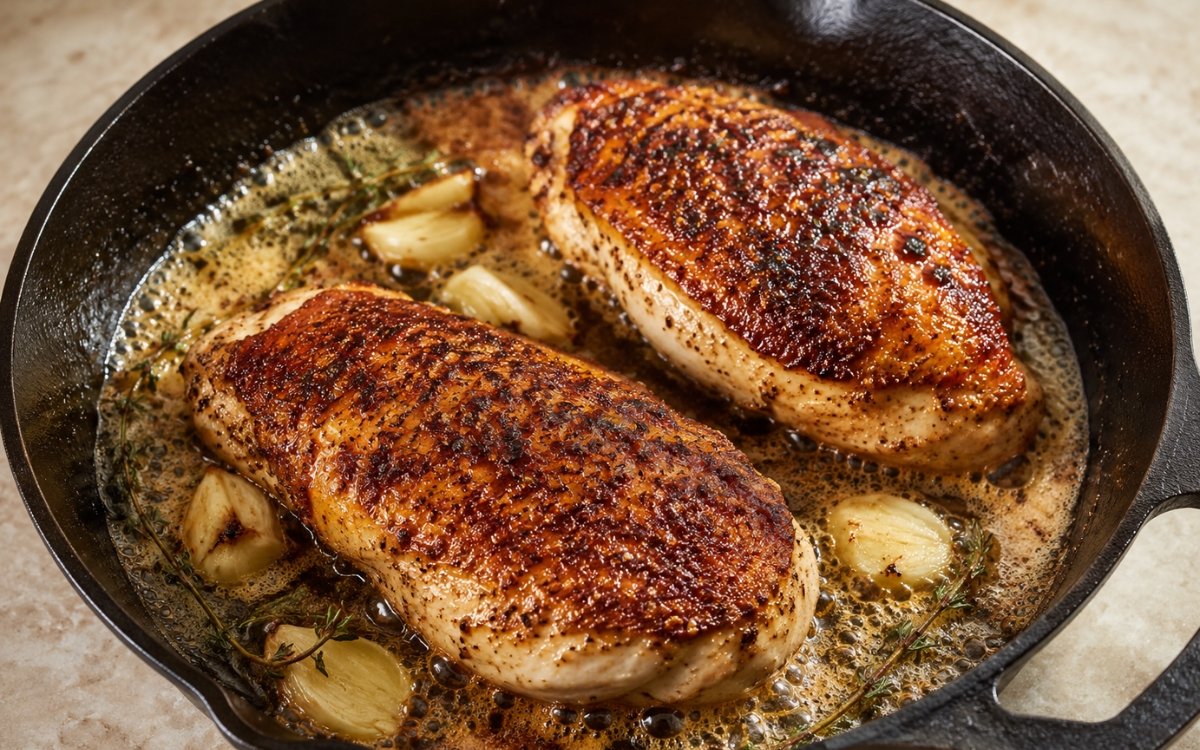
- Place the chicken breasts skin-side down in the pan, ensuring they do not touch. Immediately press each piece gently with a spatula for the first 20–30 seconds to maximize contact between the skin and the pan. This step prevents curling and ensures even rendering of the fat layer beneath the skin, which is what creates a uniformly crisp surface.
Develop the Crust
- Cook the chicken undisturbed for 7–8 minutes. Do not move it, do not check it early. The skin will naturally release from the pan when it is properly browned. If it sticks, it is not ready. During this phase, fat renders slowly from beneath the skin while the surface undergoes browning, building both texture and flavor at the same time.
Flip and Add Aromatics
- Flip the chicken to the flesh side and immediately add butter, smashed garlic, and thyme to the pan. Reduce heat slightly to maintain control over the butter — it should foam, not burn. The goal is to transition from aggressive searing to controlled finishing.
Baste and Finish Cooking
- As the butter melts, tilt the pan and continuously spoon the hot fat over the chicken. Maintain a steady basting rhythm for 6–8 minutes. This step accelerates even cooking while layering flavor onto the surface. The chicken is done when the thickest part reaches 74°C (165°F), the safe internal temperature where harmful bacteria are eliminated.
Rest Before Serving
- Transfer the chicken to a cutting board and let it rest for 5 minutes. This stabilizes the internal structure after cooking and prevents moisture loss when sliced. Cutting immediately after cooking causes juices to escape instead of staying within the meat.
Notes
Pounding to even thickness matters more for chicken breast than for almost any other protein in this collection, given how genuinely lean this cut is and how little margin it has between properly cooked and dried out. A breast with a thick end and a thin end will always overcook the thin section before the thick section reaches safe temperature, regardless of how carefully everything else is executed.
Pressing the chicken during the initial 20–30 seconds addresses a specific physical problem — chicken skin naturally curls and contracts when it first hits a hot pan, and that curling reduces the surface area making contact with the heat. Firm, brief pressure at the start counters that curl before it can compromise even rendering.
The transition to butter basting after the flip is specifically what protects this lean cut from drying out. Continued aggressive direct heat on both sides would push chicken breast toward dryness quickly; fat-mediated basting finishes the cook more gently while simultaneously layering garlic and thyme flavor onto the surface.