Ingredients
Method
Cook the Pumpkin
- Boil or steam the pumpkin with a small pinch of salt until completely tender, about 15–20 minutes depending on size. Drain very well. Mash until smooth, then let the puree cool until warm, not hot. If the puree looks watery, cook it in a dry pan over medium-low heat for 3–5 minutes to remove excess moisture. This matters. Wet pumpkin makes sticky dough that absorbs too much oil. The dry-pan reduction step is worth taking seriously rather than skipping — pumpkin varieties differ meaningfully in their water content, and a puree that looks merely "moist" can still carry enough excess liquid to throw off the dough's hydration once mixed with flour.
Make the Pebre
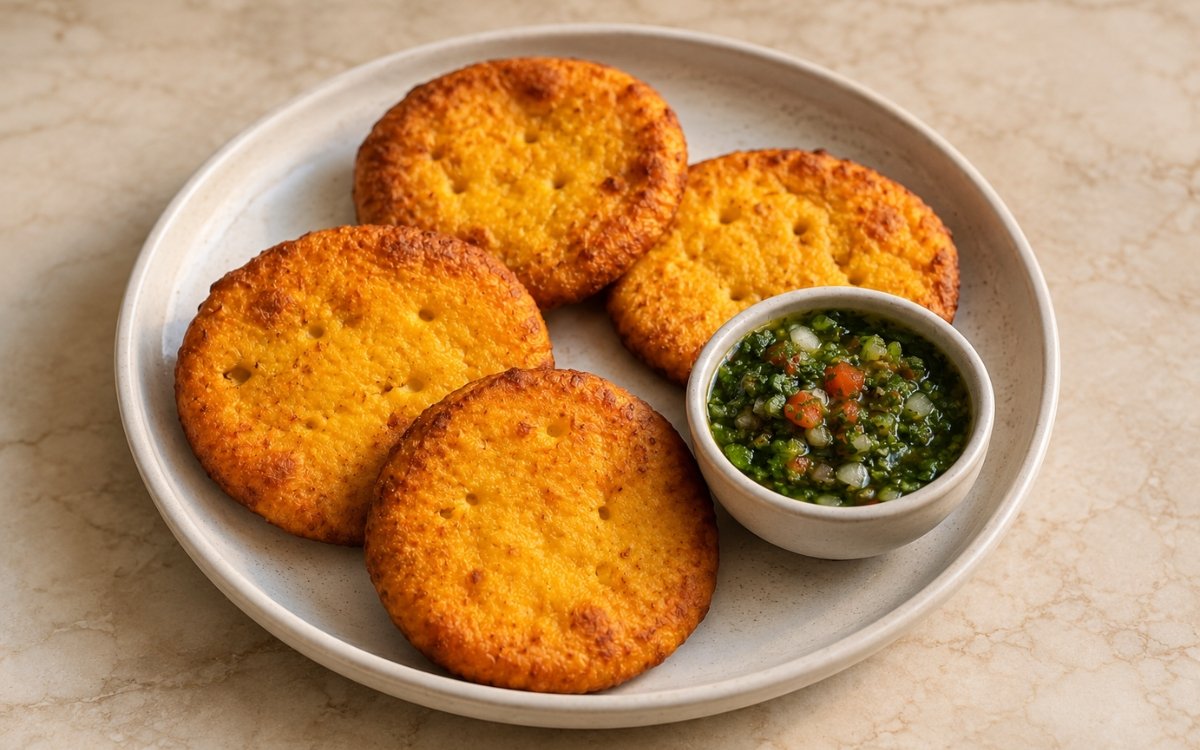
- Combine the cilantro, onion, tomato, green chilli, garlic if using, olive oil, red wine vinegar, lime or lemon juice, salt, and black pepper. Stir well and let sit for at least 15–20 minutes so the onion softens slightly and the flavours come together. Add a little cold water only if the pebre feels too tight. The pebre should be fresh, sharp, spoonable, and vivid green with visible tomato and onion pieces. It should not be blended into sauce. The short rest allows the vinegar and lime to soften the raw onion's sharpest edge and lets every component's flavour begin mingling — a pebre served the instant it's mixed tastes noticeably more disjointed than one given even a brief rest.
Make the Dough
- In a large bowl, mix the flour, baking powder, and salt. Add the warm pumpkin puree and melted lard or oil. Mix by hand until a rough dough forms. Add warm water gradually, only as needed, until the dough becomes soft and workable. Knead for 3–5 minutes until smooth but not tough. The dough should feel soft and slightly elastic, not sticky and not dry. If it cracks badly, add a little water. If it sticks heavily to your hands, add a small amount of flour. Adding water gradually rather than all at once is especially important here given how much the pumpkin's own moisture content can vary batch to batch — starting conservative and adjusting up avoids overshooting into a dough that's too soft to roll cleanly.
Rest the Dough
- Cover the dough and rest for 20 minutes. This relaxes the flour and makes rolling easier. Do not skip the rest. Freshly mixed dough fights back and rolls unevenly. This rest allows the gluten developed during kneading to relax, which is what lets the dough roll out to an even thickness without springing back or resisting the rolling pin at every pass.
Shape the Sopaipillas
- Roll the dough on a lightly floured surface to about 5–6mm thick. Cut into 16 rounds, about 9–10cm wide. Prick each round 2–4 times with a fork or skewer. The small holes help steam escape so the sopaipillas puff slightly without turning into balloons. Rolling to an even thickness across the whole batch matters directly for how evenly the sopaipillas fry — thin spots will crisp and potentially burn well before thicker spots have finished cooking through, producing an inconsistent batch from a single rolled sheet.
Heat the Oil
- Heat the neutral oil to 175°C in a heavy pot. The oil temperature is not a suggestion. Too cool and the sopaipillas absorb oil; too hot and they brown before the centre cooks. This temperature window is a genuine balance point for a dough this thick — hot enough that the exterior crisps and browns at a reasonable pace, but not so hot that it sets and darkens before the fuller depth of dough has had time to cook through.
Fry the Sopaipillas
- Fry the sopaipillas in batches for 2–3 minutes per side, turning once or twice, until deep golden-brown, slightly puffed, and crisp at the edges. Transfer to a rack and drain briefly. Do not stack them while hot or trapped steam will soften the crust. A single, uncrowded layer on the rack lets any residual surface oil drip away and lets steam escape freely — sopaipillas piled on top of each other trap that steam against their own crisp surfaces, undoing much of the work the frying stage just accomplished.
Serve
- Serve 4 sopaipillas per serving with a small bowl of pebre on the side. Spoon pebre over the sopaipillas or dip them directly. Serve warm while the edges are still crisp and the inside is tender. Sopaipillas lose their crisp edge fairly quickly as they cool and sit, so serving promptly after frying is what preserves the contrast between the crisp exterior and tender centre this bread is meant to have.
Notes
Managing the pumpkin puree's moisture content is genuinely the most consequential technical decision in this recipe, more so than it might initially appear. Pumpkin and squash varieties vary considerably in how much water they release once cooked and mashed, and a puree that goes into the dough too wet doesn't just make for a stickier dough to handle — it directly increases how much oil the finished sopaipillas absorb during frying, producing a greasier result even with correctly held oil temperature. The dry-pan reduction step exists specifically to normalise that variability before it ever reaches the flour.
Pricking each round before frying is a small, quick step that addresses a real structural concern. Without those holes, trapped steam building inside the dough during frying has nowhere controlled to escape, and the dough can puff unpredictably — ballooning unevenly in some spots while staying flatter in others, rather than the gentle, even puff sopaipillas are known for. The few seconds this step takes are disproportionately protective of the final texture.
Pebre's chopped, unblended texture is central to its identity in the same way chimichurri's texture matters in other recipes in this collection. Blending the tomato, onion, and cilantro together would produce something closer to a smooth salsa, losing the distinct, visible pieces that let each component register on its own against the warm, mild sopaipilla. The brief rest before serving softens the rawest edges of the onion and lets the vinegar and lime distribute, without needing to sacrifice that chunky texture.
The dough's resting period, though brief, addresses gluten development directly. Freshly kneaded dough has tight, springy gluten strands that resist rolling and tend to shrink back after being rolled thin. The 20-minute rest gives those strands time to relax, which is what makes the subsequent rolling stage considerably easier and produces a more evenly thick sheet to cut rounds from.