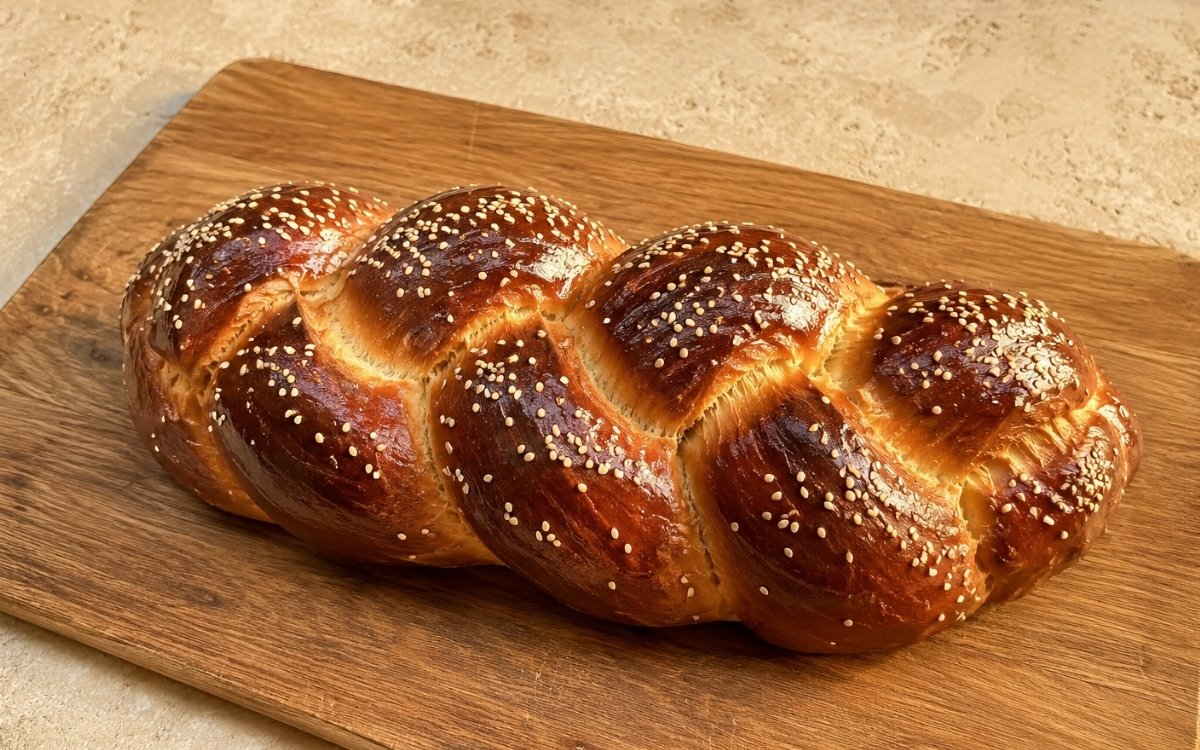
Ingredients
Method
Activate the Yeast and Build the Wet Mixture
- In a large mixing bowl, combine the 140g of warm water — measured specifically at 24–27°C, the range at which instant yeast activates vigorously without the heat damage that begins above 43°C — with the 12g of honey and 7g of instant yeast. Stir briefly to distribute and allow to sit for 5 minutes. After 5 minutes the surface should show a visible foam or bubbling activity — the reliable indicator that the yeast is active and the fermentation will proceed correctly. Inactive yeast at this stage means the water was too hot or the yeast is old — discard and begin again rather than proceeding with dead yeast that will produce a dense, flat loaf regardless of technique. Add the 2 whole eggs, 1 egg yolk, and 55g of neutral oil to the foamy yeast mixture. Whisk until completely smooth and uniform — no visible yolk streaks remaining. The oil-and-egg enrichment without butter is the specific composition that distinguishes challah from brioche. Oil's pure fat lacks butter's water and milk solids — it coats the gluten strands without contributing the richness and dairy depth of butter, producing a crumb that is lighter, more elastic, and more chewy than brioche. The three eggs (two whole plus one yolk) provide the golden colour — yolk carotenoids — and the specific richness that makes challah noticeably more flavourful and more golden than a lean bread without approaching brioche's heaviness.
Combine and Knead to Full Development
- In a separate bowl, whisk together the 500g of flour, 45g of sugar, and 8g of salt until evenly combined. Add the dry mixture to the wet mixture and stir until a rough, shaggy dough forms. Turn the dough onto a lightly floured surface and begin kneading. Knead continuously for 10–12 minutes until the dough transforms from the initial rough mass into something smooth, elastic, and slightly tacky — it will pull away from the work surface cleanly and stretch without tearing when a piece is pulled. Challah dough should feel specifically lighter, less rich, and more structured than brioche dough. Where brioche dough has a soft, almost slack quality from its high butter content, challah dough is firmer, more responsive, and more clearly extensible — it springs back visibly when pressed and stretches into longer ropes without immediate tearing. This structural firmness is what produces the braid's definition and the final loaf's slightly chewy crumb. Under-kneaded challah produces a braid that loses definition during proofing as the weak gluten cannot hold the shaped structure; fully developed challah holds its braid shape clearly through the entire proofing and baking sequence. Perform the windowpane test before accepting the dough as ready: stretch a small piece slowly between your fingers. Fully developed dough stretches into a thin, translucent membrane without tearing. Dough that tears without thinning needs additional kneading.
First Rise
- Transfer the kneaded dough to a lightly oiled bowl, turning to coat all surfaces. Cover tightly with plastic wrap or a clean damp cloth. Place in a warm spot — 24–27°C ambient temperature, such as a slightly warm oven with only the light on, or near a warm stovetop. Allow to rise for 1½–2 hours, or until the dough has genuinely doubled in volume. Watch the dough rather than the clock — ambient temperature, yeast activity, and humidity all affect rising time. A correctly proofed first rise will have visibly doubled, feel pillowy when lightly pressed, and show a dough that has pulled slightly away from the bowl's sides. Under-proofed dough produces a dense loaf; over-proofed dough has exhausted the yeast's available sugars and will have weakened gluten — producing a flat, slightly sour loaf without the oven spring that makes challah's crown impressive.
Divide, Roll, and Braid
- Gently punch down the risen dough to release the accumulated gas. Turn onto a lightly floured surface and divide into exactly 3 equal portions — use a kitchen scale for precise equal portions, as unequal strands produce a braid that tapers unevenly. Take each portion and roll it beneath your palms on the work surface into an even rope approximately 35–40cm long. Roll from the centre outward toward the ends — this technique produces ropes that are even in thickness throughout rather than thicker at the centre. If the dough springs back and resists rolling to length, allow it to rest uncovered for 5 minutes to relax the gluten before continuing. Ropes rolled to the correct length without force will hold their length more reliably during proofing and baking. Line up the three ropes parallel to each other on the work surface. Pinch the top ends together firmly — this anchor point is where the braid's structural integrity originates. Braid in the standard three-strand sequence: bring the right rope over the centre, then the left rope over the new centre, alternating right-over-centre, left-over-centre for the length of the ropes. Maintain even, moderate tension throughout — enough to produce a clearly defined braid with visible strand separation, not so tight that the strands are compressed against each other and cannot expand freely during proofing. Pinch the bottom ends together and tuck both the top and bottom pinched ends under the loaf — this tucking produces the characteristic rounded end shape and prevents the ends from splaying during baking.
Transfer and Final Proof
- Transfer the braided loaf carefully onto a parchment-lined baking tray — parchment rather than a greased tray allows the base of the challah to bake rather than fry, producing a more even bottom crust. Cover loosely with lightly greased plastic wrap or a clean cloth — the cover should not touch the dough's surface as it proofs and expands. Allow to proof at room temperature for 45–75 minutes, until visibly puffy and approximately 1.5 times larger than the just-shaped loaf. The poke test is the most reliable indicator: press one finger 1cm into the dough at the loaf's side. A correctly proofed challah will spring back slowly over 3–4 seconds and leave a slight remaining indentation — the gluten has relaxed sufficiently for the final proof but retains enough strength for oven spring. Dough that springs back immediately is under-proofed; dough that shows no spring-back and retains the full finger impression is over-proofed. Preheat the oven to 175°C during the final proof period — the oven must be fully at temperature before the challah enters.
Egg Wash and Bake
- Whisk together the egg and 1 tbsp of water until completely smooth and uniform. Using a pastry brush, apply the egg wash across the entire surface of the proofed loaf — brushing not only across the tops of the braid's peaks but working the brush carefully into every crevice and gap between the strands. The crevices are the areas most visible on the finished baked loaf, and pale, unwashed surfaces in those gaps produce an uneven, patchy appearance that the careful crevice-brushing prevents. If using seeds, scatter the sesame or poppy seeds evenly across the top immediately after egg washing — the egg wash is the adhesive that holds them against the surface during baking. Place in the preheated 175°C oven. Bake for 30–38 minutes until the entire surface is a deep, uniform amber-brown and the internal temperature reads 88–92°C at the loaf's centre, inserted from the side. The relatively lower internal temperature threshold compared to a lean bread reflects challah's enriched composition — the oil and eggs produce a fully cooked crumb at a slightly lower temperature than a lean bread's starch requires. At 88°C the crumb is fully set, moist, and slightly chewy; above 95°C it begins drying. If the surface is browning significantly before 25 minutes, loosely tent a sheet of aluminium foil over the loaf for the remainder of the baking time.
Cool Before Slicing
- Remove from the oven and allow the challah to cool fully on the baking tray or transferred to a wire rack — a minimum of 45 minutes to 1 hour. Hot challah sliced immediately produces a gummy, slightly compressed crumb that tears rather than cutting cleanly. Fully cooled challah slices cleanly with a serrated bread knife, producing even 2cm slices with visible, soft crumb structure and the characteristic slightly chewy, golden interior that identifies a correctly baked challah.
Notes
The braiding technique's even tension is the most nuanced aspect of this recipe and the most directly visible in the finished loaf. A braid braided with consistent, moderate tension produces defined strands that retain their separation through proofing and baking — each strand remains clearly distinct on the finished surface. A braid braided unevenly — some sections tight, some loose — expands unpredictably during proofing, producing a finished loaf where some sections have blurred strand definition and others remain compressed. Practising the tension consistency on the work surface before committing to the shaped loaf is worth the 3–4 minutes; a second braiding attempt takes only this time and produces a noticeably better result.
Oil-enriched doughs behave differently from butter-enriched doughs in one important respect during proofing: they are significantly more tolerant of slightly warmer proofing environments. Where butter can liquefy and pool within a dough if proofed above 27°C, oil remains distributed throughout the dough structure at higher temperatures. Challah can proof in a slightly warmer environment than brioche — up to 29–30°C — without the same risk of structural fat separation.