Ingredients
Method
Make the Filling
- Heat the oil in a pan over medium heat. Add the onion and cook for 2–3 minutes until softened but not browned. Add the flour and stir for about 30 seconds so it absorbs the fat and coats the onion evenly. Add the stock, oyster sauce, hoisin, light soy, dark soy, sugar, sesame oil, and white pepper. Stir well and cook until the mixture thickens into a glossy sauce. Add the diced char siu and fold to coat evenly. Cook for another 1–2 minutes until the filling is thick, sticky, and spoonable rather than loose. Transfer to a bowl and cool completely, then chill until cold. The filling must be fully cold and thick before shaping. Warm filling makes the dough hard to seal and can leak during proofing or baking. Cooking the flour into the fat before any liquid is added coats the starch and removes its raw taste, which is directly what allows the sauce to thicken smoothly once the stock joins rather than turning lumpy or thin.
Make the Dough
- In a large bowl or the bowl of a stand mixer, combine the flour, yeast, sugar, and salt. Add the warm milk and egg. Mix until a shaggy dough forms. Knead for 5–6 minutes until the dough begins to smooth out, then add the softened butter in pieces. Continue kneading for another 8–10 minutes until the dough is smooth, elastic, and soft. It should be slightly tacky but not wet. If kneading by hand, expect the dough to feel messy when the butter goes in, then come back together as you continue working it. Adding the butter gradually, in pieces, rather than all at once, lets the gluten network absorb each addition before the next arrives — dumping it in together would coat too much of the flour in fat at once, actively working against the structure this enriched dough still needs to develop.
First Rise
- Shape the dough into a ball and place it in a lightly greased bowl. Cover and let rise for 1–1½ hours, or until doubled in size. A full first rise matters here. Under-risen dough gives compact buns with a tight crumb instead of the soft fluffy texture char siu bao should have. That full rise gives the yeast genuine time to build the lightness responsible for the bun's eventual soft, fluffy structure — cutting it short would leave the dough without enough developed lift to bake up properly light.
Divide and Shape
- Turn the dough out onto a lightly floured surface and divide into 12 equal pieces, about 73–75g each. Shape each piece into a ball and let them rest, covered, for 10 minutes so they relax and roll out more easily. Flatten each piece into a round about 10–11cm wide, keeping the center slightly thicker than the edges. Place about 35–40g of the cold char siu filling in the center. Bring the edges up around the filling and pinch firmly to seal. Make sure the seam is completely closed. Place each bun seam-side down on a parchment-lined tray, leaving space between them. Do not overfill. Too much filling makes the buns burst or flatten. Keeping the round's center slightly thicker than its edges gives the base of each bun enough dough to actually support the filling's own weight, while the thinner edges gather and seal more easily around it.
Final Proof
- Cover the shaped buns lightly and let proof for 45–60 minutes, until puffy and noticeably lighter. They should not be doubled like dinner rolls, but they should look expanded and soft. If baked too early, they will split and stay dense. That specific, checkable target — puffy and lighter, but not fully doubled — reflects real understanding of what this particular dough needs: enough proofing to bake up soft and light, without needing the same full doubling a plainer dinner roll would require.
Egg Wash and Bake
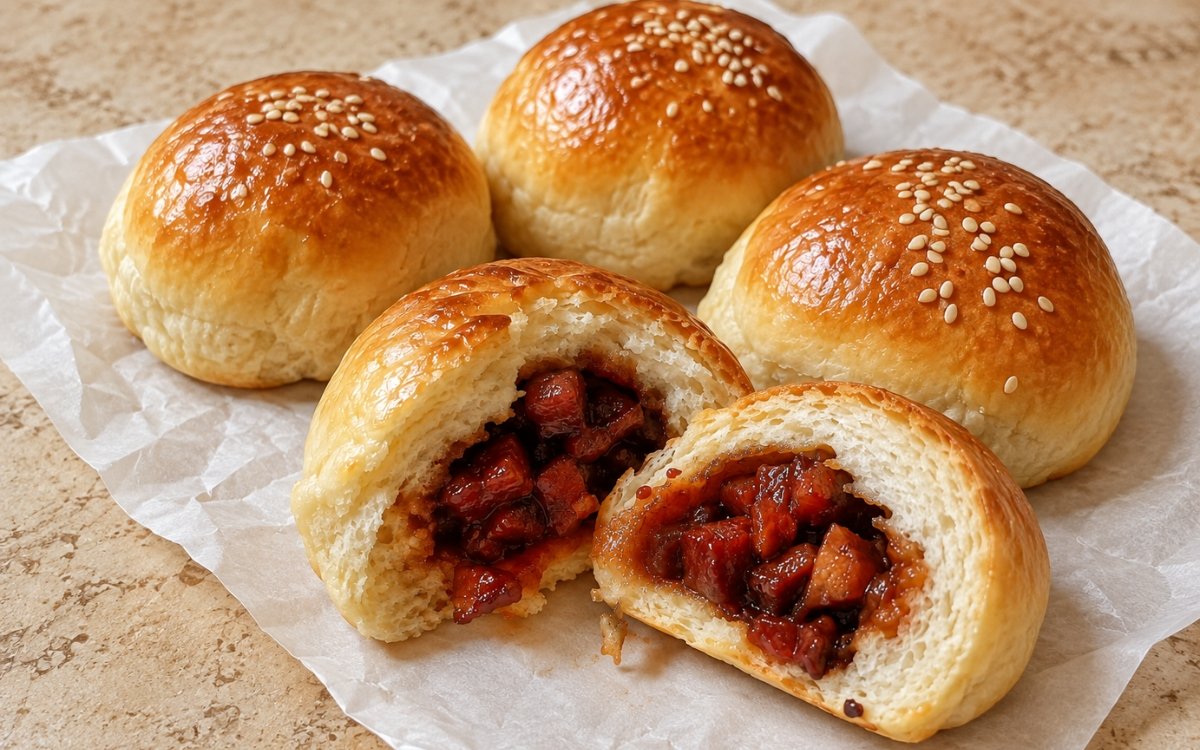
- Preheat the oven to 180°C. Brush the tops gently with beaten egg and sprinkle lightly with sesame seeds if using. Bake for 15–18 minutes, until the buns are glossy, deeply golden, and fully baked through. The tops should take on a rich egg-washed color while the sides stay pale and soft. Brushing gently, rather than firmly, protects the fragile, fully proofed dough from being pressed down and losing some of the trapped gas responsible for its own eventual softness.
Cool Slightly and Serve
- Let the buns cool on the tray for 5 minutes, then transfer to a rack. Serve warm or just slightly cooled. The filling should be thick and glossy inside, not runny, and the dough should be soft, fluffy, and light. That brief cooling period lets the filling's own residual heat settle slightly, making the buns easier to handle and eat without the sticky sauce spilling out the moment they're bitten into.
Notes
Cooling the char siu filling fully before it ever meets the dough deserves genuine recognition as the technique responsible for whether these buns actually seal and bake properly. Warm filling in direct contact with the soft, enriched dough would soften it considerably faster than intended, working directly against the dough's own ability to hold a clean, secure seal — that risk carries all the way through proofing and baking, where a compromised seal can open and leak.
Thickening the filling into a genuinely glossy, spoonable sauce, rather than something loose or watery, deserves the same attention this technique receives throughout this collection's other filled dough dishes. That specific, checkable texture is what keeps the filling contained once wrapped, rather than leaking out through any small gap during the proofing and baking still ahead.
Adding the butter to the dough gradually, in pieces, deserves genuine respect as the technique responsible for building real structure into an otherwise rich, enriched dough. The gluten network needs to absorb each addition of fat before it can properly accept more, and adding it all at once would overwhelm that structure before it's had the chance to develop.
The recipe's own specific final-proof target — puffy and lighter, but not fully doubled — deserves attention as a genuine, checkable readiness cue distinct from a plainer bread dough's needs. Baking these buns before they reach that point risks them splitting and staying dense, since they wouldn't yet carry enough built-up lightness to expand cleanly under the oven's heat.