Ingredients
Method
Make the Hogao
- Heat the oil in a small pan over medium heat. Add the white onion and scallions and cook gently for 4–5 minutes until softened and slightly translucent. Add the garlic and cook for 30 seconds, just until fragrant. Add the diced tomatoes, cumin, salt, and black pepper. Cook for 10–15 minutes, stirring occasionally, until the tomatoes break down and the mixture becomes soft, spoonable, and lightly jammy. Add a small splash of water only if it tightens too much. Set aside. The hogao should not be watery. It should be soft, rich, and spoonable, with the onion fully softened and the tomato lightly concentrated. Cooking the onion and scallions gently before the tomato ever goes in builds a sweet, softened aromatic base first — adding the tomato too early, before the onion has properly broken down, would leave the finished sauce with a raw, sharper onion note running through it.
Mix the Dough
- In a large bowl, combine the warm water, warm milk, salt, and melted butter. Stir to dissolve the salt evenly. Sprinkle in the masarepa gradually while mixing with your hand or a spoon so no dry lumps form. Add the crumbled queso fresco or queso blanco and mix again until evenly distributed. Let the dough rest for 5–7 minutes so the cornmeal fully hydrates. After resting, the dough should feel soft, moist, and pliable. It should hold together when pressed without cracking badly at the edges. If it feels too dry, add a tablespoon or two of warm water. If too wet, add a little more masarepa. Adding the masarepa gradually while mixing, rather than dumping it in all at once, is what prevents dry pockets from forming — pre-cooked cornmeal hydrates quickly, and lumps that form early tend not to fully smooth out even with continued mixing afterward.
Divide and Shape
- Divide the dough into 12 equal portions. Roll each portion into a smooth ball. Flatten one ball in your palm into a small thick disc. Place one portion of the melting white cheese in the center. Fold the dough around the cheese and seal it completely. Gently flatten again into a round arepa about 1.5cm thick. Repeat with the remaining dough and cheese. Make sure the cheese is fully enclosed. If the seam stays open, the filling will leak into the pan instead of staying inside the arepa. Reshaping into the final flattened disc only after the seam is fully sealed protects that seal from being stretched back open — flattening too aggressively before the dough has properly closed around the cheese risks reopening exactly the gap this step is meant to prevent.
Pan-Cook the Arepas
- Heat a large skillet, griddle, or cast-iron pan over medium to medium-low heat. Lightly grease with a little oil or butter. Cook the arepas in batches for about 5–7 minutes on the first side, then flip and cook another 5–7 minutes on the second side. Press very lightly only if needed to keep the shape even. Once both sides are golden and lightly charred in spots, continue turning every 1–2 minutes as needed until they feel firmer and sound slightly hollow when tapped. If your arepas are thick, you can finish them in a 180°C oven for 8–10 minutes after pan-cooking to ensure the center is hot and the cheese is fully melted. The exterior should be golden and set before the inside fully finishes. Cooking too fast will overbrown the crust before the center is heated through. Medium-low heat gives the dense masarepa dough genuine time to cook through to its centre at roughly the same pace the exterior develops its golden, charred colour — pushed at higher heat, that balance breaks down, and the crust darkens well before the interior and cheese have had a chance to properly heat through.
Finish and Serve
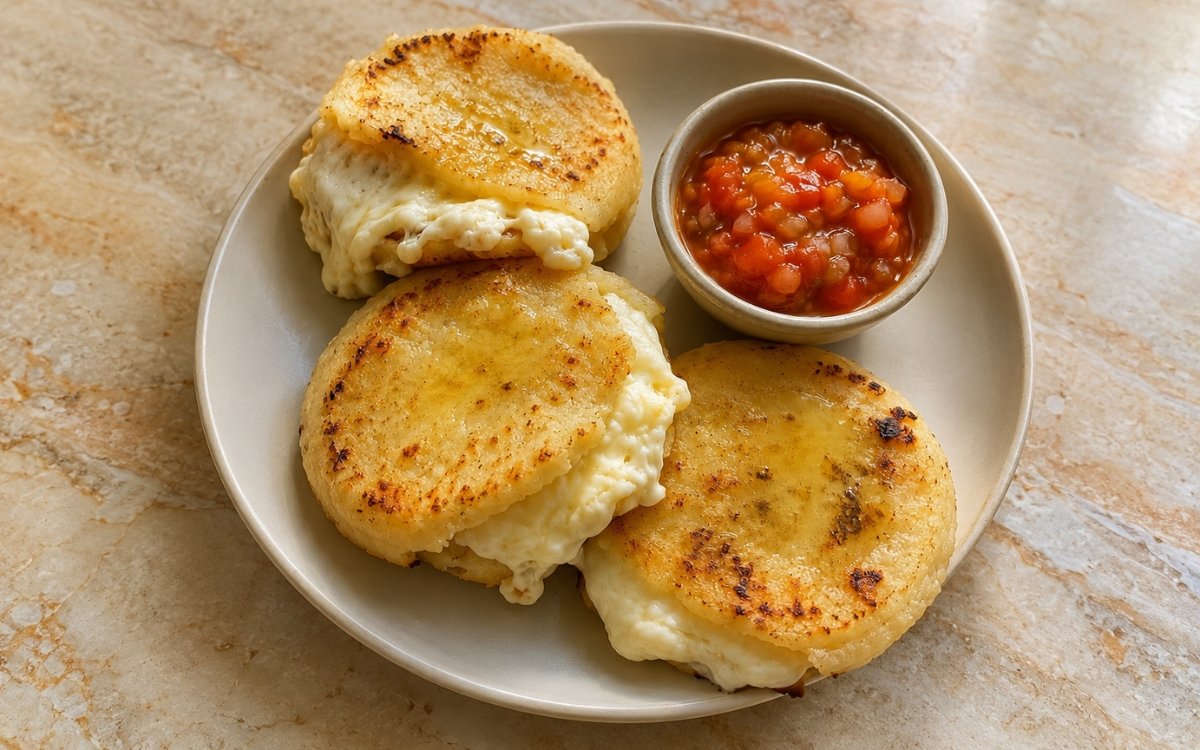
- Transfer the hot arepas to a plate or rack and immediately top or brush them with a little butter so it melts over the surface. Let them rest for 2–3 minutes, then serve warm with the hogao on the side. When opened, the cheese should be melted, soft, and gently stretchy. Brushing the butter on while the arepas are still genuinely hot lets it melt in and glisten across the surface immediately, rather than sitting as a solid, unmelted pat the way it would on a cooler arepa.
Notes
Sealing the cheese completely inside the dough before it ever meets the pan deserves to be treated as the single most consequential step in this whole recipe. Any gap left in that seam gives the melting cheese, once it liquefies under heat, a direct path to escape into the pan rather than staying contained inside the arepa — an open seam doesn't just look messy, it actively empties the arepa of the very filling that defines this dish.
Keeping crumbled queso fresco mixed into the dough itself, separate from the melting cheese used as the actual filling, is worth understanding as two distinct jobs assigned to two distinct cheeses. Queso fresco doesn't melt appreciably under heat, so its role here is purely about flavour and tenderness within the dough itself. The molten, stretchy centre this dish is known for depends entirely on the second cheese — genuine melting cheese like quesillo, Oaxaca, or mozzarella — chosen and used specifically for that job.
The medium-low cooking temperature specified throughout the pan-cooking stage addresses a genuine timing tension specific to this thick, dense masarepa dough. Unlike a thin pancake or tortilla, this dough has real depth for heat to travel through before the centre and cheese are properly hot — cooking at higher heat would darken and set the crust considerably faster than that heat can penetrate to the middle, forcing a trade-off between a burnt exterior and a cold, underdone interior.
The hogao's own cooking sequence — onion and scallions softened first, tomato added only afterward — mirrors a principle used throughout this collection whenever an aromatic base needs real time to develop before a more acidic or watery ingredient joins it. Rushing the tomato in too early leaves the finished sauce carrying a raw, sharper onion note that a fully softened base wouldn't have.