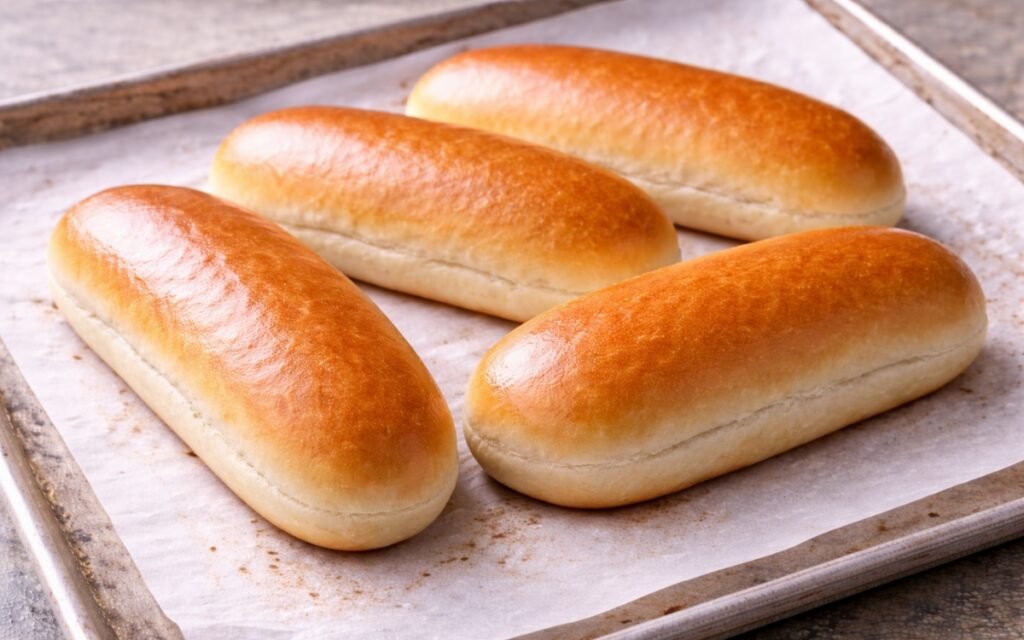
Classic Hot Dog Buns
Soft, neutral, lightly golden classic hot dog buns — the lean, everyday bun for hot dogs, bratwursts, corn dogs, and any sausage application where the bun’s job is to hold and support rather than contribute. Made with all-purpose flour and minimal enrichment, these buns have a mild, slightly chewy crumb and a soft crust that yields cleanly to a bite without competing with whatever is inside them. The Brioche Hot Dog Buns are the richer, more indulgent version — butter, egg, and a glossy golden finish. These are the ones you make when you want the filling to be the entire story, and the bun to be a reliable, well-made supporting character.
Prep Time : 20 min
Cook Time : 16 min
Servings : 4
20 min
16 min
4
Ingredients
For the Dough
• 250g all-purpose flour — this one on Amazon
• 4g fine sea salt
• 12g sugar
• 4g active dry yeast
• 30g unsalted butter, melted, or neutral oil — this one on Amazon
• 60g whole milk, warm, 24–27°C
• 80g water, warm, 24–27°C
For the Finish
• Whole milk, for brushing before baking, for a softer crust
• OR 1 egg whisked with a splash of water, for a more golden crust
• 2–3 tbsp white sesame seeds, optional
This post may contain affiliate links. As an Amazon Associate I earn from qualifying purchases, at no additional cost to you.
Directions
- Combine the Dry Ingredients
In a large bowl, combine the all-purpose flour, fine sea salt, sugar, and active dry yeast. Stir briefly for 20–30 seconds to distribute all four dry components evenly through the flour before any liquid is added. Even distribution at this stage prevents localised concentrations of salt in direct contact with the yeast before the liquid dilutes both — an unimportant consideration in a well-mixed final dough, but a practical one when working with dry ingredients before hydration. All-purpose flour is the deliberate choice here rather than bread flour: its lower protein content produces a softer, more yielding crumb with less noticeable chew — the neutral, accommodating texture of a classic hot dog bun that compresses pleasantly around its filling without the bread-forward character that bread flour would introduce. The difference is immediately perceptible in the finished bun: all-purpose produces the familiar soft, slightly pillowy crumb of a classic hot dog bun; bread flour produces a chewier, more assertively structured roll. - Mix the Wet Ingredients and Form the Dough
In a separate small bowl or jug, combine the warm milk, warm water, and melted butter or neutral oil. The temperature of both liquids should be 24–27°C — warm enough to activate the yeast and ensure the butter stays fluid, but not hot enough to damage the yeast or produce an uneven dough temperature. Mix briefly to combine, then pour the liquid mixture over the dry ingredients. Mix with your hand or a dough scraper, working from the edges inward, until a rough, shaggy dough forms with no dry flour remaining at the bottom of the bowl. The melted fat — butter or oil — is specified at this quantity and in this liquid form because it incorporates instantly and evenly into the dough at first mixing, lubricating the developing gluten strands uniformly rather than requiring progressive kneading-in as softened butter does. At 30g for 250g of flour, the fat provides sufficient softness and flavour without enriching the dough to the point where it becomes sticky and challenging to handle. - Knead Until Smooth
Transfer the rough dough to a clean work surface and knead for 6–8 minutes by hand, or use a stand mixer fitted with a dough hook at medium-low speed for 6 minutes. The classic hot dog bun dough is considerably more manageable than enriched brioche dough — the lower fat content, lower overall hydration, and absence of egg produce a dough that is only slightly tacky from the first minute of kneading and progressively smooths without the extended stickiness that brioche requires patience to work through. The finished dough should feel soft and slightly tacky — soft enough to press easily without resistance, with a slight surface stickiness that does not leave significant dough on your hand when pressed. If it genuinely sticks to everything, add a very small dusting of flour and knead it in. If it feels too firm and resists stretching, add a small splash of water. By the end of the kneading period the dough should be completely smooth on its surface, elastic enough to spring back slowly when poked, and extensible enough to stretch a few centimetres between your fingers before tearing. - First Rise
Shape the kneaded dough into a smooth ball and transfer to a lightly oiled bowl. Turn once to coat all surfaces. Cover with plastic wrap or a damp kitchen towel and allow to rise at room temperature for 60–90 minutes until roughly doubled in size. The classic hot dog bun dough rises more actively than the brioche version at the same temperature — the lower fat content means the yeast’s activity is less moderated by surrounding enrichment, producing a faster, more vigorous rise. In a warm kitchen the dough can double in as little as 60 minutes; in a cooler room it may take the full 90 minutes. Use the visual doubled-volume indicator rather than timing alone. - Divide and Shape into Logs
Turn the risen dough out onto a lightly floured surface and divide into 4 equal portions — each approximately 110g. Weigh them for consistency. Shape each portion into a hot dog bun log using the same technique as the brioche version. Working with one piece at a time, gently press and flatten with your palm into a rough rectangle approximately 10–12cm long. Starting from the long edge nearest you, roll the dough away from you firmly and tightly, pressing the roll against the surface as you go to maintain consistent tension throughout the roll — loose rolling produces irregular crumb structure with gaps and air channels; tight, even rolling produces the uniform, consistent crumb that holds together when bitten. When you reach the far edge, press the seam firmly and completely against the dough surface with the heel of your hand to seal it. Run your fingers along the entire seam length to ensure no section is loose — any unsealed area will open during proofing or baking. Once sealed, place the log seam-side down and lightly roll it back and forth with your palms from the centre outward, applying gradual, even pressure toward the ends to extend the bun to approximately 15–18cm in length and to taper the ends very slightly. The diameter should be even throughout — work slowly and consistently to achieve a uniform cylinder rather than a shape that is thick in the centre and thin at the ends. - Second Rise
Place the shaped buns seam-side down on a parchment-lined baking sheet. For softer-sided buns — the more classic diner-style hot dog bun with a soft, pillowy exterior all around — place the buns slightly closer together than you would for crusty bread: approximately 3–4cm apart rather than 6–7cm. When buns proof close together and their sides make gentle contact during baking, the touching surfaces steam rather than crust, producing the characteristically soft, pale sides of a classic packaged-style hot dog bun. For buns with a more defined crust on all surfaces, space them the full 6cm apart. Both are correct — the choice determines the texture of the sides. Cover loosely with lightly greased plastic wrap or a clean cloth. Allow to proof for 30–45 minutes at room temperature until visibly puffy, clearly expanded in both height and width, and soft to a very gentle press. Begin preheating the oven to 190°C (375°F) in the final 15 minutes of the second proof. - Finish and Bake
The choice of pre-bake finish determines the crust character of the finished bun — a genuine fork in the recipe at this stage. For a softer, more matte crust characteristic of a classic everyday hot dog bun, brush the top and sides of each proofed bun generously with whole milk using a pastry brush. Milk’s fat and protein content promotes browning through the Maillard reaction but does not caramelise as intensely as egg, producing a pale golden, slightly soft surface. For a more golden, slightly crisper, and more defined crust, brush with egg wash — one egg whisked with a splash of water until smooth. The egg wash produces a noticeably deeper golden colour and a slightly more defined, slightly shinier surface. If using sesame seeds, apply them immediately after either finish while the surface is still wet — the milk or egg wash provides sufficient adhesion for the seeds to bond during baking. Scatter generously across the top surface from a slight height for even distribution. Bake for 15–18 minutes until lightly to moderately golden brown depending on your chosen finish — milk-brushed buns will be paler than egg-washed ones at the same baking time. Transfer immediately to a wire rack.
*Notes :
- The option to place buns close together during proofing is specific to hot dog bun production and worth understanding clearly. Commercial hot dog buns are baked in pull-apart clusters — the buns touch and bake together, and the touching sides never develop a crust. This produces the characteristic soft, yielding sides that allow the bun to be pulled apart cleanly and that press inward gently around the sausage when eaten, producing the specific soft-all-around texture that most people associate with a classic hot dog bun. Spacing them apart produces a bun with a crust on all surfaces — more structurally defined and visually appealing as individual buns, but with a different texture on the sides from the classic packaged version. Both approaches produce an excellent bun — the choice is a matter of intended use and texture preference.
- The milk wash is worth recommending for this specific recipe because the classic hot dog bun’s identity is associated with a soft, pale crust rather than the deep golden finish of enriched baked goods. A milk wash produces this characteristic pale golden softness efficiently. The egg wash is the better choice if a more visually dramatic, golden-topped bun is desired — the brioche hot dog bun always uses egg wash for this reason. For the classic version, milk wash is the more contextually appropriate finish.
- All-purpose flour’s role in producing the correct crumb for this recipe deserves emphasis because the temptation to use bread flour for better structure is common. Bread flour produces a hot dog bun that holds together better when squeezed but has a noticeably more assertive, chewier crumb that many people find too bread-like in this specific application. The slightly softer, more yielding crumb of all-purpose flour is what produces the pleasant, familiar experience of a well-made classic hot dog bun — yielding and soft, not chewy and assertive.
Why This Recipe Works
This recipe works because it is calibrated for the specific texture and flavour profile of a classic hot dog bun rather than a generic enriched roll. All-purpose flour produces the correct soft, neutral crumb. Minimal enrichment provides flavour and softness without crossing into brioche territory.
The optional close-spacing during proofing produces the soft, pale sides of a classic pull-apart style bun. The milk wash provides the matte, pale golden surface of a classic everyday hot dog bun without the glossy, deep-golden finish of a brioche. Every decision is in service of a bun that does its job quietly and well.
Ingredient Breakdown
All-Purpose Flour
Moderate protein content produces a soft, yielding, neutral crumb — the structural and flavour identity of a classic hot dog bun.
Melted Butter or Neutral Oil
Lubricates the gluten strands, contributes mild richness, and produces a softer crumb than a completely lean dough — melted for quick, even incorporation at this low enrichment level.
Warm Milk
Enriching liquid — the fat and protein contribute mild flavour and a slightly softer crumb than water alone.
Sugar
Yeast food and gentle browning contributor — at 12g provides just enough for an active rise and even surface colour without adding perceptible sweetness.
Milk Wash
The soft crust finish — Maillard browning from the milk’s proteins without the intense golden caramelisation of egg wash, producing the characteristic pale golden softness of a classic hot dog bun.
White Sesame Seeds (Optional)
Nutty, toasted aromatic topping — applies the same way as on classic burger buns, adding visual identity and a specific aromatic character.
Flavor Structure Explained
This hot dog buns follow a layered balance model:
- Mild wheaty base (crumb)
- Subtle dairy warmth (milk)
- Light browned crust (milk wash)
- Nutty aromatic top (sesame seeds)
- Neutral carrier profile (overall balance)
The crumb establishes a soft, mildly wheaty foundation with faint sweetness that stays intentionally restrained. Milk adds gentle dairy warmth, rounding the profile without adding heaviness. The crust develops only lightly, with soft browning rather than deep caramelisation due to the milk wash. Sesame seeds, when used, provide the most distinctive note — toasted, nutty, and slightly sweet. The overall structure remains neutral and yielding, designed to support rather than compete with the filling.
Common Mistakes to Avoid
- Rolling the Log Too Loosely – A loose roll produces an irregular crumb with gaps and air channels that can cause the bun to tear when filled. Roll firmly from the start, maintaining consistent tension throughout.
- Not Sealing the Seam Completely – An open seam splits during proofing or baking and cannot be fixed after the fact. Press firmly along the entire seam length before placing on the tray.
- Using Too Much Flour on the Work Surface – Excess flour between the dough and the counter prevents the friction needed for the surface tension required during both the log rolling and the seam sealing. Use just enough to prevent sticking.
- Over-proofing – The lean dough proofs quickly. 30–45 minutes is the correct second proof window — significantly over-proofed buns can collapse or produce a coarse, irregular crumb. Watch the buns rather than the clock.
- Not Flattening the Rectangle Evenly Before Rolling – An uneven rectangle produces a log of uneven diameter. Take the extra 30 seconds to ensure the flattened piece is consistently thick before rolling.
Variations
Milk-Brushed Plain Hot Buns
Omit the sesame seeds entirely and use only the milk wash for a completely plain, soft, pale bun — the most neutral possible version suited to any application where sesame would compete with specific toppings or condiments.
Sesame Seeded Hot Dog Buns
Apply white sesame seeds generously over the milk-washed surface before baking. The sesame character pairs particularly well with classic beef hot dogs, bratwursts, and grilled sausages.
Egg-Washed Golden Version
Use egg wash rather than milk wash for a deeper golden, slightly crisper, more defined crust — a step closer toward the brioche version in appearance while retaining the lean dough’s more neutral crumb character.
Garlic Butter Finish
Brush warm baked buns with a mixture of 20g melted butter, 5g minced garlic, and 5g chopped fresh parsley immediately after removing from the oven. The garlic butter absorbs into the warm surface and adds a savoury, aromatic character particularly suited to Italian sausage and bratwurst applications.
Smaller Slider Buns
Divide into 8 equal portions of approximately 55g each and roll into shorter logs of 10–12cm. Reduce the second proof to 25–35 minutes and the baking time to 12–14 minutes.
Storage & Make-Ahead
Baked buns can be stored in a sealed bag at room temperature for up to 3 days. Because this is a lean dough, the buns keep their structure well, although they will firm up slightly by the second day. A quick 20-second warm in the microwave or a brief toast in a dry skillet will bring back much of their freshness.
They can also be split and frozen in a sealed bag for up to 1 month. When ready to use, toast them directly from frozen in a toaster or dry skillet. The lean crumb freezes and reheats very well with very little loss of quality.
For a make-ahead option, shape the dough into logs, place them seam-side down on the tray, cover tightly, and refrigerate them for up to 16 hours before the second proof. Then remove them from the refrigerator and let them proof at room temperature for 45 to 60 minutes before finishing and baking. The cold retard has a milder effect on flavor in a lean dough than in an enriched one, but it still gives a slightly more complex result than same-day proofing.
If you are proofing the buns close together to create soft sides, make sure the baking sheet is covered airtight during the refrigerator rest. Because the buns are close together, they are more vulnerable to drying out if the covering is not complete.
Frequently Asked Questions
What is the difference between classic hot dog buns and brioche hot dog buns?
Classic hot dog buns are lean — made with all-purpose flour, minimal butter, and no egg in the dough — producing a neutral, slightly chewy, soft-crusted bun suited to everyday use where the filling is the focus. Brioche Hot Dog Buns are enriched with butter, egg, and milk, producing a richer, more tender, slightly sweet bun with a golden, glossy egg-washed exterior that contributes its own flavour to the eating experience. The classic bun recedes; the brioche contributes. Both are excellent — the choice is application and intent.
Why place buns close together for softer sides?
When buns proof close enough to make gentle side contact during baking, the touching surfaces steam against each other rather than crusting in the dry oven air. This produces the characteristic soft, pale, yielding sides of a pull-apart style hot dog bun — the texture most people associate with classic packaged hot dog buns. Spacing them apart produces a crust on all surfaces — more defined, more structured, slightly different in character.
Should I use milk wash or egg wash?
Milk wash produces a paler, softer, more matte crust associated with classic everyday hot dog buns. Egg wash produces a deeper golden, slightly shinier, more defined crust. Choose milk wash for the most classic result; choose egg wash if you want a more visually dramatic, golden finish.
Can I use bread flour instead of all-purpose?
Yes, but the buns will have a noticeably chewier, more assertive crumb. All-purpose produces the softer, more neutral crumb that most people associate with a classic hot dog bun. Bread flour is better suited to applications where structural integrity under heavy, wet fillings is more important than soft neutrality.
What fillings work best in classic hot dog buns?
Any hot dog or sausage application — classic beef hot dogs, Chicago-style dogs, bratwursts, kielbasa, corn dogs, and Italian sausages with peppers and onions. The neutral crumb works equally well with lobster rolls, but the Brioche Hot Dog Buns are generally preferred for lobster rolls where the bun’s richness is considered part of the classic experience.
Nutrition Facts
( Per Classic Hot Dog Bun )
Calories
~255 kcal
Protein
7 g
Fat
6 g
Carbs
43 g
Calories
~255 kcal
Protein
7 g
Fat
6 g
Carbs
43 g
Related Recipes
Related Recipes

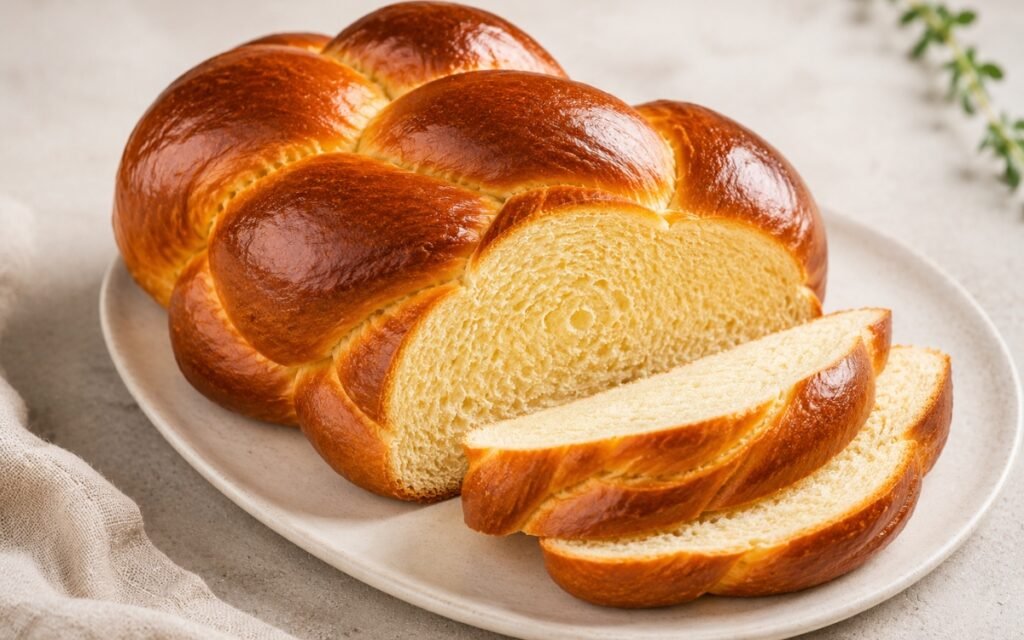
Challah Bread
Oil-and-egg enriched dough kneaded 10–12 minutes for braid structure — three strands braided at even tension, thoroughly egg-washed into every crevice, and baked to a deep amber. Soft, golden, slightly chewy.
Garlic Parmesan Carrot Fries
Crispy roasted carrot fries with garlic and Parmesan cheese—a healthier, flavorful alternative.
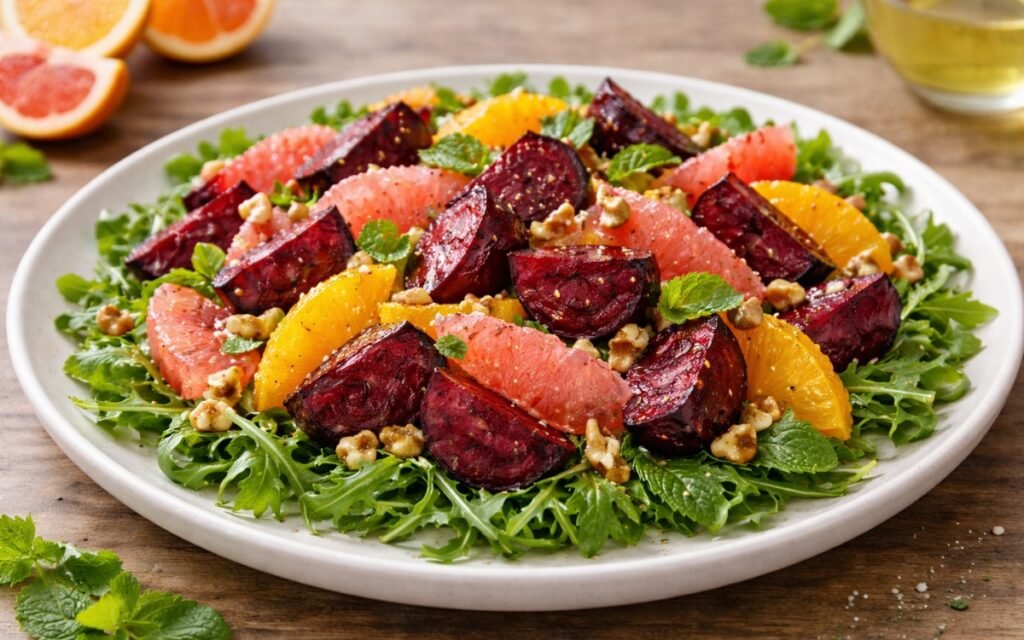
Roasted Beet and Citrus Salad
Earthy roasted beets with bright citrus segments, arugula, walnuts, and citrus vinaigrette.

You might also like
You might also like
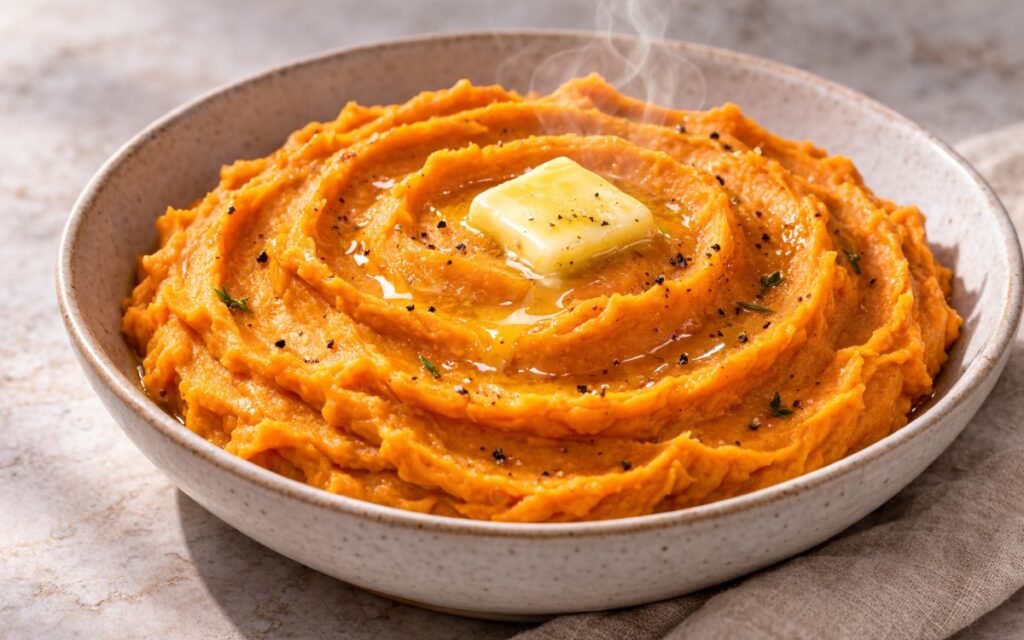
Mashed Sweet Potatoes
Creamy mashed sweet potatoes with butter, milk, and cinnamon—ready in 30 minutes for any meal.
Chocolate Chip Banana Bread
Very ripe bananas, dual fat, Greek yogurt, brown sugar, and espresso powder for chocolate depth — mini chips folded through, dark chocolate chunks melted into the top. Baked low at 165°C for maximum moisture.
Caribbean Jerk Chicken Rice Bowl
Chicken thighs scored, marinated in blended allspice jerk paste, and deeply charred in cast iron — over coconut rice with charred pineapple, black beans, and lime-cilantro crema.


Classic Hot Dog Buns
Ingredients
Method
- In a large bowl, combine the all-purpose flour, fine sea salt, sugar, and active dry yeast. Stir briefly for 20–30 seconds to distribute all four dry components evenly through the flour before any liquid is added. Even distribution at this stage prevents localised concentrations of salt in direct contact with the yeast before the liquid dilutes both — an unimportant consideration in a well-mixed final dough, but a practical one when working with dry ingredients before hydration. All-purpose flour is the deliberate choice here rather than bread flour: its lower protein content produces a softer, more yielding crumb with less noticeable chew — the neutral, accommodating texture of a classic hot dog bun that compresses pleasantly around its filling without the bread-forward character that bread flour would introduce. The difference is immediately perceptible in the finished bun: all-purpose produces the familiar soft, slightly pillowy crumb of a classic hot dog bun; bread flour produces a chewier, more assertively structured roll.
- In a separate small bowl or jug, combine the warm milk, warm water, and melted butter or neutral oil. The temperature of both liquids should be 24–27°C — warm enough to activate the yeast and ensure the butter stays fluid, but not hot enough to damage the yeast or produce an uneven dough temperature. Mix briefly to combine, then pour the liquid mixture over the dry ingredients. Mix with your hand or a dough scraper, working from the edges inward, until a rough, shaggy dough forms with no dry flour remaining at the bottom of the bowl. The melted fat — butter or oil — is specified at this quantity and in this liquid form because it incorporates instantly and evenly into the dough at first mixing, lubricating the developing gluten strands uniformly rather than requiring progressive kneading-in as softened butter does. At 30g for 250g of flour, the fat provides sufficient softness and flavour without enriching the dough to the point where it becomes sticky and challenging to handle.
- Transfer the rough dough to a clean work surface and knead for 6–8 minutes by hand, or use a stand mixer fitted with a dough hook at medium-low speed for 6 minutes. The classic hot dog bun dough is considerably more manageable than enriched brioche dough — the lower fat content, lower overall hydration, and absence of egg produce a dough that is only slightly tacky from the first minute of kneading and progressively smooths without the extended stickiness that brioche requires patience to work through. The finished dough should feel soft and slightly tacky — soft enough to press easily without resistance, with a slight surface stickiness that does not leave significant dough on your hand when pressed. If it genuinely sticks to everything, add a very small dusting of flour and knead it in. If it feels too firm and resists stretching, add a small splash of water. By the end of the kneading period the dough should be completely smooth on its surface, elastic enough to spring back slowly when poked, and extensible enough to stretch a few centimetres between your fingers before tearing.
- Shape the kneaded dough into a smooth ball and transfer to a lightly oiled bowl. Turn once to coat all surfaces. Cover with plastic wrap or a damp kitchen towel and allow to rise at room temperature for 60–90 minutes until roughly doubled in size. The classic hot dog bun dough rises more actively than the brioche version at the same temperature — the lower fat content means the yeast’s activity is less moderated by surrounding enrichment, producing a faster, more vigorous rise. In a warm kitchen the dough can double in as little as 60 minutes; in a cooler room it may take the full 90 minutes. Use the visual doubled-volume indicator rather than timing alone.
- Turn the risen dough out onto a lightly floured surface and divide into 4 equal portions — each approximately 110g. Weigh them for consistency. Shape each portion into a hot dog bun log using the same technique as the brioche version. Working with one piece at a time, gently press and flatten with your palm into a rough rectangle approximately 10–12cm long. Starting from the long edge nearest you, roll the dough away from you firmly and tightly, pressing the roll against the surface as you go to maintain consistent tension throughout the roll — loose rolling produces irregular crumb structure with gaps and air channels; tight, even rolling produces the uniform, consistent crumb that holds together when bitten. When you reach the far edge, press the seam firmly and completely against the dough surface with the heel of your hand to seal it. Run your fingers along the entire seam length to ensure no section is loose — any unsealed area will open during proofing or baking. Once sealed, place the log seam-side down and lightly roll it back and forth with your palms from the centre outward, applying gradual, even pressure toward the ends to extend the bun to approximately 15–18cm in length and to taper the ends very slightly. The diameter should be even throughout — work slowly and consistently to achieve a uniform cylinder rather than a shape that is thick in the centre and thin at the ends.
- Place the shaped buns seam-side down on a parchment-lined baking sheet. For softer-sided buns — the more classic diner-style hot dog bun with a soft, pillowy exterior all around — place the buns slightly closer together than you would for crusty bread: approximately 3–4cm apart rather than 6–7cm. When buns proof close together and their sides make gentle contact during baking, the touching surfaces steam rather than crust, producing the characteristically soft, pale sides of a classic packaged-style hot dog bun. For buns with a more defined crust on all surfaces, space them the full 6cm apart. Both are correct — the choice determines the texture of the sides. Cover loosely with lightly greased plastic wrap or a clean cloth. Allow to proof for 30–45 minutes at room temperature until visibly puffy, clearly expanded in both height and width, and soft to a very gentle press. Begin preheating the oven to 190°C (375°F) in the final 15 minutes of the second proof.
- The choice of pre-bake finish determines the crust character of the finished bun — a genuine fork in the recipe at this stage. For a softer, more matte crust characteristic of a classic everyday hot dog bun, brush the top and sides of each proofed bun generously with whole milk using a pastry brush. Milk’s fat and protein content promotes browning through the Maillard reaction but does not caramelise as intensely as egg, producing a pale golden, slightly soft surface. For a more golden, slightly crisper, and more defined crust, brush with egg wash — one egg whisked with a splash of water until smooth. The egg wash produces a noticeably deeper golden colour and a slightly more defined, slightly shinier surface. If using sesame seeds, apply them immediately after either finish while the surface is still wet — the milk or egg wash provides sufficient adhesion for the seeds to bond during baking. Scatter generously across the top surface from a slight height for even distribution. Bake for 15–18 minutes until lightly to moderately golden brown depending on your chosen finish — milk-brushed buns will be paler than egg-washed ones at the same baking time. Transfer immediately to a wire rack.