Ingredients
Method
Blanch the Pork
- Place the pork belly in a pot and cover with cold water. Bring to a boil and simmer for 10–15 minutes, skimming off any scum. Drain and rinse the pork briefly. Blanching removes impurities and gives a cleaner braising liquid. Do not skip if you want a cleaner, less murky filling. That upfront removal of impurities protects the entire braise still to come — any released proteins and scum left unaddressed would carry straight through into the finished liquid, muddying the flavour every later stage depends on.
Braise the Pork
- Return the cleaned pork to a pot. If you want deeper color and a slightly richer flavor, brown the pork first in 1 tsp neutral oil over medium-high heat, then proceed. Add the spring onions, ginger, dried chilies, star anise, bay leaf, cinnamon, fennel seeds, red and green Sichuan peppercorns, light soy sauce, dark soy sauce, Shaoxing wine, sugar, and salt. Pour in enough water to cover the pork by 2–3cm. Bring to a gentle simmer, cover partially, and cook over low heat for 3 to 3½ hours, until the pork is very tender. Keep it at a gentle simmer, not a hard boil. Hard boiling tightens the meat and makes the fat render too aggressively. The pork should be tender enough to chop easily with a knife and the fat should be soft and silky, not rubbery. That genuinely gentle simmer, maintained patiently over hours, is what lets the pork's own fat render slowly into silky richness — a harder boil would instead render it too aggressively, leaving the meat's own texture tightened and less tender.
Strain and Reduce the Braising Liquid
- Lift out the pork and set aside. Strain the braising liquid and discard the spent aromatics. Return the strained liquid to the stove and simmer until lightly reduced, about 10–15 minutes, if it seems thin. You want a rich, savory liquid that can moisten the chopped pork without making it soupy. The reduced liquid should lightly coat a spoon. Too thin and the filling tastes watery; too reduced and it can become salty. That specific, checkable reduction target protects the finished filling from both directions at once — either extreme would compromise the balance this liquid is meant to bring to the chopped meat.
Make the Bread Dough
- In a small bowl, combine the yeast, lukewarm water, and ½ tsp sugar. Leave for 10 minutes, until foamy. In a mixing bowl, combine the flour, baking powder, baking soda, and salt. Add the yeast mixture and the oil. Mix into a shaggy dough, then knead for 5–10 minutes until smooth. Cover and leave to rise for 45–60 minutes, until about 1.5 to 2 times its original size. This dough should be smooth and supple, not wet and sticky. If needed, dust very lightly with flour, but do not make it stiff. Confirming that visible foam before proceeding is what catches inactive yeast early — continuing on the assumption the yeast is fine would only reveal a real problem much later, once the dough has failed to rise.
Shape the Flatbread Buns
- Divide the dough into 4 equal pieces. For each piece: roll into a short log, flatten into a rough oval or rectangle, roll it up tightly into a cylinder to create layers, turn the rolled seam upward or inward, then flatten gently into a round disc about 10–12cm wide and about 1–1.5cm thick. Let the shaped breads rest for 10–15 minutes. The flattening should be gentle so the layers stay visible inside the bread. Do not press too hard. That deliberate rolling-into-a-cylinder technique is what builds real, distinct internal layers into the dough — pressing too hard during the final flattening would compress and lose that same structure right before it ever reaches the pan.
Pan-Cook and Bake the Breads
- Preheat the oven to 180°C / 360°F. Heat a frying pan over medium heat and add a very thin layer of oil. Cook the breads in batches for about 2–3 minutes per side, until lightly browned and set. Transfer to a tray and bake for 5–6 minutes, until cooked through. Cool for a few minutes before filling. The outside should be lightly crisp and pale golden, while the inside should remain soft and layered. Do not overbake, or the bread becomes dry and cracks when stuffed. That two-stage cooking — pan first for surface colour, then a brief oven finish — lets the bread's exterior set properly while giving the interior genuine, even heat to finish cooking through without the surface over-darkening in the pan alone.
Chop and Season the Filling
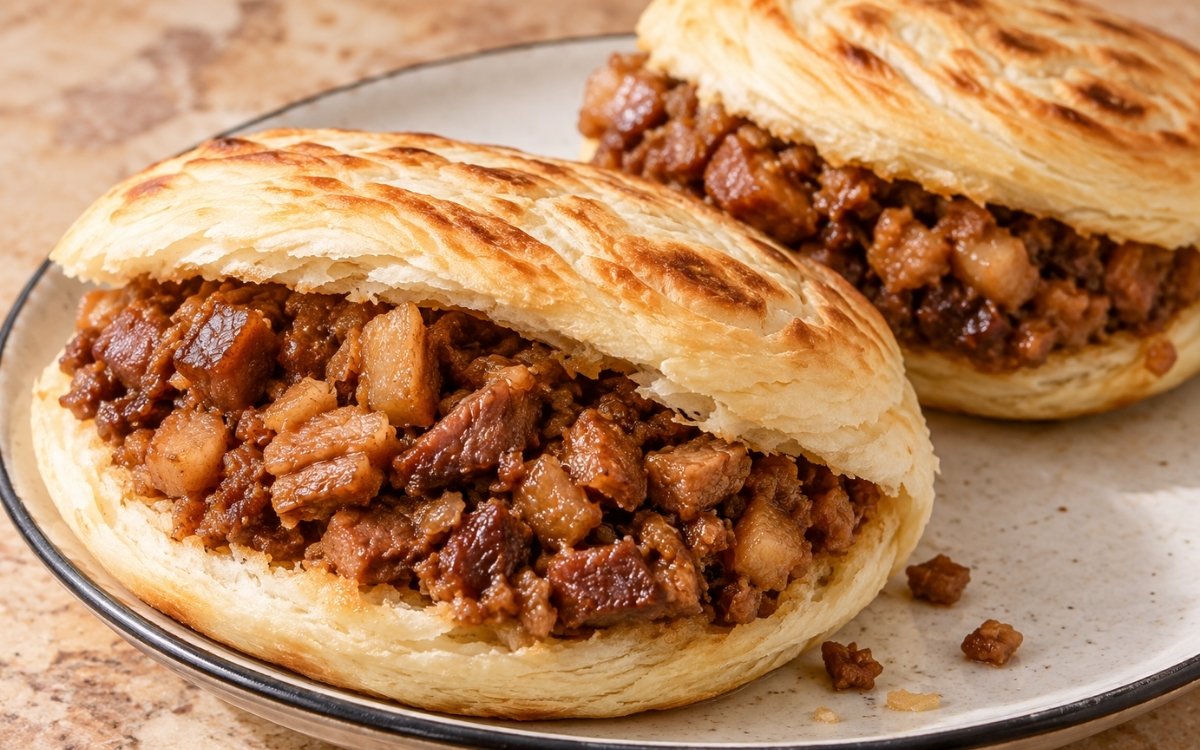
- Finely chop the braised pork by hand. You want a small, irregular mince — not a paste. Add the sliced green chili, finely sliced spring onion, and 4–6 tbsp reduced braising liquid. Mix until juicy and glossy. Taste and adjust with a pinch of salt if needed. The filling should hold together and look moist, but there should not be liquid pooling at the bottom. Roujiamo filling should be juicy, not sloppy. Chopping by hand into a small, irregular mince, rather than shredding or processing it, is what preserves real, varied texture throughout the filling — little juicy pockets of fat alongside distinct pieces of lean meat, rather than a uniform, processed consistency.
Assemble
- Split each bread bun horizontally, leaving one side attached if you like. Pack each bread generously with the chopped braised pork filling. Serve immediately while the bread is still slightly warm and the filling is juicy. Serving without delay is what actually delivers this sandwich's whole intended contrast — the bread's own crisp shell and the filling's genuine juiciness both begin to change the moment the sandwich sits.
Notes
Blanching the pork belly before it ever goes into the long braise deserves genuine recognition as the technique responsible for whether the finished braising liquid stays clean or turns murky. That brief simmer removes real, measurable impurities the pork would otherwise release directly into the aromatic liquid still to come, protecting the flavour of every stage that follows.
Keeping the braise at a genuine, patient gentle simmer for its full several hours, never a hard boil, deserves the same respect this technique receives throughout this collection's other long-braised, fatty cuts. That patience is specifically what lets the pork's own fat render slowly into something soft and silky — a harder simmer would instead render that same fat too aggressively, tightening the meat's own texture in the process.
Chopping the finished pork by hand into a small, irregular mince, rather than shredding or processing it, deserves genuine attention as the detail responsible for roujiamo's whole characteristic texture. The recipe's own explicit preference for chopping over shredding reflects real understanding that this dish depends on real, varied texture — juicy pockets of fat alongside distinct lean pieces — rather than the more uniform result shredding would produce.
The two-stage bread cooking, pan first and then a brief oven finish, deserves recognition as a deliberate technique addressing two distinct needs within the same bake. The pan stage builds real, direct-contact surface colour and crispness, while the oven finish that follows gives the interior genuine, even heat to cook through fully without the exterior over-darkening in the process.