Ingredients
Method
Prepare the Pan
- Line a 20cm / 8-inch square baking pan with parchment paper, leaving an overhang on two sides for easy lifting once the bars have fully set. Preheat the oven to 175°C. The parchment overhang matters more here than in most baked goods, since this bar needs to be lifted whole from the pan once fully set and chilled — cutting directly in the pan risks scratching it and makes clean, even squares harder to achieve.
Brown the Butter
- Melt the butter in a light-coloured saucepan over medium heat. Continue cooking, swirling occasionally, until it foams, then turns golden, then develops small brown flecks and a nutty aroma, 4–6 minutes total. Remove from the heat immediately once it smells nutty and pour into a heatproof bowl to stop the cooking. Let cool for 10 minutes until just warm. Browning the butter here does real work for a base that's otherwise fairly simple — those toasted milk solids add a depth of flavour a plain melted butter blondie wouldn't have, which matters given how much of this bar's flavour identity sits in the custard layer above it.
Make the Blondie Batter
- Whisk the brown sugar into the warm browned butter until combined. Whisk in the egg and vanilla until smooth. Add the flour, baking powder, and salt, and fold just until no dry streaks remain. Do not overmix. The batter should be thick and glossy. Spread it evenly into the prepared pan, pressing gently into the corners. Folding rather than beating the dry ingredients in protects this base from turning tough — the same restraint that governs any batter meant to stay tender rather than developing significant gluten.
Par-Bake the Base
- Bake the blondie base for 12–15 minutes, until the edges are just set and the centre still looks slightly underdone and pale. Remove from the oven. Do not fully bake it at this stage. This base needs to finish cooking under the custard, not before it. This par-bake exists specifically to give the base enough structure to hold the custard poured on top without seeping through, while leaving it underdone enough that it finishes cooking through in the same window the custard needs, rather than baking twice as long and drying out.
Infuse the Milk and Cream
- While the base par-bakes, combine the milk, cream, cinnamon stick, and lemon peel in a saucepan. Heat gently over medium-low heat until steaming but not boiling. Remove from the heat and let steep for 10–15 minutes. Strain out the cinnamon and lemon peel before using. This gentle infusion draws the cinnamon and lemon's aromatic oils into the dairy without ever reaching a full boil, which would risk scalding the milk and pushing those flavours toward something harsher than this bar's subtle background aroma calls for.
Build the Custard
- In a bowl, whisk the sugar and cornstarch together until no lumps remain. Add the egg yolks and whole egg, whisking until smooth and slightly pale. Slowly pour in the warm strained milk and cream, whisking constantly to temper the eggs. Return the mixture to the saucepan and cook over medium-low heat, stirring constantly, for 3–5 minutes, until it thickens slightly to a pourable, custard-like consistency. Do not let it come to a full simmer or boil. Remove from the heat, stir in the vanilla and salt, and strain through a fine sieve into a jug. The combination of cornstarch and a light stovetop thickening, rather than a pure raw egg custard baked from cold, is what gives this topping enough body to set into a genuinely sliceable layer once baked — a thinner, unthickened custard would never hold its shape once the bars are cut into squares.
Assemble and Bake
- Pour the warm custard evenly over the par-baked blondie base while the base is still warm. Return to the oven at 175°C and bake for 20–25 minutes, until the custard is mostly set with only a slight wobble in the very centre. Pouring the custard onto the still-warm base, rather than a fully cooled one, helps the two layers bond slightly at the seam rather than sitting as two entirely separate textures once sliced.
Broil for the Signature Spots
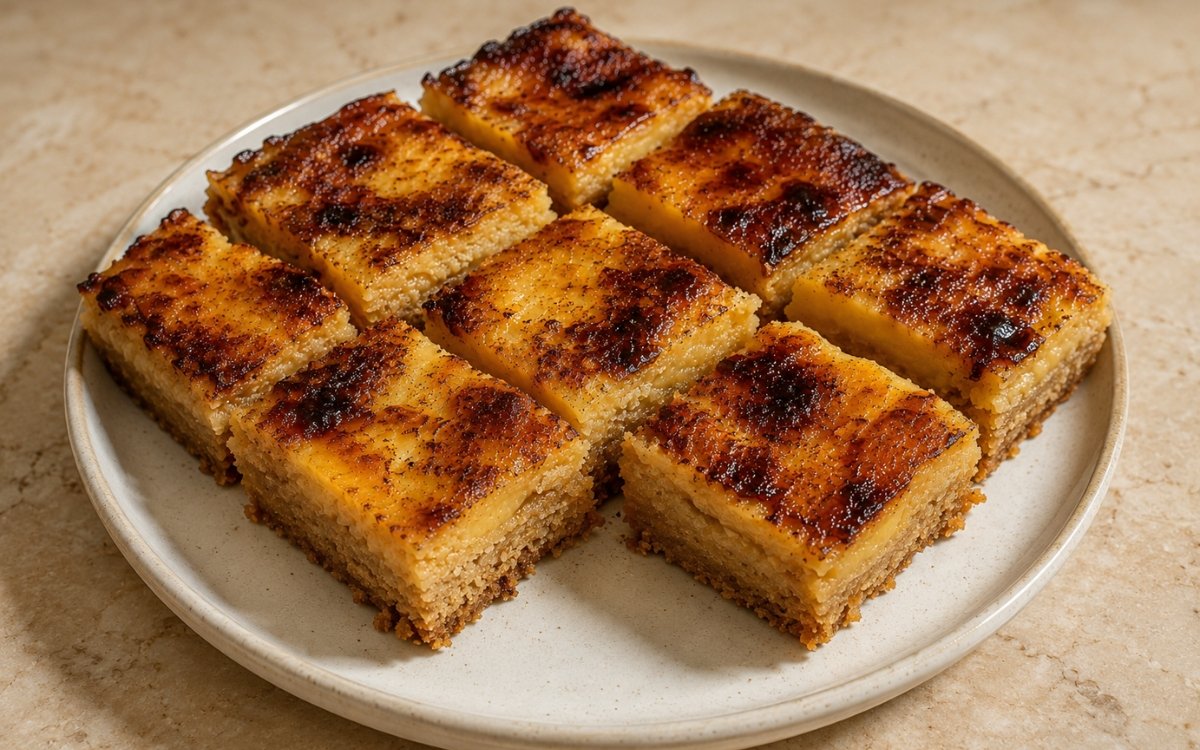
- Switch the oven to broil on high, or increase to its highest setting. Broil the bars for 3–6 minutes, watching constantly, until deep, dark, caramelised spots form across the custard's surface, similar to a classic pastel de nata. Rotate the pan if your broiler heats unevenly. Remove the instant you have good colour. This stage moves fast and can go from perfectly spotted to burnt in under a minute. Broiling only at this final stage, after the custard has already mostly set in the oven's gentler heat, is what allows those dark, blistered spots to develop on the surface without the intense direct heat scrambling the custard underneath.
Cool and Set Fully
- Let the bars cool in the pan at room temperature for 1 hour, then refrigerate for at least 2 hours, ideally overnight, before lifting out and slicing. Use the parchment overhang to lift the whole slab onto a cutting board. Slice into 9 even squares using a sharp knife, wiping the blade clean between cuts. This full chill is what allows the custard layer to finish setting into something genuinely sliceable — cutting into it while still warm, however set it looks, produces messy, collapsing squares rather than the clean-edged bars this dessert is built around.
Notes
The relationship between the par-baked base and the custard poured on top is worth understanding as a genuine timing calculation rather than an arbitrary two-step process. A fully baked blondie base under a wet custard layer would risk drying out further during the custard's own bake time, while a completely raw base would never finish cooking through in that same window. Par-baking to just-set-but-pale is the calibration that lets both layers reach doneness together.
Thickening the custard on the stovetop with cornstarch, rather than relying purely on eggs baked from a raw, poured state, is a meaningful departure from how a classic pastéis de nata custard is built. That extra body is specifically what allows this topping to hold together as a sliceable layer once cut into squares — a thinner, purely egg-set custard suited to a tart shell would be far too loose to survive being cut into bars and lifted by hand.
The broiling stage's brief, closely watched window deserves the same respect given to it elsewhere in this collection wherever direct, extreme heat is used to build caramelised colour. The custard is already largely set by the time the broiler comes on, which protects it from scrambling, but the sugars on its surface can still move from beautifully spotted to burnt within moments — stepping away, even briefly, during this stage is the most common way to lose a otherwise well-executed batch.
The full chilling period before slicing is not a formality here. This bar's custard layer needs real time at cold temperature to finish setting into something firm enough to hold a clean-edged square shape. Cutting into it too early, even if the surface looks fully set, risks the custard collapsing or smearing rather than slicing cleanly — the overnight option specifically produces the cleanest, most photogenic squares.