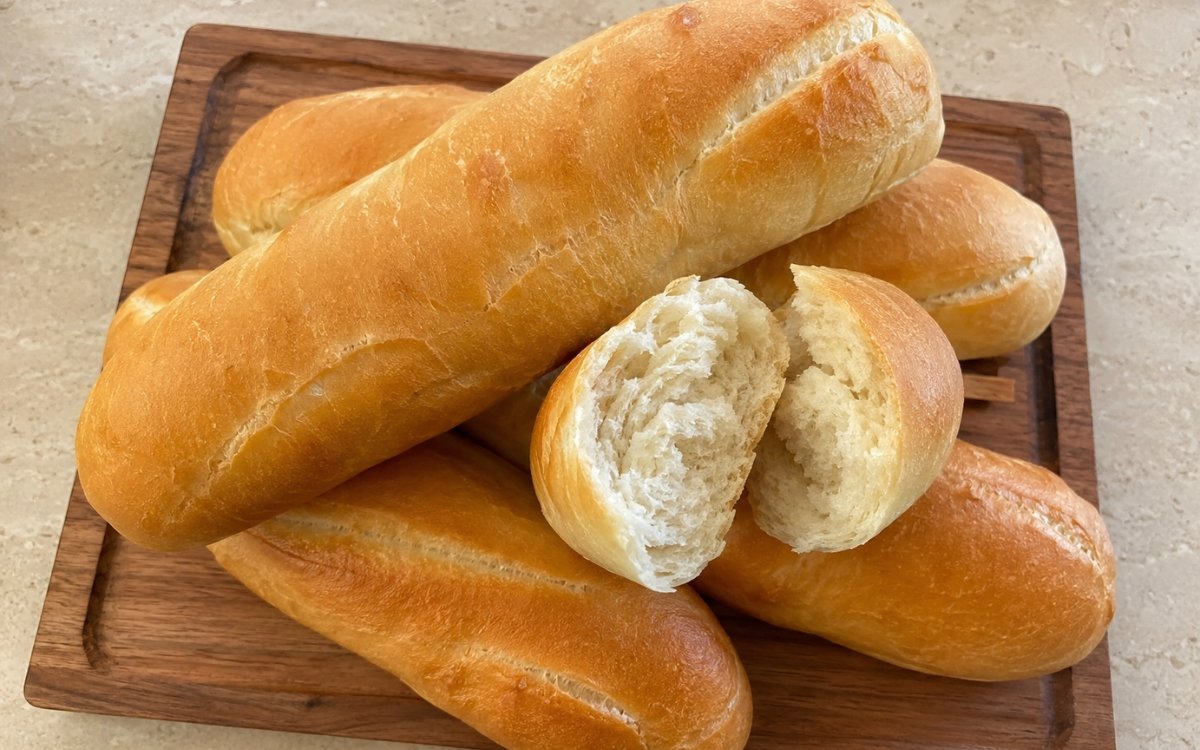
Ingredients
Method
Activate the Yeast
- In a large bowl, combine the warm water, active dry yeast, and sugar. Stir well and let stand for 5 to 10 minutes, until slightly foamy. If the surface stays completely flat with no foam at all, the yeast may be inactive. Start over before using the rest of the ingredients. Confirming that visible foam before proceeding is what catches inactive yeast early — continuing with the rest of the ingredients on the assumption the yeast is fine would only reveal the problem much later, once the dough has failed to rise properly.
Make the Dough
- Add the flour, salt, and oil. Mix until a rough dough forms, then knead by hand for 8 to 10 minutes, or in a stand mixer for 6 to 8 minutes, until smooth and elastic. Start with 290ml water and add the remaining water only if the dough feels dry and tight. The dough should feel tacky but not wet. Knead until the dough becomes smooth and springy. That gluten development is what gives the rolls enough structure to hold juicy sandwich fillings without collapsing. Starting with the lower water amount and adding more only as genuinely needed accounts for how differently flour can absorb moisture batch to batch — that gradual approach protects against a dough that ends up wetter than intended.
First Rise
- Shape the dough into a ball and place it in a lightly oiled bowl. Cover and let rise for 1 to 1½ hours, until doubled in size. The dough should look clearly expanded and feel airy when gently pressed. Under-risen dough will give dense rolls with a tight crumb. That full rise gives the yeast genuine time to build the structure responsible for the roll's eventual soft, open interior — cutting this stage short would leave the dough without enough developed lightness to bake up properly airy.
Divide and Shape
- Turn the dough out onto a lightly floured surface and divide it into 4 equal pieces, about 190g each. Shape each piece into a long roll about 18 to 20cm long, with softly tapered ends if you like. Place them on a parchment-lined tray with some space between them. Shape them firmly enough to create surface tension, but do not press out all the air. You want a smooth outer surface and a soft interior. That specific balance — firm enough for real surface tension, gentle enough to preserve trapped gas — is exactly what produces a roll with a smooth, unblemished exterior wrapped around a genuinely soft, airy crumb rather than a dense one.
Final Proof
- Cover the shaped rolls and let proof for 45 to 60 minutes, until puffy. During the final 20 minutes, preheat the oven to 220°C. The rolls should look fuller and slightly airy but still hold their shape. If they overproof, they may flatten and lose oven spring. That specific stopping point — fuller and airy but still holding shape — protects the dough's remaining oven-spring potential, since dough given too much time to rise before baking has already spent much of the lift it would otherwise gain from the oven's own initial heat.
Slash and Bake
- Using a sharp blade or very sharp knife, slash each roll once lengthwise down the center. Lightly spray the rolls with water, or place a small tray of hot water in the oven to create a little steam. Bake for 18 to 22 minutes, until lightly golden, set, and softly crusted. Transfer to a wire rack and cool before slicing. The crust should be thin and tender, not thick and shatteringly hard. If the rolls bake into something closer to a baguette, they have gone too far for this style. That light steam application, gentler than the more aggressive steam a true baguette would receive, is calibrated specifically to keep this roll's crust thin and tender rather than pushing it toward the thick, shattering crust a crustier bread depends on.
Notes
Kneading the dough until it's genuinely smooth and springy deserves recognition as the technique most responsible for whether these rolls can actually hold up under a hearty, juicy sandwich filling. That developed gluten network is what gives the finished bread real internal strength — a roll under-kneaded and lacking that structure would risk tearing or collapsing under the weight and moisture of fillings like braised beef or meatballs in sauce.
Shaping each roll to build real surface tension, while deliberately not pressing out all the trapped gas, deserves the same attention this technique receives throughout this collection's other hand-shaped breads. That specific balance is what produces a roll with a smooth, appealing exterior and a genuinely soft, airy interior at once — shaping too aggressively would flatten and toughen the crumb, while shaping too loosely would leave the exterior uneven and rough.
Keeping the oven steam genuinely light during baking, rather than the more aggressive steam a true crusty baguette would call for, deserves attention as the deliberate choice responsible for this roll's whole identity. This bread is meant to sit somewhere between a crusty baguette and a fully soft sandwich roll — the lighter steam application here is calibrated specifically to keep the crust thin and tender rather than pushing it toward the thick, shattering character a baguette depends on.
Letting the rolls cool fully before slicing, as the recipe's own notes emphasise, deserves genuine respect rather than being treated as simple patience. That cooling period lets the crumb's internal structure finish setting after the intense heat of baking — rolls sliced while still hot risk a crumb that hasn't yet firmed up enough to hold its own shape cleanly under a knife.