Ingredients
Method
Make the Tangzhong
- In a small saucepan, whisk together the 25g bread flour and 120g whole milk until completely smooth. Place over medium-low heat and cook, whisking constantly, until it thickens into a smooth paste, about 2 to 3 minutes. It should look like a thick pudding. Scrape into a bowl and let cool until just warm. Do not let the tangzhong dry out or become lumpy. This cooked flour paste is what gives shokupan its especially soft, cottony crumb and helps it stay tender longer. Cooking the flour and milk together gelatinizes the starch ahead of time, letting that paste hold considerably more liquid than raw flour mixed straight into a dough ever could — that extra retained moisture is directly what keeps this bread soft well beyond a standard loaf's own shelf life.
Mix the Dough
- In the bowl of a stand mixer, combine the 350g bread flour, 20g milk powder, 40g sugar, 6g salt, and 7g instant yeast. Add the egg, 110g lukewarm milk, and all of the cooled tangzhong. Mix on low speed with the dough hook until a shaggy dough forms, then knead for 5 minutes. Add the 35g soft butter a little at a time, mixing well after each addition. Continue kneading for 8 to 12 minutes, until the dough is smooth, elastic, and supple. The dough should become soft and slightly tacky, but not wet. It should stretch thin enough to pass a windowpane test without tearing easily. That windowpane test is a genuine, reliable confirmation that the gluten network has developed enough real strength and elasticity — dough that tears rather than stretching into a thin, translucent sheet simply hasn't built the structure this particular loaf's feathery, shreddable crumb depends on.
First Rise
- Shape the dough into a ball and place it in a lightly greased bowl. Cover and let rise for 1 to 1¼ hours, or until doubled. A full first rise matters here. Under-risen dough will give a tighter crumb and less of that soft shreddable pull-apart texture. That full rise gives the yeast genuine time to build the lightness responsible for the bread's eventual open, feathery structure — cutting it short would leave the dough without enough developed lift to bake up properly airy.
Divide and Pre-Shape
- Grease a 23 x 13cm / 9 x 5 inch loaf pan. Turn the dough out onto a very lightly floured surface and divide it into 3 equal pieces. Shape each piece gently into a loose ball, cover lightly, and let rest for 10 to 15 minutes. This short bench rest relaxes the gluten so the dough can be shaped smoothly without springing back too much. That relaxation matters directly at the next stage — dough that's just been divided is genuinely tighter and more resistant to the specific fold-and-roll shaping the classic shokupan look requires.
Shape the Three-Part Shokupan
- Working with one piece at a time, flatten it gently into a small oval or rectangle. Fold it like a letter, then roll it up into a tight short log, pinching the seam closed. Repeat with the other two pieces. Place the three shaped dough portions side by side in the loaf pan, seams down, so they sit next to each other across the pan and will rise into three connected domes. Shape all three pieces as evenly as possible so the finished loaf rises uniformly and gives that classic three-part pull-apart top. That consistent sizing across all three portions is what lets them rise at matching rates during both the final proof and the oven's own heat — mismatched pieces would produce an uneven, lopsided top rather than the classic, symmetrical three-domed silhouette.
Final Proof
- Cover the pan loosely and let the dough rise for 50 to 70 minutes, until very puffy and the top of the dough rises to about 1 to 2cm above the rim of the pan. During the last 20 minutes, preheat the oven to 175°C. The dough should look airy and swollen, not dense. If underproofed, the loaf may split unevenly and bake up heavier. That specific proofing target — rising just above the pan's own rim — is a genuine, visual confirmation that the dough carries enough built-up lightness to expand cleanly in the oven, rather than splitting unpredictably under sudden heat.
Egg Wash
- Whisk together the egg and 15ml milk for the egg wash. Brush the top of the loaf gently and evenly. Use a light hand so you do not deflate the proofed dough. The egg wash gives the loaf its glossy pale golden-brown finish. That light touch matters directly at this stage — the dough is at its most fragile after a full proof, and pressing too firmly risks releasing some of the trapped gas responsible for the loaf's eventual softness.
Bake
- Bake for 30 to 35 minutes, until the top is glossy golden-brown and the loaf is fully baked through. If the top browns too quickly, loosely tent it with foil for the last 10 minutes. The loaf is done when the internal temperature reaches about 88 to 90°C. That protective foil tent, used only if needed, lets the loaf's interior finish baking through without the already-well-coloured top continuing to darken past its ideal point.
Cool
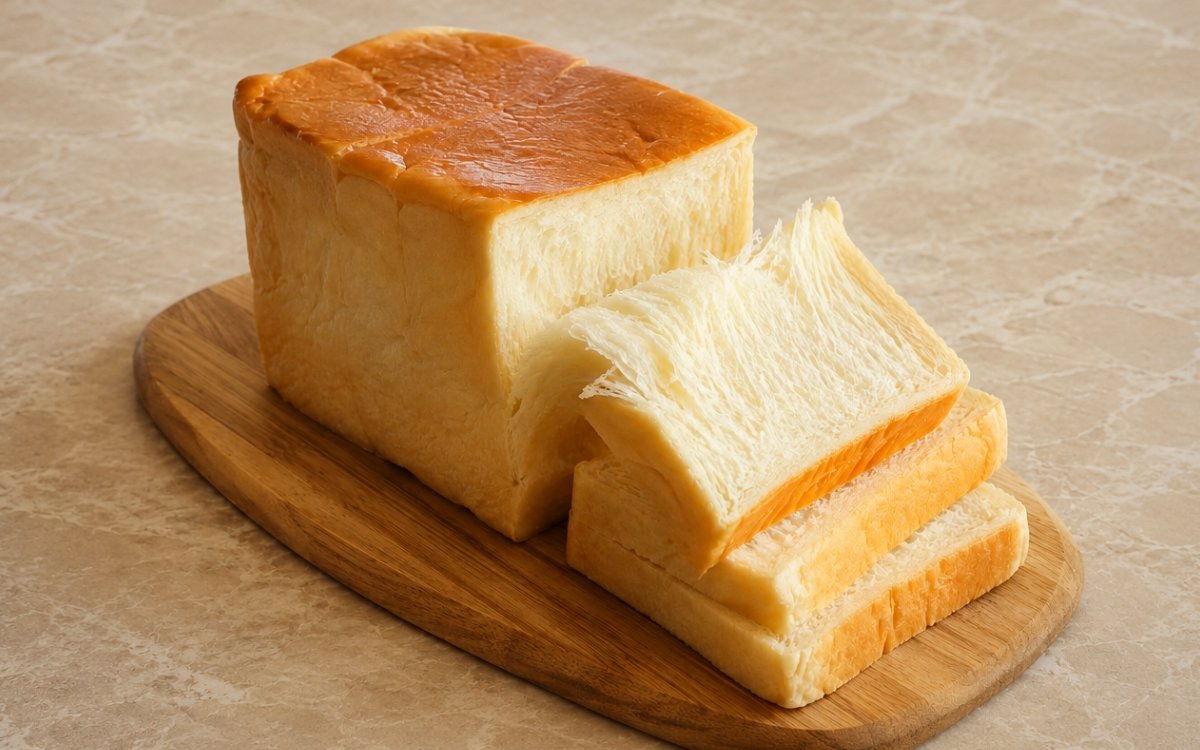
- Remove the loaf from the pan after 5 to 10 minutes and let it cool on a wire rack. For the best pull-apart texture, let it cool until just warm before slicing or tearing into the sections. If you slice while very hot, the crumb may compress. Slight cooling helps the interior set while still staying soft and feathery. That brief cooling period lets residual steam finish escaping and the crumb's own internal structure fully settle — bread sliced too hot hasn't finished this process, and a knife's pressure compresses a structure that isn't yet firm enough to hold its own shape.
Notes
Making a proper tangzhong before the main dough is ever mixed deserves genuine recognition as the technique responsible for this loaf's entire defining softness. Cooking flour and milk together gelatinizes the starch ahead of time, letting that paste hold considerably more moisture than raw flour mixed directly into dough ever could — that extra retained water is what keeps shokupan tender for genuinely longer than a standard enriched loaf would stay soft on its own.
Kneading the dough until it passes a real windowpane test deserves the same careful attention this collection gives to any bread depending on real gluten development for its final texture. That stretch test confirms the gluten network has built genuine strength and elasticity — without reaching that point, the dough simply lacks the structure responsible for shokupan's characteristic long, feathery, shreddable strands, however soft the tangzhong alone might make it.
Shaping the loaf from three separate, evenly sized portions, rather than one solid mass pressed into the pan, deserves recognition as the technique directly responsible for this bread's classic, recognisable silhouette. Each portion rises somewhat independently within the shared pan, and only genuinely even sizing across all three lets them expand at matching rates, producing the symmetrical, three-domed pull-apart top this style of shokupan is specifically named for.
The recipe's own specific final-proof target — the dough rising to just 1 to 2cm above the pan's rim — deserves genuine attention as a real, checkable readiness cue rather than a rough guideline. That visual marker confirms the dough carries enough built-up lightness to expand cleanly under the oven's sudden heat; dough pulled before reaching that point risks splitting unevenly rather than rising into the smooth domes this recipe depends on.