Ingredients
Method
Build the Levain
- In a small clean jar or container, combine the 30g active starter, 30g bread flour, 30g whole wheat flour, and 60g room-temperature water. Stir until smooth. Cover loosely and leave in a warm spot at 24–26°C for 4–6 hours. The levain is ready when it has risen by about 30–50%, shows a domed top with bubbles, feels airy, and a small spoonful floats in water. Use it at peak or just before peak collapse. That float test is a genuine, reliable confirmation the levain has built enough gas-trapping structure to actually leaven the full dough — a levain used too early or too late would leave the whole loaf under- or over-fermented from the very start.
Autolyse
- In a large bowl, combine the 400g bread flour and 50g whole wheat flour. Add 300g of the warm water and mix until no dry flour remains. Cover and rest for 1 hour. After the rest, the dough should feel smoother and more extensible than at first mixing. That hour of undisturbed hydration lets the flour's own enzymes begin breaking down starches and building gluten structure passively, producing a noticeably more workable dough before any real kneading or folding ever begins.
Mix the Dough
- Add the full levain to the autolysed dough. Incorporate by folding and squeezing until mostly combined. Gradually add the remaining 20g water in small additions while continuing to work the dough. Once the levain is incorporated, add the salt and squeeze repeatedly until evenly distributed. Transfer to a clean unfloured surface and perform slap-and-folds for 3–4 minutes until the dough becomes smoother and more elastic. At this point the dough should already feel stronger and more organized, but still soft and tacky. That repeated slapping and folding motion works the gluten mechanically in a way gentler mixing couldn't manage with dough this hydrated, building real strength before the inclusions are ever introduced.
Add the Jalapeños and Cheddar
- Let the dough rest for 20–30 minutes after mixing, then add the inclusions. The cleanest method is a gentle lamination: lightly wet the work surface, stretch the dough carefully into a wide rectangle, scatter the jalapeño pieces and cheddar chunks evenly across the surface, fold the dough over itself from each side until fully enclosed, then return the dough to the bowl. Do not use shredded cheese. It melts away too completely and can smear into the dough. Do not use overly large cheese chunks. About 1cm is the sweet spot: large enough to create real melted pockets, small enough to avoid weakening the structure. If the jalapeños are very wet, pat them dry first. Excess moisture can create slippery weak spots in the dough. That specific 1cm sizing is a genuine, deliberate balance point — chunks any larger would create real structural gaps in the dough around them, while shredded cheese lacks the mass to survive baking as a distinct pocket at all.
Bulk Fermentation
- Cover the bowl and ferment at room temperature, ideally 24–26°C, for 4–5 hours total. During the first 2 hours, perform 3–4 sets of stretch and folds at 30-minute intervals: wet your hand slightly, stretch one side of the dough upward and fold it over the center, rotate the bowl and repeat on all four sides. Because the dough contains cheese chunks and jalapeños, be firm enough to build strength but gentle enough not to tear the dough around the inclusions. After the final fold set, leave the dough undisturbed for the remaining 2–3 hours of bulk fermentation. The dough is ready when it has increased in volume by about 50–75%, the surface looks slightly domed, small bubbles are visible, and it feels airy and elastic. That deliberate balance between firm and gentle during folding protects the gluten network specifically at the points where cheese and jalapeño interrupt its usual continuity — those are the exact spots where overly aggressive folding would tear the dough rather than strengthen it.
Pre-Shape
- Turn the dough out gently onto a clean, unfloured surface. Using a bench scraper and your free hand, shape it into a loose round. Cover and let rest for 20 minutes. This bench rest allows the gluten to relax before final shaping. The dough should hold shape but relax slightly during the rest. That relaxation matters directly at the next stage — dough that's just been pre-shaped is genuinely tighter and more resistant to the final shaping a clean, taut loaf requires.
Final Shape
- Turn the dough over so the smoother side faces down. Gently flatten it just enough to organize the shape without aggressively degassing it. Fold the dough in from the sides toward the center, then roll and tighten it into a round loaf. Use the bench scraper and your hands to create surface tension. Because of the cheese chunks, the surface will not be perfectly smooth like plain sourdough. That is normal. The important thing is a taut outer skin and a sealed seam. Place the shaped loaf seam-side up into a rice-flour-dusted banneton or cloth-lined bowl. That real, taut surface tension is what gives the loaf enough structural integrity to hold its shape through the long cold proof still ahead, regardless of the surface irregularities the cheese chunks introduce.
Cold Proof
- Cover and refrigerate for 12–14 hours. The cold proof develops flavor, firms the dough for easier scoring, and helps the loaf hold shape during baking. That extended cold time is genuinely doing three distinct jobs at once — building real fermentation flavour, firming the dough's surface enough for a clean score, and giving the whole structure enough rigidity to hold its shape once it hits the oven's aggressive initial heat.
Preheat the Dutch Oven
- Place a Dutch oven with its lid into the oven and preheat to 250°C for at least 45 minutes. This full preheat is essential. The hot pot traps steam from the dough and gives the loaf strong oven spring before the crust sets. That extended preheat time ensures the Dutch oven itself, not just the surrounding air, has genuinely reached its target temperature throughout — a pot that's merely warmed on the outside would still be catching up internally when the cold dough goes in.
Score and Bake
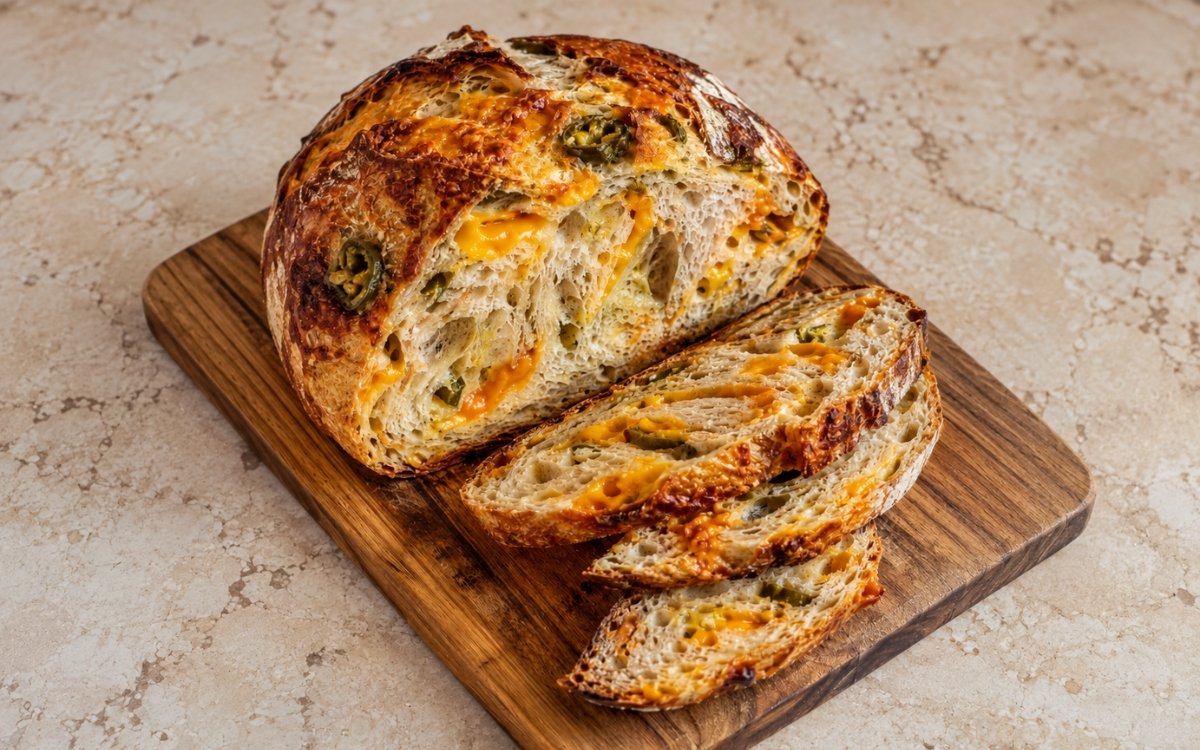
- Cut a piece of parchment to fit your Dutch oven. Remove the dough from the refrigerator and turn it out onto the parchment. Score with one confident slash, about 1cm deep, at a 30–45° angle. Transfer the loaf into the hot Dutch oven, cover immediately, and bake for 20 minutes covered at 250°C, then uncover, reduce to 230°C, and bake 20–25 minutes more. The loaf is done when the crust is deeply golden-brown, the score has opened well, and the cheese visible on the surface is deeply melted and browned in spots. That single, confident score gives the dough's own oven-spring a controlled, predictable place to expand — a shallow or hesitant cut would instead force that expansion to find its own way out, often tearing unpredictably around the cheese-studded surface.
Cool
- Transfer to a wire rack and cool for at least 1 hour before slicing. Do not cut early. The crumb needs time to set, especially with melted cheese inside. Slicing too soon can make the interior gummy and compressed. That full hour of cooling lets the residual steam trapped inside finish escaping and the starch structure fully set around every melted cheese pocket — cutting in before that process finishes would compress a crumb, and cheese, that isn't yet firm enough to hold its own shape.
Notes
Using genuine 1cm cheddar chunks rather than shredded cheese deserves recognition as the single detail most responsible for this loaf's real, distinct melted pockets throughout the crumb. Shredded cheese carries far too little mass to survive baking as anything but a smear worked into the surrounding dough, while chunks at this specific size hold together enough to create real, visible pockets of melted cheese in nearly every slice.
Laminating the inclusions into the dough through a gentle stretch-and-fold, rather than kneading them in more aggressively, deserves the same attention this technique receives throughout this collection's other inclusion-studded breads. That gentler method distributes the cheese and jalapeño evenly across the dough's surface without tearing the gluten network that's already been carefully built up to this point.
The deliberate balance struck during bulk fermentation's stretch-and-folds — firm enough to build strength, gentle enough not to tear the dough around the inclusions — deserves genuine respect as a real, practical judgment call specific to this loaf. Plain sourdough dough can tolerate more aggressive handling; dough interrupted by solid cheese chunks and jalapeño pieces genuinely cannot, without risking tears right at those interruption points.
The cold proof's role here deserves to be understood as doing three distinct, simultaneous jobs rather than a single function. Beyond the flavour development any cold sourdough proof provides, this specific loaf also depends on that firming effect for a clean score around the cheese-studded surface, and for enough structural rigidity to hold its round shape through the oven's aggressive initial heat.