Ingredients
Method
Cook and Chill the Rice
- Rinse the 300g jasmine rice in cold water 3–4 times, swirling it with your fingers, until the water runs mostly clear, then drain well. Combine the rice and 390–420ml water in a medium saucepan, using the lower amount for firmer grains, and bring to a boil over medium-high heat. Stir once, cover tightly, reduce to the lowest heat and cook for 12 minutes, until the water is absorbed and the grains are just tender. Spread the rice straight away in a thin layer on a large tray and let the steam escape for 15–20 minutes, then refrigerate it uncovered or loosely covered for at least 2 hours, or ideally overnight. For same-day rice, spread it as thinly as possible so the surface dries in time. The rice is ready when the grains feel cold and firm and separate easily without clumping. That chilling and drying stage is what lets the grains fry and toast later instead of steaming into a sticky mass.
Marinate the Chicken
- Cut the 700g chicken thighs into small bite-size pieces, about 1.5–2cm, trimming away any thick pieces of fat. In a bowl, mix the chicken with the 1 tbsp soy sauce, 1 tsp kecap manis and ¼ tsp ground white pepper until every piece is evenly coated. Leave it to marinate for 15 minutes while the paste and seasoning sauce are prepared; a short seasoning is all it needs, so there is no benefit in leaving it for hours. The chicken should look lightly seasoned and glossy, not swimming in marinade, and if liquid pools in the bowl, tip off the excess before cooking. That short, light seasoning is what flavours the chicken without adding extra moisture that would steam it in the wok.
Make the Aromatic Paste
- If using the 1 tsp shrimp paste and it is raw, toast it in a small dry pan over medium heat for 1–2 minutes, pressing it flat and turning it once, until it smells roasted rather than sharp. Pound or pulse the 6 shallots, 4 garlic cloves, 2–3 red chillies, the extra small red or bird’s eye chilli if using and the toasted shrimp paste with the 1 tbsp neutral oil, using a mortar and pestle or a small food processor. Stop when the mixture is a rough, moist paste with no large hard chunks of garlic or shallot left; it does not need to be smooth. If the blades will not catch, scrape down the sides rather than adding water. That coarse texture is what fries into genuinely distinct, caramelised flecks that cling to the rice rather than a wet purée that clumps it.
Mix the Seasoning Sauce
- In a small bowl, stir together the 2½ tbsp kecap manis, 1½ tbsp soy sauce, 1 tsp fish sauce or light soy sauce and ½ tsp ground white pepper. Taste it: it should be sweet-savoury, deep and slightly peppery, so add the ½ tsp sugar only if your kecap manis is on the less sweet side. Hold back the salt for now, because kecap manis, soy sauce, fish sauce and shrimp paste all vary widely in saltiness. Set the sauce beside the stove with the paste, the marinated chicken, the sliced scallions and the cold rice, loosened roughly with your fingers so no large clumps remain. That complete setup is what lets the stir-fry move fast and stay properly hot once the wok goes on.
Sear the Chicken
- Heat a large wok or wide skillet over high heat for 2–3 minutes, until properly hot and just beginning to smoke. Add 1½ tbsp of the neutral oil, swirl to coat, then add the marinated chicken in a single layer; if the pan is not large enough, cook it in 2 batches, splitting the oil between them. Leave it undisturbed for 1 minute, then stir-fry for 4–6 minutes in total, until the pieces lose their raw colour, brown at the edges and any released liquid has mostly evaporated. Cut the largest piece to check that it is cooked through with no pink, then transfer the chicken to a plate. That separate high-heat sear is what caramelises the chicken while keeping it juicy, since it only warms through briefly with the rice later.
Fry the Paste and the Rice
- Return the wok to high heat and add the remaining 1½ tbsp oil. Add the aromatic paste and the sliced scallion whites and fry for 1–2 minutes, stirring constantly, until fragrant, slightly darker and the raw shallot-garlic smell has gone. Add the 900g cold rice and break up every clump with the spatula, tossing continuously so the grains are coated in the paste. Return the chicken, pour in the seasoning sauce and stir-fry for 3–5 minutes, letting the rice sit against the pan for a few seconds between tosses. If the rice looks pale, add a little extra kecap manis 1 tsp at a time; if the wok turns wet or steamy, keep frying until the moisture cooks off. Taste, season with salt only if needed and fold in the scallion greens. The rice is ready when the grains are evenly brown, glossy and clearly separate, dry-fried and loose rather than saucy. Take the wok off the heat. That brief contact with the hot pan is what gives the grains their genuine toasted, wok-fried aroma.
Fry the Eggs
- Heat the 2–3 tbsp neutral oil in a skillet over medium-high heat until it shimmers, around 180°C. Crack in 1–2 eggs at a time and fry for 2–3 minutes, tilting the pan and spooning hot oil over the whites, until they are fully set, the edges are lacy, crisp and browned, and the yolks are still bright and runny, or cooked further to your preference. If the edges brown before the whites set, lower the heat slightly. Lift the eggs out with a slotted spatula and repeat with the rest. That hot, generous oil is what gives the frilly, crisp edges a proper nasi goreng egg is known for.
Assemble the Bowls
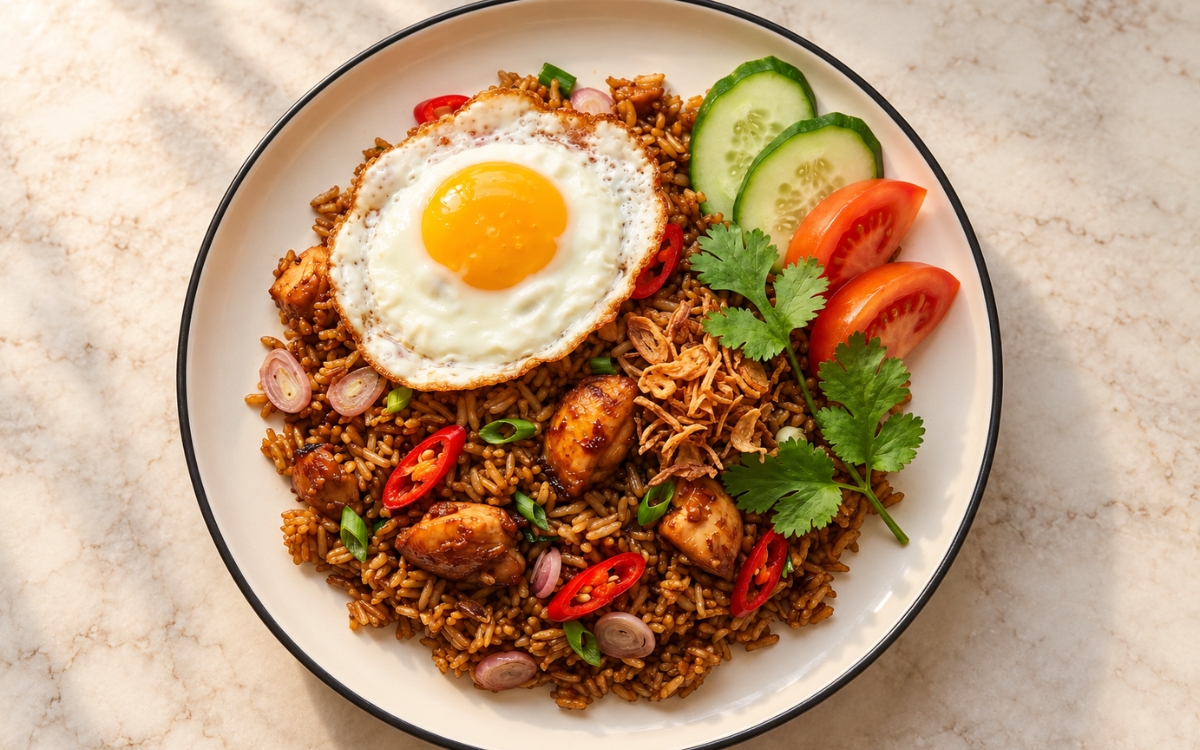
- Divide the nasi goreng evenly between 4 bowls and top each portion with one fried egg. Arrange the cucumber slices and tomato wedges on the side of each bowl rather than over the hot rice. Finish each bowl with 1 tbsp fried shallots, a scatter of extra scallion greens, sliced red chilli if using and a few small cilantro leaves if using. Add the fried shallots last so they stay crisp, and serve straight away while the rice is genuinely hot and the egg edges still crackle. That deliberate separation of hot and cool is what keeps every bowl’s contrast between dry-fried rice, rich egg and fresh, crunchy garnish.
Notes
Chilling the cooked rice until cold and dry deserves genuine recognition as the technique most directly responsible for whether this nasi goreng fries or steams. The recipe’s own warning that "Rice for nasi goreng must be cold and dry, not freshly hot and steamy" explains why — warm grains still carry surface moisture and soft starch, so the kecap manis glues them into clumps instead of coating each grain separately.
Frying the aromatic paste until the raw smell disappears deserves the same attention this technique receives throughout this collection’s other spice-paste dishes, because it builds the whole savoury base of the rice. The recipe’s own note that "A rough paste gives a more classical fried-rice texture than a completely smooth puree" matters just as much — coarse shallot and garlic fry into caramelised flecks, while a smooth purée turns wet and stops the rice toasting.
Searing the chicken on its own before the rice goes in deserves genuine respect as the detail most directly responsible for juicy, properly browned pieces. Cooking it first in a very hot wok, in 2 batches if needed, lets the soy and kecap manis caramelise at the edges — stirred raw into the rice, it would release liquid that steams the grains and leaves the chicken pale and soft.
The finished texture of the rice deserves attention as a genuine, checkable readiness cue rather than a loose approximation. The recipe’s own target that "The final texture should be dry-fried and loose, not saucy" gives the test — evenly brown, glossy and separate grains are done, while a wet, sticky wok means the heat is too low or the rice was too moist, so keep frying.