Ingredients
Method
Mix the Dough
- In the bowl of a stand mixer, combine the bread flour, instant yeast, and sugar. Add the warm water and olive oil and mix with the dough hook on low speed until no dry flour remains. Let it sit for 5 minutes, then add the salt. Knead on low to medium-low speed for 8–10 minutes, until the dough is smooth, elastic, and only lightly tacky. It should clear most of the sides of the bowl but still feel soft, not stiff. The dough should be supple and slightly tacky rather than sticky-wet. A dry dough will make dense knots; an overly wet dough will be harder to shape cleanly into ropes. That brief rest before the salt is added lets the flour begin hydrating passively, building real gluten structure before the salt has any chance to slow that early process down.
First Rise
- Transfer the dough to a lightly oiled bowl, cover, and let rise at room temperature for 60–90 minutes, until doubled in size. It is ready when it looks puffy and airy and a fingertip pressed lightly into the surface leaves an indentation that slowly springs back. That slow spring-back is a genuine, reliable readiness cue — dough that springs back instantly hasn't yet built enough structure, while dough with no spring-back at all has likely overproofed.
Divide and Pre-Shape
- Turn the dough out onto a lightly oiled or very lightly floured surface. Divide into 8 equal pieces, about 108–110g each. Shape each piece roughly into a short log, cover loosely, and let rest for 10 minutes. This short rest relaxes the gluten and makes rolling easier. If you skip it, the ropes may shrink back aggressively. That relaxation matters directly at the next stage — dough that's just been divided and shaped is genuinely tighter and more resistant to being rolled into long, even ropes.
Shape the Knots
- Working one piece at a time, roll each piece into a rope about 28–32cm long. Keep the thickness fairly even. Tie the rope into a loose overhand knot, then tuck one end underneath and the other end into the center or underneath so the knot holds its shape. Do not tie the knots tightly. They need room to expand during proofing and baking. Tight knots bake up dense in the center and lose the defined knot shape. If a rope keeps shrinking back while rolling, let it rest 3–5 minutes and continue. That deliberately loose tie is exactly what gives the dough's own continued rise real physical room to expand into — a tight knot instead constrains that growth, forcing the center to bake up dense rather than properly soft and airy.
Second Rise
- Arrange the shaped knots on a parchment-lined baking tray, leaving space between them. Cover loosely and let proof for 35–45 minutes, until visibly puffy. They should feel lighter and slightly swollen, but not fragile or collapsing. If underproofed, they bake up tight and heavy. If overproofed, they lose structure and brown less evenly. That specific, checkable target — visibly puffy but still holding structure — protects the knots from either extreme, since either underproofing or overproofing here directly compromises the finished bake in different ways.
Bake
- Preheat the oven to 220°C. Bake the knots for 14–18 minutes, until the tops are glossy golden-brown and the bottoms are lightly browned. Rotate the tray if needed for even color. They should be fully baked, with a soft interior and lightly crisp outer edges. If you want to check with a thermometer, the interior should read roughly 93–96°C. That internal temperature check offers a genuine, objective confirmation of doneness beyond colour alone, since a knot's exterior can look properly golden before its own dense center has actually finished baking through.
Make the Garlic Butter
- While the knots bake, melt the butter in a small saucepan over low heat. Add the garlic and warm gently for 30–60 seconds, just until fragrant. Do not brown it. Remove from the heat and stir in the parsley, Parmesan, salt, and black pepper if using. The garlic should lose its raw harshness but not toast. Burned garlic will turn bitter and dominate the whole batch. That genuinely low heat and brief warming window is calibrated precisely to mellow the garlic's own raw sharpness without ever crossing into the browning that would introduce real bitterness.
Coat the Knots
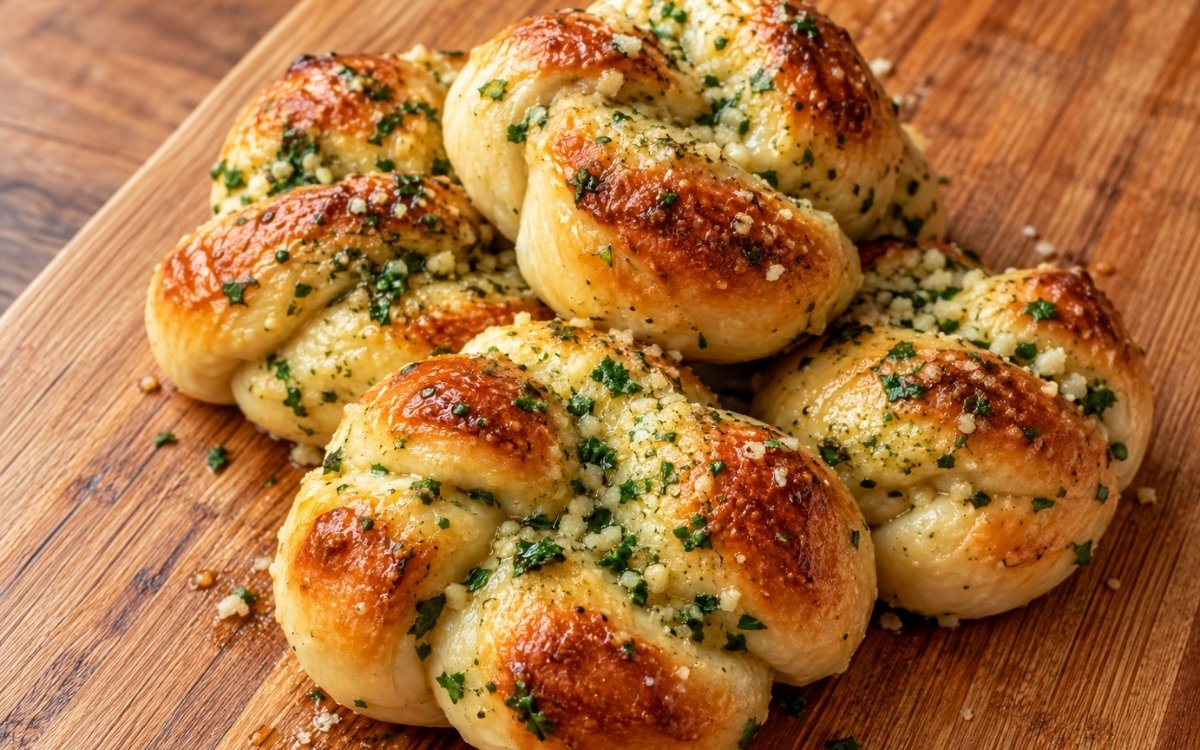
- As soon as the knots come out of the oven, brush them generously all over with the garlic butter, or place them in a large bowl and toss gently with most of the butter mixture. Return to the tray or serving board and finish with any remaining butter and a little extra Parmesan. The coating should go on while the knots are still hot. That is when the crust absorbs the butter best and the Parmesan clings properly. Applying that butter to bread that's still genuinely hot lets it soak into the crust's own surface rather than sitting on top as a separate, unabsorbed layer that would simply slide off once cooled.
Serve
- Serve warm. The exterior should be glossy and lightly crisp, while the inside should stay soft, fluffy, and bread-like. This dish is genuinely at its best in the window right after coating — both the glossy exterior and the soft, warm interior begin to change noticeably as the knots cool.
Notes
Tying each knot deliberately loose, rather than pulling it tight, deserves genuine recognition as the technique responsible for whether the finished center bakes up soft and defined or dense and misshapen. A tightly tied knot physically constrains the dough's own continued rise during both proofing and baking — the deliberately loose tie specified here is what gives that growth genuine room to happen, producing a properly puffed, recognisably knotted shape rather than a compressed, dense one.
Brushing the garlic butter on while the knots are still genuinely hot, straight from the oven, deserves the same attention this technique receives throughout this collection's other freshly baked, butter-finished breads. Hot bread's own surface is considerably more receptive to absorbing that butter — coating a cooled knot instead would leave the butter sitting on top as a separate, less integrated layer, one the Parmesan would have far less to actually cling onto.
Warming the garlic only gently, watching carefully for fragrant rather than browned, deserves genuine respect as the detail most directly responsible for this coating's whole flavour balance. That specific window is calibrated to mellow the garlic's raw sharpness without ever letting it toast — garlic pushed even slightly further into browning would introduce a real bitterness that, as the recipe's own notes make clear, would dominate the entire finished batch.
The specific second-rise target — visibly puffy but still holding real structure — deserves attention as a genuine, checkable readiness cue rather than a loose approximation. Both underproofing and overproofing at this stage compromise the finished bake in distinct ways, and watching for that particular window is what protects the knots from either failure mode.