Ingredients
Method
Test the Yeast
- Pour the 830g warm water into a medium bowl or measuring jug. Add the 7g instant yeast and whisk until dissolved. Cover and leave undisturbed for 5 to 10 minutes. The surface should show visible foam, light bubbling, or a creamy active layer. If the water stays completely still with no foam or activity after 10 minutes, do not continue. The yeast may be dead, expired, stored badly, or damaged by water that was too hot. Start again with fresh yeast and fresh water. This upfront test exists specifically because a multi-day cold ferment gives absolutely no earlier warning sign of dead yeast — without this check, the failure wouldn't become obvious until days of waiting had already been spent on dough that was never going to rise.
Mix the Dough
- In the bowl of a stand mixer, combine the 720g 00 flour and 240g fine semolina. Add the foamy yeast-water mixture and mix with the dough hook on low speed for 8 to 12 minutes, scraping down the sides of the bowl when needed. Add the 22g salt and 30g olive oil, then continue mixing on low to medium-low speed for another 8 to 10 minutes. The dough should be very wet, glossy, elastic, and sticky. This is a very high-hydration dough. Do not add extra flour. It will look too wet at first, but the long mixing and cold ferment are what build the structure. That extended mixing time is what actually develops the gluten network strong enough to hold a dough this wet together, compensating for the lack of structure extra flour would otherwise provide.
Slap and Fold the Dough
- Use a bowl scraper to transfer the dough onto a clean, un-floured work surface. Perform slap-and-folds for 2 to 3 minutes: lift the dough, slap it onto the counter, fold it over itself, rotate, and repeat. The dough should become smoother, more elastic, and slightly easier to handle, though still tacky. The dough should start pulling together instead of spreading like batter. If it still feels completely loose, continue for another 1 minute. That repeated slapping and folding motion works the gluten mechanically in a way gentler kneading couldn't manage with dough this wet, building real strength without ever needing to dry the dough out with additional flour.
Start the Cold Ferment
- Generously grease a large container with cooking spray or oil. Drizzle in more olive oil so the inside is well coated. Transfer the dough into the container. Drizzle a little olive oil over the surface. Cover with a greased lid or greased plastic wrap pressed close to the dough surface. Refrigerate for 48 to 72 hours. 48 hours gives excellent flavor. 72 hours gives deeper flavor and more fermentation character. Do not push much past 72 hours because the gluten can weaken and the dough can start collapsing. That extended cold fermentation is genuinely the main flavour-building stage of this whole recipe, giving the yeast real time to develop the complex, tangy depth a same-day dough simply couldn't produce in the same way.
Prepare the Tray
- When ready to bake, generously oil a large rimmed baking sheet, ideally about 33 x 46cm. Use enough olive oil that the tray looks clearly coated and a little oil pools in the corners. This oil is not just for sticking. It fries the bottom of the focaccia during baking and gives the bread its crisp golden underside. That generous pooled oil is doing real, active work during baking, essentially shallow-frying the dough's underside as it bakes rather than simply preventing the bread from sticking to the pan.
Transfer the Dough to the Tray
- Remove the dough from the refrigerator. With oiled hands and a bowl scraper, gently release it from the container and transfer it to the prepared tray. Stretch it gently toward the corners. If the cold dough resists or springs back, stop and let it rest for 10 to 15 minutes, then continue stretching. Do not force or tear the dough. Letting it relax keeps the trapped gas inside and protects the open crumb. Forcing cold, resistant dough to stretch beyond what its own gluten will comfortably allow risks tearing that structure and releasing the very gas bubbles the long ferment worked to build.
Final Proof
- Cover the tray with an upside-down rimmed baking sheet, or cover loosely with greased plastic wrap. Let proof at room temperature for 2 to 3 hours, until the dough is puffy, airy, and jiggles gently when the tray is moved. The dough should look inflated and alive before baking. If it still looks flat and tight, it needs more time. That visible jiggle is a genuine, reliable readiness cue — dough that's still tight and unresponsive hasn't yet regained enough active fermentation after the cold shock of the fridge to bake up properly airy.
Make the Garlic Butter
- Melt the butter with the olive oil in a small pan over low heat. Add the garlic and cook gently for 2 to 3 minutes, just until fragrant and softened. Remove from the heat and stir in the rosemary. Do not brown the garlic. Dark garlic turns bitter, especially when it later touches the hot focaccia. Cooking over genuinely low heat and pulling the moment the garlic is fragrant protects it from crossing into that bitter territory, which would carry directly into the finished focaccia once the butter is spooned over it.
Preheat the Oven
- Preheat the oven to its maximum setting, ideally 260°C, for at least 30 minutes. If your oven goes higher, up to 290°C, you can use it, but watch the top carefully. That extended preheat time ensures the oven, and specifically the baking stone or tray surface if used, has genuinely reached its target temperature throughout, rather than just registering that temperature on a thermostat while still catching up internally.
Dimple and Top the Focaccia
- Uncover the proofed dough. Drizzle generously with olive oil. With oiled fingers, press deeply into the dough to create dimples across the surface. Spoon over about ⅓ of the garlic rosemary butter, making sure some garlic and rosemary settle into the dimples. Finish with flaky sea salt and black pepper. The dough should jiggle and hold deep dimples. Press confidently, but do not aggressively flatten the whole tray. Those deep dimples do genuine structural and flavour work beyond simple decoration — they create pockets where the oil and butter pool and fry slightly during baking, building concentrated flavour right at those specific points.
Bake
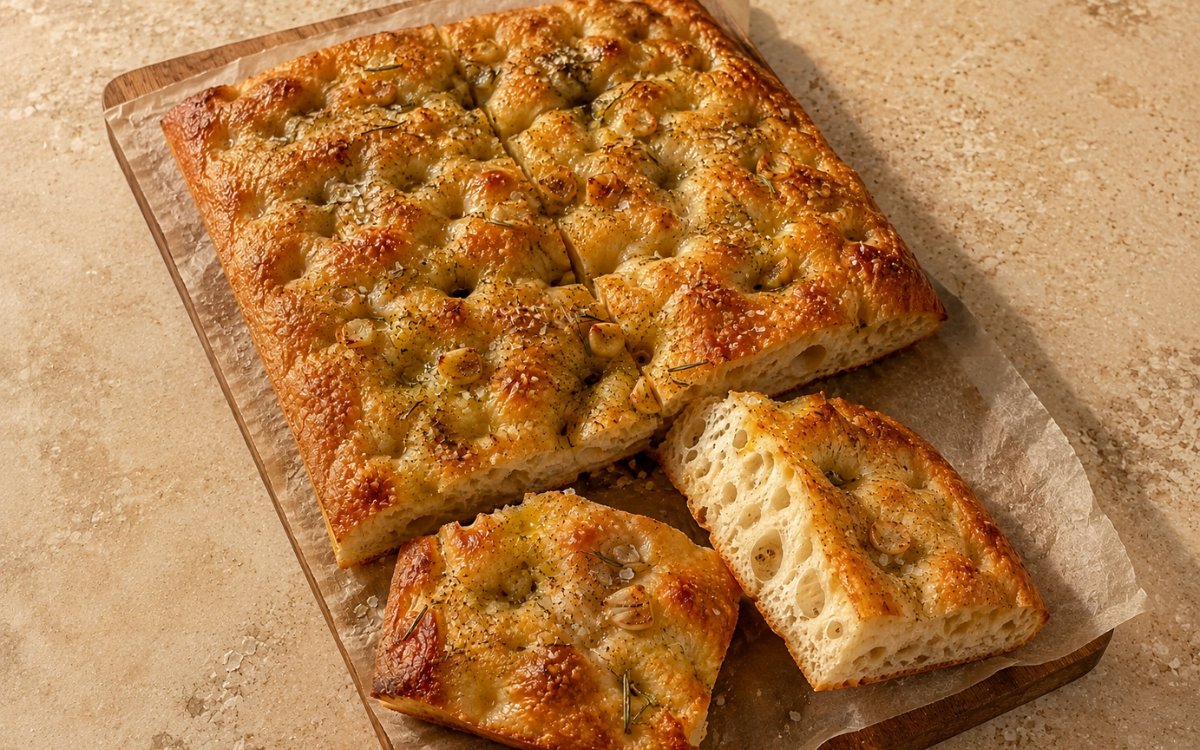
- Bake for 20 to 25 minutes, until the focaccia is deeply golden brown, crisp at the edges, and fully cooked through. If using a thermometer, the center should read about 93°C. Do not pull the focaccia when it is only pale gold. It should be dark golden with some deeper amber spots for the best crust and flavor. That deeper, more developed colour reflects real, substantial Maillard browning having taken place — a paler focaccia pulled too early would taste noticeably flatter and less complex despite being technically cooked through.
Finish with Garlic Butter
- As soon as the focaccia comes out of the oven, spoon or brush the remaining garlic butter over the hot surface. Let it soak into the dimples. Scatter with parsley if using and finish with a little more flaky salt. Most of the garlic butter goes on after baking. This gives the strongest garlic butter flavor and glossy finish without burning the garlic. Applying that remaining butter to bread fresh out of the oven, genuinely hot, is what lets it properly soak into the dimples and crumb rather than simply sitting on the surface as a separate, unabsorbed layer.
Rest and Slice
- Let the focaccia cool in the pan for 5 minutes, then transfer to a wire rack. Rest for another 10 minutes before slicing into 8 large square pieces. Serve warm. That brief rest lets the crumb's internal structure settle slightly after the intense oven heat, making the bread easier to slice cleanly without tearing or compressing the airy interior.
Notes
Testing the yeast before committing to this recipe's multi-day timeline deserves genuine respect as the single step most responsible for protecting the entire investment of time ahead. A cold ferment lasting up to 72 hours gives no earlier indication that something's wrong — dead or weak yeast would only reveal itself as a flat, unrisen dough days later, by which point that time is simply gone. The five-minute upfront test is what catches that failure while there's still time to start again with fresh yeast.
Keeping the dough genuinely wet throughout, resisting the instinct to add flour for easier handling, deserves the same attention this collection gives to every high-hydration bread. That extra water content is precisely what allows the long mixing, slap-and-folds, and extended cold ferment to build real structure and an open, airy crumb — a dough dried out for convenience would trade away exactly the texture this focaccia is built around.
The 48 to 72 hour cold ferment itself deserves to be understood as the genuine core of this recipe's flavour development, not simply a waiting period. That extended time at cold temperature lets the yeast and other fermentation processes develop real complexity, tang, and depth that a same-day focaccia simply has no time to build, which is directly why this version reads as more "bakery-style" than a quicker version would.
Splitting the garlic butter into two applications — a smaller portion before baking, the majority applied only once the focaccia is fresh out of the oven — deserves recognition as the technique responsible for keeping the garlic flavour rich rather than bitter. Garlic exposed to the oven's full heat for the entire bake time would risk scorching; reserving most of it for after baking lets that flavour stay bright and aromatic while still soaking properly into the hot, receptive crumb.